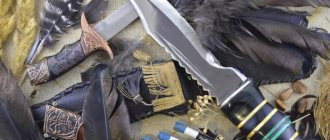
Lanyard and its history
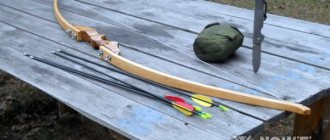
Lanyard is an original type of weaving that is used to decorate the handles of various weapons - pocket and hunting knives, checkers, sabers, as well as tools. Weaving is done with a leather cord or synthetic cable, which is also called paracord.
The history of this interesting device goes back several centuries. And if now the lanyard often serves only a decorative function, then initially it served to prevent the weapon from being lost and slipping out of the hand. This term was first mentioned during the times of chivalry, that is, in the 14th–15th centuries. In the Russian army, this accessory was a mandatory part of the military uniform, as well as an insignia on award weapons. The presence of a lanyard on a weapon spoke of the soldier’s special services to the fatherland.
What is paracord
To briefly describe “paracord, what is it”, it is a lightweight, but at the same time quite durable nylon cord. It dries quickly and is resistant to rot and mold.
Paracord consists of two main parts:
- The outer braid is a dense shell consisting of a large number of intertwined fibers.
- The core is an internal cable consisting of several ropes. Each one was also created by intertwining threads for added strength.
This is interesting! Paracord was invented for the needs of the army during World War II in the United States for air force personnel - it is a cord traditionally used in parachute lines. That is why it got its name - Parachute Cord.
After landing, the paratroopers cut off the lines and used them for other survival purposes. After some time, in the absence of an equally strong but light rope, it is used not only for military purposes, but also for civilian household purposes.
Weaving tools
Weaving a lanyard for a knife is not difficult even for a novice craftsman. This is a simple and fun activity that does not require special skills or serious expenses.
To create a lanyard with your own hands, you will need:
- a cord or rope about a meter long. Experienced craftsmen advise taking leather or synthetic lace in a bright color. It is desirable that it be round and not flat;
- lighter to melt the ends of the cord;
- tools for drilling a hole if there is no special loop on the knife.
Learning to create paracord: weaving patterns for beginners
What you will need:
- Two pieces of paracord, 1.5 meters each
- Scissors
- Lighter
- Clasp
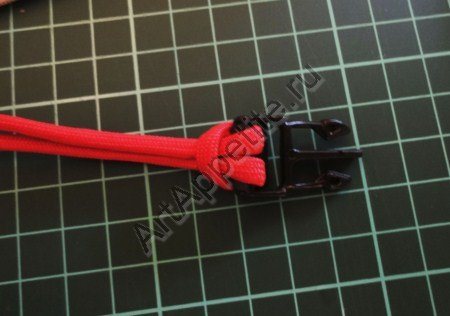
Before you start weaving a bracelet with your own hands, you need to connect the ends of two ropes. To do this, you need to take paracord of two different colors and pull the core out of it by 1.5-2 cm and cut it. Next, one of the empty ends needs to be melted and squeezed with your fingers, and then inserted into the second cord. The connected cords must be cauterized again at the joint. This connection is reliable and strong. Next, the connected cord should be inserted into the fastener, adjusting its length, as in the photo below.
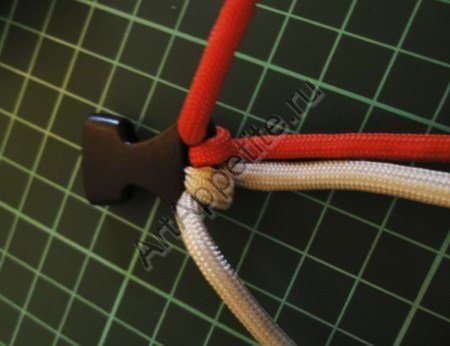
The cord is inserted into the second fastener simply by twisting it through its crossbar, as in the photo. As a result, the melted part of the rope ends up in the middle.
When both ends of the rope are secured, you can begin weaving. It is very convenient to weave a bracelet from cords of two colors, because one color is always the leading one and the knot begins with it. In this manual, this is the red cord.
The two outer threads are tied with a simple knot, as in the photo.
The knot is tightened tightly and, if necessary, straightened. Next, a second knot is knitted, which should also be tightened and straightened. Each new knot should be pulled towards the clasp with your fingers to make the bracelet tight and strong.
This way the bracelet is braided along its entire length. In some cases, when you want the bracelet to be especially tight, having reached the end, you can start weaving in the opposite direction. In this case, you will need twice as much paracord, but in this master class the bracelet is woven in one layer.
The ends are secured as follows. The ends of the lace should be threaded through the crossbar of the fastener using tweezers or small tweezers, because the rope will sit quite tightly on it, tie it in a knot, cut it and melt it.
The bracelet is double-sided. You can experiment with colors and thickness of the cord to make the bracelet look even more interesting.
Manufacturing instructions
It is better for a beginner to become familiar with lanyard weaving using the example of the easiest technique of a simple knot. So, in order to make a lanyard for a knife, you need:
- find the middle of the prepared rope;
- make a loop in this section of paracord and thread the end of the rope into the loop - a simple knot is ready;
- knit the same knots until the required length is reached;
- attach to a knife or tool through a special hole in the handle. A stylish and practical accessory is ready!
Having mastered the most basic technique, you can proceed to a more complex craft and weave a lanyard from paracord in two colors:
- take 2 cords of different colors, each approximately 25 cm long. Tie the ends of the cords together so that the accessory is bright and clearly visible;
- fold the cord in half, put on a carabiner and use it to measure the length of the future keychain;
- after folding in half, two free ends of the cord are formed next to the carabiner. One of the cords (for example, blue) needs to be braided with the rest. To do this, place the blue cord under the bottom and then put it on top, forming a loop;
- The free end of a cord of a different color (for example, yellow) is inserted into this loop. Tie a knot, thereby securing the carabiner clasp;
- The keychain turns the other way. Using tweezers, the yellow cord is pulled through the finished blue loop. This stage is repeated until the length of the key fob reaches the required mark. The two-color lanyard is ready to use!
What are the features?
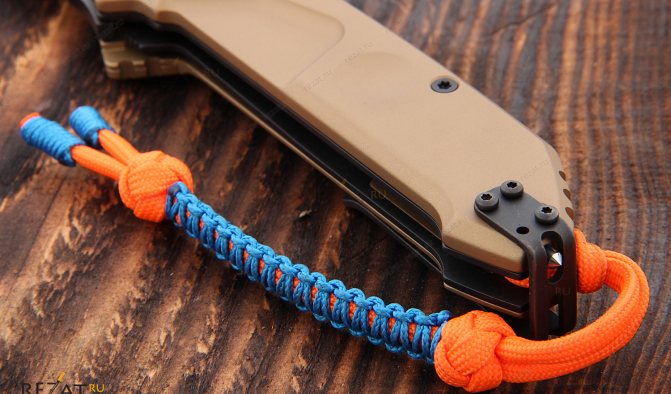
Why is a bracelet woven from paracord thread called a “survival bracelet”? The thing is that, if you get into an extreme situation, it easily unravels, turning into a strong rope, indispensable for many purposes. In addition, a paracord survival bracelet can be woven into a variety of necessary outdoor gear that can help out at the most necessary moment. Therefore, a paracord bracelet is an indispensable assistant for all tourists and extreme sports enthusiasts, which in everyday life looks like an original decoration.
The bracelet can be unwoven in a few seconds to be used for its intended purpose. There are many purposes for use:
- Medical care: rope and its fibers can be used as a hemostatic tourniquet, a splint for applying to a broken limb, dental floss, and can also be used to stitch wounds and make stretchers.
- Foraging for food. Paracord fibers are used as fishing line, bow string, making traps, hanging food or bait.
- Repair of clothes, tools. Used to sew up clothes, bandage shoes, tie up pants, and replace shoelaces. It is an indispensable thing when repairing equipment, bandaging parts of any structures, making handles for bags and other devices for transporting objects and things.
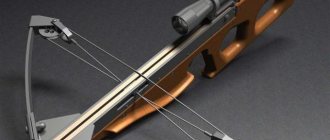
- Survival. It is used in the manufacture of weapons: rewinding handles, fixing the tip to an arrow or spear, and also as a bowstring in the manufacture of a crossbow for hunting. An indispensable thing when creating and securing parts of a shelter, tying the logs of a raft, making snowshoes, making fire. To start a fire, you can use flammable individual paracord fibers or use it as a bow string when starting fire by friction.
- Other purposes that can be achieved in everyday life: use as a cable for a car, a collar for animals, handcuffs, securing a load to a car, a sled, as well as paracord for drying clothes and as a rope ladder.
It should be taken into account that paracord is not used for dynamic loads, i.e. not suitable for any actions with the weight of a person (descent and ascent of a mountain, mountaineering, etc.).
Mounting methods
Before you begin creating this unique accessory, you need to think about methods for attaching the lanyard to a knife or other tool .
For example, you can attach the decoration to the handle through a special hole. This is the simplest and most reliable fastening option.
It is also possible to mount it through a ring or shackle; this method is compact, movable and allows you to quickly find a pocket weapon by touch. You can attach a lanyard using different techniques: with a knot or with a clip, on a loop or with a special clip. Each method is good in its own way and depends on the tastes and wishes of the owner. The main thing in this matter is to secure the accessory in such a way as to ensure maximum comfort and safety for the future owner.
We make an original “centipede” survival bracelet
A “centipede” paracord bracelet is interesting and useful because up to 5 meters of cable is used to weave it, and such a bracelet unravels in a matter of seconds.
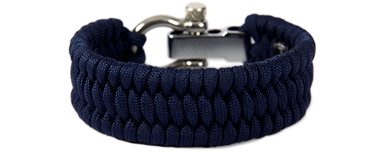
To weave a bracelet like in the photo above, you will need a carabiner clasp and paracord. The length depends on the size of the wrist.
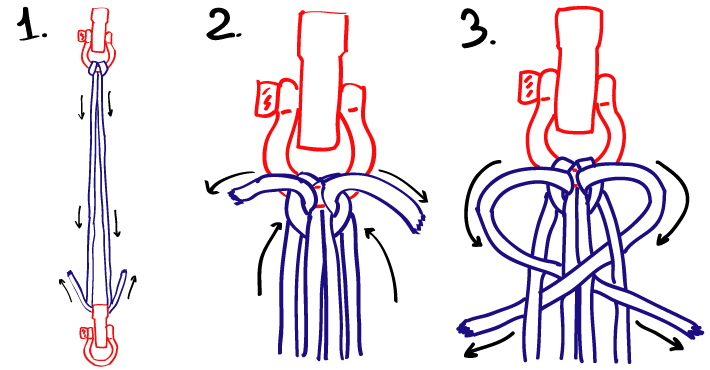
The length of the bracelet is controlled by special stretchers, along which the weaving will be done. The paracord should be folded in half and attached to the top fastener in the middle. Next, the paracord clings to the bottom fastener, and then returns to the top again.
There are two ways to secure the paracord to the top fastener again. The first fastening option is when the cable is secured to the fastener. As a result, it is attached in 4 places. The second option is when the paracord is passed through the fastening loop that was made in the first step. In this case, the fastener is attached in 2 places. Since the second method is more convenient, this master class discusses it.
To begin weaving the warp, a securing knot should be created in the thread. Then you can braid the bracelet. The bracelet pattern is shown in the picture below.
When the securing knot is tightened, you can begin braiding the bracelet. It consists of a knot, which will then be braided around the entire bracelet. Before braiding, the right thread should be at the top and the left at the bottom. The threads are intertwined in a mirror manner. Step No. 4, shown below, is repeated until the base of the bracelet is completely braided. To avoid unevenness and prevent the bracelet from spiraling, you need to ensure that the knots are tightened tightly and securely.
Once the base is braided, it is best to use paracord knitting needles to continue weaving. They make it easier to work on the bracelet and tighten it.
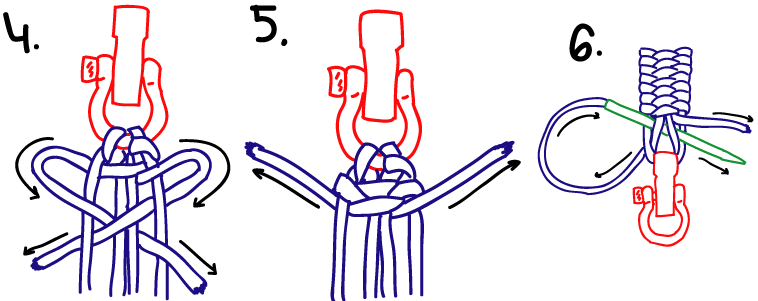
Now that the base of the bracelet is ready, you should thread the right cord of the paracard between the braid and the clasp to secure the ends. Now both threads should be passed under two or three center stitches and tightened. This is easier to do with metal needles. To compact and straighten the future bracelet at this stage, you must use pliers or any other forceps. Now the ends of the cable can be trimmed. The place where the paracord is cut melts. Melting will make the bracelet last longer, but if you need to unravel it, it will take longer to work on the melted ends. The diagram below shows the process of weaving a bracelet at this stage.
Rating
Survival bracelets, belts and even small keychains made from paracord have long been in fashion and have taken their strong, reliable positions. When purchasing, you need to pay attention to the quality of the cord and dyes. It should be light, elastic, and not stain when in contact with skin or water.
Accessories are produced by many different companies, but the most popular among them are:
- The Friendly Swede;
- Bomber & Company;
- WRAPS;
- A2S;
- Core Survival.
The Friendly Swede
The manufacturer offers simple and laconic bracelets, without additional elements. They can be worn as a basic decoration or as a piece of equipment on a hike “just in case.”
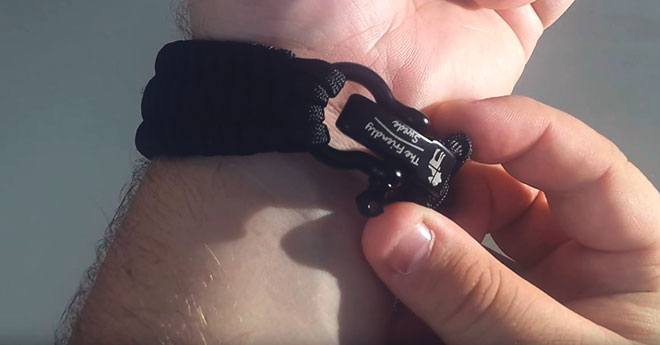
The Friendly Swede bracelet
A reliable clasp prevents it from being lost, and the rope used in production can withstand a weight of about 250 kg.
Bomber & Company
The company has supplemented its products with flint, so the accessory will help start a fire even in the most unpredictable conditions. The durable rope does not stretch, does not lose its brightness when exposed to water, and is also resistant to mold and rotting processes.
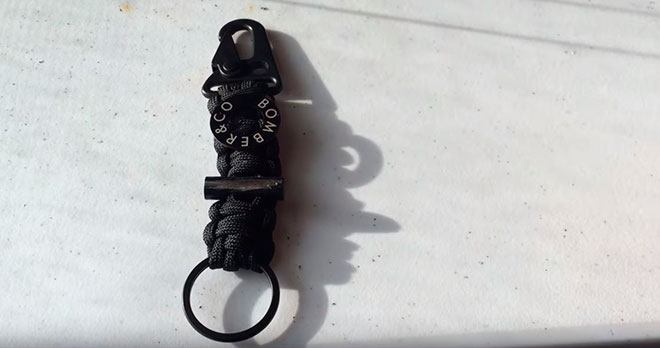
Survival bracelet with flint, from Bomber & Company
Original weaving methods will emphasize not only the brutal image of a man, but will also suit girls.
WRAPS
This paracord bracelet will be a godsend for extreme tourists. A small flint is woven into a strong, long cable, and a sharp edge for ignition replaces a knife. An accurate compass is also built into the small element. Even if lost in the forest, the owner will definitely not be left without a fire, and the next morning he will find his way home.
A2S
This multifunctional bracelet includes:
- Compass.
- Loud whistle.
- Scraper.
- Metal rod.
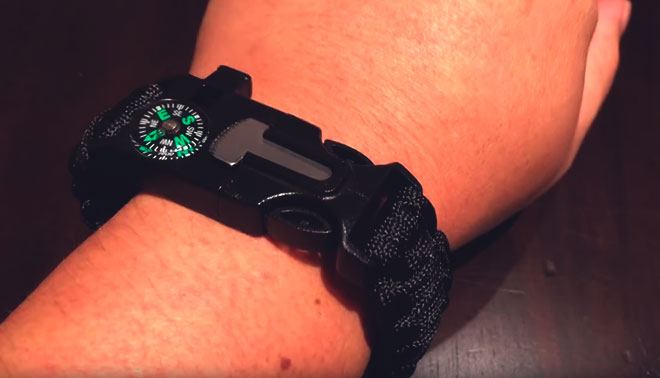
Bracelet A2S, with compass, flint, whistle and scraper.
The paracord used for weaving is durable and practically weightless. It can support weights up to 250 kg.
Core Survival
This is a favorite product of extreme travelers. To create a bracelet, 3 meters of type 4 paracord are used. That is, the breaking force is more than 300 kg. The clasp has a built-in small precision compass, scraper, flint, and whistle. This is a great set for those who are not afraid to challenge the wild and are ready for real adventures.
Prepper's Sling
— How to weave a sling from paracord.
School of survival
Tags: “paracord”, “survival gear”
Dmitriy
comments:
friends, what about belt buckles? Are there multifunctional ones?
02/03/2016
Artem
comments:
The most multifunctional - army! This is written here - https://rusurvival.ru/text/Kak-sdelatj-oruzhie.html
07.02.2016