As the old tourist wisdom says, you need to start packing your things a week before the start, and disassemble them immediately after your return. Life has proven that we do everything the other way around.
Friends, we continue to get ready for a hike. This time we will talk about the logic and how best to pack your equipment and fold your backpack.
Let's start with the most important thing: packing a backpack takes time! You should start packing your things at least a week in advance, and not do it the night before your flight. For convenience, divide the entire list of equipment into categories and devote an evening to each. This way you will calmly and without nerves and definitely won’t forget anything. So let's get started.
How to prepare a backpack and things for a hike
Get your backpack out a few days before your hike. Check the straps, fittings, and fastenings. If necessary, send it in for repairs: no little things should let you down on a hike.
Things can be collected according to the list or simply thrown into a pile according to the “remembered - put it down” principle. Place the collected items on the sofa or on the floor, but not in a pile, but so that everything is visible. This will make it easier to check if you have found everything. Just in case, look through things again and remove unnecessary things, but without fanaticism. A spare set of thermal underwear is always useful.
A hermetic bag or garbage bag will protect things from moisture
Insulation from moisture is needed so that the things in the backpack do not get wet if it rains or even if the backpack falls into the water. Special waterproof liners will help with this - for backpacks there are lightweight models made of waterproof fabric (like tent awnings) and with taped seams.
There is a budget option - thick garbage bags with a capacity of 240 liters. It’s worth taking the big ones - they are the most durable. But they can also tear, so take 2-3 spare pieces.
When you go hiking often, it is better to use waterproof liners - you buy one that will last for several seasons, without having to spend money on garbage bags each time.
There are two ways to pack things in herms:
- take a large waterproof liner or garbage bag for the entire backpack;
- pack individual items in hermetic bags.
Here are our recommendations. If the hike is short, you are confident in the weather, and there are no water crossings on the way, you can simply pack your things tightly and put only a sleeping bag and a change of clothes in the shelter. They must always remain dry - this is a strict rule.
For long hikes, take one large waterproof liner and several packages for things - in reserve. For example, it may rain during a hike, and a wet tent should not be placed next to dry things. It is better to isolate it in a separate bag and put it in a backpack, where there is already a large hermetic liner inside.
The wet tent can also be placed inside the waterproof liner to balance the right and left sides. This is done so that the backpack does not warp.
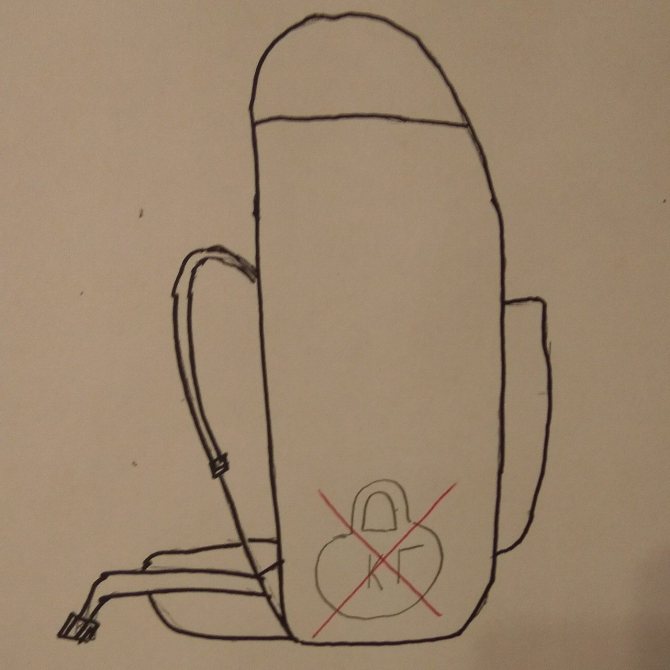
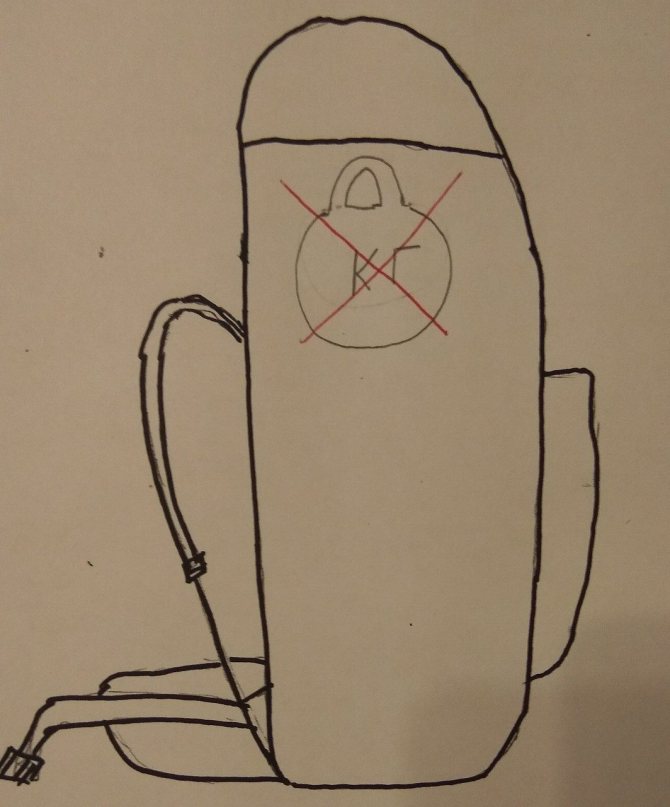
Place valuables in a separate wallet
Pack valuables, documents, money, matches and a cell phone in a waterproof wallet to protect them from moisture. If you don’t need to take a train or bus, pay for travel, or make transfers, you can put the sealed wallet in your backpack. If you change transport, leave your backpacks at the station or in a “clump” at a rest stop, take your waterproof wallet with you and your valuables will be safer.
To the table of contents >>

The waterproof wallet is closed with a thick tape or lock - this way things will definitely not get wet
List of things
Making the right list of things is the first thing you need to do in order to properly pack your backpack for a hike. And it’s better to take care of this in advance, because shopping on the last day is a thankless and very nervous task. Something may not turn out to be, something will not be as you planned, and many other problems may arise due to haste and limited choice.

Things you need on a hike
The list may vary depending on the time of the trip, its duration and the area where you are going. However, there are things that are useful everywhere and we will list them immediately.
- Tent. You can agree on this issue with the rest of the group members and one person will take it. Then others will carry other accessories.
- A sleeping bag selected according to the weather and height.
- Karemat is a tourist rug.
- Raincoat. • A spare pair of shoes to give your feet a rest at rest.
- Spare pants, or better yet a pair.
- A warm sweater for cold weather.
- A couple of replacement T-shirts.
- Several changes of underwear.
- Two or three pairs of spare socks.
- Warm socks.
- Light trousers or shorts in case of heat.
- Bathing suit.
- Unbreakable, but not disposable tableware (spoon, mug, pot).
- Personal hygiene products (soap, towel, toothbrush, toothpaste, napkins, etc.).
- First aid kit for personal use. The group must have a general first aid kit with the necessary set of medicines and dressings, but it would not be amiss to take sunscreen, insect repellent, and a couple of packs of bandages.
- Matches, lighter, flashlight, compass.
- Food products after agreement with other group members.
- Documents, money.
This, or a self-compiled list, which must include the essentials, should be taken with you to the store and constantly checked with it. Tested by time and bad experience - without such a piece of paper you will definitely forget something.
And I would like to pay special attention to the products. If you are going on a solo hike, how and what to pack in your backpack depends only on you, including what products you will take with you. But if you are planning a group hike, some things need to be agreed upon with your comrades so that there is no misunderstanding such as the abundance of pearl barley in the absence of tea. A few days before departure, you need to get together, make a list of groceries, distribute it among all members of the group, and immediately a day or two later check again whether everyone has fulfilled their assigned duties.
How to fold a backpack correctly
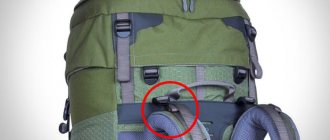
The backpack must be monolithic - this is a strict rule. Otherwise, it will become askew and will be awkward to carry.
Packing a backpack can be compared to playing Tetris. Fill all the voids with soft clothing - socks, hats, fleece jackets and tamp tightly so that the structure does not warp.
Ideally, the backpack should be filled completely to the very top or at least to the tube - a fabric “pipe” under the valve (lid). This is also a strict rule for packing a backpack on a hike - it will be inconvenient to carry a half-empty one.
Two ways to pack things
The installation method depends on the position of the rug - it can be placed inside or outside. You can choose any option, depending on your preferences and route:
- the mat inside is rolled up and placed inside the backpack.
And already into the “pipe” that it forms, you need to compact things. With this option, packing a backpack is easy; even a beginner can handle the task. The disadvantage of this method is that there is less free space in the backpack. And you can’t get a rug at a rest stop to lay on the ground. - rug outside - hung under the side ties or under the bottom.
So it is always at hand, it is easy to get it at a rest stop. When you break up your camp, you can put your things in one place - on a mat, not on the damp ground, and then put the dry items in your backpack. The downside is that the rug can cling to branches in the forest or float in the mountains. Therefore, the recommendation is that if you plan to walk through a windfall, forest or bush, attach a rug to the front wall of the backpack so that it does not interfere.
To the table of contents >>
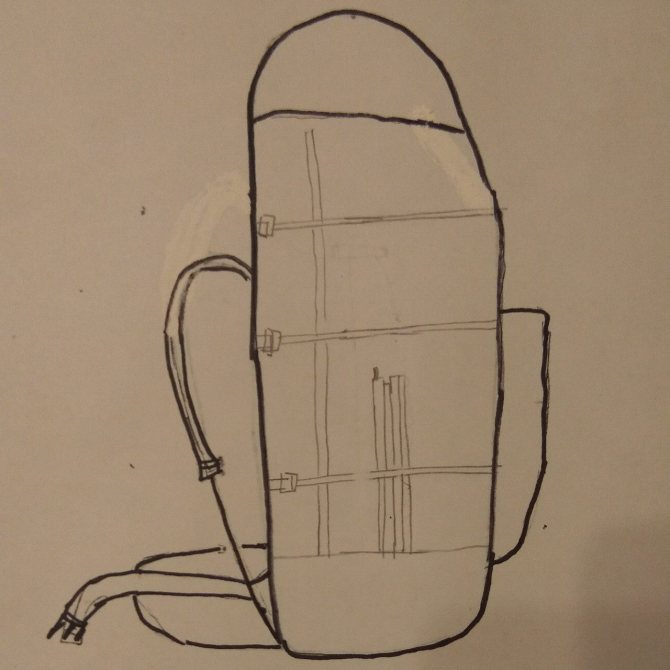
Rules for distributing things
There is a standard scheme for distributing things in a backpack. To make the backpack comfortable to carry, its center of gravity should be as close as possible to the center of gravity of the body: at the level of the shoulder blades and adjacent to the back. For this to happen, you need to put things together correctly.
Important points in the distribution of things:
- The heaviest items should be in the middle of the backpack and closer to the back. This is a place for a tent, canned food;
- in the middle part and further back there are also heavy things;
- at the very bottom - light but voluminous: for example, a sleeping bag and clothes for an overnight stay. Do not put heavy things down, otherwise you will constantly bend down under the weight of the backpack;
- do not put heavy things on the very top, otherwise you will swing like a pendulum;
- fragile things - in the flap pocket. Things that crumble/crush - go to the very top. If you sit on a backpack at a rest stop, remember that you need to sit on the part that is below the straps.
The second point - and this is a recommendation - the necessary things should be at hand. Then you won’t have to rummage through your entire backpack in search of a mug-spoon or water at a rest stop.
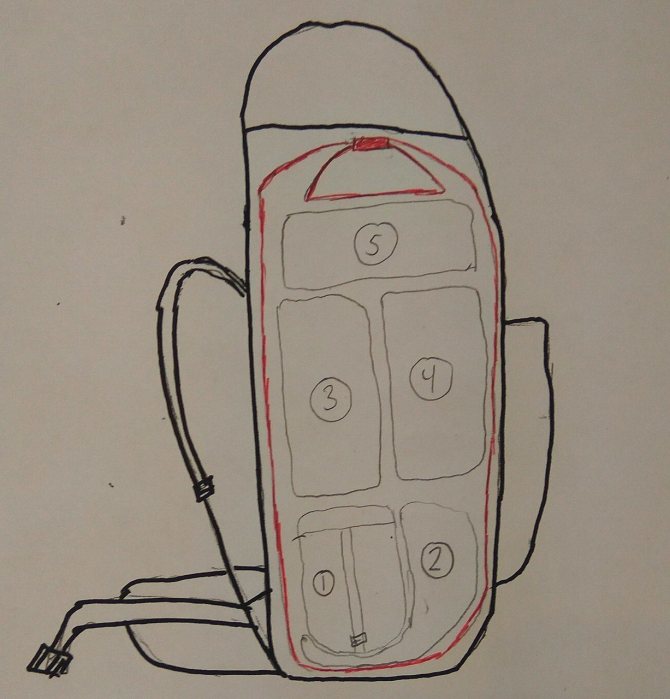
Distribution of things during a short hike or the option of “dropping” - “carrying”
This distribution scheme is suitable for cases when you do not need to take out the tent every day. For example, for short hikes or for the option when it’s one day’s trek to the camp.
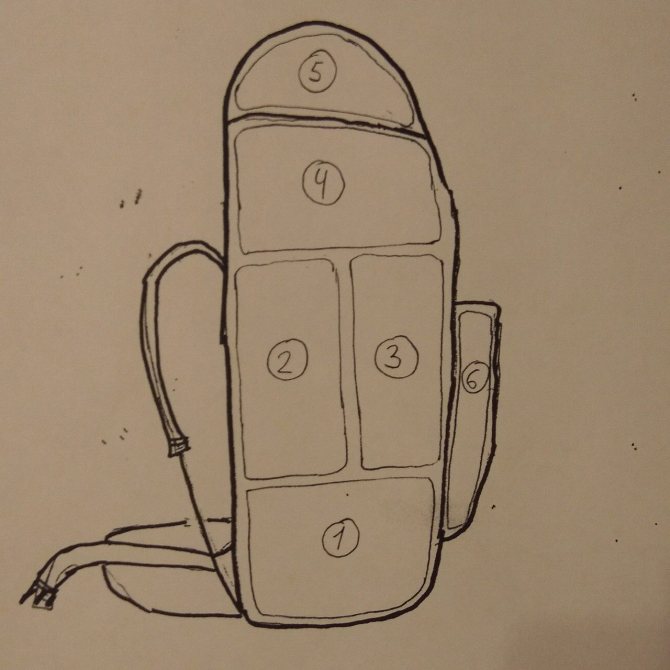
1) light things and bulky things - a sleeping bag and spare clothes;
2) the heaviest things - canned food, a tent, gas cylinders;
3) moderately heavy items - food supplies, spare shoes;
4) fragile things and not very heavy things - a cosmetic bag, food for a rest, a gas burner, a down vest;
5) fragile things and those that should be at hand - a first aid kit, sunglasses, food for a snack, dishes, money, documents, phone in a hermetic wallet;
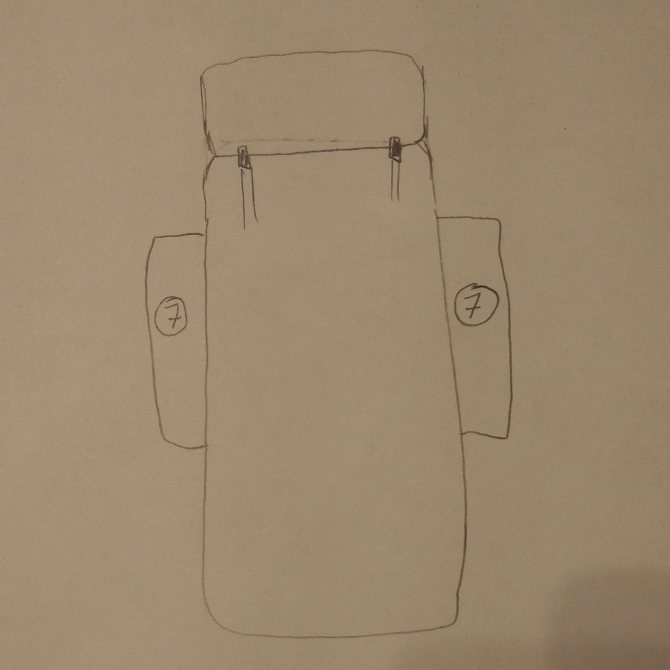
6−7) non-fragile things that need to be quickly retrieved - map, water, raincoat - in the front or side pockets;
 long things - fishing rods, trekking poles - in pockets under the side ties.
To the table of contents >>
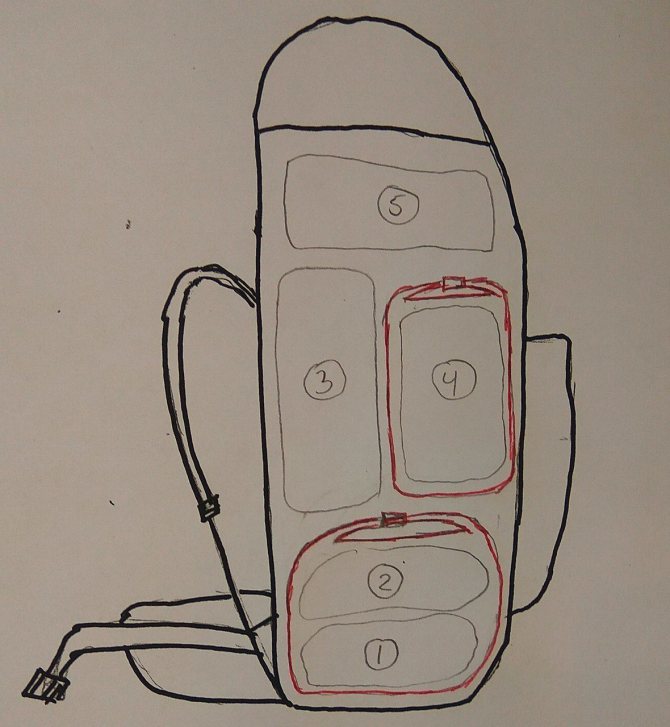
Distribution of things on a multi-day group hike - “carry every day”
The principle of distribution of things remains the same: heavy things to the back, sleeping bag down, fragile things at the top. The layout differs only in the location of the food, group awning and tent. This is due to the actions of tourists along the route.
Before the daytime halt, there should be food, a burner, gas, and a group tent at the top. They are first taken out during the parking lot at lunchtime. After a halt, a tent and awning are placed on top, and food and a cooking kit are placed under them. At the end of the trek, tourists come to the camp site, stretch out the awning, put down their backpacks, begin to set up tents and then prepare dinner.
But you can put a small and light (up to 5.5 kg) tent on top. If it is heavy, you need to disassemble it and distribute the parts throughout the backpack.
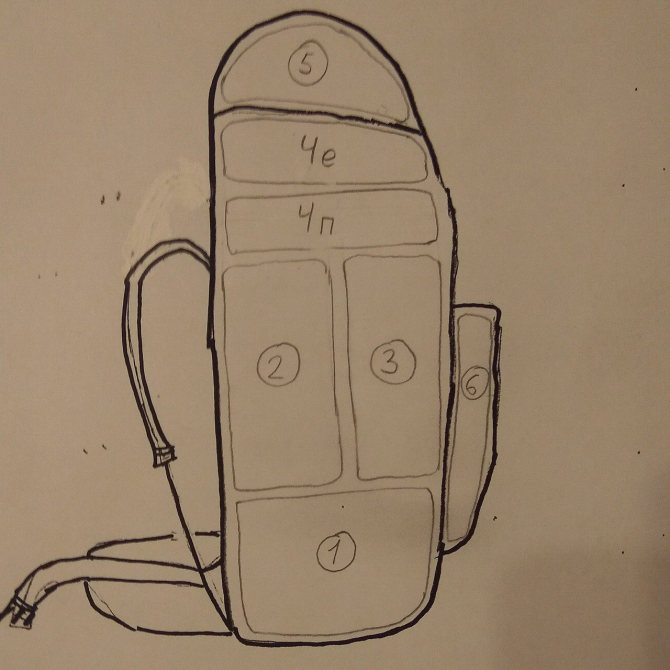
1) light things and bulky things - a sleeping bag and spare clothes;
2) the heaviest things - canned food, gas cylinders;
3) moderately heavy items - food supplies, spare shoes;
4e) set for food at a rest stop - burner/gas, food, dishes;
4p) tent, above it there is a group awning, there is also a fleece/vest for a rest;
5) fragile things and those that should be at hand - a first aid kit, sunglasses, food for a snack, dishes, money, documents, phone in a hermetic wallet;
6−7) non-fragile things that need to be quickly retrieved - map, water, raincoat - in the front or side pockets;
After a break, the layer with the awning/tent and the food set are swapped.

4p) group awning and tent
4e) meal kit.
To the table of contents >>
Don't forget about packing your things
Small packages, bags or sacks will not only protect things from moisture and other external influences, but will also make it possible to sort all the equipment. For example, you can put a change of clothes in one large compression bag, and personal hygiene products and other small items in small bags. Thanks to this, all things will not “mix” with each other and you will be able to quickly find the necessary item in a given situation.
A variety of modern bags and sacks for equipment allows you to choose the most optimal option for equipment of any size and type. The most important thing is not to forget what is in which package/bag.
Shrink the backpack and check that it doesn’t rattle
Shake the backpack and make sure nothing is rattling. A rattling backpack will irritate both you and your fellow hikers.
Once you fill your backpack, it will become round and uncomfortable to carry. You need to make the back flatter: place the backpack on the floor or on the ground with the straps up; tap the back with your fist, jump, then press with your knee and tighten with side ties.
The center of gravity of the backpack should be brought closer to the back: the more monolithic and flat it is, the closer this center is. Walk with your packed backpack through the rooms or along the street - check if it is too heavy and if it is not skewed to the side, if it is pulling backwards or forwards. If something is pressing in your back, it’s better to disassemble your backpack and repack your things.
Final preparation
A well-packed backpack must meet certain rules, failure to comply with which can have a very negative impact on the entire trip. Why did we place them at the very end? Because they can only be checked and corrected after the backpack has already been packed. So:
- The backpack should even visually look smooth without distortions or bulges and should not hang on one side.
- It should not rise above your head. Maximum of one level.
- A fully assembled backpack should weigh no more than a third of the weight of the person who will carry it.
- It happens that not all things fit into the backpack. In this case, you should not run for a larger backpack and start all over again. You should think carefully and leave at home what is of the least value for the trip. As a last resort, try compacting soft things or arranging everything in a slightly different order.
Well, after you have finished packing your backpack for a hike, you should put it on, adjust all the straps and waist belt, walk around the room a little, paying attention to how you feel with such a weight on your back. Although this heaviness is pleasant because of the anticipation of all the wonderful surprises and indescribable sensations that await you in direct contact with nature.
Gathering equipment for a hike
You need to divide the entire mass of clothes that you want to take with you into several parts:
- The clothes you wear directly. We go hiking in it and then, if the weather permits, we put it on every morning.
- Membrane set - jacket and trousers. We won't move them far if the weather suddenly starts to deteriorate. For the same reasons, you can leave a thin fleece jacket.
- A set of clothes that you will use in parking lots. As a rule, these are warm clothes, a change of dry clothes, etc. You will wear these clothes in the camp; the rest of the time they will be packed in your backpack.
- Things that you will rarely take out, or that you will only need at the end of the trip. These things include the clothes you will wear when you return home, or a change of underwear and socks. In a word, you will look into this bag once every three to four days.
In the end, we ended up with four piles. We don’t need packaging for everyday clothes; we wear them every day. There is also no point in packing the membrane separately, because... sometimes you need to get it out very quickly, and unwinding the bags only wastes time.
Thus, we need to add the remaining two piles. You can use compression bags: when compressed, clothes take up less space, but in the future this can complicate packing a backpack, because The voids between the “compression sleeves” are inconvenient to fill.
The best option for packing clothes is lightweight hermetic bags. For example, this one. On the one hand, they protect things from moisture, and on the other hand, when folded they remain more flexible and are easy to pack tightly into a backpack.
The author also recommends keeping a powder puff in a separate “herm” and leaving it somewhere on top so that, if necessary, it can be easily taken out at a rest stop. Your wives will thank you