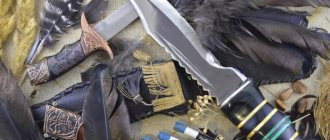
Lanyard and its history
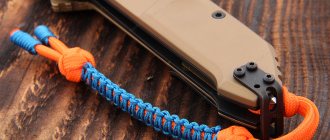
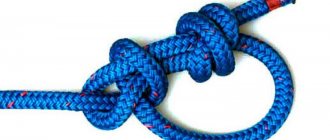
Lanyard is an original type of weaving that is used to decorate the handles of various weapons - pocket and hunting knives, checkers, sabers, as well as tools. Weaving is done with a leather cord or synthetic cable, which is also called paracord.
The history of this interesting device goes back several centuries. And if now the lanyard often serves only a decorative function, then initially it served to prevent the weapon from being lost and slipping out of the hand. This term was first mentioned during the times of chivalry, that is, in the 14th–15th centuries. In the Russian army, this accessory was a mandatory part of the military uniform, as well as an insignia on award weapons. The presence of a lanyard on a weapon spoke of the soldier’s special services to the fatherland.
Weaving tools
Weaving a lanyard for a knife is not difficult even for a novice craftsman. This is a simple and fun activity that does not require special skills or serious expenses.
To create a lanyard with your own hands, you will need:
- a cord or rope about a meter long. Experienced craftsmen advise taking leather or synthetic lace in a bright color. It is desirable that it be round and not flat;
- lighter to melt the ends of the cord;
- tools for drilling a hole if there is no special loop on the knife.
How to distinguish real paracord from fake
Real paracord is usually made in the USA. One of the most famous manufacturer brands is Rothco. But, in fact, it is not so important in which country the product is made, what is important is how well its quality meets international standards. However, the name “paracord” can hide anything that is at least a little similar to the original. Here are the signs by which you can distinguish a real survival rope from a fake that will not cope with its task.
- If you touch the paracord, you will immediately notice the softness. It is precisely because of the softness of packacord that it is convenient to weave products.
- Light the edge of the paracord. Combustion will occur with a smoky flame, with black smoke. It will smell like burnt plastic.
- The core and sheath fibers are never fused together. The shell will always melt faster and expose the core, similar to stripping insulation.
But from the outside I see it is very difficult to determine what exactly they are selling to you. It is especially difficult to do this using photographs from Chinese sites.
The breaking weight parameter is very important. For paracord of the third type, a breaking load of an average of 250 kg is considered normal; the Chinese version can withstand 50 -100 kg. Don’t be lazy to ask the seller if the paracord he is offering you is real. And ask for some kind of certificate of conformity, it always comes with wholesale sets of rope - paracord. A good quality product is suitable for making a paracord bracelet.
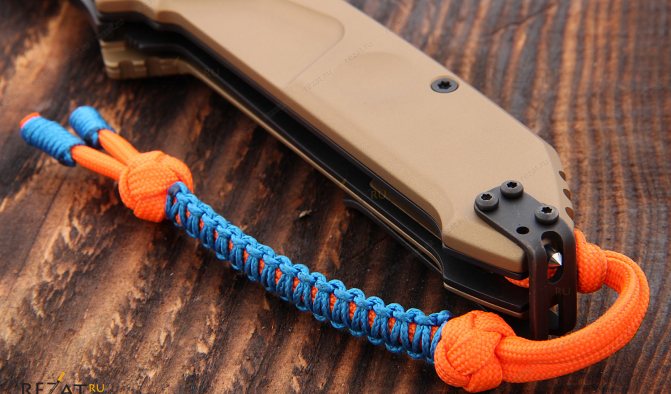
Paracord handlebar cover - a strong rope is always at hand.
Manufacturing instructions
It is better for a beginner to become familiar with lanyard weaving using the example of the easiest technique of a simple knot. So, in order to make a lanyard for a knife, you need:
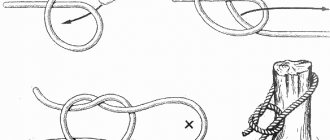
- find the middle of the prepared rope;
- make a loop in this section of paracord and thread the end of the rope into the loop - a simple knot is ready;
- knit the same knots until the required length is reached;
- attach to a knife or tool through a special hole in the handle. A stylish and practical accessory is ready!
Having mastered the most basic technique, you can proceed to a more complex craft and weave a lanyard from paracord in two colors:
- take 2 cords of different colors, each approximately 25 cm long. Tie the ends of the cords together so that the accessory is bright and clearly visible;
- fold the cord in half, put on a carabiner and use it to measure the length of the future keychain;
- after folding in half, two free ends of the cord are formed next to the carabiner. One of the cords (for example, blue) needs to be braided with the rest. To do this, place the blue cord under the bottom and then put it on top, forming a loop;
- The free end of a cord of a different color (for example, yellow) is inserted into this loop. Tie a knot, thereby securing the carabiner clasp;
- The keychain turns the other way. Using tweezers, the yellow cord is pulled through the finished blue loop. This stage is repeated until the length of the key fob reaches the required mark. The two-color lanyard is ready to use!
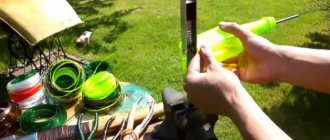
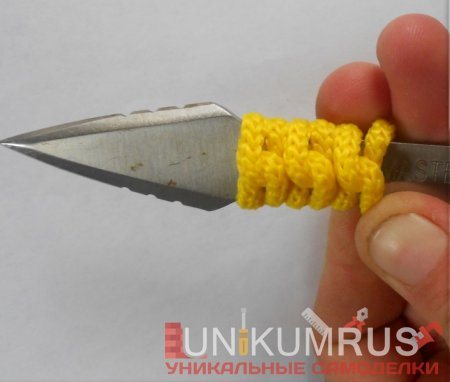
Knife handle braid

To braid the knife we will use blue and yellow household cord. In general, ideally, it is better to take paracord - a lightweight nylon rope that is used in parachute business and has very high strength. But in this particular case, the braid will be more decorative than practical, so it makes no sense for me to spend money on paracord.
By the way, if you want to find out what kind of wood to use for a knife handle, then this is the place for you.
Safety precautions:
Dear users, take care of your hands and feet, because you can cut yourself with a knife, and I don’t want your blood on my conscience.
Well, now we can begin the braiding process.
For this we need: 1. Knife; 2. Household cord or paracord; 3. Scissors; 4. Matches; 5. Patience and perseverance.
For my knife, I take about 1 meter of cord, but for each case its length may vary. In any case, I always try to take a longer cord.
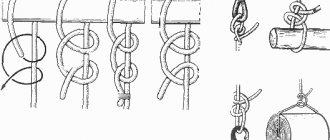
Conventionally, we divide the cord in half and make the first loop like this.


Then we turn the knife over to the other side, take both edges of the cord and twist them so that we get a knot like this.

Now we turn the knife over again and make exactly the same knot as shown above.

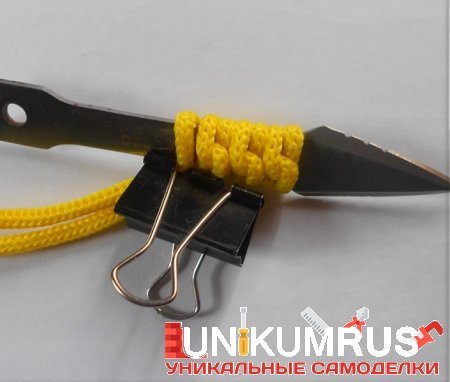
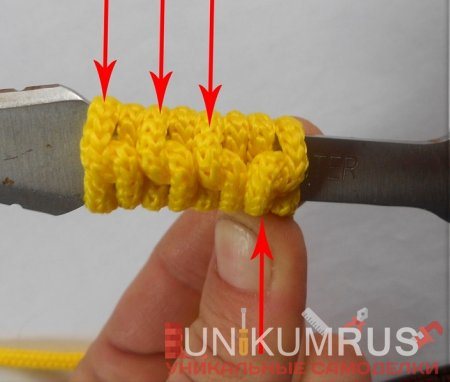
Following this technique, we continue to collect knots on both sides of our knife. Periodically we tighten the cord tighter and smooth out the resulting pattern.
Out of habit, your hands get tired quickly. Therefore, to give your hands a break, you can grab both edges of the cord with a binder or clothespin so that our weaving does not unravel while we rest.
Another very important point.
Watch the pattern carefully. If you initially ran the left cord under the right, then you should continue to do so. Otherwise you will ruin the drawing.
In the next photo, I made three knots where the left cord goes under the right one, and I deliberately made the fourth knot incorrectly - I put the right cord under the left one. Look how the pattern deteriorates in this case.
Using this technique, we completely braid our handle.
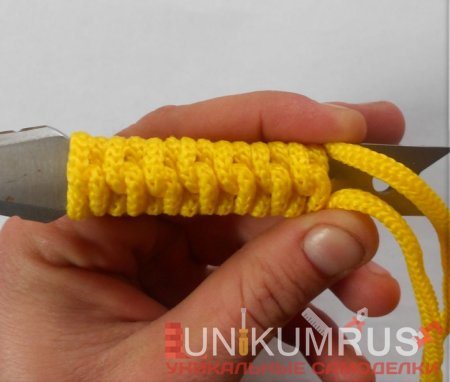
Now we insert both edges of the cord into the hole.
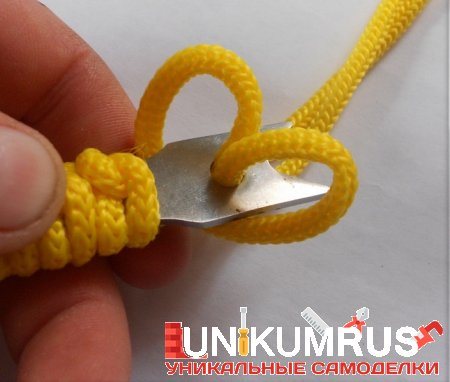
Tighten as tightly as possible. After this, we make a knot and cut off the excess cord with scissors. To prevent the knot from coming undone, you can slightly melt the edges of the cord with matches or a lighter.
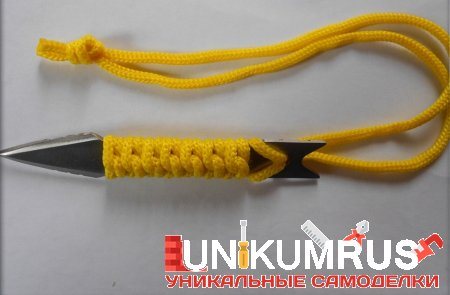
That's all - 10 minutes of work, and the result will last for several years. Both braids are ready, but who likes which one better is a purely individual matter.
Source: delaysam.net
unikumrus.com
Mounting methods
Before you begin creating this unique accessory, you need to think about methods for attaching the lanyard to a knife or other tool .
For example, you can attach the decoration to the handle through a special hole. This is the simplest and most reliable fastening option.
It is also possible to mount it through a ring or shackle; this method is compact, movable and allows you to quickly find a pocket weapon by touch. You can attach a lanyard using different techniques: with a knot or with a clip, on a loop or with a special clip. Each method is good in its own way and depends on the tastes and wishes of the owner. The main thing in this matter is to secure the accessory in such a way as to ensure maximum comfort and safety for the future owner.
Thick braided knife handle
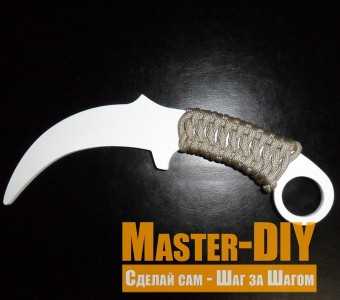
Thick braided knife handle - comfortable and dense braided knife handle with a curved handle.
Materials and tools:
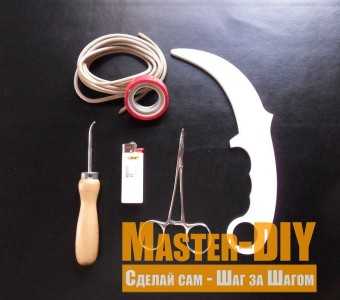
- knife;
- Paracord;
- scissors;
- clamp;
- scotch;
- lighter;
- awl with a round end.
Step 1
Let's take a knife and Paracord and start wrapping the handle. The technique of braiding the handle is shown in the pictures. To temporarily fix the cord during winding, use tape. After wrapping the handle, we cut off the ends of the cord and burn it with a lighter.
The handle is ready.
master-diy.ru