photo 10 1332925449
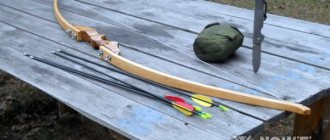
Why spend a lot of money on purchasing a motor boat if you can make a raft for river rafting from improvised materials? This is a reliable, wave-resistant craft, used not only for rafting, but also for crossing. Its buoyancy and strength make it suitable for rafting on taiga rivers with natural rapids and fast currents. The disadvantages of the raft include low speed and low maneuverability, and it cannot be used when rafting on water bodies with impassable debris. Wooden rafts are the most common, but they can also be made from other materials that everyone has on hand.
How to build a raft for river rafting
How to build a raft for river rafting
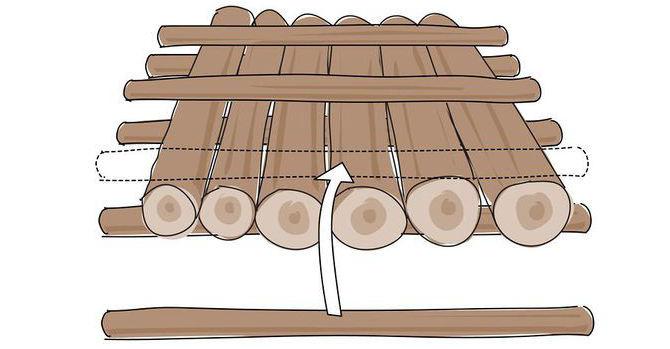
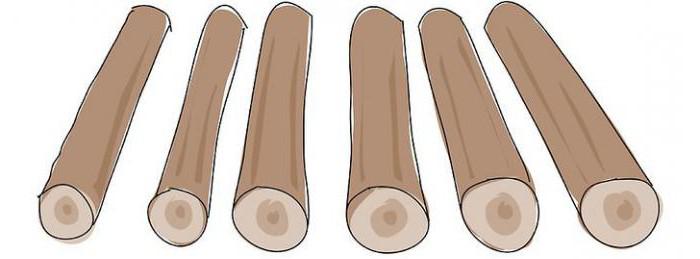
The most reliable raft for rafting on a choppy taiga river is made of wood. To make it you will need from four to ten logs, depending on the size of the craft and the number of people designed for the crossing. The logs must be the same size. To tie them together, you need to prepare six poles, longer than the width of the logs folded together. The poles are attached to a bundle of logs above and below them, perpendicular to them. The ends of the poles are tied with strong rope on the sides to hold the logs together more tightly. If there is no rope, and the raft is assembled in survival conditions, you can use wire, bast, or plants suitable for tying instead.
How to build a raft for rafting
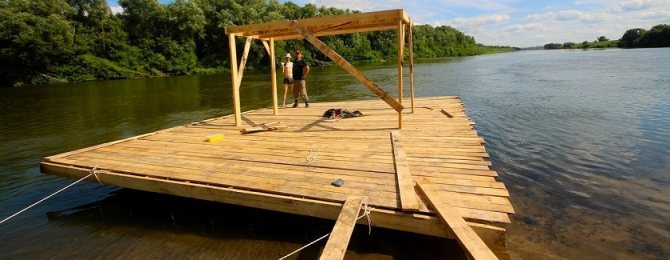
A raised platform should be created on top of the stacked poles to keep clothes and shoes dry, as well as to create thermal insulation. At home, a platform can be made from boards, attaching them with a screwdriver, but if construction is carried out in an emergency, you can inspect the area for any wood, floating driftwood, or bark that can be laid on top of the logs. To make the raft easier to control, you can attach a pole perpendicular to the base on which to place the sail. For comfort, it is better to make a frame of bars on which to attach a canopy that protects from the sun, wind and rain.
When it is not possible to use logs, any materials that have the ability to float on water are used.
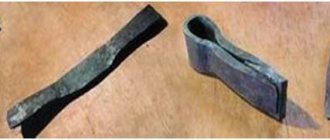
For example, to cross in the warm season, you can partially float on the water using a bundle of reeds, reeds, and a raincoat stuffed with straw. If you can find a tire or inner tube on the shore, you can build something like a boat for one person, wrapping them in a raincoat-tent.
Manufacturing
Don't know how to make a raft with your own hands? Follow these steps:
- Place wooden poles 5 meters long lengthwise, the shorter ones across them at the same distance from each other.
- Next, the manufacturing of the main deck and the “captain’s” bridge begins. They are 3 shields made from assembled poles. First of all, the main deck is made. On two hewn poles 1.7 m long, poles or pieces of two-meter planks 20 mm wide (this is even better) are laid out and driven in with nails. “Commander’s” bridges are constructed in a similar way.
- The supports for the canopy are willow twigs. You should proceed to making the raft only after they have been installed. First of all, the car cameras are tied to the base with ropes, then the main deck and “captain’s” bridges are installed. The sides are made from 4 hewn poles, and the canopy is made from a piece of cellophane.
- The rowing (control oar) supports are located diagonally on the bridges: on the front part - on the right, and on the rear - on the left side. The supports are bent from three duralumin pipes and reinforced with two steel or duralumin strips. The rowing itself is made from long poles (250 cm), and the blades are made from duralumin or plywood sheets (sizes are selected individually).
- The frame is formed using a cable with a diameter of 6 mm and modules 200 cm long, their connecting parts are hinges. A 20 degree bend is formed at this point. The frame weighs approximately 80 kg. On solid shafts, cable breaks are possible.
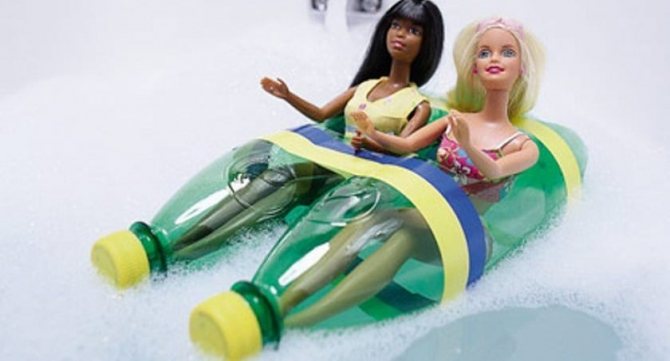
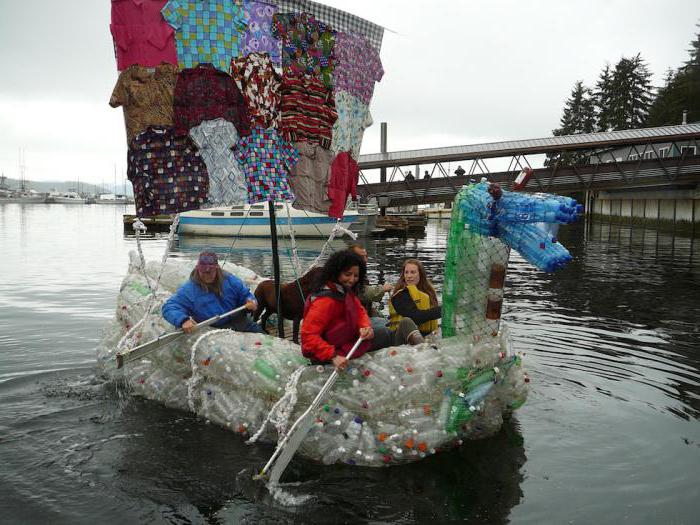
How to build a raft from plastic bottles
How to build a raft from plastic bottles
Plastic bottles as floats are capable of keeping different numbers of people afloat; this ability must be supported by a reliable frame. There are three ways to build a raft from plastic bottles:
The easiest option is to use plastic bottles and tape.
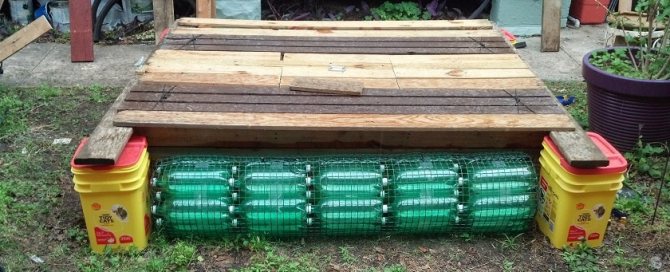
The bottles need to be prepared - washed, dried and screwed on tightly with a lid so that they are filled with air. The bottles are held together with tape, 3-4 pieces each, and there should be from 30 to 50 such blanks. These pieces are then simply tied together to form a raft. Of course, a raft made from plastic bottles made in this way may not withstand serious tests, but it is quite suitable as a means of recreation on calm water.
How to build a raft from bottles
Catamaran made from bottles.
A raft made of plastic bottles, reminiscent of a catamaran, is made on the basis of the frame from an old cot. It must be completely freed from fabric and various fastenings. Wooden boxes are attached to the four corners of this frame, inside which plastic bottles are placed in a vertical position and secured with tape and rope. The boxes are attached to the corners of the frame with clamps, cables, ropes and other fastening elements. A wooden seating strip is installed in the middle of the frame.
The most reliable bottle raft is made as follows: the bottles are tightly closed with lids and placed inside plastic bags. The more bags made, the better, this will give more stability to the craft. The bags are well tied with ropes. A frame is formed from wooden boards: they are tied together and fastened with nails to form a lattice. Bags with bottles are attached to this frame, and the raft is ready.
Create a raft
One unit during construction will be a block of bottles. It's very easy to make. For this you will need four bottles. When you connect them together, you get a square. That's exactly what we need. The construction of such blocks will turn out to be very strong and reliable. The most important thing is that it can be quickly repaired. If something happens to the block, it can be easily removed and replaced with a new one. Therefore, such a lightweight circuit is very easy to maintain and operate.
You need to fasten the bottles into a block using waterproof tape. For greater safety, it is best to secure yourself with a rope. The main thing is to twist them tightly so that it is rigid, otherwise the block will fall apart again.
Now all you need to do is just make blocks. How many are needed depends on the size of the raft and its carrying capacity. But the extra ones won't go to waste. Once a sufficient number of blocks have been made, you can begin to form sections. This is the next stage in dividing the raft. One section consists of several blocks. It is formed according to the width of the swimming device. If it is four blocks wide, then one section will combine them. This division will also make it easier to connect all the elements together and replace damaged bottles.
In this way, the blocks are combined into sections, which are then fastened together into a raft.
How to build a raft from barrels
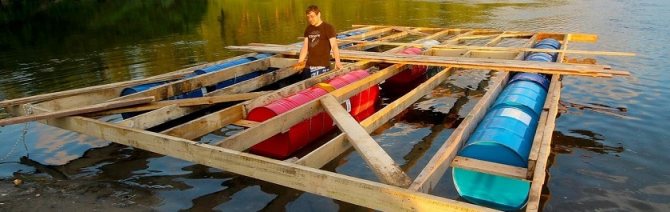
How to Build a Raft from Barrels
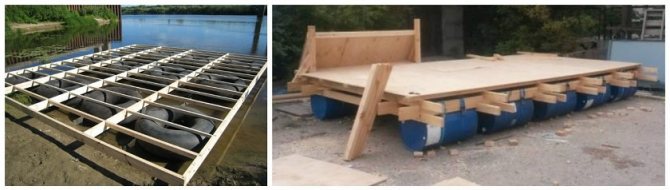
To build a raft from barrels, you will need more expensive material than bottles, but this design allows you to achieve a higher landing above the water. To build a small raft from barrels, six 200-liter plastic containers are enough; to make a large raft, you will need about 20 barrels. They are airtight, plastic, but at the same time very durable. The tanks are located parallel to each other, like the pontoons of a catamaran. For the frame, a frame is made of beams with transverse crossbars, and each barrel is located, as it were, in its own compartment, which is limited by two crossbars and two beams. The barrels are attached to the frame with slings.
A deck of planks is laid on top of the frame. On a large raft, you can build an upper deck for relaxation from barrels. It is assembled from wooden posts, which are attached to the main deck with grooves. Since the weight of the finished structure is quite impressive, it is best to move the production of the raft to a place near the shore in the water. A large raft made of barrels is a good means for a relaxing holiday on the water, which can be equipped with a kitchen, tents for spending the night, shelter from rain and wind, etc.
By the way, with the help of plastic barrels you can make not only a mobile watercraft, but also a stationary pier on the river bank.
Structural features
You already know how to make a raft from wood; it’s time to figure out how to choose the right material.
- The largest diameter of the log is 25–30 cm.
- Minimum – 10 cm.
- To ensure that the future raft made of logs has good stability, thin logs are placed in the middle, and thicker ones along the side. If the logs are slightly crooked, then these parts are placed in the lower part.
- Allowable gaps between logs are 2–3 centimeters. Otherwise, the water structure will be unreliable and inert, and besides, it simply won’t be possible to build a raft according to all the rules.
- The logs are stacked on a slipway, after which they are rolled out to the sides and their upper parts are marked.
How to build a raft for rafting from inner tubes
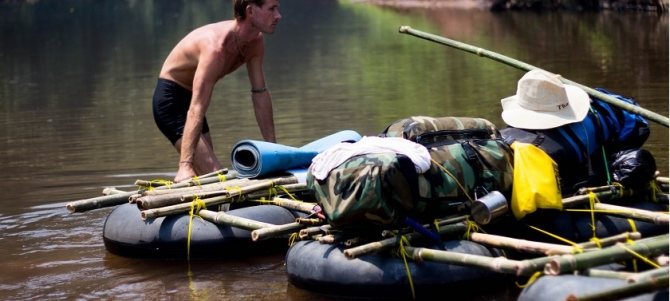
How to build a raft with your own hands
You can make a raft with your own hands from a pontoon such as an inner tube. It is much lighter than a wooden raft or a raft made from barrels, which is convenient when making and being forced to carry it across the shoal. To build a raft designed for six people, it is necessary to take eight chambers from heavy vehicles, for example, KAMAZ, ZIL, MAZ. They are laid out parallel to each other in two rows and fastened with strong nylon rope. The choice of fasteners in favor of nylon thread is explained by the fact that it does not collapse or stretch from prolonged exposure to water.
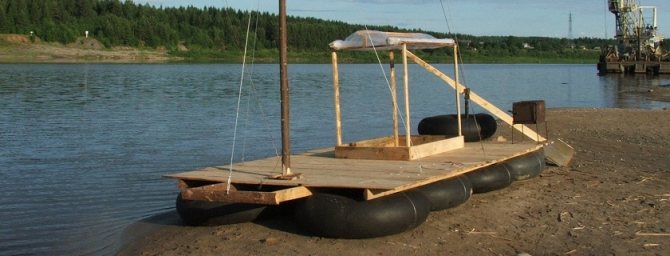
How to build a raft from inner tubes
Square bars are placed on top of the auto cameras, two for each row of cameras, and attached to them in the same way. Boards are attached to the beams to form a deck. It must be taken into account that the length of the boards should be such that they extend beyond the edges of the auto cameras by about half a meter. This is necessary so that when obstacles arise in the water, they bump into the boards and not the cameras to avoid damage.
In addition, the protruding edges of the deck leave room for the manufacture of various fastenings for a canopy, sail, rowing seats, and others. A canopy is necessary not only for shelter from wind and rain, but also for drying clothes, and in windy weather it can serve as a sail. It is better to make the canopy foldable so that it can be removed in a headwind for easy rowing. To be on the safe side, when going on a long trip on the water, you need to have a spare tube and pump with you.
Manufacturing process
Don't know how to make a raft? The assembly process consists of the following steps:
- Place two logs parallel to each other at a distance of 85 cm.
- Place eleven planks across the logs to form a deck. The boards need to be laid in such a way that they slightly extend beyond the line of the logs, which, in turn, should protrude slightly from all sides from under the deck.
- Hammer it all in with nails.
- Turn the raft upside down.
- Insert foam between the logs. Try to choose a piece that is the same size as the raft. If you can’t find the right size, then you can use separate pieces, the main thing is to arrange them carefully.
- Lay 5 thin boards across the logs to secure the foam.
- Nail them down.
- Turn the raft over and lower it into the water. This design is designed for one adult passenger of average build.
Important! When using a raft on a lake, you must wear a life jacket. This structure should not be taken onto a river as it is unstable and can be dangerous in moving water. For such movements, only an inflatable raft is suitable, which is used in sports such as rafting, but it is quite expensive. The structure made from logs, made with one’s own hands, is perfect for a lake; you can fish or sunbathe on it.
How to make a fishing raft with your own hands
It often happens that you have to fish somewhere in a remote body of water. But there are no watercraft there. Or they are too bulky to be delivered there. A way out of this situation can be a simple design, very compact and fairly lightweight homemade raft
. For example: from balloons...
Early in the morning I went to the forest lake, where the day before I had set up the girders and scattered the mugs around the water area. While approaching the lake, I heard people talking somewhere very nearby. “Who brought this here so early?” I thought anxiously. After all, it was precisely in the place where the voices were heard that my homemade raft from car inner tubes was hidden. He quickened his pace and, rounding a pile of massive rocks, saw on the shore two guys and a girl sitting by a dying fire.
Approaching them, I greeted them and asked in surprise what brought them to this wilderness?
“We want to explore this lake...” explained a young man in a bright orange T-shirt. And, having finished his tea, he added: “We’ll just assemble the raft.”
The word “raft” had a magical effect on me... I am very interested in any kind of watercraft, I have seen a great variety of them. I am especially attracted by the originality of the design and the method of movement on water. “What are they going to make the raft out of?” – I thought, looking around. But I didn’t see anything special... Two large backpacks, about a dozen different sticks and poles, several thin planks. That's probably all they had.
Meanwhile, the second guy, tall in jeans, a baseball cap, and the girl in shorts pulled out of their backpacks two plastic and one rubberized bags, a coil of thick rope and a small tightly stuffed bag. When they unwrapped the bags, they turned into bags, and in the bag there were... ordinary balloons. Having poured the balloons onto the ground, the three of them began to inflate them. Moreover, they filled it with air a little more than half.
- Why bother if I have a car pump? – I suggested.
“No need,” the tall guy answered, and after inflating another balloon, he explained: “We have everything checked, it’s faster.”
After inflating the balloons, they immediately stuffed them into bags and as a result they got three unique pontoons. Each of them is 60-70 centimeters in diameter and about two and a half meters long. Having finished filling the bags, the guys tied them and pulled them together with a piece of rope. (see Figure 1) Moreover, the rubberized bag ended up in the middle.