A fire alone is not enough; you will need a homemade stove. It does not require much effort or special skills. But first you need to decide what type of product you will assemble, and prepare materials and tools.
First of all, the oven must have certain properties:
- have low weight and size;
- use fuel economically;
- comply with fire safety regulations;
- simple and easy to install in a tent without special tools;
- work reliably and uninterruptedly;
- easy to operate.
We can conclude that the device should be compact, easy to use and burn fuel economically. All these requirements are suitable for simple stoves assembled with your own hands. There are a wide variety of devices on the market that also perform other functions.
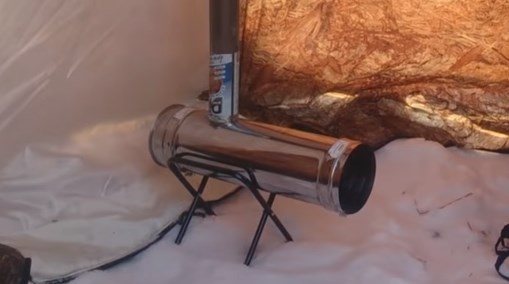
The stove must be installed on legs. If you go outdoors in the winter, when there are deep snowdrifts, then your legs should be higher.
The main tasks of a portable stove: easy transportation, quick ignition and heating of the tent. Appearance doesn't matter anymore.
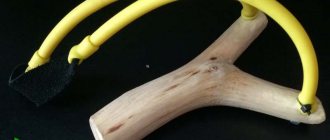
Gas infrared
In this method we will tell you how to assemble such an installation yourself, because... building an infrared burner is very difficult.
Materials and tools
For production you will need:
- Infrared ceramic burner.
- Gas cylinder.
- Oxygen hose 2 m with a diameter of 0.4-0.6 cm.
- Clamp 2pcs
- Screwdriver
- Nozzle for liquefied gas or natural gas (depending on the fuel used).
- Retaining ring
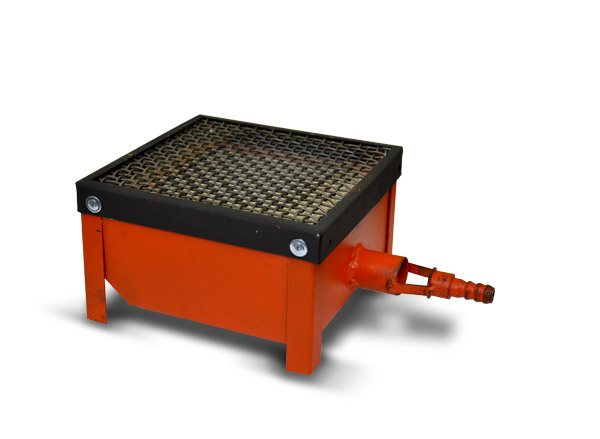
When choosing a ceramic heating pad, it is better to give preference to small models - gas is consumed more economically. The peculiarity of infrared heating is that it heats objects, not air, so if possible, it is good to have a stand under the heating pad, which will allow you to direct the energy.
Manufacturing instructions
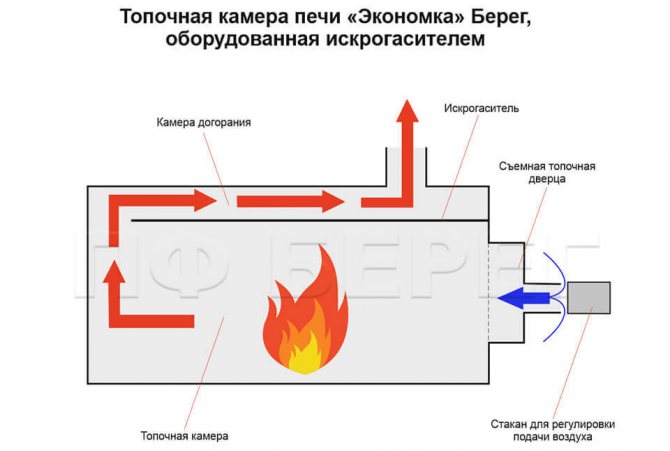
The diagram clearly describes the principle of operation of the stove. The gas-air mixture allows you to achieve high temperatures with the least risk of fire.
Principle of operation
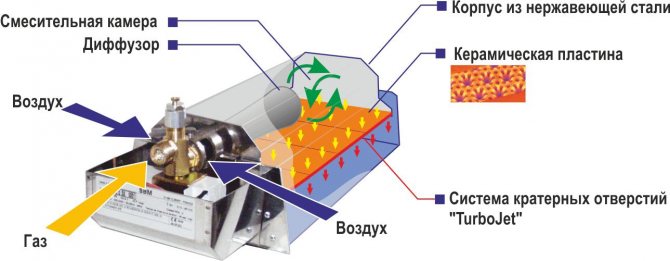
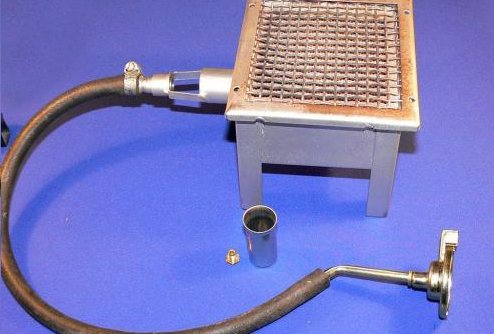
Essential elements
- Place the nozzle into the connection hole of the infrared burner.
- Attach the retaining ring on the reverse side.
- Place a clamp on the oxygen hose to prevent gas leakage.
- Connect to the nozzle, tighten the clamp with a screwdriver.
- Connect the gas cylinder to the hose, also using a clamp.
- To light the heater, you need to hold a match to the ceramic heating pad. It is forbidden to ignite gas near the nozzle. Fuel can be propane, argon and natural gas. When replacing fuel, you need to change the type of injector. The gas camp stove is ready.
Type of infrared gas stove for a tent
Operating rules
A camp stove for a tent should not only heat the space, but also serve as an assistant in cooking.
Infrared heaters are not intended for this, but craftsmen have learned to cook on the following tiles:
- You need to place the heating pad with the radiating side up, and place two stones or bricks on the sides.
- Place metal rods or skewers on the bricks.
- Place dishes on top for cooking and heating canned goods.
A 200g can will last for 2 hours, after which you need to replace it with a new one. The gas cylinder must stand upright. It is prohibited to leave the stove unattended. Ventilate the tent from time to time. The surface temperature of the ceramic heater is 800-900 degrees.
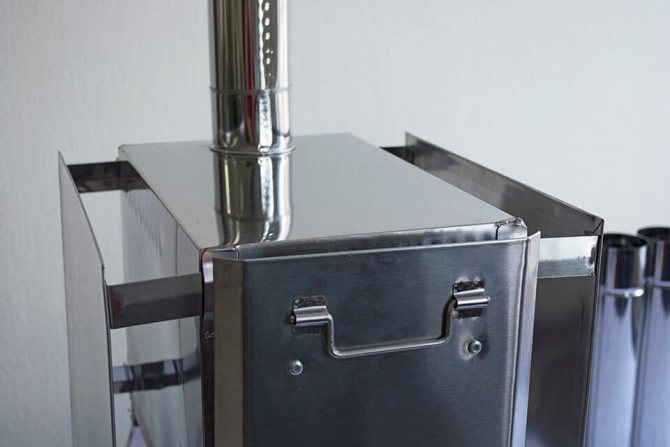
Installation of removable protective screens
If the design involves the presence of removable protective screens, then, depending on the purpose of use, they can be installed in 2 different positions relative to the hob:
Position 1. Flush with the hob. Suitable for cooking as it allows you to conveniently place the dishes.
Position 2. Above the hob. Raised screens form a box for laying stones necessary for organizing a bathhouse in the field.
ATTENTION! The Fireplace series is not intended for organizing bath procedures.
During transportation, the removable screens must be pressed tightly against the box ( Position 3 ). You can remove them by loosening the thumb-mounted mechanism. In the future, the heating intensity of the room can be adjusted by the position of the screens.
Position 1 Position 2 Position 3
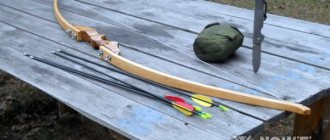
From a can of alcohol
The debate about how best to use alcohol, for indoor or outdoor heating, will never end. This does not prevent tourists all over the world from using it as fuel for mini stoves for tents. The weight and dimensions of this design are insignificant; it is convenient to take on a hiking trip.
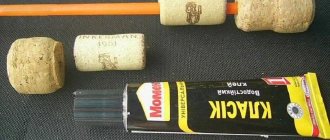
Materials and tools
To make a homemade camping stove you will need:
- Any tin can.
- Nail or awl for making holes.
- Alcohol 96%. Vodka won't do.
- Metal cover
- Knife and scissors for even cutting of a tin can.
- Ruler.
Manufacturing instructions
To make an alcohol stove, no complex diagrams are needed; the principle is simple and accessible, as are the materials.
From a beer can:
- You need to take two beer cans (or Coca-Cola cans).
- The bottom of the jars is cut off by approximately 5 cm.
- Insert the bottom into the bottom, slightly twisting the edges of the jar. Make a hole in the middle in the part of the bottom that became the stove lid.
- In both beer and coffee cans, holes are made for the fire to escape by using a nail or awl to pierce holes around the perimeter, about a millimeter in diameter. The number and diameter of holes is selected experimentally and depends more on the size of the can itself. For the stove, holes are made from beer cans in the lid, and in a coffee stove at a level slightly above the middle.
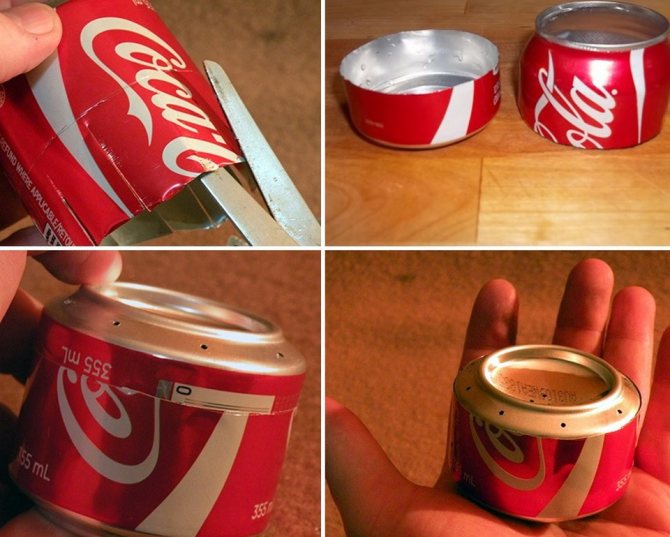
4 simple steps - Pour alcohol into the hole on the lid and close it with a coin. The DIY camp stove is ready.
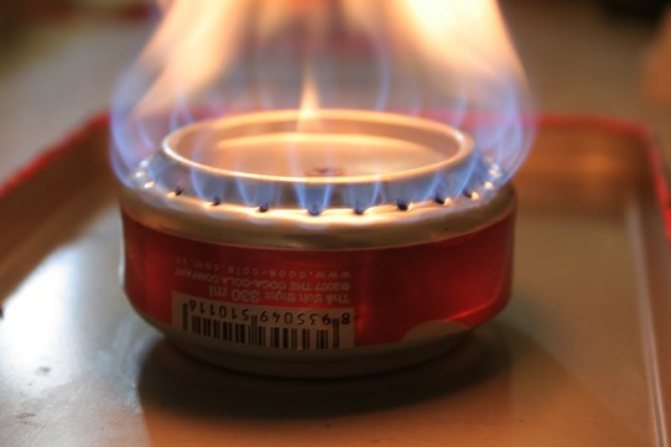
Work process
Operating rules
Such a burner must be ignited in a special way:
- The place for the stove is chosen at a short distance from the walls of the tent. This may be a stone or other immovable, non-flammable base. If a can of alcohol turns over, you will have to wait until it burns out.
- Place the stove on a metal lid; a regular seamer will do.
- Pour alcohol onto the lid under the base of the burner and set it on fire. Burning alcohol outside the stove should heat its contents.
Visual application
Such camp stoves for tents are used in the off-season; the design will not give a large increase in temperature, but it will allow you to heat canned food and boil water. The stove will boil one liter of water in 9 minutes at home; when camping it will take longer, depending on the ambient temperature.
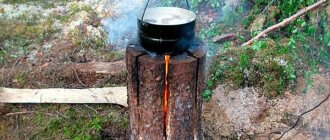
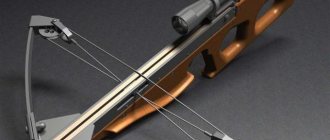
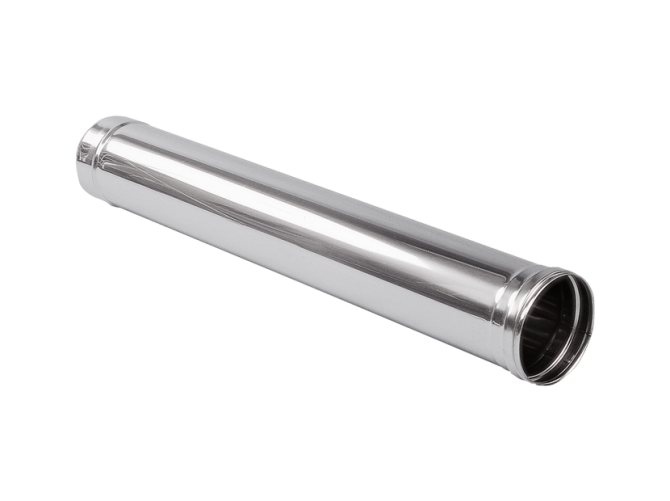
From a pipe on wood
If the trip is planned for the winter, you cannot do without a serious heating device. Any stove should not be left unattended, especially a wood stove. Purchased models of the best tent stoves are equipped with a spark arrester and an additional chamber for complete combustion of gases. It is difficult to make additional cameras in homemade structures.
If you remove the chimney not vertically, but at an angle of 30 degrees, you can increase the efficiency by 30%. A simple mesh in the chimney is used as a spark arrestor. Thanks to the installation, you won’t have to wait long for heat; the stove heats up the space instantly.
Materials and tools
When making a stove for winter fishing with your own hands you will need:
- Chimney pipe 200mm.
- Clamp for plugs 200mm – 2 pcs.
- The chimney pipe is 80mm, the length depends on the height of the tent.
- Plugs 200mm – 2 pcs.
- 80mm clamp.
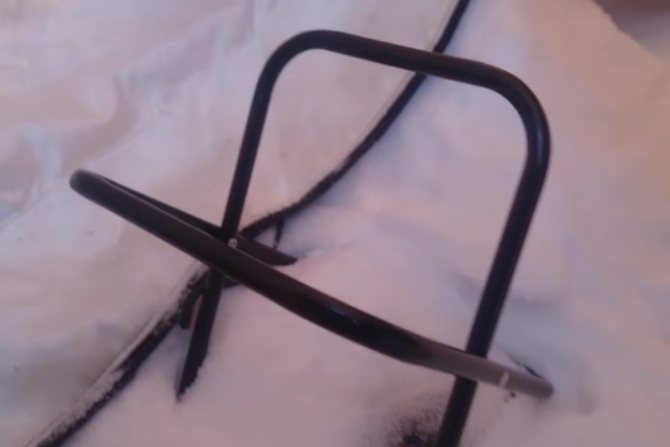
- Legs from a travel chair.
- Sheet of tin.
Manufacturing instructions
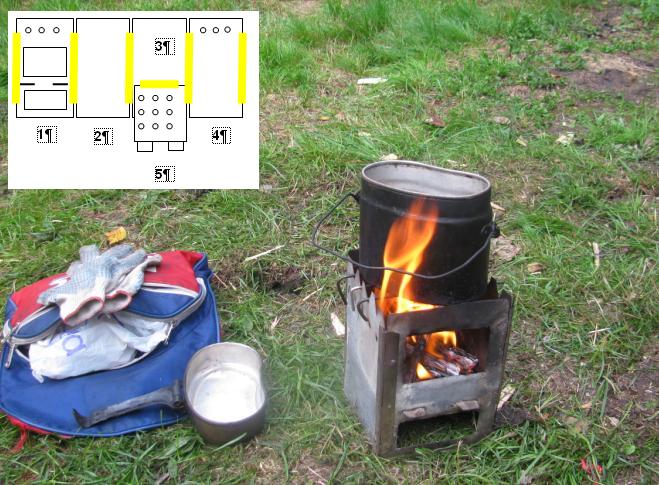
The diagram is quite general, but shows the principle of operation. The shape of the oven depends on the available materials and capabilities. If you don’t want to weld parts, you can use a simpler method described below in the instructions. Tourist stoves for tents should be collapsible and light in weight.
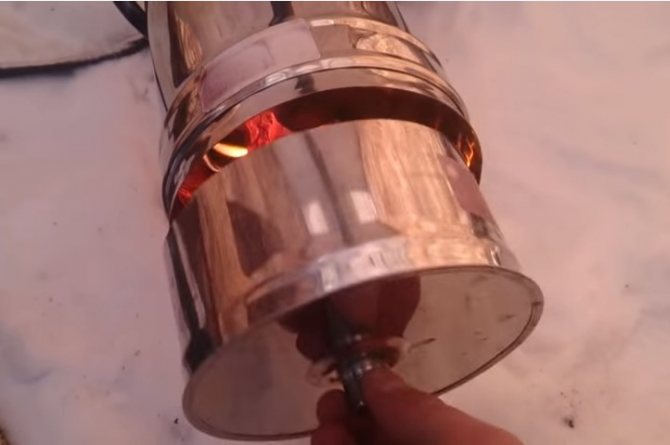
- Cut a suitable pipe length of 200mm, based on the size of the tent and the desired fuel load.
- Bend the edges of the plug slightly to allow free entry into the pipe.
- Use a grinder to cut a hole for the chimney pipe with a diameter of 80mm. Place the hole at a distance of 10-12 cm from the rear plug.
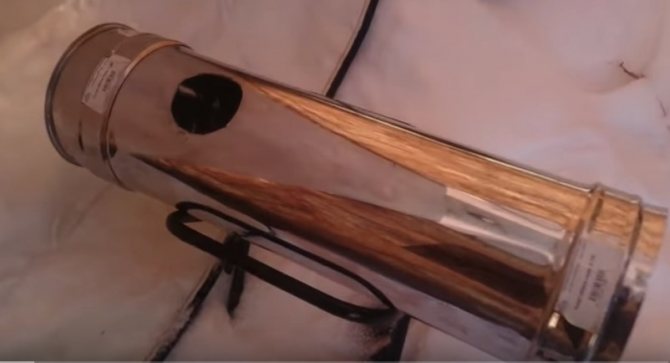
- Try on the chimney pipe, adjust the hole if necessary.
- Cut 20-30 cm from the chimney pipe, cut the edges for riveting by 5-7 cm. This will serve as a diversion.
- Insert the tube into the hole and rivet it, pressing the cuts on the outside together.
- Place a clamp on the outlet; this will hold the metal in place as it expands.
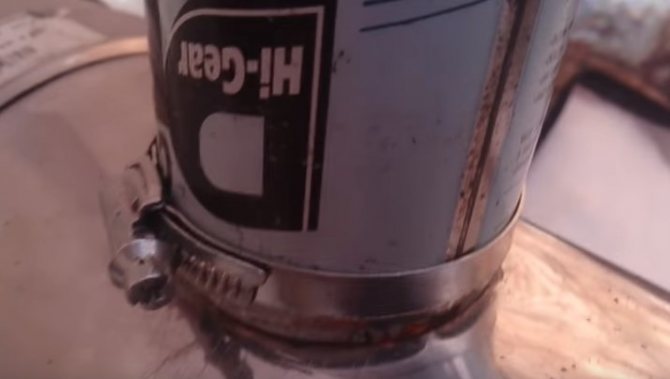
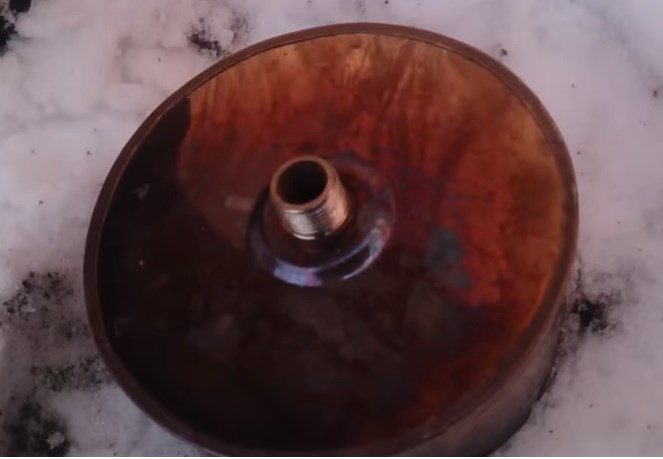
- In the second unattached plug, cut a hole for a neck with a diameter of 70 mm. From a sheet of tin, cut a piece 70 mm wide for the neck hole, and insert a twisted piece of tin into it. Drill holes.
- To regulate the blowing force, you should make a cover from an 80mm pipe. Cut a piece of pipe equal to the length of the piece of tin at the neck. Cut a circle with a diameter of 110 mm from the sheet and rivet it. Put it on the lid.
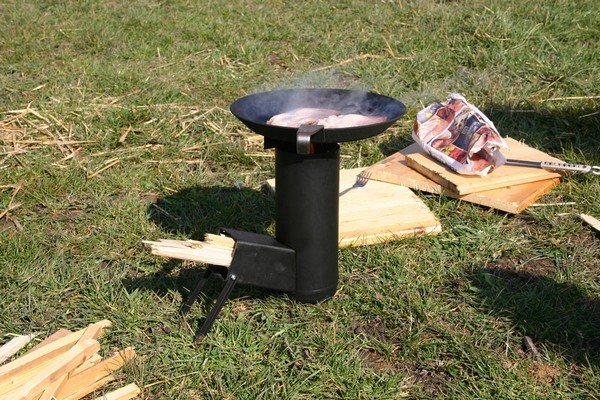
Using the lid - Place a chimney pipe of suitable length on the outlet, install the stove on the legs of a camping chair, and lead the chimney into the opening of the tent.
- Everything is ready, but due to the round shape of the oven, there is no possibility of cooking.
Operating rules
The operating rules are simple:
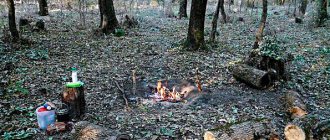
- The stove must not be left unattended; non-flammable materials must be placed under the structure, and the chimney pipe must be insulated from the tent. This stove will easily heat a 4*4m tent.
- After use, allow the metal to cool, pour out the ash, and disassemble the stove into parts for transportation.
- Ventilate the tent, check the draft and tightness in safe conditions before leaving.
- All openings must be precisely adjusted to prevent smoke leakage.
A stove for a winter tent is made with your own hands in a day, and lasts for several years.
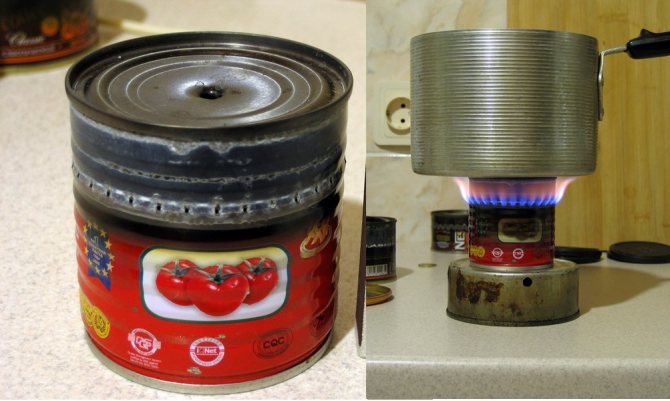
Can stove without oil filter
We take:
- two jars with a diameter of 10 cm and a height of 6 cm;
- a metal mug, the diameter of which is one centimeter smaller than the cans;
- piece of tin;
- antenna;
- bolts and nuts.
Process
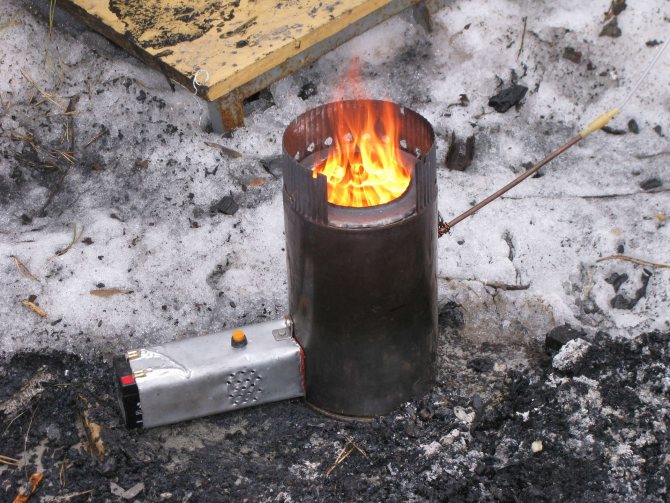
e edges of the cans so that they are smooth and do not scratch your hands. Bend a piece of tin in the shape of a circle to make three petals, which need to be lowered to the bottom of the jar, having previously drilled three holes in it with a diameter of at least 3 mm. Place dry fuel, such as small pieces of wood, on a circle placed on the bottom. In the top of the jar, at a distance of 2 cm, make three holes into which you need to insert the bolts. This will be a stand for the mug. Screw the bolts with nuts. To screw the legs to the jar, you need to make three holes in the bottom, the angle between which should be 120 degrees. Insert three pieces of antenna into them. Do not make the height of the legs greater than the diameter of the can so that the structure is stable. Cut five holes at the bottom of the stove for ventilation. The handle will be the screw terminal removed from the power supply.
Which stove is best to use in summer?
In summer, the oven is needed more for heating and preparing food, tea, coffee. There is no point in pulling gas cylinders or wood stoves - heating the tent is not needed.
The best solution would be a mini-alcohol stove for a tent. Light weight and compact dimensions allow each member of the camping trip to take their own homemade stove.
The only drawback in comparison with ready-made branded designs is the inability to transport the stove with filled fuel. But this is not a significant drawback - putting a bottle of alcohol in your backpack is not difficult. Long-burning stoves are used for winter tents.
Terms of use
Tourist tents are made of flammable materials, and sometimes fire situations occur in which people do not have time to get out of them and get burned. Therefore, when heating the space of a camp home, it is necessary to take all possible safety measures:

- Do not use fire-based heating devices unless the tent material is heat-resistant.
- The use of the stove must strictly correspond to its intended purpose. If the design does not provide for simultaneous cooking and heating, therefore, this is prohibited. You should also not use the stove to dry things.
- The chimney must have a spark arrester.
- Do not use flammable liquids for kindling.
- Go to bed as far away from the stove as possible.
- Avoid carbon monoxide poisoning and maintain proper ventilation.
- Do not use questionable structures for heating.
- Use an electric torch for lighting.
Which stove is best to use in winter?
All three types of stoves are suitable for a winter tent. Winter fishing involves staying at low temperatures for a long time; the holes should not freeze, otherwise fishing will not take place. The difference in temperature in the tent and outside without heating devices will not exceed 2-3 degrees, which is not noticeable at -20C.
- Most often, a long-burning gas infrared heater and a wood-burning stove are used. They provide good heating and increase the temperature in the tent by at least 15-20 degrees. The gas model is suitable as a camp stove for cooking, it heats up the space perfectly, it is compact and lightweight.
- A more economical option would be a wood stove. The steel structure is easy to transport. The folding stove can be quickly assembled and disassembled. If fishing is planned near plantings or forests, there will be no problems with collecting firewood, otherwise you will have to bring fuel with you. There is also a risk of carbon monoxide poisoning if the chimney pipe is not sealed. Even if a homemade stove for a tent is made according to technology, it is necessary to ventilate. Wood stoves for winter fishing tents are used for large tents, and gas stoves for small ones.
Advantages and features of wood-burning stoves for Bereg tents:
Before you buy a stove for your tent, make sure you have the most important elements!
- The design of all Bereg stoves includes a spark arrester located in the upper part of the firebox. Its presence increases the operational safety of the product and also allows for greater efficiency of its operation. An afterburning chamber is formed in the firebox, which does not allow heat to escape directly into the chimney. Thus, the stove operates longer on one stack of wood and heats the room more intensely than analogues without a spark arrester;
- Removable legs allow you to reduce transportation dimensions, which makes transportation and storage of the product more convenient. There are special holes in the legs to protect against overheating. The bottom of each leg is equipped with a plastic plug that prevents damage to the floor;
- The presence of stationary screens on the end and bottom parts of the firebox allows you to protect the floor and awning from heat;
- The range includes highly specialized models. For example, Bath or Army stoves, the design of which is designed for maximum efficiency in the given conditions;
- For the Housekeeper series, it is possible to choose the most suitable option for the buyer’s purposes of protective screens: removable or stationary ;
- Depending on the conditions and purposes of use, you can choose the appropriate size of the model. From the most compact (Economy Mini) to the largest (Army).