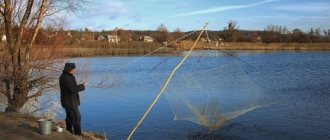
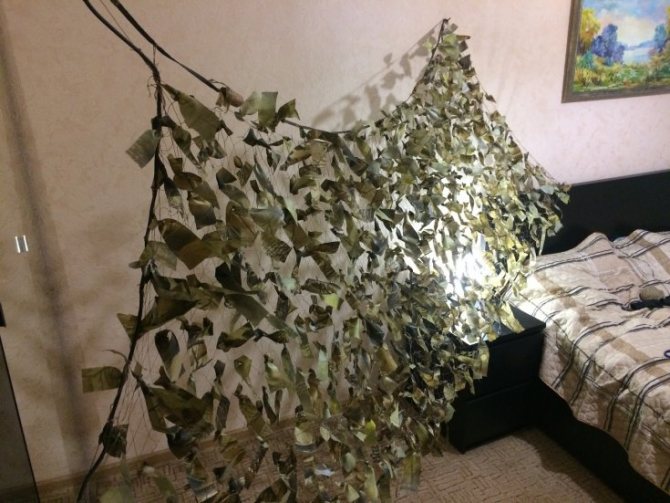
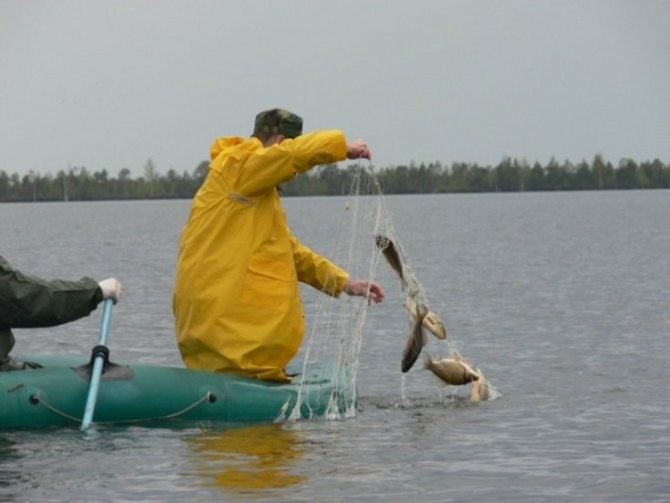
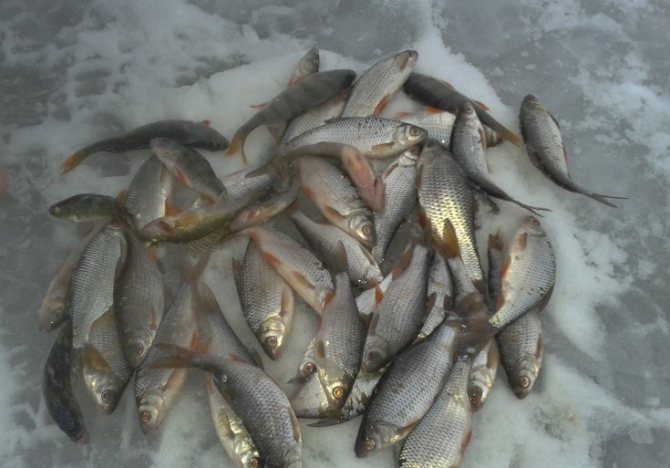
A legal net is stronger than a homemade fishing net
Fishing is entangled in a network of prohibitions and special permits to block the fishing net from entering the water area.
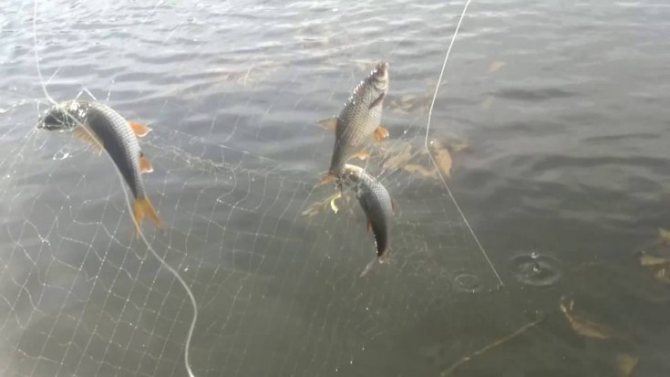
What to fish for, how much and how – there are no general federal rules. Localism is different everywhere: in one province it is positive, in the neighboring province it is strictly prohibited. The same goes for fishing with nets.
In the Leningrad region, it is almost impossible to break through the palisade of restrictions and amounts for a license. Therefore, its residents go quietly to fish in the neighboring liberal fishing region of Karelia - licenses are cheaper there and are issued faster.

Create a pond on your six hundred square meters, fish in it with a fishing rod or a net. But if you fill it with water from a river or an unnamed lake, it is illegal.
Suddenly some fish with red or black caviar from the Caspian Sea gets lost and ends up through other rivers and rivulets into your pond, and you cover it with a net. Expect to be severely punished too.
Selection of materials
Before you start weaving gear, you need to carefully prepare. Be sure to sketch out a drawing. Only in this case the net will be of high quality and will ensure a good catch. Before starting work you need to prepare:
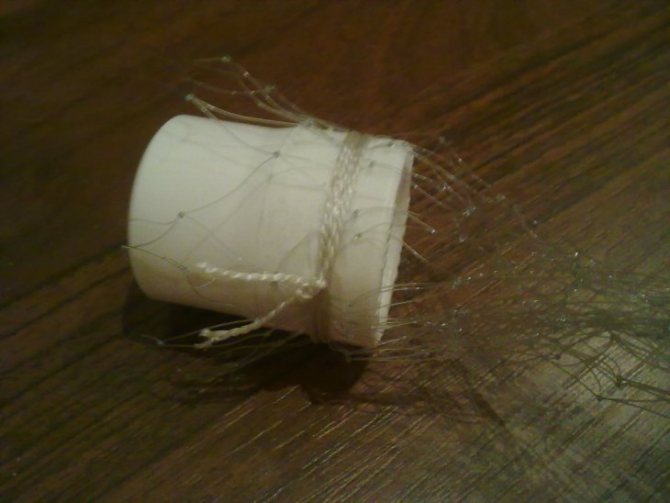
- The main web of the network. You can weave a mesh fabric yourself, but this work is very painstaking and complex. A novice angler will not be able to complete it. Therefore, it is recommended to purchase the necessary material in the store. This will save effort and time.
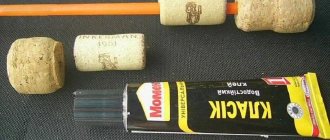
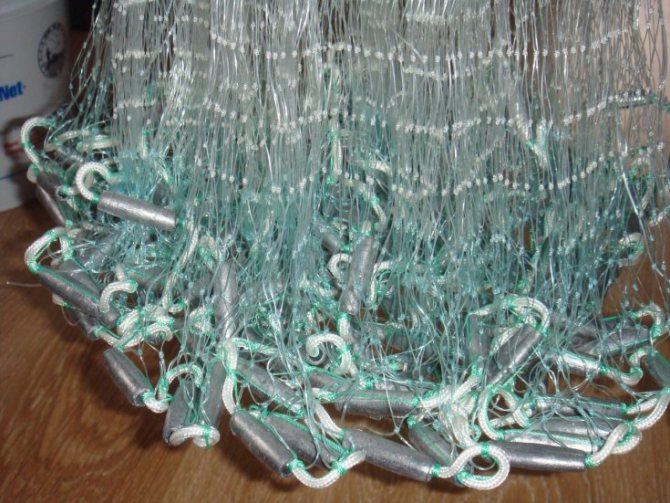
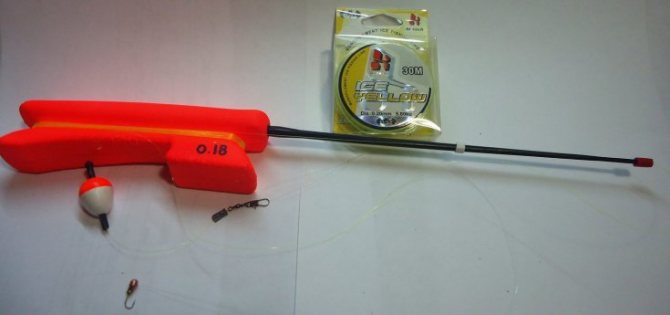
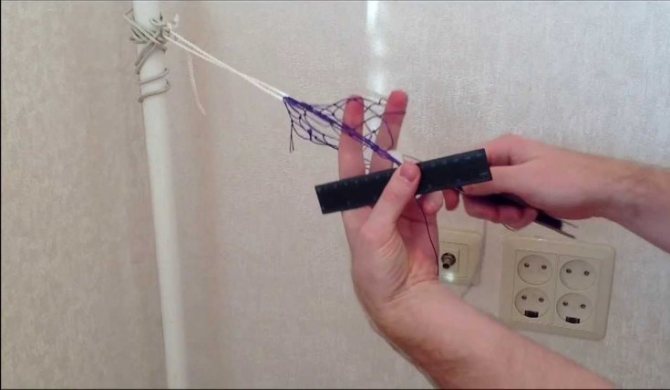
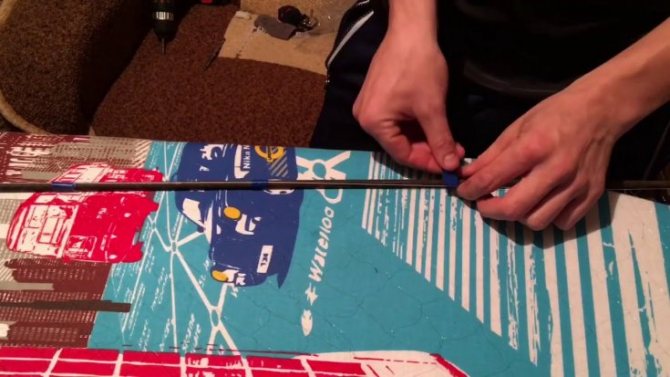
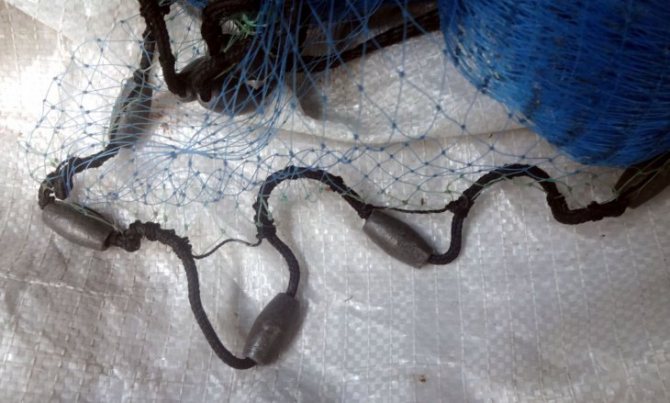
- Braided cord. This is an important structural part of the network. The thickness of this element must be at least 4 mm. It will act as the edge of the tackle. Loads will be attached to it. This means that the length of the load cord must correspond to the circumference of the tackle.
- Throw rope. This cord should be thicker, but its diameter cannot exceed 8 mm. Ideally, the length of the throwing rope should be 7 m, but in practice 5 m is often enough for fishermen. However, professionals say that with experience there is a need to increase the length of the throwing rope. The longer it is, the further you can throw the tackle.
- Set of weights. Each sinker tied along the edge of the tackle must weigh no less than 20 g and no more than 30 g. The number of weights will be very large, taking into account the fact that they will have to be knitted along the perimeter of the net in 10 cm increments. On average, one net takes up to 250 cargo.
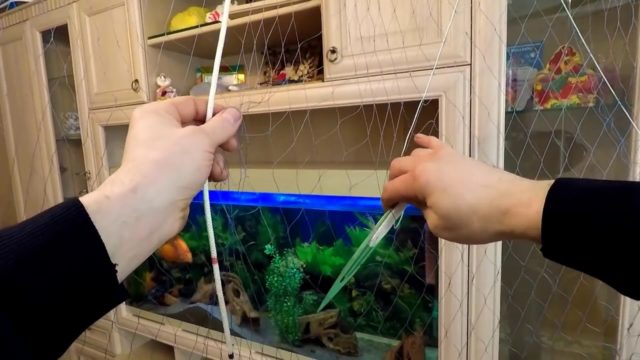
- Thick fishing line with a diameter of at least 1 mm. Slings will be made from it. In total, the seine will take at least 150 meters of fishing line.
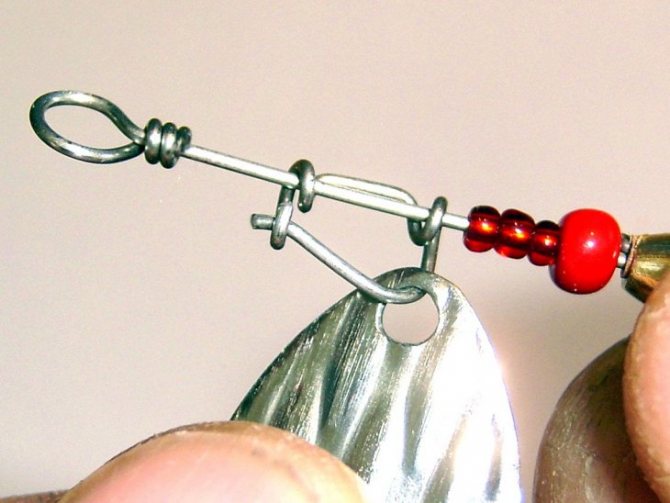
- Central ring. It is necessary to fix the slings in one position. After passing through the ring, the lines are tied to the throwing rope. The connection between the slings and the rope can be achieved using epoxy glue or a special purchased device.
- A bay of lavsan threads for 100 m. They will be needed to fix the mesh fabric to the cargo cord.
When choosing the size of the casting net, you must not forget that its width is directly related to the circumference of the casting net. The required width can be calculated using a simple formula or looked at in a special table.
Diamond tack knitting technology
In practice, there are two methods of weaving fishing nets:
- manually;
- mechanical, on a knitting machine.
If you think about how to tie a fishing net yourself, then know that this is:
- very long process;
- you have to be an extremely diligent and patient person.
Read here - How to make a boat with your own hands - a variety of options and manufacturing methods in the photo! Find out what you can use to make your own boat here.
At the end of this process, you will be happy with the finished work and rush to test the created creation on the nearest pond or river.
Technologically, the production of a network is divided into two steps, although several are close to each other:
- actual weaving;
- network landing.
Tactics and fishing techniques
There are no special secrets to how to use a fishing screen. “TV” is not the fisherman’s main tool, but performs only an auxiliary function: catching live bait on a predator, catching small things to prevent unwanted bites and catching small things to attract predatory fish. The screen also helps catch fish on the ear and is only used as a last resort for catching trophy fish.
Read more
When does carp spawn?
How to equip and use the fishing screen:
- Elements are tied in the center or along the edges to attract attention: a garland, a bait;
- installed on “fish paths” where prey constantly moves;
- thrown in the gap between the algae;
- hooks along the edges of the screen cannot be used, otherwise there is a high risk of snagging and stuck fish will scare away other peace-loving relatives;
- when knitting a mesh, it is better to use a thin fishing line that is invisible to the fish eye;
- You should not use wooden sticks as a frame, as they float and you have to install a heavy weight.
There are no special secrets to using the fishing screen
What is needed for weaving cells
Material. It determines not only how to weave a fishing net with your own hands, but also what kind of fish you will catch with a seine. So far, there are two reliable materials - nylon thread and fishing line.
Check it out here too!
Do-it-yourself winter fishing rod - an overview of the best options. Instructions for creating an unusual winter fishing rod from different materials
DIY boat anchor: making a homemade anchor for PVC boats (95 photos and videos)
- How to make a zherlitsa with your own hands - features of making winter and summer gear (110 photos and videos)

The threads are chosen based on the size of the fish you will hunt and the area of the future seine. A net made of synthetic polyamide fiber, known as “rag” in fishermen’s slang, is stronger than fishing line and lasts longer.
The diameter of the threads is important: thicker means stronger. But this type of net is more difficult to knit, and it is more noticeable to underwater fauna, so choose the middle.
Instructions for making a fishing screen
It is better to buy a net for tackle, since weaving a net takes a long time, and the benefits are minimal. If a fisherman prefers to weave himself, he will have to stock up on fishing line and endurance.
Fishing line screens can be made by hand
How to weave a fishing screen from fishing line:
- Initially, we make the elements - the main part of the grid and screen; a network is assembled from a number of such elements.
- Along the edges, the parts are fixed with a strong rope or wire that acts as a frame.
- We plant the mesh. There are 3 main types of landing: 1:2, 1:3, 1:15, which means attaching a mesh every 2, 3 and 15 meshes.
You won’t be able to knit a fishing screen with your own hands that is too large; most often the dimensions range from 1.5 m2.
Before assembling the fishing screen, it is important to determine the mesh size of the mesh. The dimensions of the cell depend on the size of the expected catch:
- 2 cm - for live bait and small things;
- 2.5-3.5 cm – for perch and roach;
- 4-5 cm – for medium crucian carp and small bream;
- 12-14 cm – for a large pike.
Making a fishing screen with your own hands:
- We determine the size of the TV, the standard is 1.5 m2, but at great depths it is advisable to increase the size of the gear.
- We make a float. In its role we can use a flat piece of wood or a plastic pipe. If wood is used, to prevent the destruction of the material, we cover it on top with a waterproof paint coating.
- Metal elements are attached to the bottom to facilitate the immersion of the gear. Without a load, the net will float to the surface and be useless.
Making a fishing screen with your own hands - Preparing the canvas. Be sure to take a size that matches the dimensions of the frame. We determine the size of the cells ourselves.
- We fix the mesh fabric. We fix it at the top and bottom using a nylon thread, pull it through the cells and nail or wind it to the frame. To make the tackle more effective, we use thin but strong threads at the base of the mesh. The thin line is not visible in the water and the fish falls into the cells without fear.
- To the left and right of the upper part of the frame, 2 strings of fishing line are attached; they are connected to a thick cord with a diameter of 0.7 mm. At the end, we attach a foam float indicating the location of the screen and the presence of a catch.
Advice! You shouldn’t pull the net tightly onto the frame; it’s better to tie it with a little slack, then the fish won’t feel the danger the first time it touches the fishing line.
Weaving technology
It's difficult at first. But it can be mastered faster only through the experience of other fishermen. Our hint will be in the video on the site. Turn it on and watch it several times. Refer to the expert’s story on video as many times as possible until you understand this system.

You will understand the most difficult thing. For example, how to cut a shuttle and how to “guide” it so that it produces cells and rows. How to turn it one by one relative to the canvas.
Check it out here too!

Fishing camera: rating of the best models and tips for building a homemade device (135 photos + video)
Do-it-yourself boat tuning - modification options, tuning directions and improvements to serial PVC boats (130 photos and videos)
Do-it-yourself fishing gear: making equipment, catchy models and practical advice from experts (105 photos and videos)
How to form a loop, how to secure knots. This will also be useful for another part of the process of creating a network fabric - planting it.
Installation of fishing screen
The most promising fishing places are narrow channels, areas without vegetation on the bottom, places where predators chase fry. This is the best place to install the screen. The casting process itself is extremely simple. If you are using a boat, just swim up to the area and smoothly lower the tackle. In the absence of a floating device, a long and strong stick is used for casting, and the “TV” is also simply lowered with it. A similar method - lowering the screen is carried out from a bridge or other surface structure.
How to properly plant a fishing screen:
- We take the shuttle and attach the fishing line to it.
- We tie the end of the shuttle to the last cell, and tie the picking cord behind it.
- We thread the shuttle every 3.5 cells (selected individually).
- We attach the cell to the cord and continue fastening until the entire mesh is tied to the base.
What is the network “planted” on?
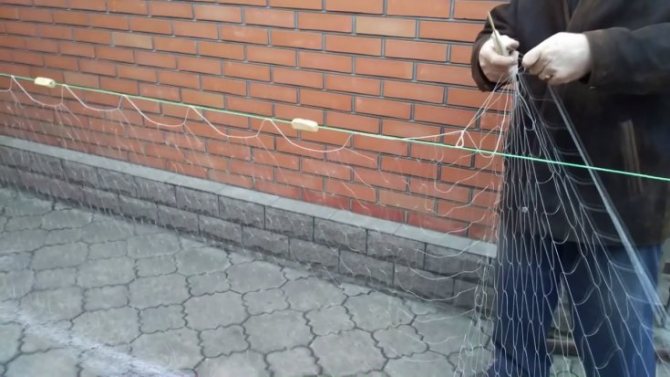
Seine weaving and its planting are technologically interconnected. What is this procedure? Planting fishing nets with your own hands involves attaching a net plane to a cord. Each mesh has two landings - upper and lower.
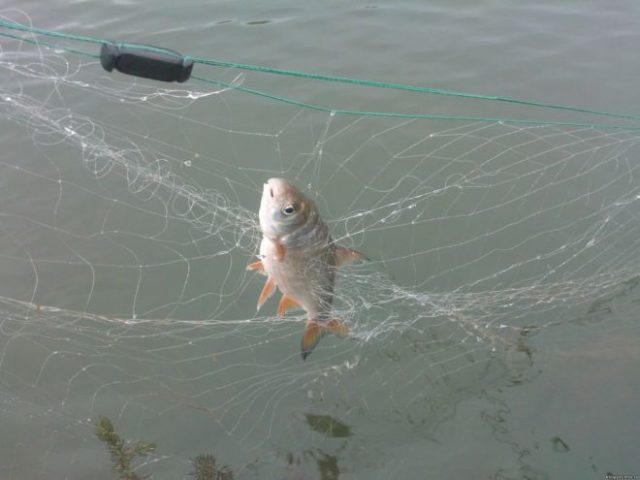
For example, for pike near the reeds, cast a net with an inclination similar to a scoop, as if you were hooking the fish at the bottom, forcing it to leave. But there is nowhere to go - the net is wrapped almost until the two sticks are completely connected: the result is a trap.
How to plant a fishing net with your own hands? This work is really done by amateur fishermen only by hand. But using the same shuttle as when weaving a network.
But you can use the landing without sticks. So that the upper floating string is longer than the lower one. This fishing method is used for bottom and near-surface fishing.
Check it out here too!
DIY bait recipes: simple and effective baits for fishing for different types of fish (125 photos and videos)
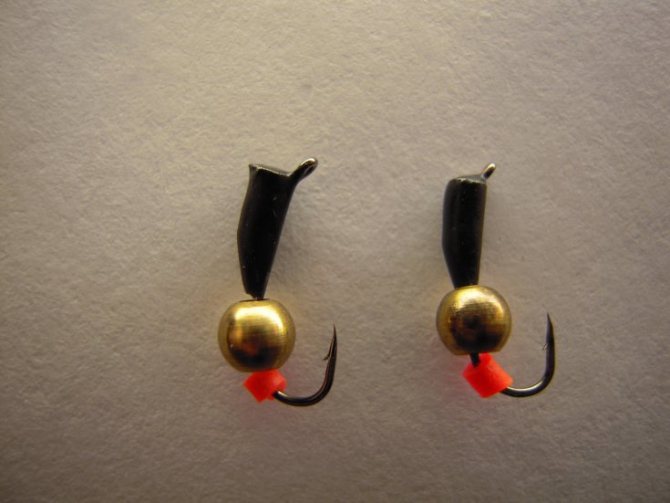
DIY jigs: video master class on how to make, main varieties and rules of use (125 photos + video)
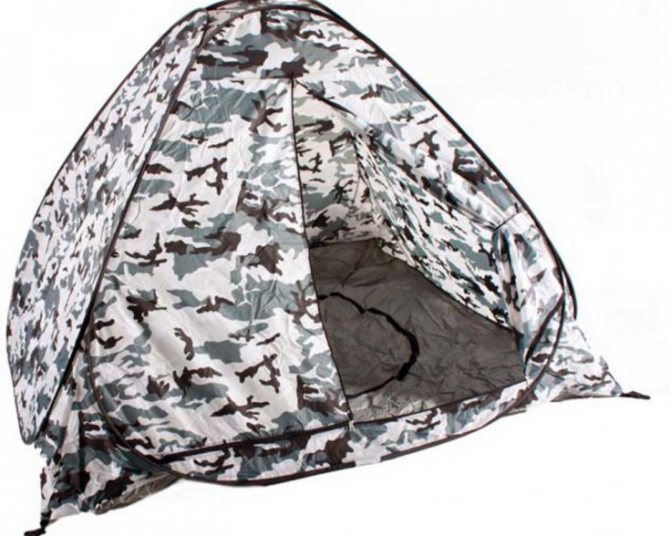
DIY fishing tent: diagrams, designs, patterns, tailoring and design features (120 photos and videos)

With the net planted, you need to get the hang of fishing. Despite some disadvantages, it has advantages. Here they are:
- The lower, loading cord, when completely lowered to the bottom, rarely clings to snags and stones.
- The weakened top of the net is not used, so it will not miss big fish.
- A floating fish net does not get twisted even by strong swaying, and debris on the surface of the water area does not linger in it.
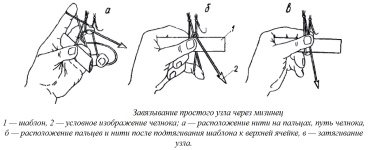
For the convenience of planting a network, you can make a kind of measuring stick called a “milestone”. This is a ruler or pattern for uniform planting in the form of a meter long bar with a section of 5x25.
- symmetrical with a width equal to the gap between its nodes;
- wide, at a greater distance;
- narrow - with less.
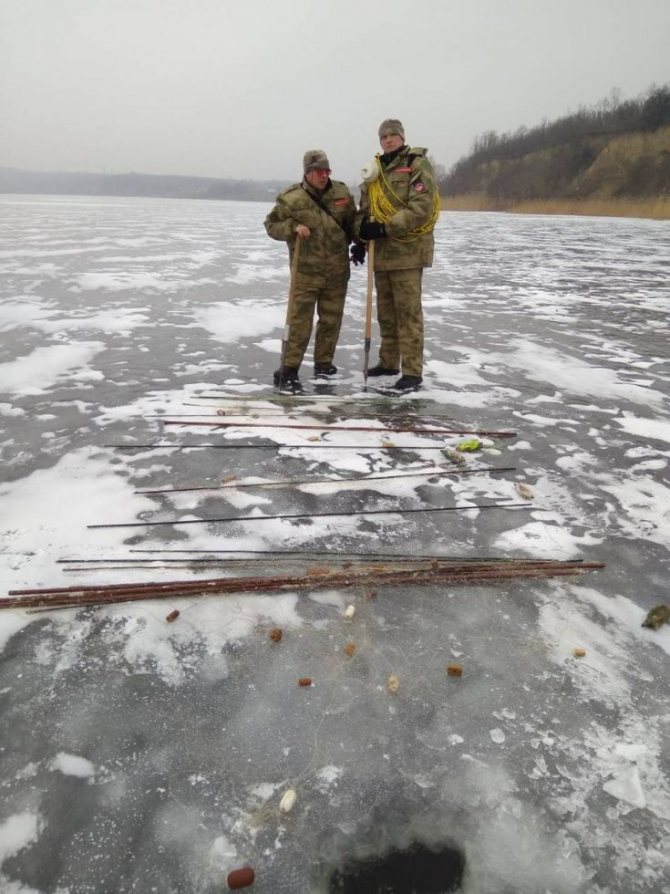
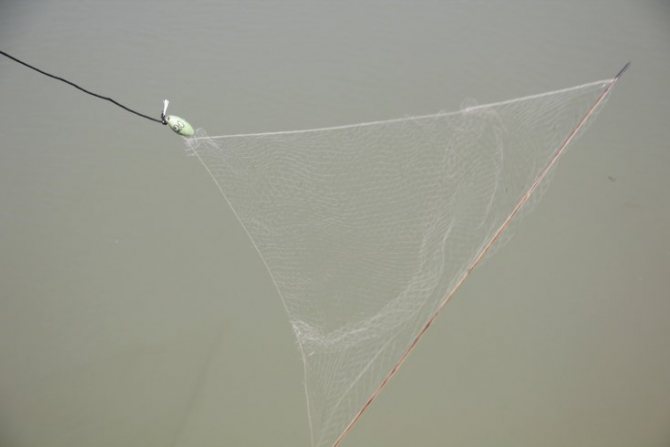
Is fishing with a fishing screen legal?
The use of fishing screens (“TVs”) is illegal and is subject to fines throughout Russia. With the help of the assembled screen, it will not be possible to catch a lot of fish; in terms of catchability, the tackle is inferior to donka and nets, but even taking this fact into account, the Fishery Supervision Authority prohibits the use of the device.
Read more
What is a fishing scarf and how to use it?
This is a risky tackle that is used at your own peril and risk. Even a small structure made by yourself is subject to fines. During spawning, the law is especially strict; now it is more correct to completely abandon fishing, even with fishing rods.
More often than not, fishing with a screen far from the shore turns out to be more effective.
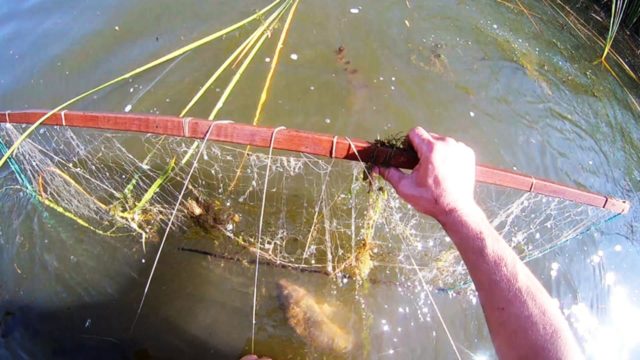
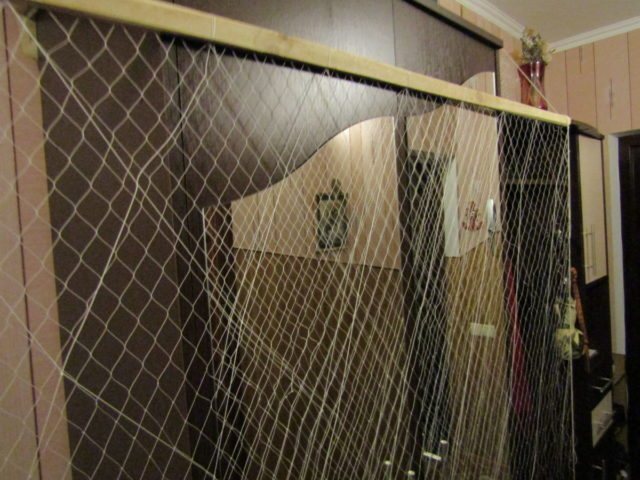
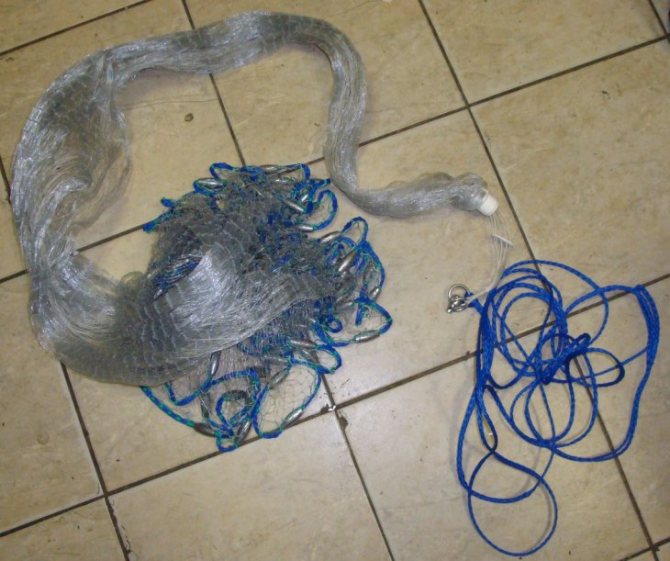
DIY fishing net photo
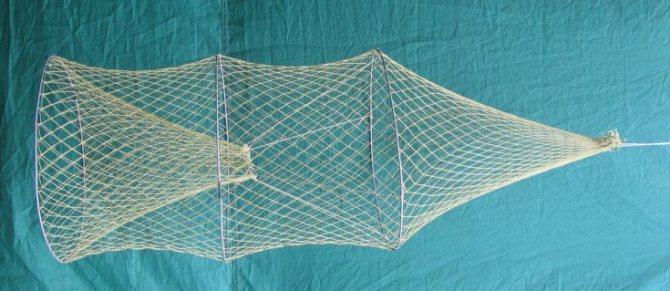
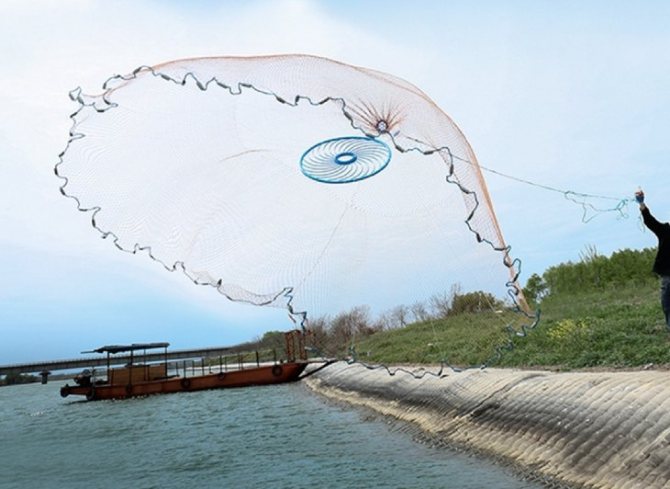
How to make a casting network
Creating a net of this format at home is not that difficult, which is why many fishermen choose this particular variety.
To begin with, you will need good cylindrical lead weights. The weight of each of them is determined by the characteristics of the dimensions of the wicker part. It is better to first draw up detailed drawings of the casting network.
The slings will require monofilament. Only in this option will difficulties during fishing be eliminated.
Note!
- A nod for do-it-yourself winter fishing - how and what to make good gear from. 115 photos and video tips from the pros!
Do-it-yourself spinners - types, features of homemade spinners and their assembly (100 photos and videos)
How to minimize fishing costs? Useful tips from experienced fishermen and an overview of current solutions (65 photos)
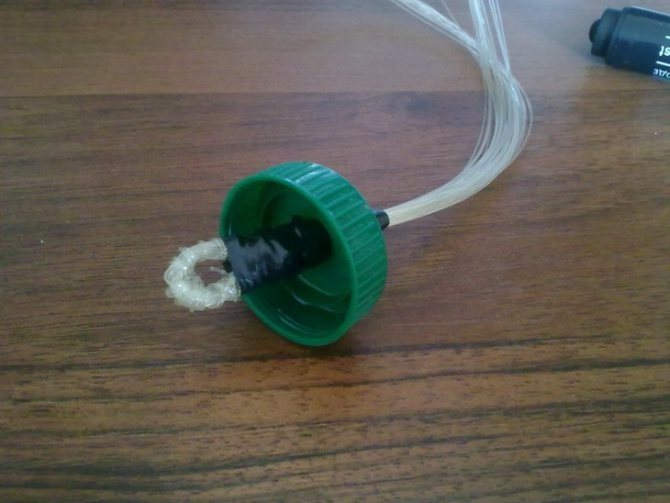
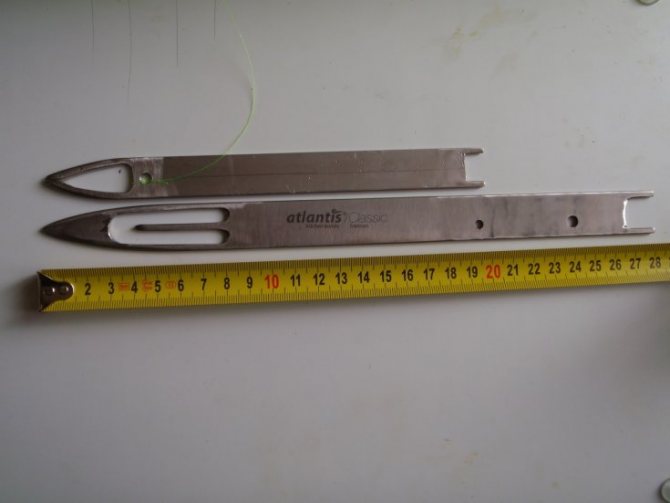
When using a plastic sleeve, the order of threading must be strictly observed. The threads are threaded into a sleeve with several holes in the sequence in which they go when attaching the slings to the loads.
Thus, it becomes clear that assembling a network is not at all a difficult task and, with sufficient experience and knowledge, anyone can do it. A ring for a casting net made by yourself can be equipped with a plastic disk.
The sequence of starting knitting nets.
Next, the template is removed from the cell (2), the auxiliary loop is cut and removed. The first loop is removed from the nail, turned 180 and hung on the nail again. The next knot is tied in the same way, forming a cell (3). The following cells are knitted in the same sequence.
The resulting garland should consist of even and odd loops, the number of which should be equal to the estimated number of cells in the network row. Then a cord is pulled into the even cells and its ends are tied. Hang the loop on a nail and begin forming subsequent rows.
A small loop is tied at the end of the thread so that the shuttle fits through it. A lace is inserted into this loop and, having tied its ends, the loop of the lace is hung on a nail. Throwing the thread coming from the loop knot (1) onto the template and passing the shuttle into the lace loop, pull the template to the first loop knot, tie and tighten the slip knot, thereby forming a loop (2).
The slip knot is tied in the following sequence: after pulling the template, the last two threads going up are clamped on its edge with the thumb and middle finger. The thread from under the thumb is thrown onto the index finger, the shuttle is passed under the two threads of the resulting loop and over the thread thrown over the index finger. The knot is tightened on the upper edge of the template between the thumb and middle finger, next to the first knot.
Read also: Drilling machine gauge SS 16 550 reviews
Rope net
To tie a network of fishing line and rope, it is enough to prepare a high-quality shuttle and a bar, the width of which corresponds to the size of one cell. If we are talking about rope gear, then the thread must be placed on the tongue of the shuttle and gradually wound around it, catching it on the tongue and lowering it to the shuttle’s double horn. Then the tool rotates, lifting the material upward. The main thing is that the winding of ropes is complete. The remnants of the thread are cut off and the ends are set on fire.
The next step is to create a loop with a diameter of one meter . This loop is attached to any durable object, and then the end of the thread from the loom is attached to it. Next you need to place a bar under the thread and insert the shuttle into the loop.
After carefully pulling the thread, you need to make a second circular movement around the hand. As a result, another knot will appear that needs to be pulled towards you and tied firmly. At the next stage, the working thread is held with a finger and thrown over the hand, while the shuttle must be placed under one outer thread and the loop tightened again to create a double knot. After the first row has been formed, the bar can be removed from the loops.
Types of knots with double overlaps when knitting nets.

The second knot is obtained by tying a knot with an overlap at the top. After the first overlap and passing the shuttle under the threads of the upper cell, make a second overlap from below behind the right thread of the cell and tighten the knot. This knot is more compact and is good for knitting networks of single-strand threads.
Before you start knitting a network, you need to make some calculations, prepare a sufficient number of threads, select or make a shuttle and a template. The number of cells is calculated as follows. Let's say you need to knit a mesh fabric with dimensions of 11.5 meters and a mesh of 7 cm. When the network is stretched, its cells will look like squares. The number of cells in a row is determined by the ratio:
Where N is the number of cells in row P1; W is the width of the network (the length of one row of cells); c is the length of the diagonal of the square formed by the cell. Since c=a, where a is the cell size, then N=W:(a).
Substituting the initial data into the formula, we get: M=100:(71.41)=10. Thus, each row of the network, which determines its width, must contain 10 cells. Since the length of the network is 11.5 meters, then N=150:(71.41)=15 needs to be attached to the first row of cells - another 15 rows of cells, or 30 rows of half-cells.
To tie one row of half-cells, you will need about 140 cm of thread (2aN=2710=140), and for 30 rows - 42 meters of thread. You should take the thread with some excess (about 15% of the total length) for tying knots and accidental thread breaks, that is, about 46 meters of thread will be required to make a net measuring 11.5 meters with a mesh of 7 cm. For cells measuring 7 cm, a shuttle 4 cm wide is needed. The width and thickness of the template are selected so that one turn of the thread around the template is 14 cm.
Starting to knit a network can be done in two ways. The first method is to knit two rows of meshes at the same time. By wrapping the thread once around the template and tying its ends, you get an auxiliary loop “O”. From the thread coming from the shuttle, make two turns around the template and tie a knot on its edge. Both loops are removed from the template, the straightened second loop will be the first mesh cell.
This cell is inserted into the auxiliary one and both are hung on a nail. Or on any other stationary object located at arm's length of the knitter. If you decide to knit the network in knots, for example, with an overlap from below, proceed as follows. Draw the thread around the template, wrap it into the loop (1) from below, pull it to the edge of the template, tie and tighten the knot, forming a cell (2).
Tying a simple knot through the little finger when knitting nets.
Having placed the thread on top of the template, they begin to pull it to the top cell. In this case, all fingers, except the little finger, are freed from the loops. When the weave of threads is on the upper edge of the template, the weave is clamped with the thumb and forefinger. Then the little finger is released from the loop and the knot is finally tightened between the fingers on the upper edge of the template.
This method of knitting network nodes is considered the best. Firstly, because the resulting knot does not move along the thread of the upper cell, as a result of which all four sides of the cell are the same. Secondly, despite the apparent complexity, knitting is done at the highest speed. Since you only have to intercept the shuttle once, passing it through the upper cell. However, this method does not allow knitting nets with a mesh size of less than 1 cm. With a certain skill, a knot through the little finger can be knitted blindly.
This knot is knitted in two steps. First operation: the thread coming from the previous knot is wrapped around the template, the shuttle is passed into the upper cell from above (overlapping from above) and the cell is pulled to the upper edge of the template. In this case, the threads of the upper cell should turn and form a small loop at the bottom. After which the loop, together with the upper edge of the template, is tightly clamped between the thumb and middle fingers.