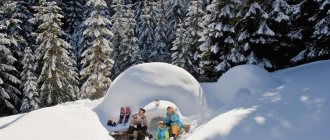
Night sounds of the forest, the cozy crackling of a fire and sparks flying up to the starry sky... Perhaps there is not a single person who will not be touched by such a picture. The romance of distant travels, overnight stops in the wilderness, hermits in the taiga, hunters, fishing huts, many in childhood read adventure novels that tell about this way of life. But there are many people for whom such romance is an integral part of their everyday life. Geologists, fishermen, commercial hunters. It is about such fishermen and how they live in the taiga that will be discussed further.
Life in the taiga
Of course, life and work in the taiga consists of far more than just romantic moments. This is not easy, daily work, and there is very little time left for romance. Nevertheless, a person periodically needs rest. Eat, sleep, and what if we are talking about the rainy season or winter, which is very harsh in the Siberian taiga? You need somewhere to dry off, warm up, and cook food. After all, you won’t have to clear the area of deep snow every time for a fire. Yes, and supplies need to be stored somewhere, and for this you will need a dugout or hut in the taiga, photos of which are presented in this article.
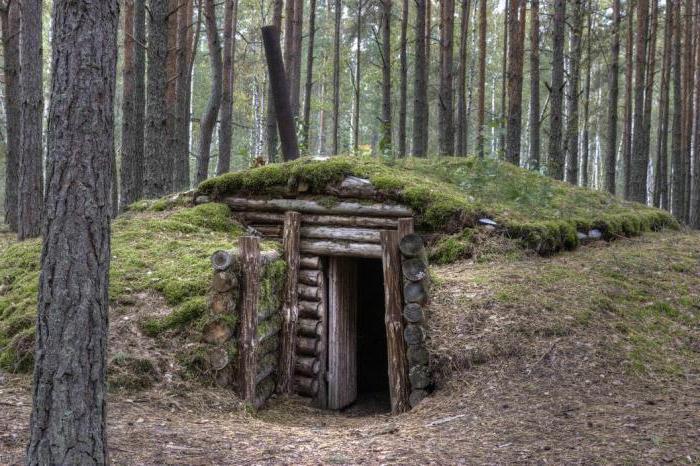
Dugout
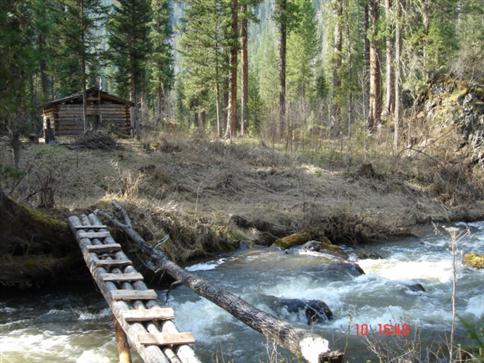
The simplest and fastest solution would be to build a dugout. Yes, equipping such a shelter does not require much time, any special skills or significant effort. It is also quite warm. But there are also many disadvantages. In such a shelter it is dark, damp and quite problematic to equip a normal stove for heating. A dugout is more suitable for temporary shelter. After all, a fisherman walking around his area will often need places to stay for the night. Moreover, the area of the site may be of such dimensions that a complete walk-through will last not one day or two, but a week or more. In this case, temporary dugouts are set up at a distance of a day's march. Well, a real taiga dweller will definitely build a log hut in the taiga as his main home.
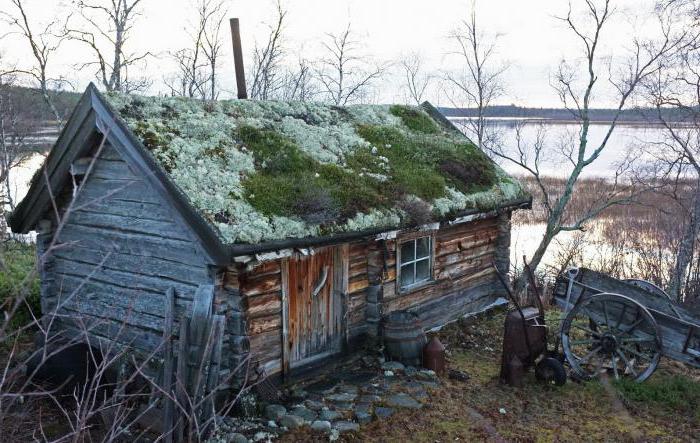
Taiga hut
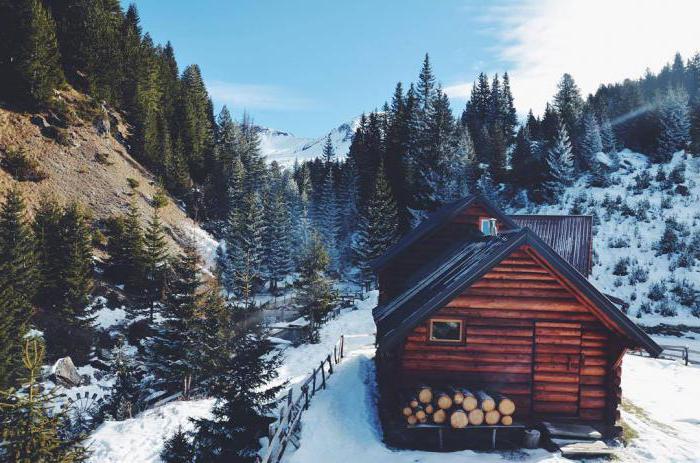
There is no point in arguing about the advantages of a log hut as a winter hut. It will perfectly protect against autumn slush and winter cold. It is dry, warm, light and definitely more comfortable and cozy than in a dugout. In addition, a wooden hut will serve not only as protection from weather conditions, but also from wild animals. In general, both a commercial hunter and an ordinary hermit who, instead of the bustle of people, chose unity with nature as their main home, and any sane person will give preference to a log building.
Selecting a location
So, permission has been received, and the next step is choosing a location for future construction. It is advisable that this be a small clearing near a pond or at least some source of water. If such a clearing could not be found, then you will have to clear the space for construction yourself. The felled trees will immediately be useful as building material, and the twigs and branches will be used for firewood. You will have to suffer a little with the stumps left after cutting down, but no one in their right mind will uproot stumps by hand. It's easier to burn them. You also need to take into account the fact that there are no tall and dry trees close to the hunting hut in the taiga, since from a strong wind they can fall and overwhelm the building. We must not forget that you cannot build a hut in a lowland due to dampness and possible flooding. You should not build a building on a bare hill, since due to its exposure to cold winds there will be a problem with heat conservation. And in general, taiga housing, if it does not necessarily have to be carefully camouflaged, is worth more or less hiding it from prying eyes. Otherwise, you never know, different people can wander around the taiga.
Laying crowns
Before laying the crowns, the logs must be debarked, i.e. remove the bark from them.
You can, of course, not do this, but are you planning to live there for a long time? For debarking, you can use a sharpened shovel, a scraper, or your taiga ax out of hope. Around the beginning of May, the bark should peel off well from the tree; it also peels off better from already dried logs harvested in winter.
Dried logs are more difficult to process than raw logs, but they are lighter.
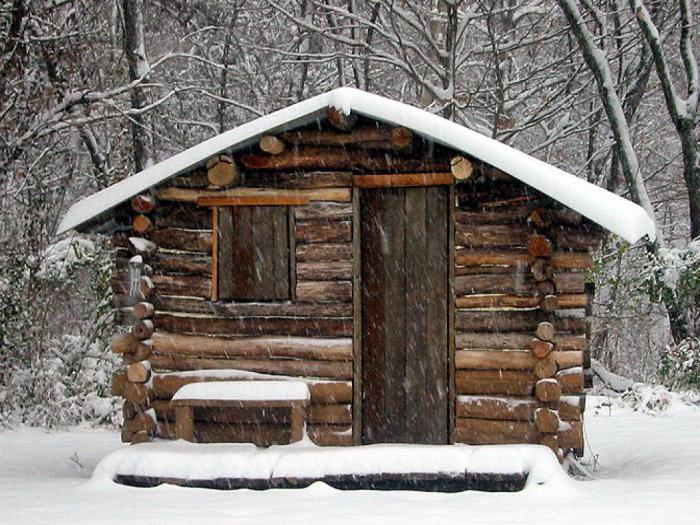
There are two main types of placing crowns: “in a bowl” and “in a paw”. There is also a simpler version of the “paw” method, widely used by hunters – “half-tree”. The following photos show winter huts with crowns laid using these methods.
Laying “in a bowl”
Laying “in the paw”
Laying “half-tree”
The simplest method is “half-tree”. With the “in the bowl” method, the logs fit better together and, therefore, there is less chance of cracks in the walls.
Moss, which is abundant in the taiga, is placed between the logs. Moreover, raw moss is much better than dry moss.
Dry moss crumbles and is blown away by the wind, while wet moss lays down well. There is no need to worry that moisture from the moss will contribute to rotting; everything will soon dry out on its own, along with our damp logs.
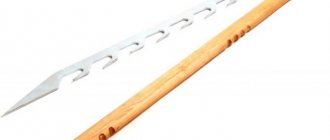
This is interesting: How to tie a bayonet knot
Moreover, moss contains many natural preservatives that slow down the decay of wood. The crowns of your taiga winter hut should be mossed well! Moss is not worth feeling sorry for! Otherwise, this may not be pleasant for you at all, since in winter every tiny crack brings a lot of problems when cold air blows into it.
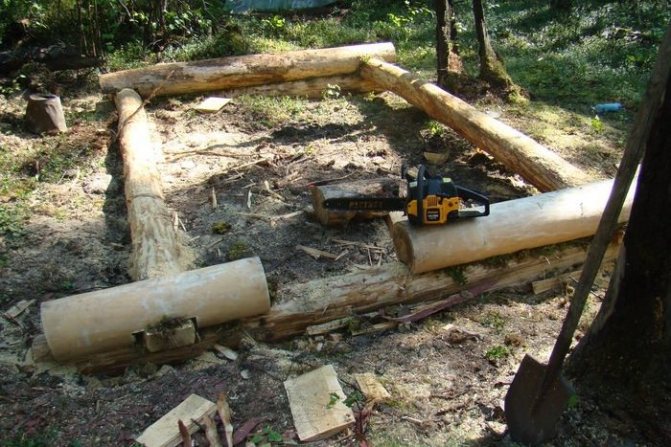
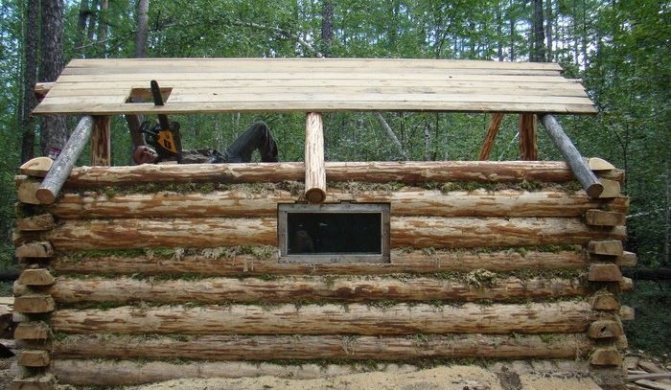
The photo shows an example of crowns folded using the “half-tree” method and mowing them. It can be seen that the first crown is covered with earth and longitudinal grooves are made in the logs.
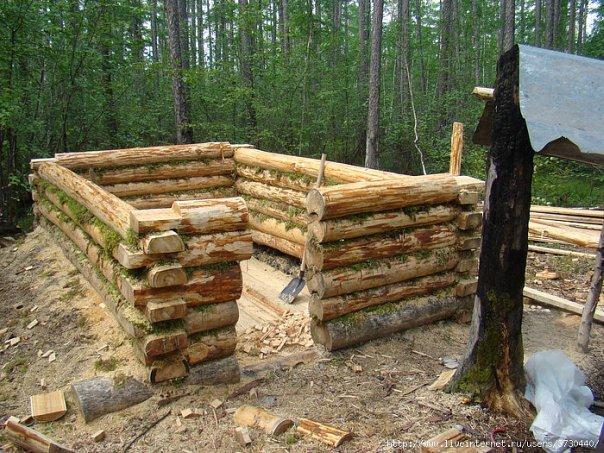
It is not necessary to make longitudinal grooves at all. In this photo they were made using a chainsaw, but you are unlikely to have one in stock. You can simply cut it off with an ax and put more moss in this place. Actually, the whole point is in the moss, the more of it, the better!
How many logs will be needed for construction? Well, in general, a lot, but this, of course, is not the answer, and so let’s count with you. The height of the walls will be, roughly speaking, 180 cm, i.e.
so that a person of average height does not have to bend over. Divide 180 by 20 and we get 9 logs per wall.
Multiply by 4 walls = 36 logs. But the winter hut must also have a roof and a floor.
For this you will need boards, more on them later.
Expert opinion
Smirnov Alexander Stanislavovich
Wilderness survival instructor. More than 15 years of teaching experience
It’s hard to say how many logs will be needed for the boards. If you cut down a forest with a reserve, then this remainder will come in handy somewhere else.
The forest will not become much poorer, given that you will be cutting mainly for sanitary felling. Also, do not forget about windows and doors - for them you will need to make cuts in the logs, and it would be advisable to secure the logs themselves together with a tenon.
This is interesting: How to tie a strong knot for a rope
To do this, you will need to drill through the logs and hammer a wooden spike into this hole so that the logs do not come apart.
Selection of trees for construction
Typically, the construction of huts in the taiga is made from coniferous trees. Of course, larch would be more suitable, since it rots much more slowly than conifers, but it still needs to be found in sufficient quantities. As a last resort, lay out the first crown from deciduous trees, and then continue with conifers. Cedar is also perfect for this purpose, since in a hut with cedar walls the air has a healing effect. There is no need to choose very thick trees. Fifteen to twenty-five centimeters thick logs will be sufficient. Practice shows that a raw pine log up to 25 cm thick and up to 4 m long will weigh about 120 kg. And since you will not be lifting the whole log, but only one edge of it, this weight will be quite feasible for an adult and healthy man. If such a weight still seems heavy, you can choose thinner trees. Of course, in this case you will need more of them.
Preparing for the construction of a winter hut
If for a good, solid hut the timber should be harvested in advance (it is recommended in December), then for a simple hunting winter hut you can use raw logs right away. Since the hunter spends a night in this winter hut, maybe two or three at most, and moves on along the path. What is important here is not beauty, but, first of all, simply the ability to be guaranteed to spend the night in a warm place, cook your own food and process sable skins.
Whether you are a commercial hunter or a hermit, you will choose a winter hut, not a hut. The construction of a winter hut is much simpler than the construction of a good-quality Russian hut. For a hunter, the main thing is simplicity and reliability, because he has not one such winter hut in the forest, but several. And the main house where his family lives is in a nearby village or city. A hermit doesn’t need a big house, because it’s also important for him to quickly build a home for himself and start living in it, because the hermit will have enough other worries. But let’s assume with you that the hermit will use this winter hut as a temporary hut while he builds a good-quality hut. What will it look like...
So, before building a taiga winter hut, our hermit or hunter chooses a suitable place. This is either a small clearing or an area right in the middle of the forest. There must be a source of water nearby.
If this is not a clearing, then the place will have to be cleared for construction, and the forest will also be used for crowns. The problem will be with the stumps - they are usually simply burned out.
We have prepared the place, pulled out the grass - and now we need to think about the first crown of the future winter hut. In general, by and large, you can put in the first one you come across, if this winter hut is not very expensive for you, but if you are going to live there for a long time, then it is better to approach this issue more seriously. It is recommended to make the first crown of the winter hut from larch, since it rots very slowly compared to other trees, but if it is not nearby, then from what is available. You can put stones under the crown, or you can put logs directly on the ground.
The construction material is coniferous trees. Pine and larch work well, but spruce and fir are also possible. You can also use cedar and chop it without undue pity, because such thinning sanitary cuttings, on the contrary, clear space for larger and stronger cedars. Thick trees should not be cut down; the optimal size would be 15-25 cm in diameter. It is better to make the first two or three crowns from thicker ones, and the rest from thinner ones. You can drag the logs to the location alone, without a partner. A raw pine tree with a diameter of 25 cm per meter will weigh approximately 40 kg (as suggested by an experienced taiga resident). Log lengths, i.e. The length of the wall of your winter hut will be about 3-4 meters enough for one person. It turns out that a 4-meter log with a diameter of 25 cm will weigh about 120 kg. But you will not lift the whole log, but only one side of it, and you will drag the other side. It's still hard, but quite doable for one person. If it’s really hard, then you can cut down thinner trees, you’ll just need a little more of them - that’s all. How to fell a tree is shown in the figure:
Laying the log house
So, let's start laying the frame of the future hut in the taiga. The first crown can be placed directly on the ground, but it will be much safer to dig a depression of about fifty centimeters around the perimeter and fill it two-thirds with small stones. Compact the stones and place the first crown on top. For the first 2-3 crowns it is better to use thicker logs. Before laying, the logs must be cleared of bark. There are several ways to lay logs. The most famous are cutting into the paw, into the bowl and into half a tree. The easiest way to build a hut in the taiga is to cut half a tree. In this case, grooves in the logs are not made at the corners, but simply the floor of the log is removed, and a treated trunk is placed on top in the same way. Here you can also drill a hole in the logs and additionally secure them with a wooden spike. Chopping into a bowl looks a little more complicated. In this case, a transverse hollow is hollowed out in the upper log, with which it lies transversely on the lower log. If desired, you can also strengthen the logs with spikes, but this is no longer so necessary, since the crowns themselves turn out to be well secured. Well, the last method is cutting in the paw. This is the most difficult method and without some carpentry training a beginner will not be able to do it. By the way, in places where there will be windows and a door, despite the longitudinal hollow in the logs, it is imperative to strengthen the joints with wooden spikes. Since in most cases, hunting lodges are built from raw wood, in order to avoid significant deformation of the walls after drying, it is advisable, despite the type of log house, to additionally strengthen the logs with spikes. Well, with the walls it’s more or less clear. But there are also windows, doors, floor, ceiling and roof. Building a hut in the taiga without boards is possible, but it will not be quite a hut. Where can you get boards in the forest? Don't carry it with you. You'll have to make them yourself.
DIY FRIEND
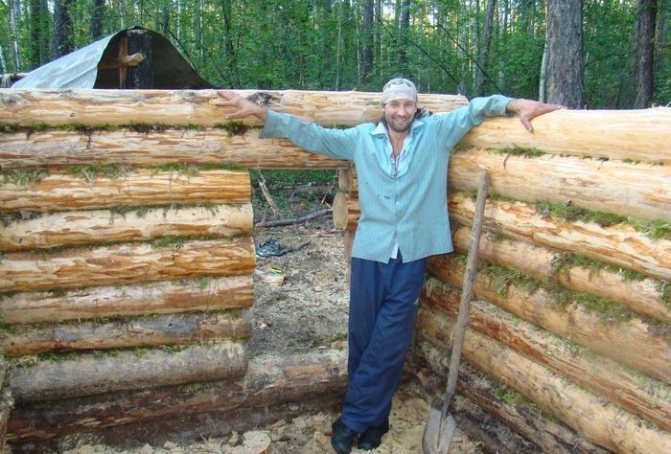
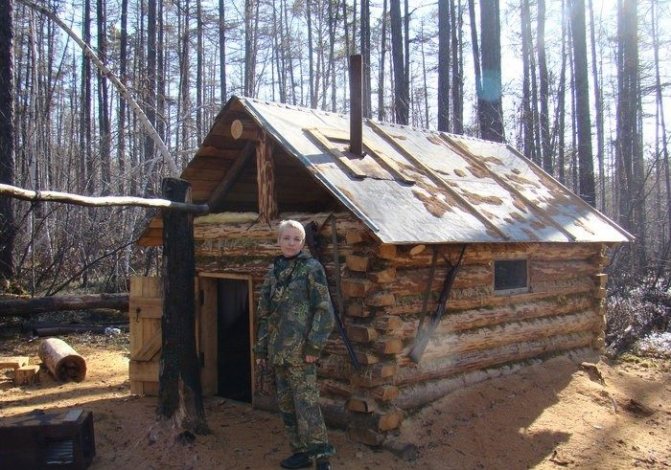
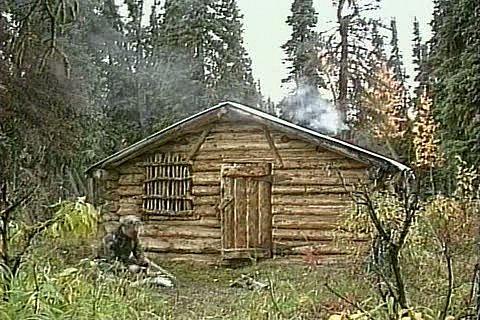
Dear visitors to the “ Samodelkin Friend ” website, today we will go to the deep taiga to build a hunting winter hut. A small hut in the forest serves as a hunter’s second home, and he must build it himself, with his own hands. A story and photo of a taiga hunter, as well as his friend Maxim, with whom they built a hunting hut together... Winter huts are built at a great distance from permanent human settlements in the depths of impenetrable taiga or forest, where there is least human activity, where the animal is not afraid of people .
The main purpose of a hunting hut is, of course, a roof over the hunter’s head, strong and reliable walls that can shelter the taiga dweller from severe frost, pouring rain and angry blizzards; the taiga has its own laws and they are very harsh! In the hut, a traveler can rest, warm up and light the stove, cook a meal, as well as sleep and gain strength.
By the way, they don’t put locks on such houses, but only close the door.. -You ask why? The answer is simple... so that every person, be it a hunter, fisherman, tourist, mushroom picker, or a lost person, can simply survive in harsh conditions. In the winter hut there is always a supply of firewood for at least a week, some food (stewed food, canned food, cereals, salt and matches). This is an unspoken and strict law of hunters; the hut must always have a supply of the above. If you had to survive in a hunting hut and it saved you, then be so kind as to replenish your supply of firewood and provisions if possible, who knows who else trouble might happen to in the taiga.
Choosing a place to build a winter hut is as follows: first of all, you need to choose the most suitable place in the forest, preferably on a small edge protected from strong winds. There must be a source of clean drinking water nearby, be it a stream or a river, because in case of illness a person could get to the water and not die from dehydration. The hut should be located on a small hill in a pit, preferably of natural origin; this will protect the lower crowns from spring floods and heavy torrential rains. Under no circumstances should you build a dwelling in a ravine, only on flat ground or on a hill.
The construction of a hunting hut lasts from several weeks to a month, it all depends on the skills and proficiency of a person in carpentry. Material for construction is taken naturally on site, the best way is to harvest pine and larch, and the very first crown should be cut from oak and the frame should be placed on oak stumps dug into the ground - this is a kind of columnar foundation. Cutting a log house is not a simple or delicate task..., I’ll tell you, friends) Sometimes it can take the whole day to adjust the groove of just one crown. There are several types of joining logs (foot, dovetail). Harvesting wood, logs that have been felled and cleared of branches and twigs must be cleared of bark, because under the bark there live various “friends” who will grind down your logs if you don’t do this. The cleaned wood must dry!!! A damp log house will warp! The inter-crown joint of the groove is insulated with freshly collected and damp moss, WET MOSS!!! The height of the hut is generally small, so that a person of average height could stand tall (example as in a bathhouse, the same thing) The roof is strictly gable, covered with light roofing material (roofing felt, mica, metal if possible)
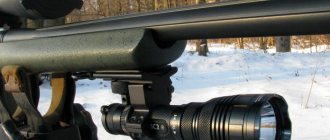
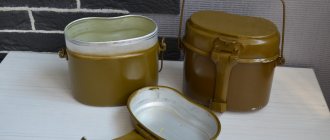
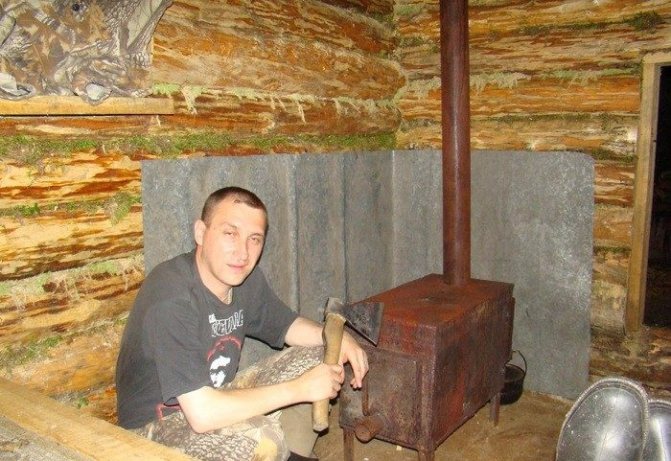
The stove is the heart of a hunting hut; it will warm you up in inclement and frosty weather, dry clothes that are soaked to the skin, and you can also cook food on it. Basically, hunters install light metal stoves in winter huts and cover them with stones collected from the surrounding area, thus increasing the efficiency of the stove, namely, the heated stones then slowly and evenly release heat. But if it is not possible to deliver the stove deep into the forest, then you will have to build it yourself from stone and clay.
And so on, let's move on to the winter hut built by one of the taiga hunters and his friend Maxim.

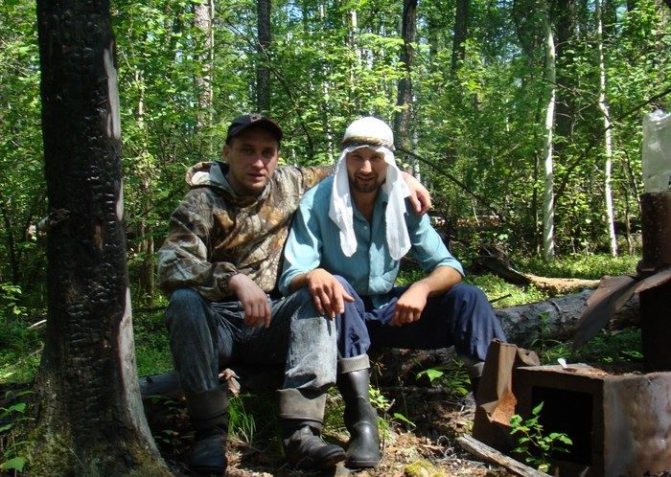
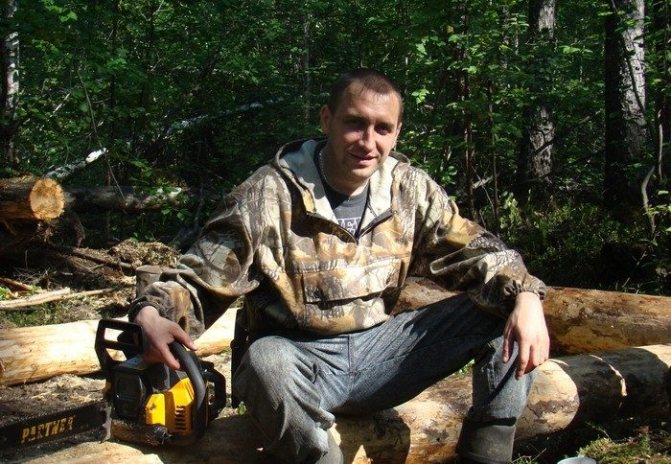
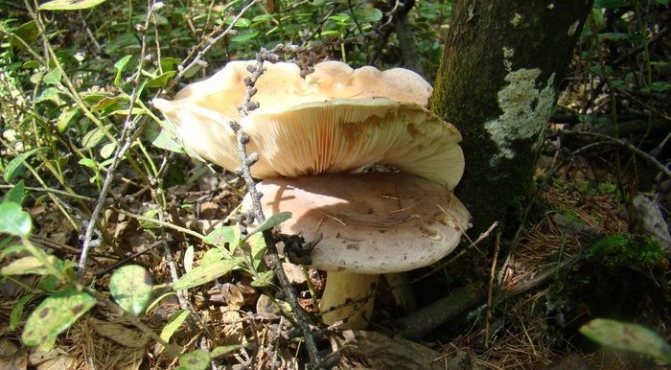
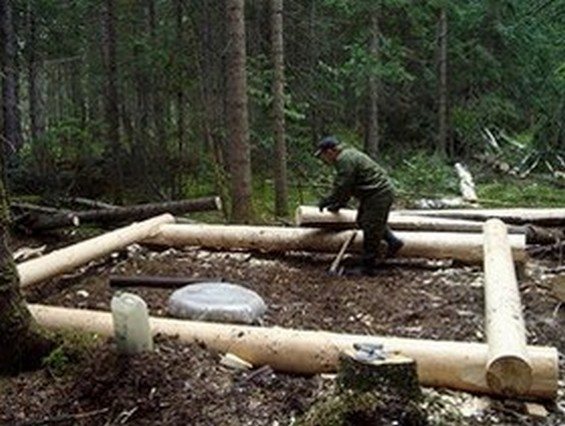
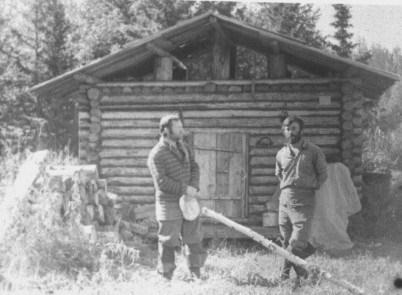
The backstory it all started back in 1995. The older and middle generations remember very well these terrible years, when everyone survived as best they could, so my friend Maxim and I at that time were still teenagers of 15-16 years old and began to master the profession of a commercial hunter, caught game This is how we lived in the taiga, collecting cranberries, blueberries, mushrooms, nuts, the taiga generously gifted us and took care of us in its own way. With Max, far from our village, we built our first hut, it’s better to call it even a hut, because we put it together from poles, boards, and covered it inside with old blankets; in winter, of course, it froze through and through, but we really liked it even despite all the shortcomings. Quite a few years have passed since then and we have grown up, matured, started families ourselves, but we don’t forget that native place where our hut stood, and in 2009 we decided to build a permanent hut there. In the photo the owner of the hut and his friend Maxim.
The place where the hut was located had not been visited by anyone for a long time, and the building itself was set on fire by some hooligans. It’s painful to watch, of course, but hoping for the best, we begin construction and clear the clearing.
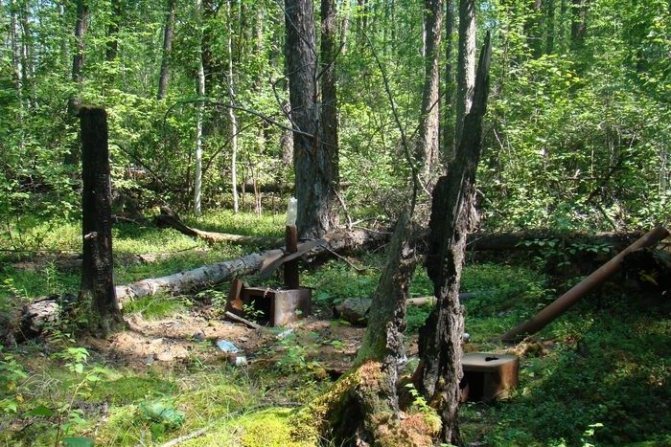
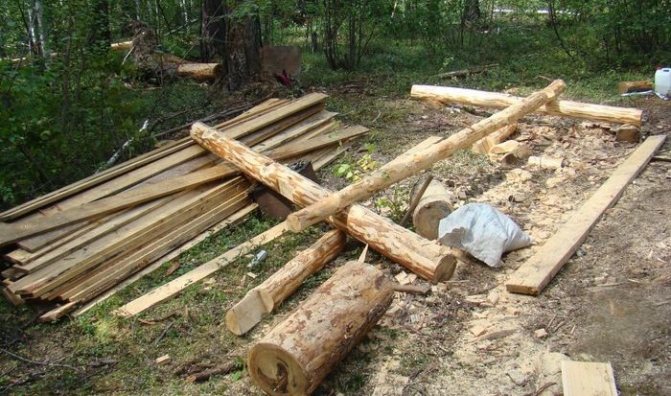
In the place where the hut stood there is a small depression, they cut down the first crown of larch - it is resistant to moisture, and before that they dug in oak logs as a foundation.
Then we immediately begin to form the doorway.
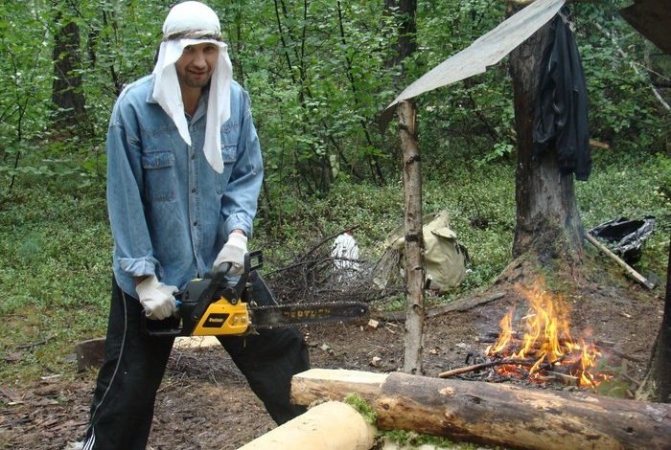
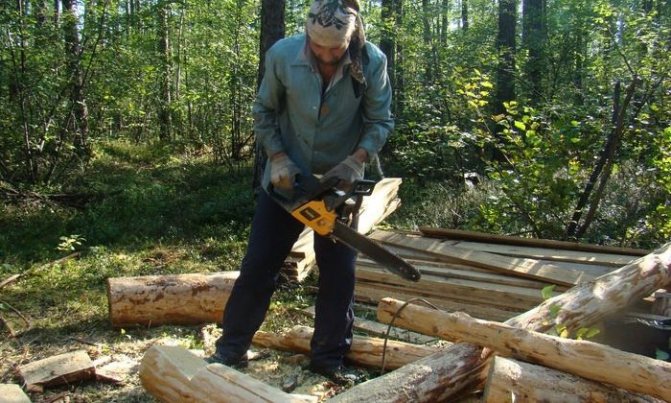
We sawed logs with a “Partner” chainsaw, it worked 14 hours a day without breakdowns, we tested the inexpensive tool for strength, the saw did not let us down)
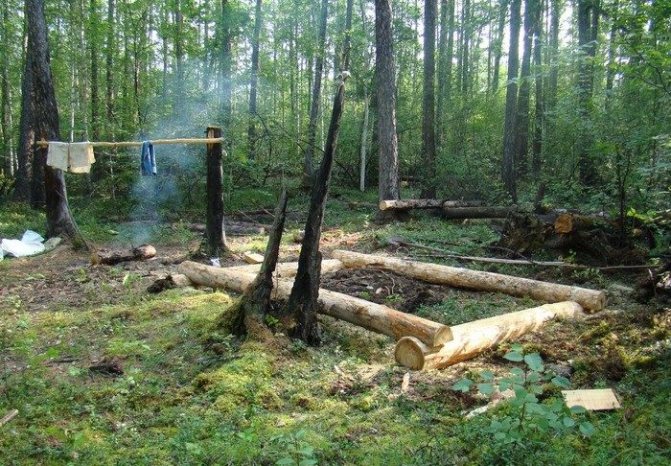
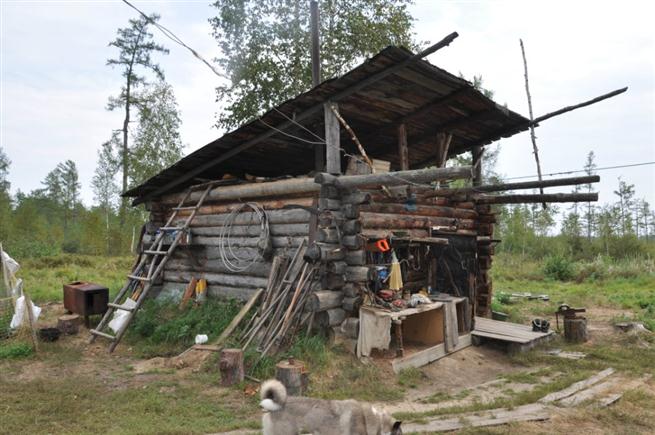
The weather was not always sunny; on the second day of work it started to rain and we had to quickly make a canopy out of galvanized sheet metal.
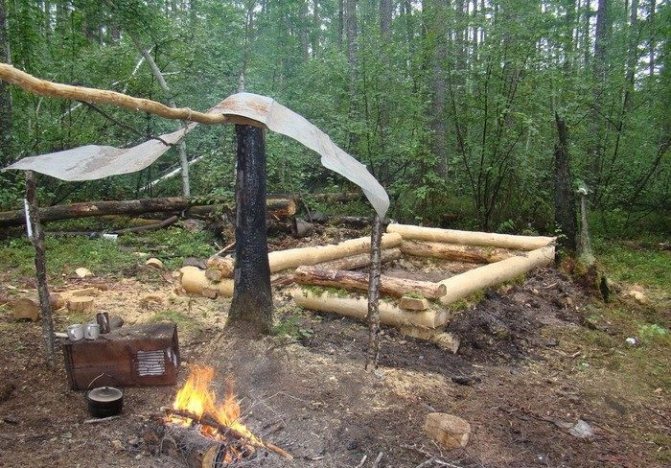
It began to rain little by little, but we continued to work.
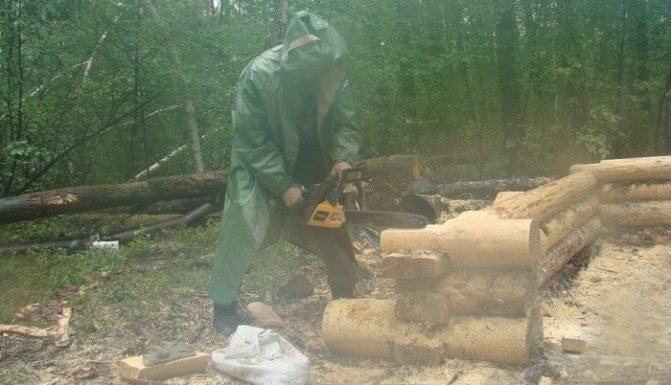
The rain was clearing up and we had to put on chemical protection raincoats and continue working, because we didn’t have much time, and there was a lot of work ahead.
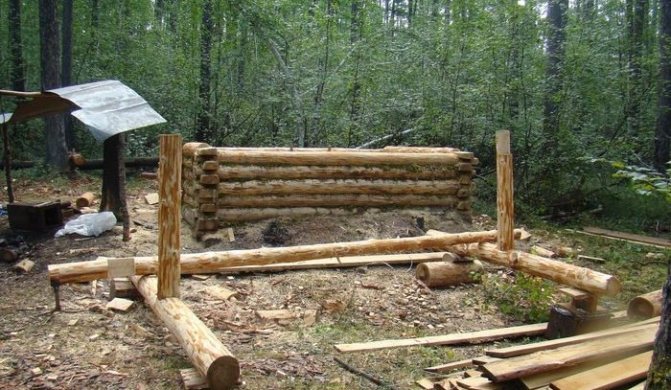
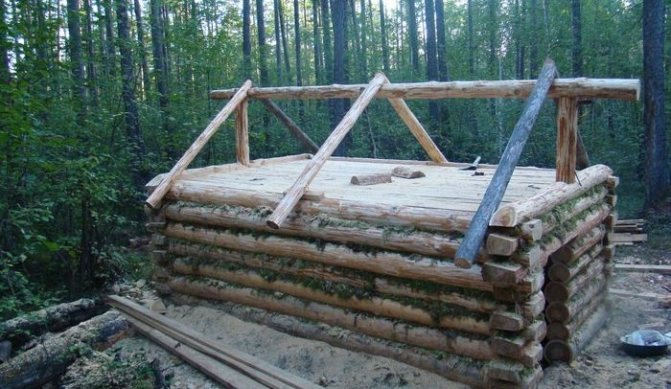
And now the outlines of the future hut are already visible, the log house was connected into a dovetail, but what happened was what happened) At the same time, the creation of the roof and rafter system of the hut was going on.
The markings were made with a homemade tool called a “dash”
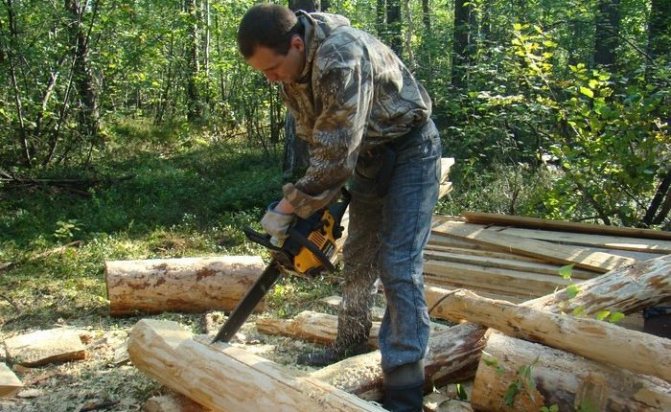
We make transverse cuts.
Freshly collected wet moss is laid between the crowns. Attention! Moss should not contain foreign materials (sticks, twigs, etc.) only pure moss!
The board was brought from the mainland, namely, friends dropped it off on a timber truck to the nearest quarry, and then Maxim and I carried the boards on ourselves through the forest, 65 pieces in total, it was very difficult and it took us 4 whole days. 17 forties and 48 inches. Magpie for the floors and ceiling, inch for the roof sheathing, bunks, table, benches.
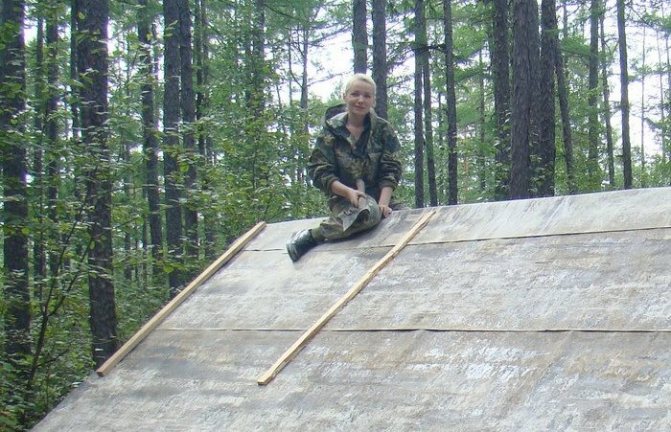
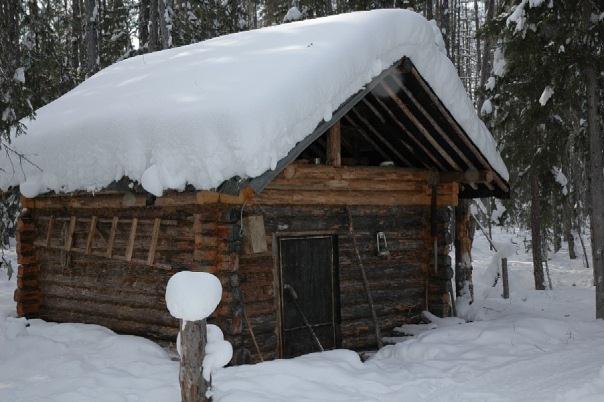
The floors and ceiling are laid and we move on to the rafter system, the roof has two slopes. There is a lot of snow in the taiga in winter, and if you make one slope, it can crush the boards, and this is much more reliable.
Then we move on to sawing a window opening in the wall of the hut; the glass with frame was found in one of the abandoned quarries, so it was adjusted to fit the finished frame.
We lay the boards close to each other and immediately make a hole for the outlet of the chimney.
The stove and chimney are installed.

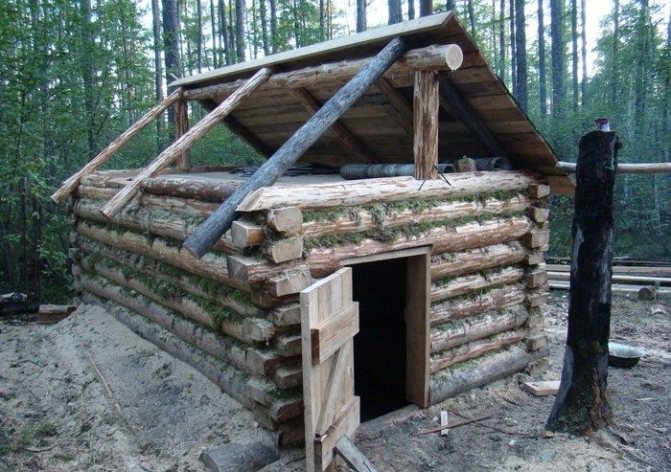
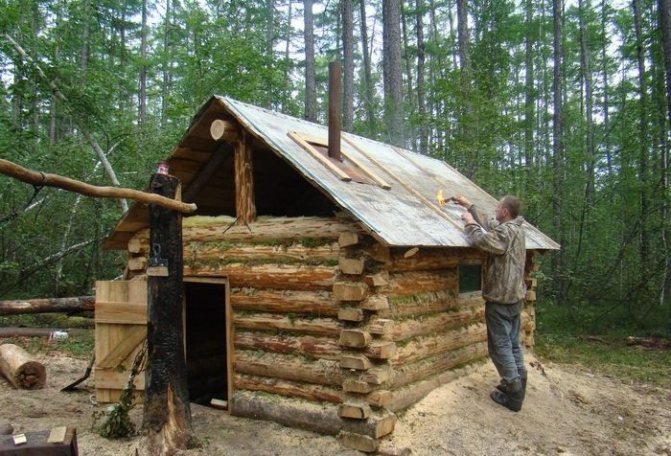
Let's move on to the second half of the roof. Pay attention to the door! It is small in size, this was done so that when opening the hut the hut would not get cold, but it is better to cut down a small canopy or make a firewood stand in front of the entrance to the hut.
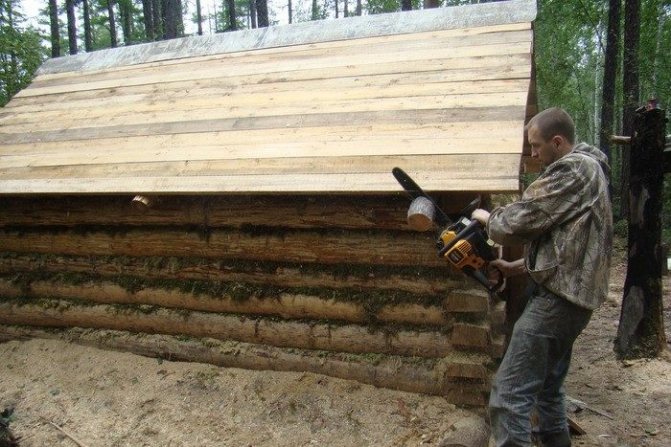
Use a chainsaw to saw off the excess protruding parts of the rafters.
Soon Maxim left and the two owners completed the construction of the hut.
A magnificent woman, helping her husband build a hunting hut, a real wife!
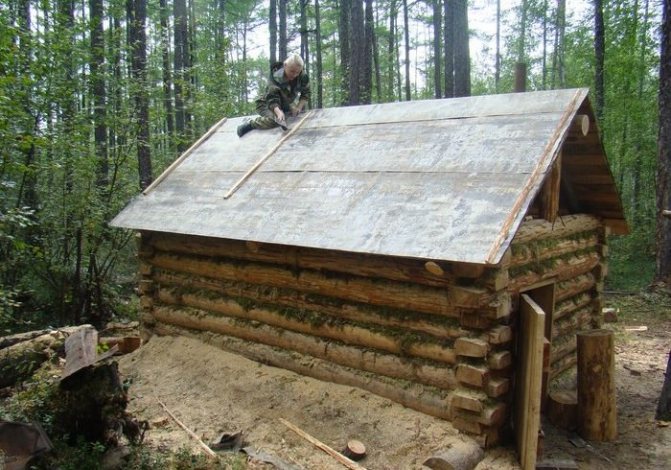
We coat the joints of the roofing felt with molten tar.
We installed the stove, fired it up, everything was just fine)
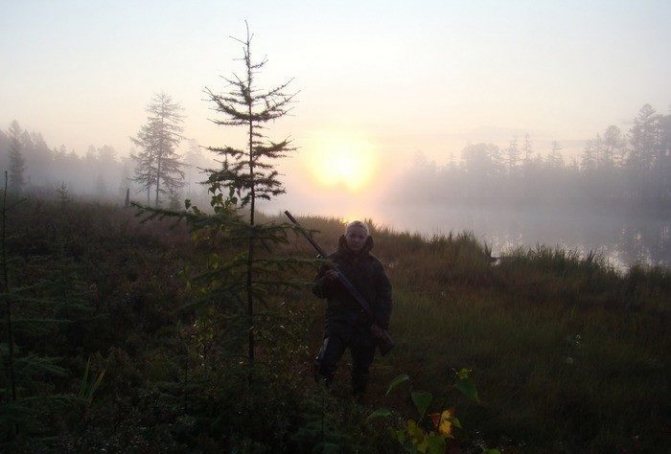
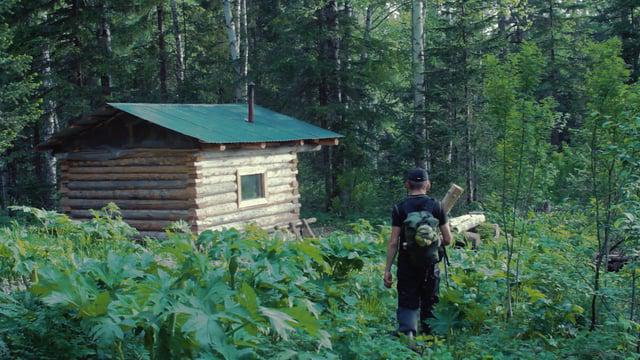
After the construction was completed, it was urgently necessary to return home to the city because a lot of things had accumulated during the absence and rest in the forest. My wife and I returned to the taiga only in the fall with the opening of duck hunting. Arriving at the place, the first thing we inspected was the hut, whether there were any guests, whether everything was in place, to the surprise it was in perfect order, it’s just that often an animal behaves mischievously, or passers-by are ignorant) It was in the evening, there was nothing to do, they took photographs as a souvenir, lit the fire stove, had dinner and went to bed until the morning, and at 4 o’clock they went hunting to the lake.
In the morning we set out for the lake, taking photos along the way against the backdrop of the rising sun.
Returning from the hunt, we lit the stove, prepared a meal, and hung up our clothes to dry. my wife went to bed, and I took care of the housework)
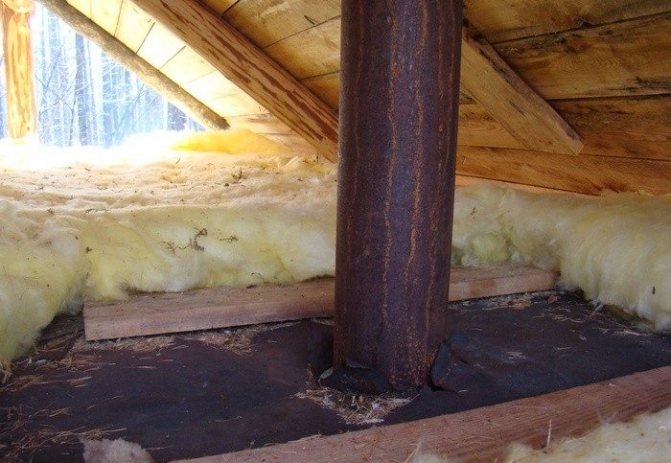
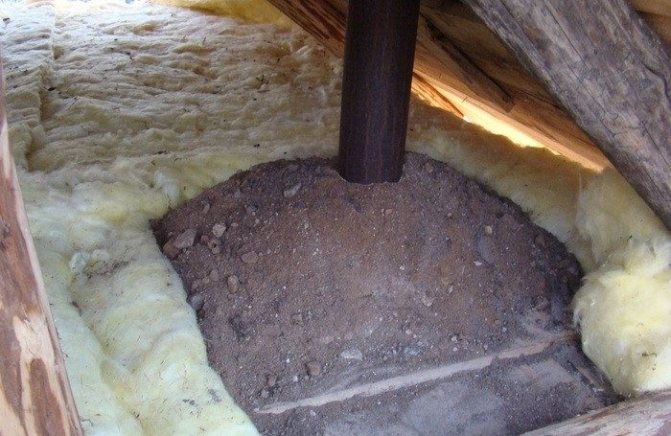
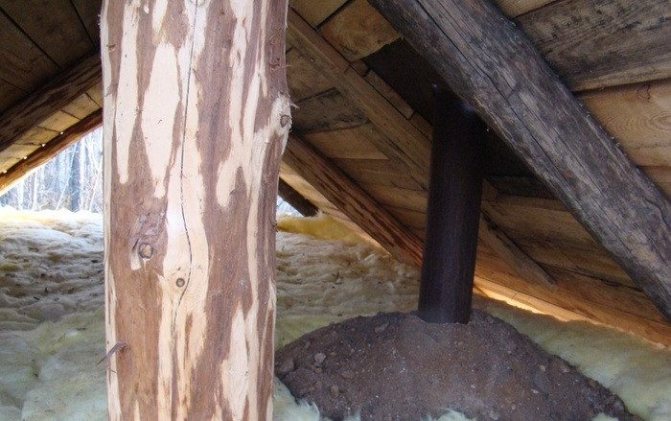
While I had some free time, I started insulating the ceiling and sealing the pipe, and sprinkled the chimney with loam from under an uprooted larch tree.
The embankment was made in this way, everything is fireproof.
All that remains is to sew up the attic of the hut with boards so that a strong wind does not blow out the cotton wool and flood it with rain and snow.
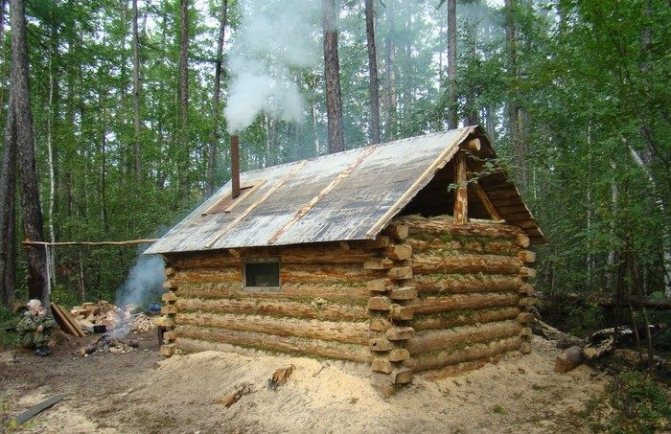
We managed to build such a winter hut in the taiga forest, now going fishing and hunting has become very convenient and comfortable, there is a place to rest, warm up and spend the night, no need to carry a tent with you. Thus, there is one more hunting hut in the taiga.
- Tweet
- 11
Shared
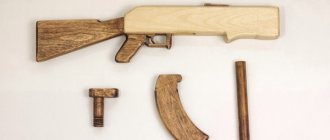
Making boards
Of course, we can’t count on even and relatively smooth boards that are made at sawmills. Nevertheless, we are quite capable of making a product that is quite similar to them and which we are not ashamed to call a board. All you need for this is a sharp axe, and for greater convenience you can make a wooden sledgehammer. It is necessary to choose a straight tree without large knots or twists in the trunk, plan several wooden wedges, make a small cut at the base of the trunk and drive a wooden wedge into it, gradually splitting the log along the fibers. A second cut is made nearby and the wedge is driven in again. Then the entire deck is split into boards, or as they are called - shingles. By the way, these boards have much more strength than those made on a sawmill in the usual way, since the wood fibers are not damaged. In this way, you can provide yourself with the necessary number of boards to build a roof, doors, floors and other necessary parts.
Construction of a winter hut, do-it-yourself house
Continuation of the topic: - A hermit’s dwelling, how to build a winter hut - Construction of a winter hut, a house with your own hands - Construction of a winter hut, log house, fastening logs
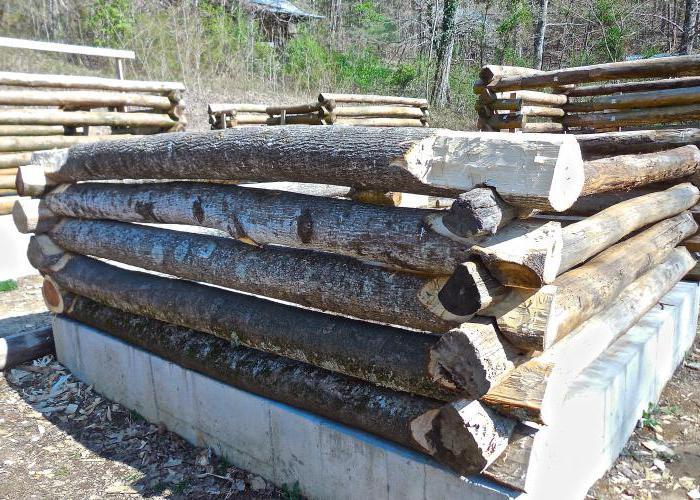
You can’t build a good, solid, comfortable house in a season, since you first need to prepare the main material, that is, logs for the base and the frame of the house itself. Dead wood and dead wood are not entirely suitable for these purposes, since they rot quickly, temporary housing can be built from it, while the house itself is being built, this is usually two seasons, and building from damp logs can lead to the fact that when the wood dries out the house may begin to move, the logs will begin to dry out and bend. Therefore, it is better to make a house from dried logs that will no longer move .
Wood for the house is usually harvested in winter or early spring, while the tree is dormant and excess moisture, that is, the sap does not flow into them, and the remaining moisture freezes out in the cold and the tree turns out to be almost dry, and much lighter than in the summer. In winter, wood is less susceptible to drying out, rotting, cracking, etc. This time is good because the snow is not yet deep and the logs can be felled and carried out and the forests can be stacked until spring. Tree trunks naturally need to be chosen as evenly as possible, and with the least number of knots, the usual butt diameter for a house is about 35 cm. in diameter, and the top will come out, but it can be thinner, the average diameter is about 25 cm.
For a hermit, logging in winter is the best option, since the first summer and autumn seasons are full of other things, such as building shelter for the winter, procuring food, and much more, which is very important at the stage of survival in the first difficult winter. And in winter there will be more free time for logging, and in the spring when the snow melts, the material will be ready for sanding and preparation.
They bark and clear the bark from logs usually in the spring, in April-May, when the snow has almost melted and the sun begins to warm up more strongly. By this time the wood should have recovered from the frost and softened. The bark heats up on a sunny day, and moisture collects under it, and the bark easily falls off, so cleaning the logs is not difficult. You can cut with ordinary axes and bayonet-cut shovels, and some work the old fashioned way - with a special tool.
In some places it is called a skobel, which in outline resembles a staple, in others it is called a hack. They cut logs from the butt to the top so as not to leave burrs. This results in a smooth surface. Usually the entire surface of the log is cleaned. But if time is short, some areas are left with bark, so the log also dries out and the dry bark then quickly comes off.
During debarking, the logs are sorted and tidied up - unusable sections of the trunks with large cross-layers, peeling, and other defects are sawed off. Then the logs are allowed to dry. To do this, they are again rolled in rows onto spacers in a stack. Wedges are placed under the outer logs to prevent them from rolling out.
The upper logs are covered with pre-prepared birch bark or roofing felt. There are stakes driven into the ground on the sides. And their ends sticking out above the stack are fastened together with ropes or wire. This way the stack is compressed and does not move the logs when drying. A single or gable roof is installed on top. The degree of readiness of the logs is determined by hitting them with the butt of an ax. In response, a ringing melodic sound is heard. The logs dry completely just in time for the onset of summer, just when everything dries up and construction time begins.
FOUNDATION FOR A HOUSE
If there is any material for the construction of a preliminary foundation, then the foundation is laid in the fall so that it settles during the autumn, winter, and spring periods and gives natural settlement. The foundation can be cement-brick or adobe with wooden supports, on wooden and other piles, on large stones along support points, on clay-stone foundations, a log house was placed on logs, etc. But due to the possible lack of availability of many materials, a good foundation in real conditions is quite difficult to lay.
Many houses were built without foundations as such. In place of the foundation, they simply laid 3-4 crowns of thick, resinous logs, or aspen logs, which are less likely to rot. This method is probably the most optimal for us, just before laying the foundation crowns, you need to prepare the soil, that is, isolate the place where the logs themselves are laid from soil and dampness by compacting these places with sand or clay, and lay a waterproofing material, such as film or roofing felt.
This will extend the service life of the logs, that is, they will rot less from moisture from the ground. Also, under the place where the stove will be located, you also need to immediately make a foundation; you can simply lay it out like a box at the height of the floors and fill it with soil or clay , or clay with stones for density, and compact it all thoroughly.
Next continued CONSTRUCTION OF A HOUSE, CONNECTION OF LOGS INTO LOCKS
Roof
A hut in the taiga can have either a single or double roof with an attic. Single - it is done faster and easier, but with an attic it is many times more convenient and practical. Firstly, the hut becomes many times warmer, and secondly, additional space appears for storing various things and supplies. In the warm season, you can dry hay and all sorts of herbs there. The roof is made as follows. First, the ceiling is laid out of shingles. The cracks between the boards are lined with moss. You can sprinkle it with earth on top or cover it with plastic wrap. Next, in front and behind the hut, two supports are attached to the top, the ridge rests on them and on the sides, two or three on each side. Then we cover the entire structure with shingles, we also caulk the cracks with moss, there is no need to spare the moss, and on top everything is covered with plastic film. It is not heavy and you can take it with you in sufficient quantity.
How to make a roof?
There are two types of roofs for winter huts: with and without an attic. Attic roofs can be single-pitch or gable. In principle, you can build any of them. Below you can see examples of these roofs.
Roof with attic
Roof without attic
Roof with attic, pitched
What is the attic for? Firstly, it can be used as a storage room, storing various things there, and drying herbs in the summer. Secondly, the attic is warmer, especially when the attic is closed, since the roof becomes smaller and warm air rises upward. And the lower the roof, the easier it is to keep warm in such a winter hut. Most hunters build their winter huts with an attic. But it’s easier to build without an attic; it will require much less material.
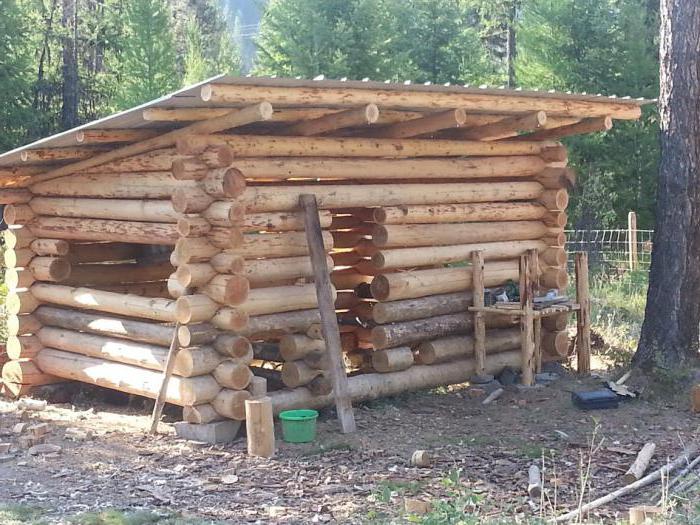
The attic roof is essentially two roofs: one is located at an angle of 90° to the walls, and the second is already above it. From the lower photos we see that the first roof can be laid not even with boards, but directly with small logs or their halves.
You will also need to lay moss between the logs, and pour earth on top or cover it with roofing felt (polyethylene). But for an intermediate roof (ceiling), film is not at all necessary. The photo below shows mineral wool, but instead of it there will be moss and earth. In the photo we see two vertical supports attached to the walls with brackets, a roof ridge and 6 slabs.
Boards are laid on top of the layers, and without much beauty, since the top will need to be covered with film. Carrying roofing material is difficult, so you can take plastic film instead. The main thing is to protect from rain, and the lower roof will protect you from heat transfer. Cover the floor in exactly the same way with the same shingles.
Bake
The stove is one of the most basic internal elements of a hunting hut in the taiga. There are two types: metal (potbelly stove) or brick. The stove can be heated either in a black way (without a chimney), which is extremely inconvenient, or in a white way - with a chimney. Installing a metal potbelly stove is quite simple and does not require any special skills. Building a brick oven is not a very simple matter, and besides, you will first need to make raw bricks from clay, which can be found near the nearest body of water. In terms of its properties, a potbelly stove differs from a brick stove in that it heats up very quickly. Accordingly, it quickly warms up the room. But after the fire goes out, it cools down just as quickly. Therefore, you need to constantly ensure that the fire does not go out. But a brick oven, on the contrary, warms up the room not so quickly, but also cools down much longer, as a result, the heat does not leave the room for a long time. It is better to place the stove in the middle of the room. This way it will warm up the hut faster and more evenly, plus it will be convenient to dry things around it. And in terms of fire safety, this placement option is safer. Photos of hunting huts in the taiga with and without a stove can be easily found and viewed in the article.
Stove and firewood
There are two types of stoves used in winter huts. This is an iron stove and a brick one. All of these ovens have their pros and cons. An iron stove is good when a traveler needs to quickly warm up. You throw in an armful of firewood - and after a few minutes it begins to give off heat, warming the chilled traveler. However, as quickly as it warms up, it cools down just as quickly, so such stoves need to be heated by constantly adding firewood, or using raw firewood on top of hot coals. However, in severe frosts, the heat that smoldering damp firewood will provide is not enough, and the room will still be cool. But you shouldn’t overdo it with adding firewood either: you can easily heat the house to a hot state, in which you simply won’t be able to sleep and you’ll have to ventilate it, and the firewood will be wasted uneconomically.
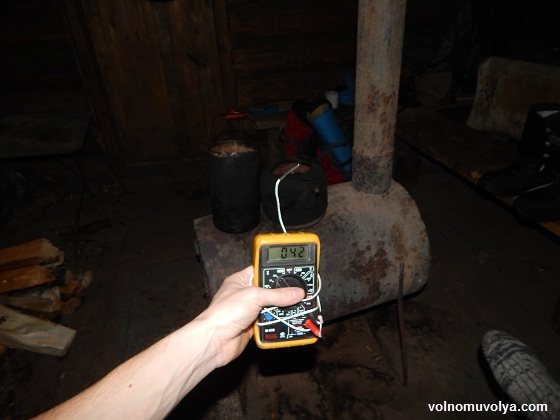
if your partner heats up to +42° - change your partner!
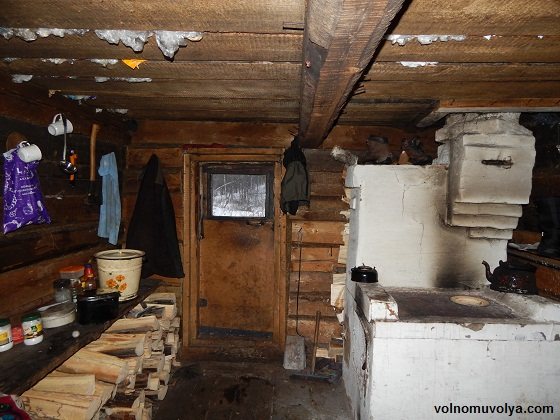
well-kept hut with a good-quality brick stove
A brick stove takes a long time to burn, but it also gives off heat for a long time. It's all about the thermal conductivity of brick, which is an order of magnitude less than the thermal conductivity of steel. It’s difficult to heat, but it’s also difficult to cool. You shouldn’t abuse the heating of such a stove either. In mild frosts and thaws, it is not necessary to heat it too much. Having cooked dinner on it in the evening, after the wood has burned out, close the damper and go to bed, the stove will warm you all night. In severe frosts, it may be necessary to heat it more.
Some stoves are built incorrectly, and when you try to heat them, smoke can come out into the room. Such stoves smoke when they are cold, but as soon as they are warmed up, the smoke begins to flow into the chimney, and the draft becomes good. These stoves can be inconvenient if you need to heat a room quickly. For the first minutes (or even hours) you will have to heat with the door open, and the room will be cold. After warming up, the stove heats in the same way and gives off its heat for a long time.
It is better to prepare firewood for the stove yourself, but if this is not possible, then you can use what is in the hut itself. Also, near the hut in the forest there may be wood caches, which the owners of the hut prepare in the warm season. Already sawn logs (you just need to chop them) or even already chopped ones are placed between the trees. Firewood can also be stored in poles. You can use this firewood.
Mice and larger animals
The hut must be equipped with a tightly closed door, locked from the inside, to prevent free access for wild animals. Also, inside the ceiling there should be hooks for hanging supplies, since if you place them on shelves or hang them on the wall, you risk losing everything, since mice are excellent acrobats, and in this case they can easily get to the food. To catch mice, you can use one and a half liter plastic bottles. They need to be strengthened at an angle near the corner and the wall with the neck up. The mouse will definitely get inside the bottle, but will not be able to get out back.
Unwritten rules of behavior in hunting huts
Unwritten rules have long been in force for those who hunt in the taiga and hunting huts left unattended for some time, in accordance with these rules, must have a supply of firewood, salt, matches and essentials. It is not customary to lock such houses. The door should be tightly closed, but not locked. Perhaps someday someone will be able to save their life thanks to this. Also, if you need to spend the night in such a hut, behave decently in it, as if visiting a good friend. Don't litter, be careful with other people's property. Before leaving, clean up after yourself, hang supplies from the ceiling, and if you have your own, don’t take the owner’s. Renew your firewood supply. A hunter's hut in the taiga must be ready to meet the next wanderer. Also, someday some taiga traveler will take care of your house. In the taiga it is customary to help and help each other out.