Often, many travelers and tourists, especially inexperienced ones, have difficulty folding a modern tent. But in order for the design to be compact, take up minimal space and easily fit into a case, it is also important to lay it out correctly. Of course, all products usually come with detailed instructions, but not everyone can do everything correctly the first time. It’s worth learning how to assemble a tent in a figure eight pattern, since this method is the most common.
Nowadays there are several types of tents:
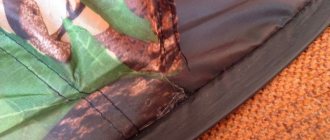
Assembling a fishing tent in a figure eight
To assemble a fishing tent, you should initially give it a vertical position by pressing one of the sides with your foot. Then hold the top with your hands and begin to twist it 180 degrees. The ring formed during the twisting process must be folded down. Then connect the resulting another ring to the first one and place the tent in the cover.

Setting up an army tent
Sometimes it becomes necessary to set up an army tent. This requires a lot of effort and skill on the part of several people.
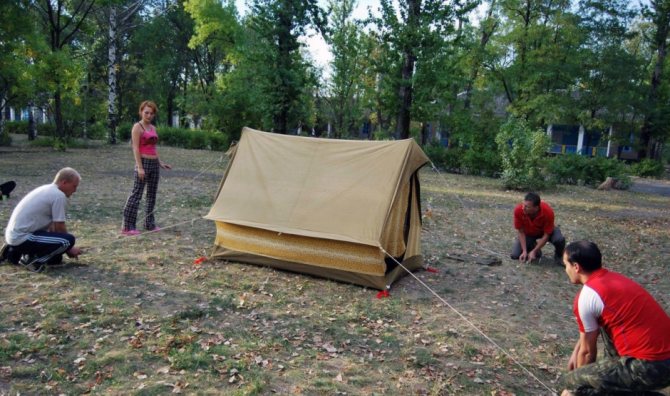
Since the “soldier’s” structure is very large, it is first laid out on the ground, after which the following algorithm of actions is followed:
- inside, around the perimeter, wooden pegs are placed;
- the center is strengthened with large supports (two or three);
- fix the external tension with stakes.
When installing, you need to monitor the tension of the structure between the pillars, otherwise it will settle during use. The erected army tent can be decorated by marking the entry point. They place two poles and pull several guy wires.
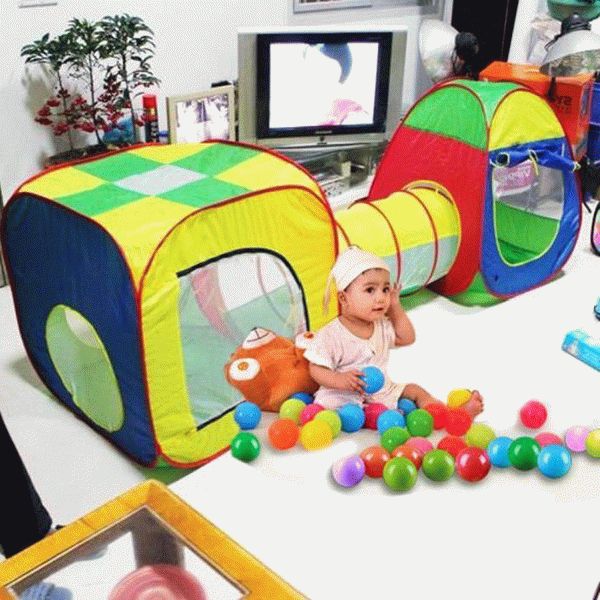
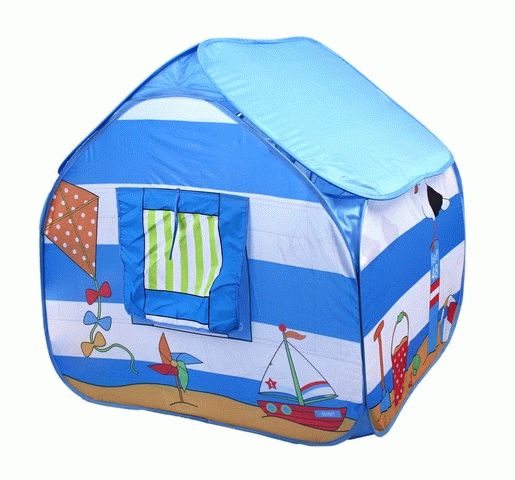
How to properly assemble a children's tent with a figure eight
Children's play tents are also divided into several types:
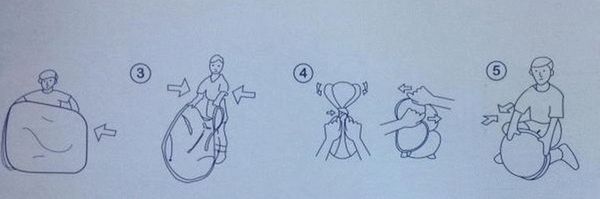
In fact, all these structures fold and fit into the case in a minute, freeing up a lot of space in the room. But sometimes it’s impossible to cope with them if you don’t know how to assemble a tent with a figure eight. The first type of house is assembled in the following way:
- you need to stand opposite one of the walls, while holding two opposite ribs with your hands;
- connect the left and right sides together;
- take the lower third of the resulting plane with your hands so that the roof of the tent is in the “away from you” position and place one hand behind the other, folding the ribs in a figure eight;
- The rings of the resulting figure eight are stacked on top of each other, after which they are successfully placed in the case.
This is interesting: How to tie an Albright knot: diagram
Also, knowledge of the basic principles will help you assemble a triangle house. To do this, you need to hold one of the sides of the structure facing you and, pushing the edge towards the opposite edge, insert it inside. Achieving a flat shape, tuck in the entire panel, leaving only the elastic band at the bottom outside. Twist the middle and top to form a figure eight.
Assembly of Chinese tents
Recently, tourist tent structures made in China have become very popular. They attract many buyers not only for their ease of use, but also for their ease of assembly. But sometimes not everyone is able to understand the instructions, which describe how to assemble a Chinese figure-eight tent. Often difficulties arise at the very beginning of the process. So, at the beginning of assembly, you need to fold two side faces, holding one of the sides with your foot. The resulting oval will only have to be twisted into a circle. It is best to do this procedure together.
Setting up a half-barrel tent
The spherical structure can be installed by one person. You'll have to put in more effort, but it's much more spacious. The basis of its frame is made up of several semicircular arcs. They are located parallel to each other. The strength of the installed “half-barrel” will depend on its fixation with pegs, so choose a spacious place for it.
So, how to set up a half-barrel tent:
- stretch the awning by inserting arcs into it;
- fasten the inner tent to it;
- The bottom of the tent is tied with stakes.
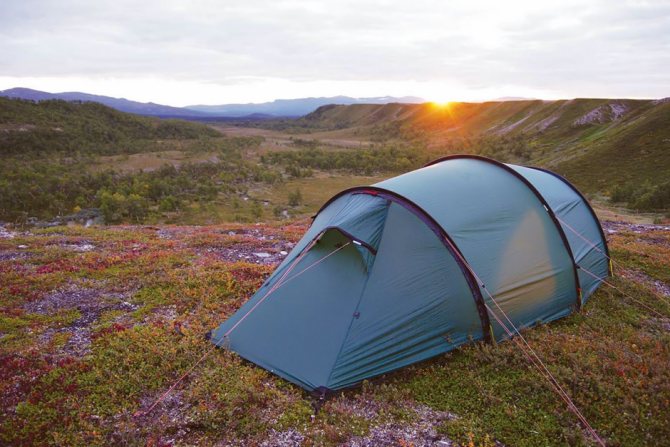
The advantages of the “half-barrel” are not only in its spaciousness, but also in its convenience. When the weather is dry and warm, it is permissible to use only the outer awning as shelter, and fasten the inner one if it gets colder.
How to assemble a camping tent
Automatic tents, often called semi-automatic, are characterized by minimal weight, as well as ease of installation and dismantling. When pulled out of the case, the structure itself opens up in the air, taking on the appearance of an assembled model if you shake it a little. Some outdoor enthusiasts have learned to create entire campsites using similar tourist tents. Moreover, they can be installed and disassembled at any time of the day, in any weather conditions. However, there is one drawback associated with the manufacturability of the product, since its advantage turns into a real problem if you do not know how to assemble a figure eight tent. The scheme is very simple, but if you are dealing with a double or triple structure, with a vestibule and an awning, experts recommend practicing doing the procedure together, remembering all the bends and applying the appropriate efforts.
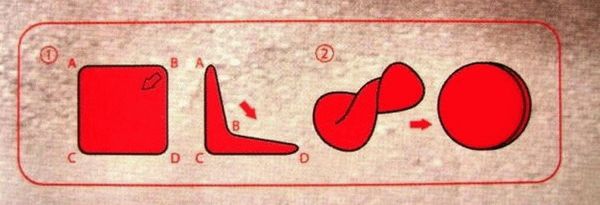
Initially, fold the model, giving it a flat shape. Depending on the type of tent, the end result should be a square, rectangle or triangle. Then fold all the sides into one and lay them on the ground. Pull one end towards you, pressing the tent towards the opposite edge. As soon as you see that the arcs take the shape of a figure eight, twist them to form a circle.
It is worth noting that if a left-handed person does not know how to assemble a tent with a figure eight, the dismantling scheme should simply be carried out in the opposite direction. Practice a little at home, after which you can easily do all the necessary manipulations in nature.
Tips for properly setting up a winter fishing tent
1. First of all, a tent for winter fishing must structurally meet your requirements and be chosen correctly .
We wrote a little earlier about how to choose a tent for winter fishing. Let us note one more important point.
Modern manufacturers (at least the leading ones in this area) do not make gross mistakes in design, and therefore the tents do not differ very much. Therefore, you can only run into an unsuitable tent among the “Chinese”.
A priori, we will assume that if you are reading this article, then you have already chosen a tent and done it correctly.
2. The main reason for freezing even in the most perfect winter tent is its incorrect installation relative to the existing wind rose.
Before installation, you need to determine the direction of the wind and place the tent so that the entrance and air valves are on the leeward side . A blank smooth wall should be placed at the peak in the direction of the wind on the windward side .
3. Most winter tents have a so-called skirt.
When setting up the tent, the skirt must be covered with snow ! The snow even needs to be compacted. If nature is greedy for snow, then the skirt should at least be fixed, for example with stones.
This will prevent blowing from the bottom of the tent. Such wind currents are the main reason for freezing a tent.
Some fishermen freeze the tent skirt using water from a reservoir - this should not be done. The fabric will be damaged and the tent will be difficult to assemble.
4. The tent must be secured with screws. This will not only prevent it from deflating, but will also prevent one corner of the structure from rising, which will cool the entire internal space in a second. Screwdrivers need to be taken care of - they are expensive, and their manufacture is quite problematic.
5. If the weather is very unlucky, but there is snow or there is an opportunity to “hide” behind relief elements, this must be used . It’s probably obvious about the relief elements. But let’s note about snow that it can be used with great success to build excellent windproof protection from the direction of the wind.
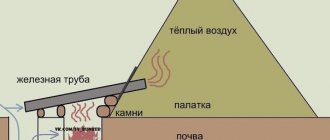
6. If you plan to use a heat source inside the tent, or simply stay there for a long time, you need to take care of air circulation .
The fact is that if the humidity inside increases, the feeling of cold will become unbearable even in slight frost. And if you use any heaters, then the lack of proper ventilation is dangerous to your health .
Carbon monoxide and burned-out oxygen will, at a minimum, cause a headache or worse, carbon monoxide poisoning. All modern tents are equipped with a ventilation hatch.
You should definitely use it! Don't think that you end up heating the street. Heat losses are minimal.
This is interesting: What constellation does the polar star belong to?
But excluding humidity will greatly affect comfort.
7. If the tent is not equipped with a floor, you definitely need to think ! The huge ice floe under you is a powerful heat-intensive cooler. Your heat will be greatly wasted in an unsuccessful attempt to warm up the ice floe. It is energetically more profitable to warm up a closed, thermally insulated system (I’m talking about a tent with a floor).
8. You don’t need to take off your hat in the tent. The fact is that the main heat loss from the body occurs through the head.
How to fold a children's play tent?
Children love to build houses from any available material: chairs, armchairs, sofa cushions, blankets and rugs are used. In such houses it is so wonderful to play with dolls, hide from the evil Baba Yaga and turn on a flashlight in the dark.
One thing is a pity, this house is not strong. One move and the roof has already broken. And even the walls along with it. The children are upset. But the parents are worried: how safe is such a house?
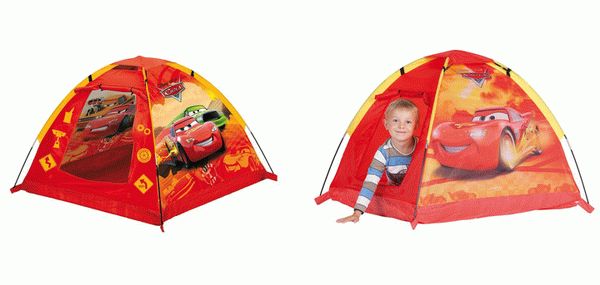
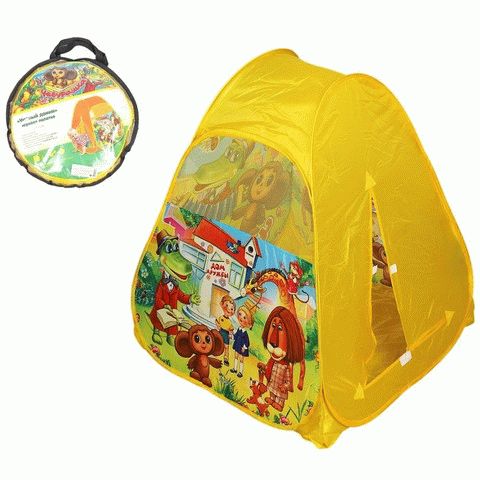
Children's play tents that went on sale became an excellent way out of the situation. Lightweight and durable, they can look like a real princess castle, a house with a tunnel, or even a car.
This is interesting: Beaver hunting dates
As a rule, they are installed literally in one motion. But collecting them after the game turns out to be not so easy. How to fold a children's tent to put it in a small cover? So this tent stands in the corner of the room for months. Or on the balcony.
But the inscription on the case states that you can pack a gaming tent into the case in one minute. What are we doing wrong? Let's figure it out together.
How to install a “hemisphere”
Now let’s look at how to properly lay out a spherical tent. The popular modern model does not cause any hassle during installation and disassembly. It has good wind resistance and is based on frame arches.
You need to install it like this:
- disassemble and lay the inner tent (it looks like a mesh with a black bottom);
- collect arcs;
- place them crosswise so that they are above the inner tent.
The arcs are inserted into the holes in the corners and attached to the fabric with hooks. Sometimes they can be threaded through grooves in the fabric and secured at the bottom. The inside is ready. Now you need to fix the arches on top with ropes to strengthen the tent. All that remains is to throw the tent over it so that its exit coincides with the exit of the inner tent.
The awning must be stretched using pegs, otherwise it will get wet overnight from moisture and dew. The inner tent is more stable than the outer tent, so it is not necessary to stretch it.
What is a children's frame play tent?
Such tents can have different appearances - a ladybug, a round house. But they are all very similar to ordinary tourist tents, installed using a tubular frame.
The tubes are assembled into longer ones, pushed into the grooves of the fabric of the house panel and secured in special pockets or tied with ropes.
They are easy to disassemble - untie the fastening ropes, remove the frame and fold the canvas itself. A tourist tent takes a little longer to assemble, but only because of its large dimensions.
Types of tents
Tents are different. Let's look at the main categories:
- Tent. Quite light (3-4 kg). However, they are not so quick to assemble. Tent tents are most often installed on central stakes and stretched using guy ropes.
- Tunnel. somewhat similar to hemispherical ones, but longer. In addition, they are significantly less stable.
This is interesting: Concepts and rules of orientation
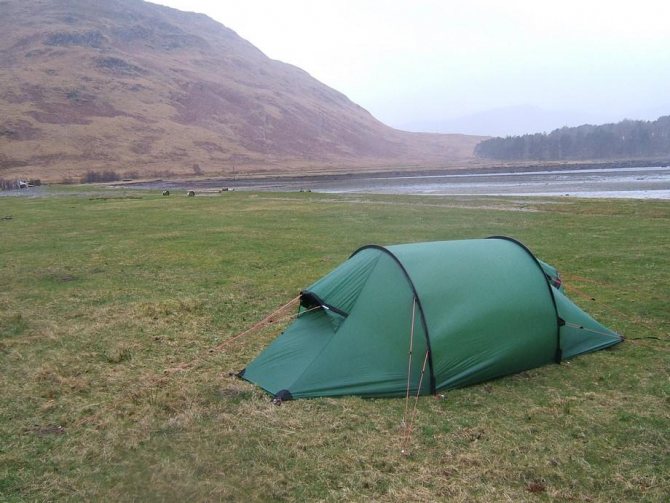
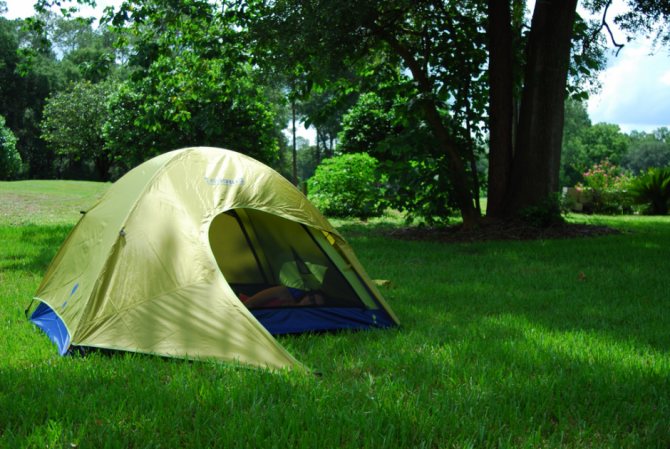
Tents are also divided into tourist, storm, ultralight and camping. The first ones are light and durable, weighing on average up to 3 kg. This tent is suitable if you are going camping for a day and just need to spend the night in it.
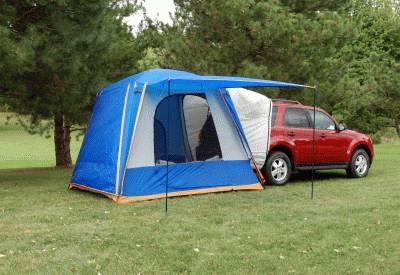
The last, special type is camping tents. They may be needed if, for example, you are going camping with a large family.
These tents have a lot of space, corridors and windows. They can be used for overnight stays or just for outdoor recreation.
A significant disadvantage of such options is the price. In addition, they weigh a lot and do not warm up well due to their size.
So now you know how to fold a tent correctly. We hope our tips will be useful to you more than once on your hike.
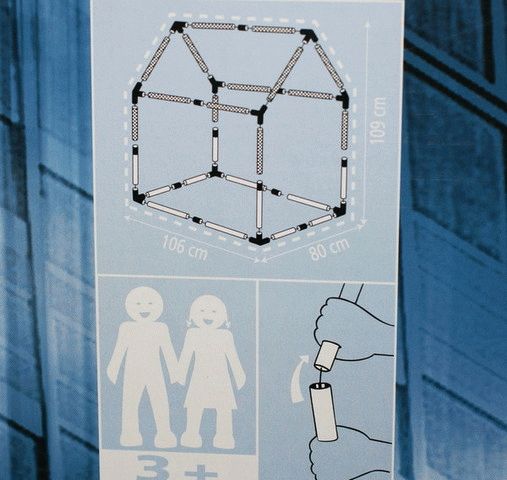
What is a wire children's tent?
The situation is completely different with wire play tents. At the base of the frame there is a thin and strong wire.
Installing this one really takes one minute: you just need to take it out of the package and unfold it. Thanks to elastic wire stiffeners, the tent itself takes the desired shape.
But not everyone succeeds in assembling a tent the first time. Probably because parents are afraid of damaging the stiffeners or doing something wrong. If your house does not have assembly instructions or you just can’t figure it out, try using our action algorithm.
Installation of a gable tent
These are “nostalgic” models from the Soviet past; they are becoming less and less common among tourists. If someone has such a rarity, you can learn how to handle it.
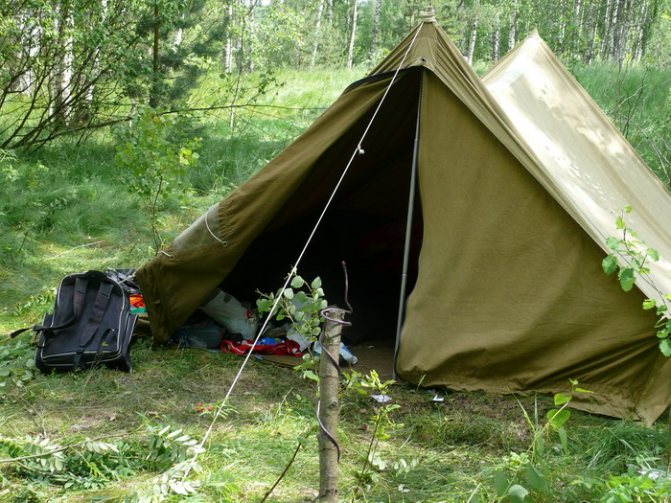
The roof is assembled first, and the bottom is assembled last. The roof is installed, fixing it with two racks, which are placed vertically. Next, they begin to stretch the bottom and awning. The awning can be attached to the wall of the tent inside: this is normal for a gable model.
How to fold a children's square tent-house: step-by-step instructions
- Stand facing the wall of the house (any one) and grab the ribs on both sides with your hands.
- Push the edge that you hold with your right hand (or left, if you are left-handed) forward - to the opposite corner.
- Now the house looks like a book, which you fold, closing the pages.
- Hold the folded house by the side ribs in their lower third (“floor” towards you, roof away from you). Move your hands towards each other, as if moving one towards the other. The wire ribs will form a figure of eight when you bring your hands together.
- Place the two “heads” of your figure eight on top of each other.
- In your hands the house has formed into a ring. Now it can be easily stored in a round case.
The video illustrates the addition process in even more detail:
If the figure eight is not easy for you or the structure of the house does not want to fold in this way, try another option:
- Place the flat house folded into a “book” on the floor or any other surface.
- The lower part (“floor”). The right hand holds the lower part of the house, while the left hand holds the side panel in the middle with a rigid wire rib.
- Gently press the side piece against the top piece. Landmark - the right hand is in the center of the upper part of the house. Pull the sidewall towards it.
- Since the tent has stiffening ribs, when folded in half, the house has rounded sides. When folding the side part, turn it slightly, like a steering wheel, around its axis.
- Press it also with your right hand, rolling it into a ring.
- The second half is placed on top of the first.
- You have a comfortable circle in your hands again. Put it in the case.
This is interesting: Taiga forests, taiga plants
And a couple more detailed videos on folding a square children's wire house; in the second, the process of folding the frame into a circle is presented in detailed slow motion:
How to fold a children's triangular tent: a detailed algorithm
- It would be more appropriate to call this house a pyramid. Stand facing one of its sides. Insert one rib inward, pushing towards the opposite one.
- Tuck all parts of the panel inward towards the center and get a flat triangle.
- The elastic band located on the bottom of the house must remain outside.
- Grasp the top of the triangle and the middle part of the base. Using a rotational movement of your arms, making a figure eight, connect both hands.
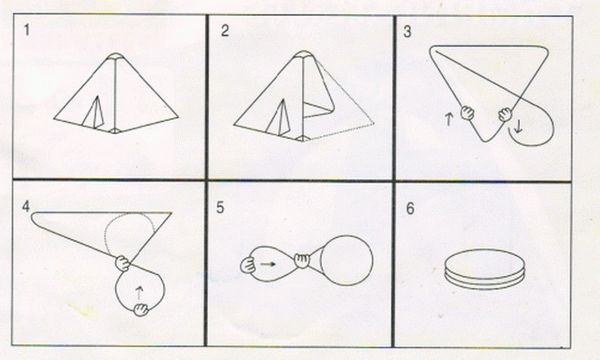
- OR press the top to the base. The side parts of the resulting structure, as in the case of the tent-house, will become rounded. Fold one circle towards the center of the base. The second one will develop on its own.
- Secure the resulting circle with an elastic band.
- You can put the folded tent in the cover.
The folding algorithm is presented even more clearly in the following videos:
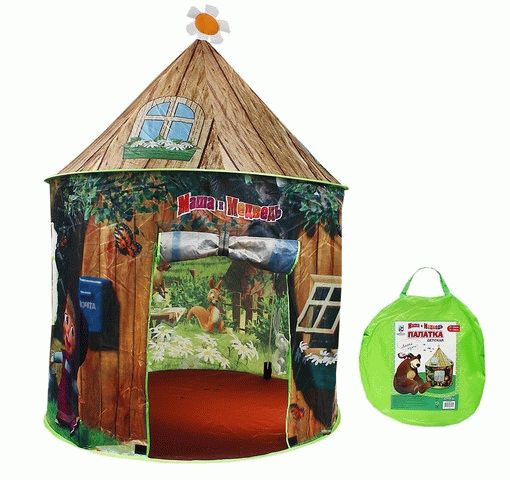
How to assemble a children's round tent “Princess Castle”: action diagram
Is it really possible that such a large and luxurious castle can also be hidden in a small round container bag? Exactly.
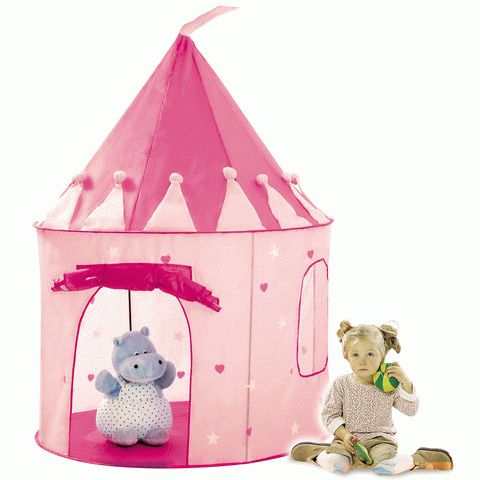
The Princess Castle belongs to the category of frame tents that are assembled according to the principle of adult tourist tents.
- Remove the vertical stick from the frame. They hold the turret cylinder in a vertical position.
- This long stick consists of several small ones, attached to an elastic band. Fold them up.
- Do the same with the rest of the frame sticks of your castle.
- You are left with a round base and a round top of the tower. Connect them to each other. Tuck the cylinder panel inside.
- Grasp both sides of the circle with both hands. And again make a figure eight - turn one hand down and the other up.
- Connect two figure eight circles.
- Use an elastic band attached to the base of the tent to secure the resulting structure. The lock is ready to “hide” in a round case.