When faced with an emergency, a person forced to survive in extreme conditions needs a temporary structure for rest and overnight stay. Even the simplest shelters can protect against the harmful effects of the external environment. When choosing the type of temporary shelter, it is worth considering various factors: potential dangers, natural conditions, experience and skills of those building.
The construction of a shelter involves the expenditure of energy, which should be carefully saved. Therefore, before you start building a shelter, you should evaluate the available resources and try to make your work as easy as possible, using all kinds of available materials.
Briefly about the functionality of shelters
All temporary shelters that can be built independently from available materials must meet certain requirements:
- Capacity . A shelter should be made that can easily accommodate the person and his belongings. At the same time, there should not be a lack of air in the cave or hole. Temporary shelters must be made taking into account the height and build of the people who will be inside.
- Ergonomics , that is, suitability for use. Even the simplest shelters must meet the basic requirements of convenience: provide the ability to get out at any time, have a flat floor and sufficient space for movement inside.
- Safety . When building a shelter with your own hands, special attention should be paid to this issue. A shelter should protect, and not pose an additional risk to, human life. When building a cave, you need to carefully compact the snow so that it does not collapse.
- Cold protection. At a frost of -25-30°C, a person’s body temperature drops by 0.5°C every 1-1.5 hours. If a person gets lost in the winter forest and has no choice but to make a shelter for the night, then, first of all, it should protect against hypothermia. Otherwise, death from cold may occur within 7-9 hours.
- Moisture protection . A sure way to get hypothermic and catch a cold is to spend the night in the rain or on wet ground. Even the simplest shelters must be dry from the inside. When choosing a location for a temporary structure, preference should be given to sandy or rocky areas and hills.
- Wind protection . Due to the strong gusty and cold wind, you get the feeling that the temperature outside is several times lower than what the thermometer shows. A properly made shelter with your own hands should protect from the wind and, therefore, from hypothermia.
- Protection from animals . If there are large predators or dangerous snakes in the area where a person is forced to spend the night, temporary shelters should be located in hard-to-reach areas: in trees, in natural caves.
Temporary shelters from the shock wave
The simplest shelters can be designed for autonomous survival in the wild or for shelter from danger in an emergency: an air attack, a radiation alarm. Such shelters can be trenches, dugouts, basements or underground passages. They can be built in a short time or ready-made structures can be adapted to shelter people.
The construction of a shelter will reduce the effect of shock and heat waves, radioactive radiation, and will protect against the debris of collapsing buildings. In the absence of specially adapted shelters, you can make a shelter yourself.
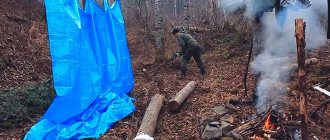
A hole is dug in the soil 1.8-2.5 m deep and about 1 m wide. The top of the trench needs to be covered with boards, a 10-15 cm layer of clay should be laid on them to protect them from moisture, and earth should be covered on top. The resulting roof must be at least a meter thick. As additional protection, temporary shelters can be covered with sheets of iron or sandbags; they block radiation well. After a nuclear explosion, it is forbidden to leave the shelter for at least 48 hours.
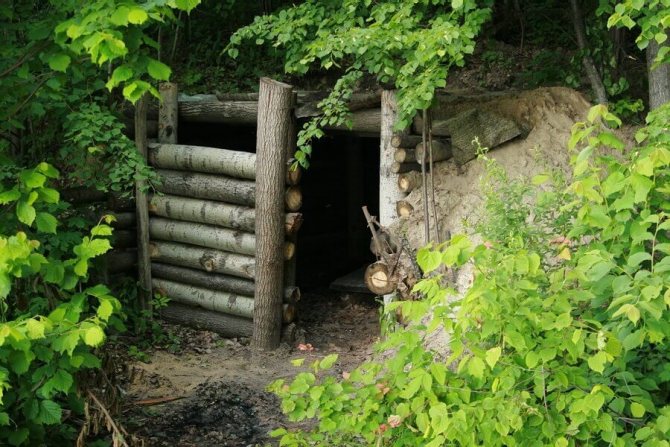
In the photo: the most primitive option, it can protect you from a blast wave, but not from radiation.
If the explosion has already occurred and there is no time left to build a shelter, then you should quickly find a safe place under a car, a fallen tree or any other object that can prevent radioactive particles from settling on your skin and clothing.
Types of winter shelters. Life safety 6th grade. © Borisova A.V. - presentation

Types of winter shelters. Life safety 6th grade. © Borisova A.V.
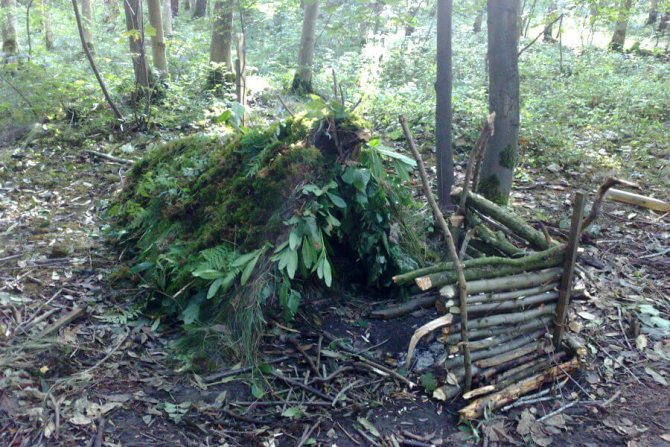
Types of winter shelters. How to build an ordinary hut in the forest? How to build an ordinary hut in the forest? Look at the picture and help choose a place for a tent. Look at the picture and help choose a place for a tent.
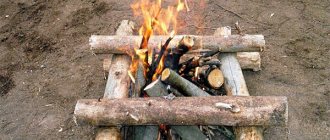
Types of winter shelters. In cold times, you can arrange an overnight stay on the site of a burnt fire on warmed ground. In cold times, you can arrange an overnight stay on the site of a burnt fire on warmed ground. If it is dangerous to spend the night on the ground, then it is necessary to equip a place to spend the night on a tree. If it is dangerous to spend the night on the ground, then it is necessary to equip a place to spend the night on a tree. When spending the night on damp ground or in snow, you need to insulate your lower back with some kind of woolen item, put spruce branches and dry bedding under you. When spending the night on damp ground or in snow, you need to insulate your lower back with some kind of woolen item, put spruce branches and dry bedding under you.
Types of winter shelters. An igloo is a dome-shaped winter home of the Eskimos, made of snow slabs. Height up to 2 m, diameter from 2.5 to 4 m. Entrance through a hole in the floor, to which a trench leads, dug in the snow below the level of the floor of the needle. This keeps the heat below the igloo's floor level. This retains heat and allows carbon dioxide (exhaust air) to escape. Light penetrates through the snow walls. Igloo is the winter home of the Eskimos, domed in shape, made of snow slabs. Height up to 2 m, diameter from 2.5 to 4 m. Entrance through a hole in the floor, to which a trench leads, dug in the snow below the level of the floor of the needle. This keeps the heat below the igloo's floor level. This retains heat and allows carbon dioxide (exhaust air) to escape. Light penetrates through the snow walls.
Types of winter shelters.
Here are some fairly simple types of cover.Here are some fairly simple types of cover. Trench. It can be dug in deep snow by laying branches at the bottom of the hole. Trench. It can be dug in deep snow by laying branches at the bottom of the hole. Snow cave. It can be dug in a slope, a snow blow, a large dome-shaped snowdrift with a ceiling height of about 1.5 m. Snow cave. It can be dug in a slope, a snow drift, or a large dome-shaped snowdrift with a ceiling height of about 1.5 m.
Types of winter shelters. Anyone who is going on winter expeditions to the forest or field simply must be able to build a shelter from snow bricks or slabs. Anyone who is going on winter expeditions to the forest or field simply must be able to build a shelter from snow bricks or slabs.
Temporary shelters in deserts
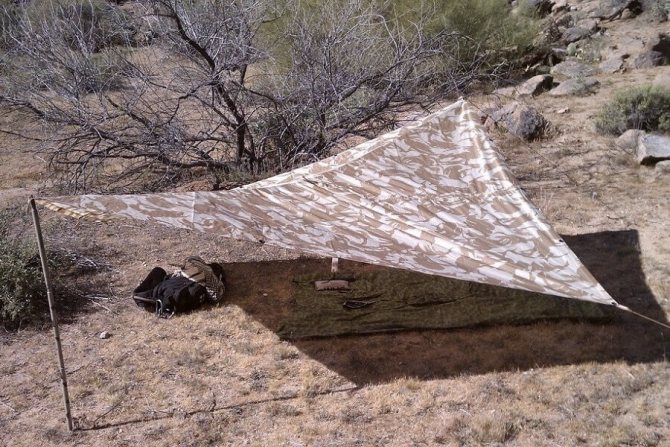
Making even the simplest shelters in the desert is quite problematic. The shelter should protect from the scorching sun, sandstorms and cold snaps at night. Arrangement of a place to spend the night or a parking lot should be done early in the morning or late in the evening, when the heat subsides. This measure will protect you from heat stroke and significantly save energy.
If the desert is hilly, rocky or covered with dunes, then building a shelter with your own hands will not be difficult: at the top of the dune and below, on the ground, you need to secure a stretched piece of fabric with stones or sand. Such a canopy will create shade and protect from hot winds.
If a sandstorm begins, you should immediately build any simple shelters. It is recommended to cover your mouth and nose with a cloth and, if possible, wear glasses. In the absence of a reliable structure, you need to get to a hill, since the lowlands are very quickly covered with tons of sand. It is best to sit near a rock, large stone or tree. You need to tuck your trousers into your socks, button up your jacket, tighten the backpack straps as much as possible and cover your head with an awning, blanket or jacket.
How to make a shelter with your own hands in the flat desert? This is somewhat more complicated and will require a lot of effort. You need to dig a hole 1 to 2 meters deep, it is better to place it at the base of a large cobblestone. You should stretch the fabric over the top of the trench, pressing the corners with stones. If you have several awnings, you need to place them in layers one above the other at a distance of 15-20 cm. This technique will ensure that the temperature inside the pit is 20-30°C lower than on the surface. As a separator between the fabric, you can put plastic bags filled with sand.
About shelters in the steppe or tundra
In the steppe and tundra there is the same problem as in the empty ones - a lack of building materials. You can build the simplest shelters in a beam - a crevice in the rock. You should make sure in advance that there are no snakes or excessive moisture in it. Grass is laid in a thick layer at the bottom. A piece of fabric is stretched on top, which is covered with branches and earth.
In the tundra, you need to build a shelter as far as possible from the swamps. It should also be located on sandy hills or in gullies. Moss and dwarf birch trees can be used as building materials. If it is impossible to build a canopy, temporary shelters are built in the ground. It retains heat well and protects from wind. A person lies down in a pre-dug hole and almost completely covers himself with earth. This is not the most comfortable and functional structure, but it allows you to survive in an extreme situation.
Temporary shelter is one of the most important factors for survival in conditions of aggressive environmental influences. Therefore, the structure must be functional, that is, spacious, safe and provide the necessary protection. You can make such a shelter with your own hands from any materials available. But it should be taken into account that the shelter, first of all, must meet its purpose: in the desert to protect from heat, in tundra conditions - from cold and wind, in case of radiation danger - from radiation and heat stroke. A timely and properly constructed shelter will save the life and health of people in extreme situations.
Shelter for a family: How to build a bunker with your own hands
Home, according to the saying, is a fortress, but there are misfortunes from which it is better to hide not in this fortress, but somewhere further away or, more precisely, deeper - for example, in your own family bunker . Especially for those who, according to the Last Day Club - “ Hope for the best, prepare for the worst!” “, admits the possibility of serious natural disasters in the area of its habitat, and generally takes a responsible approach to the issue of its own safety, we have prepared material on how to build a shelter on a suburban area on our own.
The content of the article
No bureaucracy required
To build a small shelter on your own site, you do not need to draw up special documents. However, this only works if there are no centralized communications running under the site, which could be damaged during the construction the bunker . It is advisable to find out this before starting construction.
We measure the groundwater level
To prevent the construction of an underground bunker from turning into a pool of water, you need to know the depth of the groundwater. This can, in principle, be done on your own: just pay attention to the water level in nearby wells or pay attention to reservoirs or rivers that are nearby. The difference between the surface of the water, for example, in a well, and the surface level of the land plot will be an approximate indicator of the depth of groundwater.
You can also seek advice from neighbors who have their own water wells on their property, since when drilling them, the depth of groundwater is determined more accurately.
build a bunker at least 50 centimeters above the groundwater level. For example, if groundwater in a site flows at a depth of 4 meters, then the depth of the pit should be no more than 3.5 meters.
Experts who carry out such work claim that the ideal depth of a bunker is 4 meters, so in the case of closer groundwater, it is unlikely that it will be possible shelter
Location
It is important to choose the right place to build a bunker . Some homeowners prefer to install a bunker directly under the house, almost in the basement. But experts do not agree with this location. to set up such a shelter at some distance from the house, since in the event of, for example, a strong hurricane or earthquake, the main building may be destroyed and its debris will block the exit from the bunker .
The location of a shelter under a house is only possible if there are separate exits from it within a radius of 15 meters from the house structure. In addition, communication systems must be autonomous and not connected in any way with home systems.
Moreover, according to the expert, it is better to disguise the shelter For example, it can be placed on the side of a wooden outdoor toilet or tool shed. Typically, such structures are located in the garden among plants and trees, which makes penetration into the bunker most invisible to surrounding eyes.
Taking measurements
Before you start building a bunker , you need to calculate its area. Considering that a bunker - a shelter in case of a hurricane or earthquake - is not designed for long-term stay of people, you can limit yourself to 3 square meters per person, which will provide quite adequate conditions in case of danger. Thus, for an average family the area of such a room will be 9-12 “squares”.
Short term bunker
If the bunker is being built exclusively for short-term stays, in case of natural disasters, then the most rational solution is to use a septic tank made of impact-resistant plastic dug into the ground. Experts confirm that such a solution will be quite sufficient to wait out a hurricane, and on the other hand, it is a durable structure that will not require significant funds to maintain it in proper condition.
Moreover, such a design does not require any complex engineering solutions, be it ventilation or heating.
For a small shelter, natural ventilation is sufficient: essentially two pipes leading to the surface. Specialized air purification systems are also not needed a shelter
You can limit yourself to a standard dust-proof ventilation filter, which you can make yourself from gauze or fiberglass. Electricity supply, he said, may include connecting the facility to central networks and creating a reserve of batteries and accumulators for emergencies.
According to experts, it makes no sense to implement a serious heating system: the ground rarely freezes to a depth of more than 1 meter, while the shelter does not provide for long-term stay. In this case, it makes sense to limit yourself to a supply of warm clothes, thermal underwear and other hiking accessories.
On average, a high-quality septic tank with a capacity of 18 cubic meters will cost about 300 thousand rubles. Whereas land work does not require special preparation, and it is quite possible to carry it out independently. If hired force is used, the cost of such work is unlikely to exceed 50 thousand rubles.
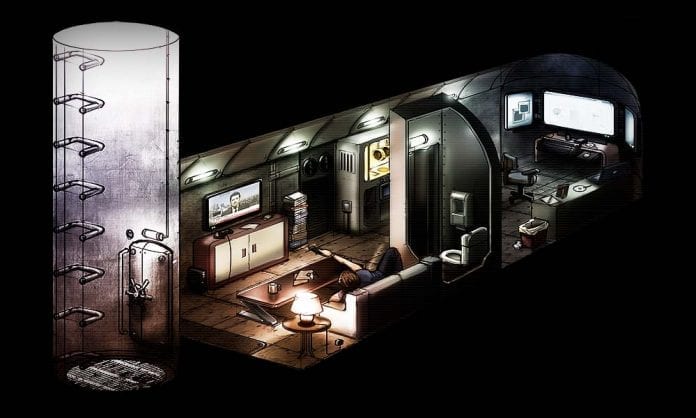
Long stay bunker
For those homeowners who are serious about security issues and want to build a bunker in which they can hide for a long time not only from bad weather, but also from chemical attack, leading experts in the field of constructing such structures advise building a bunker with an area of 12 square meters with a separate technical room in 2-3 square meters where the energy generator and dry closet will be located.
Construction of a shelter begins with a pit , and when digging , you need to take into account the thickness of the walls and the height of the foundation of the future bunker and, accordingly, make “allowances” for them. So, for example, the thickness of brick walls will be 25 centimeters, and the thickness of the foundation slab will be 23 centimeters. , the walls of the pit must be reinforced with logs and boards in order to avoid collapse of the soil or ground.
Before pouring the foundation slab, it is necessary to prepare the base by leveling and strengthening the bottom of the pit with 20-30 centimeters of crushed stone or sand. To enhance the strength of the foundation, it is better to reinforce the foundation floor with reinforcement and binding wire. After pouring concrete, it is advisable to wait 10-15 days for it to harden and become durable.
After the foundation has completely dried, you can begin building the walls . Experts recommend using white solid brick with masonry reinforcement every 3 rows with metal mesh or wire. The thickness of the masonry can be half a brick. The height of the masonry must be at least 2.2 meters.
The next stage is the construction of the roof . the roof covering from a metal I-beam, covering it on top with boards 4 centimeters thick and sheets of metal 2 centimeters thick. For roof waterproofing, for example, 2 layers of dense polyethylene are suitable. After this, the bunker is filled with earth. The entrance to the bunker is equipped with a tightly closing hermetic hatch door and a wooden ladder for descent. a pressure door yourself by laying, for example, strips of insulation from a rubber tube. In addition to the main entrance, the bunker must also have an emergency exit in case the main manhole is blocked. To waterproof the shelter from the inside, before finishing it is necessary to coat the walls and floor with waterproofing.
At the end, internal half-brick partitions are erected to create an engine room with a separate door. The estimated cost of such a bunker , built with your own hands, will range from 75 to 130 thousand rubles.
Engineering and household equipment
In order to survive in a bunker from 12 hours to several days, it is necessary to provide a source of autonomous power supply and an external ventilation duct with air filters to prevent toxic substances and dust from entering there. However, it is also possible to equip the bunker with an internal air conditioning system with air regeneration, but this will cost much more than conventional “external” ventilation. The cost of such a system starts from 100 thousand rubles. However, this will be the only significant line of expenses when building a shelter .
A generator running on gasoline or diesel fuel is suitable as an autonomous energy source system. Accordingly, the bunker should always have a canister with a supply of fuel for it, say, 10 liters. To save space, the sleeping places in the bunker are arranged in the form of bunk beds.
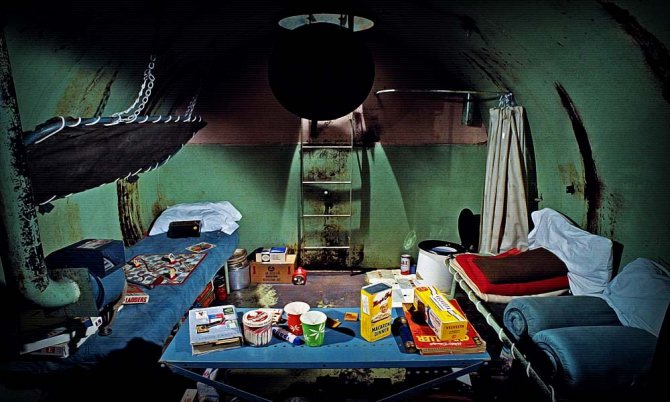
Strategic reserve
The main strategic reserve in the bunker is water; you need to store as much of it as possible - 200-300 liters. Food should be canned, and it’s also a good idea to stock up on various cereals - they are nutritious and have a long shelf life.
The first aid kit should include septic tanks, bandages, cotton wool, adhesive plasters, a thermometer, scissors, a rubber heating pad and gauze masks. Each family, in principle, can determine the set of medications independently, focusing on the health status of each member of the household, but it is better to include in the list heart medications, painkillers and drugs to normalize intestinal function.
Finally, in addition to warehouses with food and medicine, the bunker should have everything necessary to conduct “reconnaissance” forays to the surface. These items include gas masks, protective clothing and a flashlight.
Source