ogon
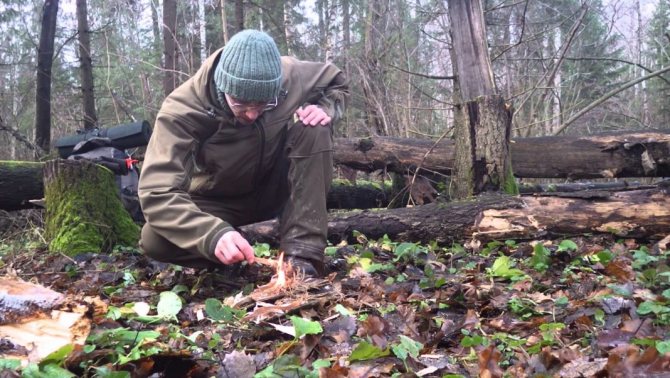
The ability to start a fire without matches or a lighter is invaluable, especially when faced with extreme survival conditions. Various circumstances can cause matches to become damp, a lighter to be lost or to run out of gas. In this case, making fire by friction can save you from cold and hunger, despite the fact that this process is very labor-intensive and lengthy. They knew how to make fire without matches (by friction) back in ancient times, since there were no other ways to keep warm, protect themselves from animals at night and cook the food they got.
Starting a fire by friction
How to make fire by friction: methods
There are two main ways to start a fire by friction:
- Method using a hand drill.
For this you will need: a base and a dry wood rod, tinder, and ignition material. You need to make a groove in the base where friction will be carried out with a wooden rod. Another groove is removed from this groove; coals and other friction products will come out of it. After this, a rod made of durable wood is installed in the groove. The friction of the rod against the base is carried out by rotating it with your hands around its axis, resulting in coals. After this, the coals need to be moved to previously prepared tinder, and when the flame starts, move to another material for igniting the fire (logs, branches, etc.).
- Using a bow drill.
The principle of operation is similar to the previous ignition, with the only difference being that a clamp is attached to the top of the rod, which allows it to be rotated more quickly without injuring your hands, the danger of which arises when using a hand drill. This is a more efficient way.
Making fire by friction: process technology
Before starting a fire, you need to prepare tinder, collect firewood, prepare a nest for coal, make a bow with a drill and prepare a wooden base.
Dry fibrous material is used as tinder: moss, lint from clothing, bird feathers and down, thin wood shavings. For firewood, you need to collect thin dry twigs, which can be found in dead wood, the lower tier of trees. Branches lying on the ground are most likely damp and damp; it will be difficult for them to catch fire. Green wood should be avoided as it does not burn well. The bundle of tinder should be wrapped in a denser material, such as leaves or dry grass. In this case, you need to leave a recess for coal and gaps for air ventilation.
The next step is making the bow, for which you need to choose strong, elastic wood. Once a suitable material has been found, a bow 30-60 cm long is made. It should be a thin, light rod, not too curved and at the same time rigid enough so that it does not bend during rotation. To make a bowstring, a cord, rope, or twine is used, which is attached to the bow so that it is slightly slack.
For the base you need to prepare a dry wooden board. To make it, you need to choose light and soft wood. Its length should be 30 -32 cm, width 5-8 cm, thickness 2.5 cm. Next, a drill is made at least 20 cm long, the diameter of which should be 2-4 cm. The lower end of the drill should be rounded, and the upper end should be sharpened with a knife .
For the spindle you need to make an upper support from stone or wood. The stone should fit comfortably in your hand and not be too small. It should have a notch and smooth edges. A support block can be made from wood using hardwood by drilling a hole to about the middle of the block with a knife.
The support should be such that the spindle rotates freely around its axis, while maintaining a stable position of the narrow end. To make the upper end less likely to wear out, you can lubricate the hole in the block with resin.
Starting a fire
Making fire by friction
You need to make a mark on the base where the wooden drill will spin. Then drill a recess in this place with a diameter equal to the diameter of the spindle and a depth of about 5mm. A hole is cut underneath for the tinder.
After this you need to burn a hole:
- The wooden base is placed on a flat piece of ground.
- With your left foot you need to stand on the base at a distance of 2-3 cm from the funnel. The second leg is bent at the knee behind.
- Hold the spindle with your left hand, and hold the bow in your right hand.
- The bow string should be looped at the top, pointed end of the shaft so that too much tension is not created. If it is difficult to tighten, you need to loosen the string.
- The rounded end of the spindle is inserted into the hole on the base, and a support block is held above it.
- You need to take one end of the bow and begin to rotate the spindle around its axis, pressing its lower end to the base.
- If done correctly, black charcoal will form around the drill and smoke will appear.
Then you need to make a chimney: you need to cut a V-shaped hole from the edge of the newly formed burnt funnel, not reaching the middle of the funnel. When the spindle rotates, coals are formed that will fall out through this hole. You need to place a flat base underneath to collect the coals; a flat wood chip will do for this.
After this, they begin to lay out the firewood as follows: they are laid at right angles with spaces between the rods for air circulation in the order tinder - kindling - fuel. In this case, the kindling is not placed on the surface of the ground, but on a bed of leaves or dry branches. You should also leave a hole for placing coals inside.
Now you need to turn the drill again on the base to get charcoal, gradually increasing the rotation speed. The coals will fall through the hole onto the tinder, which will soon begin to smoke. An indicator that they have formed will be darkening, redness or lightening of the tinder. Then you need to carefully remove the board, support the smoldering coals with air (with a wave or a gentle blow), gradually surrounding them with tinder. When the first flames appear, the burning tinder should be placed in the hole of the prepared kindling and the fire should be fanned.
The main mistake when using the friction fire method with a bow is that inexperienced tourists place the kindling material in the immediate vicinity of the friction point, hoping that it will ignite on its own. They do not take into account the fact that this will only produce smoke, and for a fire to start, you need to place the coals in the kindling material, fanning it.
Making fire from water - a hydrogen station from baking dishes
Hello dear readers.
Perhaps everyone knows that water consists of hydrogen and oxygen, and in this state, these elements cannot burn. But if you separate these elements and transform them into a gaseous state, then one of these gases can burn, and at a very high temperature. The author of today's homemade product made a small apparatus for extracting hydrogen from water using the electrolysis method, from ordinary baking tins, and connected a homemade gas burner to it. I suggest you familiarize yourself with the manufacturing process and the result of the work in this article or by watching the video.
Materials and tools used by the author.
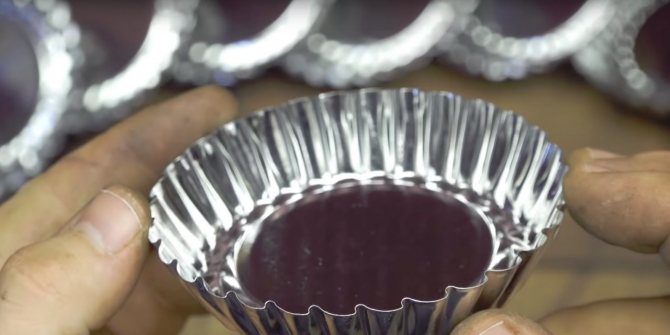
-Stainless steel baking dishes 20 pcs.
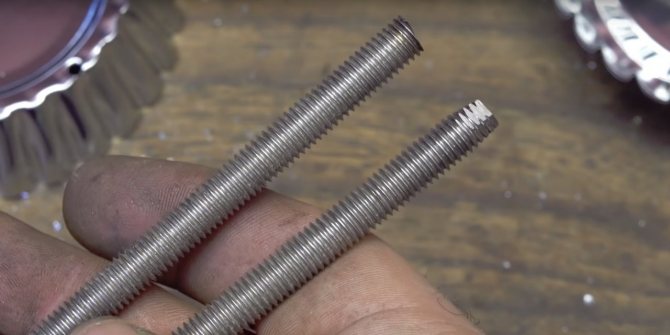
-M8 hairpin (80-90cm) -Nylon tube 10mm -Plastic container -Oxygen tubes 8mm -Silicone -Metal nozzle -Metal sponge for dishes -Drilling machine (you can get by with a drill) -Pipe cutter for plastic pipes (can be replaced with a stationery knife) -Block food Manufacturing process.
To begin with, the author purchased Chinese stainless steel baking dishes; they are excellent for extracting hydrogen from water. You can use ordinary stainless steel plates, you can even use other metal, but they will quickly oxidize and become unusable. And with such muffin tins, you don’t really need to do anything, just drill a few holes and that’s it.
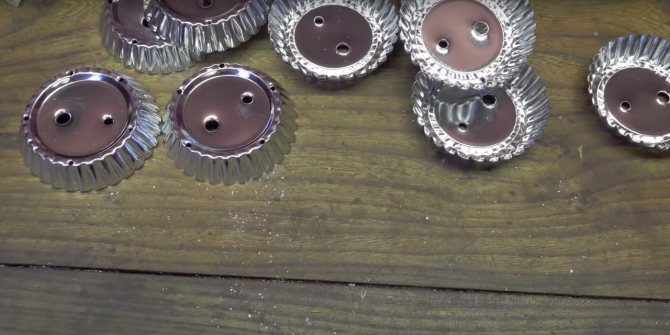
The author makes marks for future holes. There are two holes in the bottom of the mold, 10mm and 8mm, and along the perimeter there are 5-6 holes with a diameter of 3mm, small holes are needed for the unhindered passage of gas through them, to avoid the formation of air pockets, so you can drill a larger number.
In total, the author drilled holes in 20 molds.
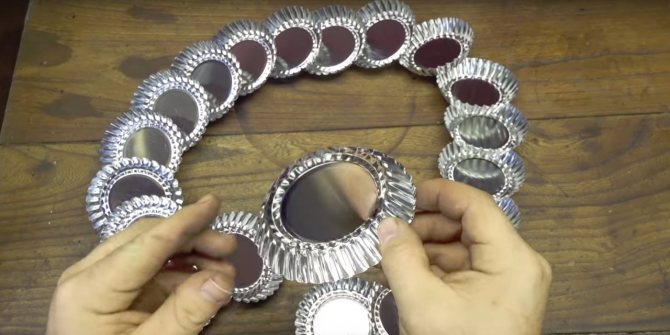
Now these molds will need to be put on two M8 hairpins, each about 40cm long. The author slightly sharpened the ends of the pins to simplify the process of fitting the molds.
These pins will serve as current conductors, one will be the positive terminal and the other will be the negative terminal. But the point is that each form will have to touch only one pin, the second should pass through it without making contact. Also, the forms should not touch each other. To do this, the author takes a piece of nylon tube and cuts 20 pieces of 10-12mm each. By the way, the author cuts the pipe using this cool pipe cutter.
We continue, the author inserts a piece of tube into the 10mm hole, the second hole remains free. This operation is performed with all forms.
Next, insert the pins into the holes of the first shape.
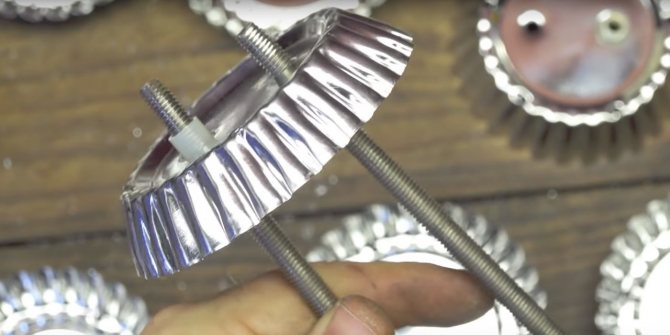
The next form must be put on the studs, turning it 180° along the horizontal axis, relative to the first form. In other words, the holes with a plastic tube inside should alternate, putting them on the right and then on the left. Thus, it turns out that one form touches the positive contact and the next one touches the negative one, then the next one touches the positive one again, and so on. I hope you understand)) In this case, the surfaces of adjacent forms should not touch each other.
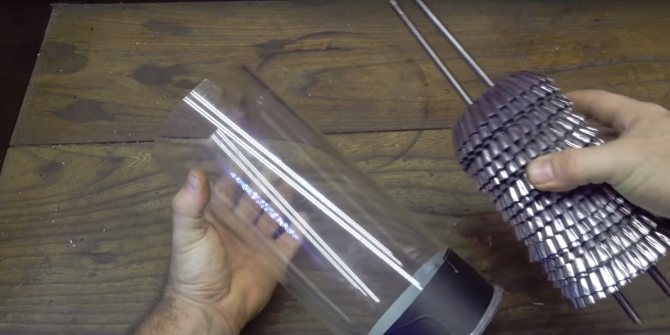
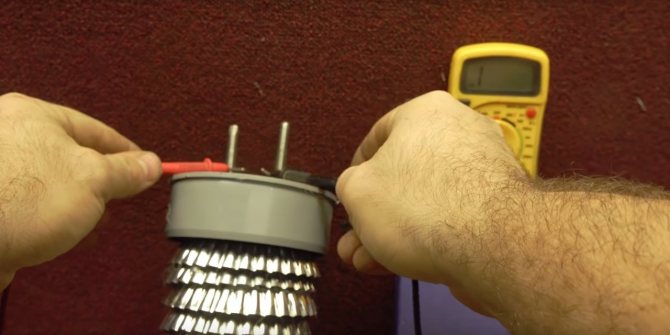
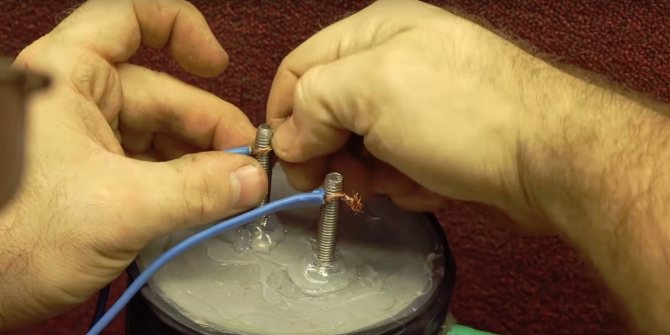
The author places the molds in the flask, and makes two holes in the lid for electrodes, 8 mm in diameter.
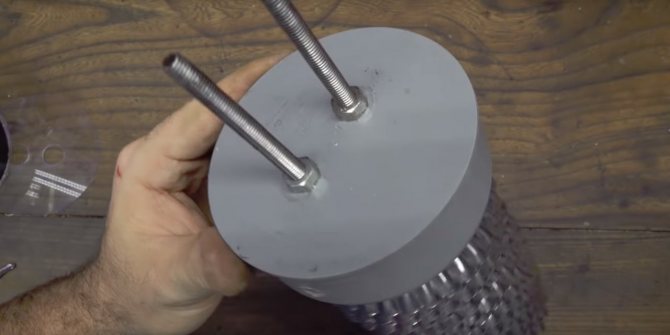
He screws nuts onto the studs, puts on the cover, lubricates the holes with silicone and screws two more nuts on top of the cover, thereby securing the cover to the studs.
Before assembling the flask, you need to check the contacts for the absence of a short circuit, the author checks with a tester, there is no short circuit. Great, that means all the molds are sitting as they should and not touching each other.
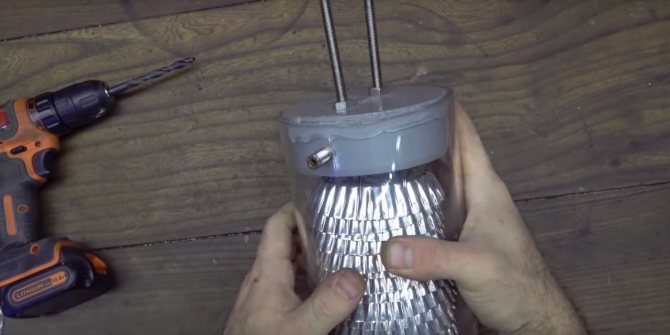
The author places the electrodes in the flask. But wait, where will the gas come out? The author makes a hole in the top of the flask. A piece of some kind of bushing with a thread is inserted into the hole, although the thread here will only get in the way (apparently there was no other one on the farm). The sleeve sits on silicone.
Now you can close the lid, of course, having previously coated it with silicone.
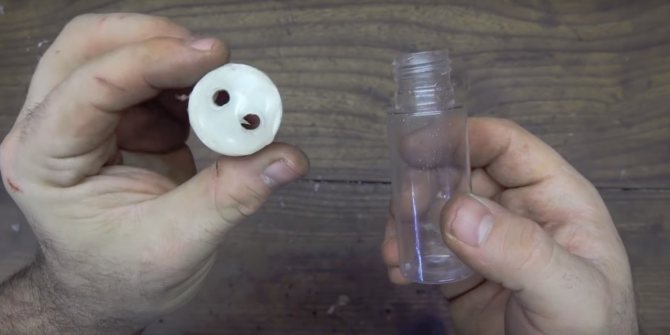
Now the author begins to manufacture a kind of safety system to prevent flames from entering the flask with the generated gas. To do this, he takes a small plastic flask and makes two 8mm holes in its lid.
Oxygen tubes are inserted into the holes. One tube is inserted so that it reaches almost to the bottom of the container; this tube will be connected to the fitting on the main flask.
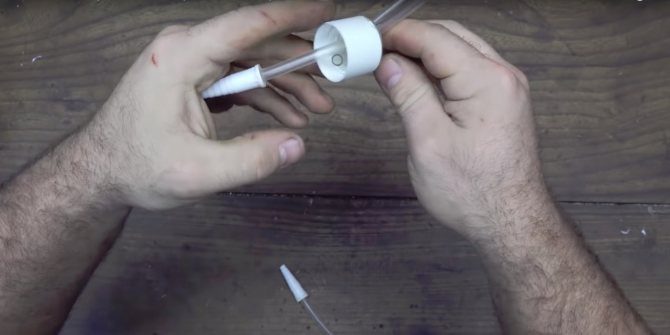
The second tube should be at the very top; from this tube the gas will go to the burner. You need to pour about ¾ of the water into this jar, but so that the water does not reach the top tube a few centimeters, and when bubbles form on the surface of the water, it does not get into the top tube.
The result was a security system in the form of a water seal. If the flame gets through the tubes to the main flask, it won't be fun.

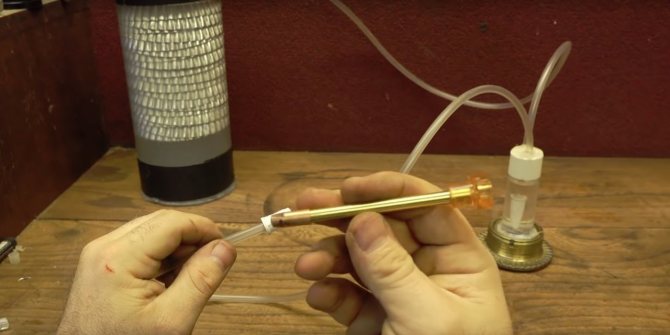
The hydrogen generator is almost ready, but we still need to make a burner.

Some make burners from a syringe, some from copper tubes, flattening one end of them. But the author already has a metal nozzle for some reason, and it is suitable for making a burner. It just needs a little tweaking.
In order to create additional protection against backdraft, the author makes a flame arrester. To do this, he cuts off a small piece of metal sponge (for dishes), rolls it into a tube and places it inside the burner tube. That's it, the flame arrester is ready. This flame arrester will also compensate for the unevenness of the supplied gas. Which will certainly be present due to the installed first stage of protection, a water seal.
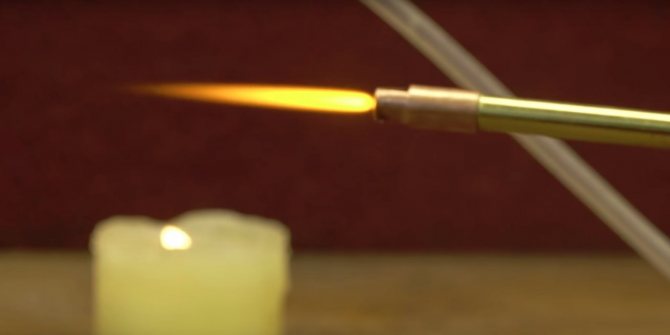
Now you can connect the burner and begin the process of hydrogen production.
A DC source, say a car battery or charger, is suitable for power supply. But the source power must be high.
The author has an old transformer with rectifier diodes, with a power of as much as 70 A, at a voltage of 5 V, and this is what he will use.
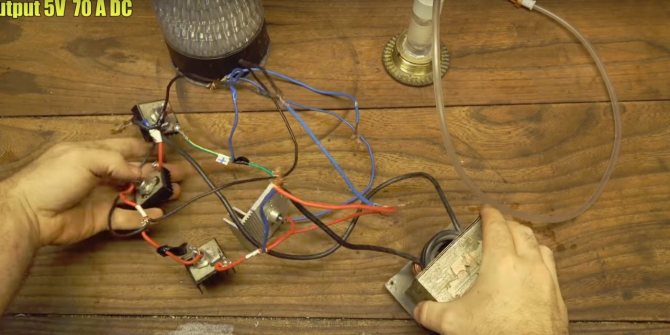
Connects the terminals, polarity does not matter here.
When the transformer is connected to the network, hydrogen bubbles instantly form on the surface of the molds.
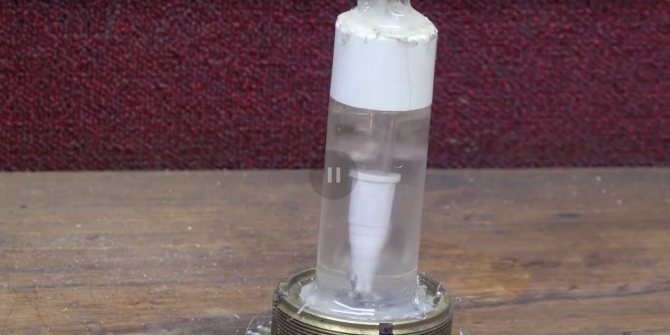
It's time to light the burner. The flame temperature is quite enough to burn through an aluminum can.
The flame also melts the strands of the copper cable.
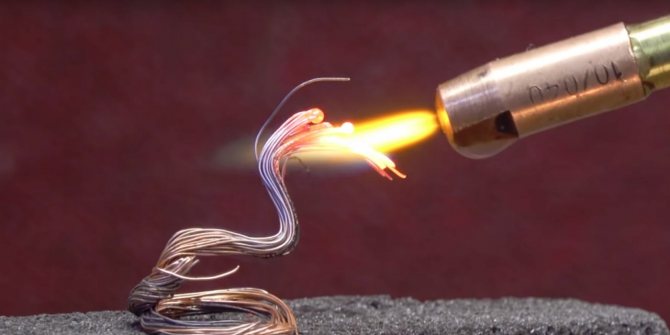
Glass won't hold up either.
All the best, see you again.
Become the author of the site, publish your own articles, descriptions of homemade products and pay for the text. Read more here.
Starting a fire by friction: other methods
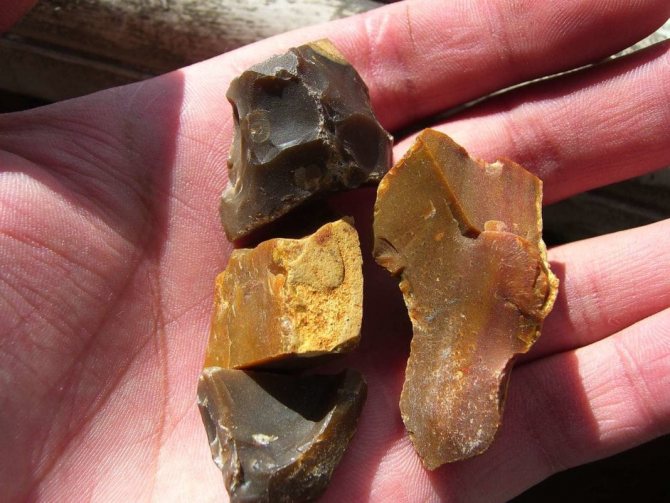
Fire with stones
In addition to using a hand or bow drill, there are several other methods of making fire using the friction method:
- You will need a regular nail and a die to drive it in. This needs to be done for several minutes, turning the nail around its axis. It will get hot enough to ignite the tinder.
- You need to make a small base with a split from pine. The tinder is placed there so that there is a little space left under the board. Next, you need to find a rope, it is better if it is made of natural fiber. You need to take it by both ends and begin to “saw” the wooden plank from below with quick movements. When smoke appears, it needs to be fanned to create fire.
- The easiest way: place a piece of cotton wool between two dry wooden planks and begin to rub them against each other. After a few minutes the cotton wool will begin to smoke.
A little physics
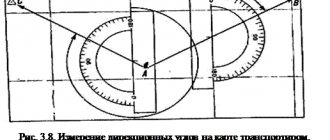
When a beam of light passes through a lens, it is concentrated at one point
. At the same time, the energy of the sun's rays at this particular point is amplified tens of times (the energy of each of the rays that is concentrated at this point is summed up). The temperature at this point becomes so high that flammable materials (their general name is tinder) begin to smolder. And in order to make fire, it is necessary to concentrate the sun's rays on tinder (dry grass or moss, a sheet of paper, birch bark, leaves, etc.). But not everything is so simple, because first you need to find the correct angle of the lens and select the appropriate distance between the lens and the tinder. And only practice will help with this.
Not only a magnifying glass, but also many other objects (not necessarily glass) can be used as a lens. After all, as the definition says, a lens is a transparent, homogeneous material that has certain properties.