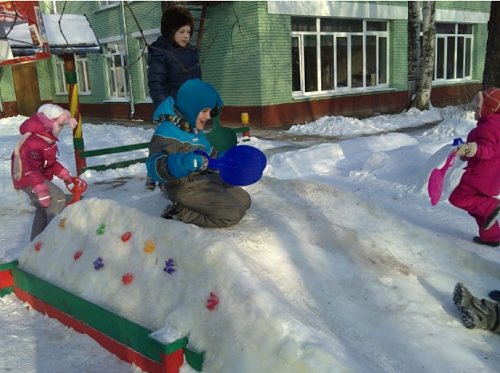
Winter has come, and our children disappear all day long on the street. They are happy about the first snow, because for them it is a fairy tale. It also includes downhill skiing, snowball fights and, of course, snow crafts.
Snowball is a good material for crafts. No matter what they sculpt from it, you can build a fortress with your children and have a snowball fight. Make your favorite cartoon characters out of snow, and they will delight our children.
This activity is fun and exciting and we will give you ideas for snow crafts.
What kind of snow is suitable for crafts?
- When is the right time to create crafts outside? Firstly, after a good snowstorm, there should be snowdrifts. Secondly, when the snow is not loose and molds well.
- Choose a place for your creativity with your child where the snow cover is clean. Then the crafts will have an attractive appearance. And it will be easy to sculpt individual snowball parts on them.
- What to do if the snow mass crumbles. The weather is not always suitable for snow sculpting. And the kids have long dreamed of making snowmen with you.
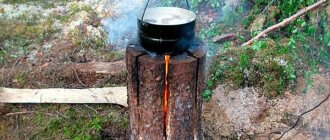
- Water will help us get out of this situation. Take a watering can with warm water and pour the snow, and then quickly rake it into a pile and compact it. Now the snow mass is ready for crafts.
- To make your crafts durable and not fall apart, try to moisten them with water more often. Then they will harden faster and not crumble.
Do-it-yourself fairy-tale house made of snow in the country
The snow house in the country will be a continuation of the theme of country houses for children.
First there was a tree house, then a hut and an ice palace, but now we decided to build something new using modern technology.
It is clear that this will be a temporary structure, quite simple and inexpensive, but the use of our knowledge gained in country house construction will help us make such a house comfortable, practical and even warm.
What is a snow house?
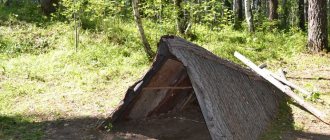
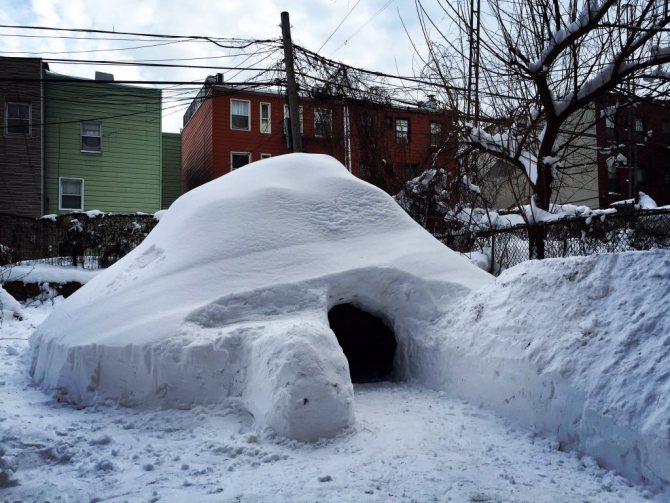
You can build something like a hole in the snow, a kind of tunnel that will end with a small expansion that forms a room. But this is only possible with a large layer of snow. In addition, such a snow tunnel will be damp and cold.
We decided to take a different path and make a snow house for children a little differently.
It will not be a structure made of snow alone. It will include a frame covered with a special material to contain snow. Also, the inside of the structure will be insulated so that children can stay there even for several hours without the risk of getting sick.
Building a fairytale house out of snow
You can build a house in advance, while the snow has not yet fallen, because if there is already 20-30 cm of snow cover on the ground, it will not be very convenient to work. Therefore, we start in advance, and if the snow has already fallen, then we clear a small area for the construction.
Preparing a site for a snow house
First of all, you need to choose a flat area so that the installation of the structure is as simplified as possible.
Next, clear the installation site, right down to the ground, and level the site if possible.
You can also determine the location of the construction of the snow house near the already finished building, for example, with one side resting it against the house. It will be much easier this way, and the snow will move better under the walls.
What will we build a winter house from?
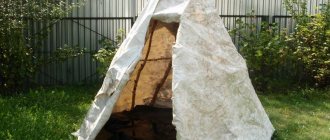
We will start with a frame, which we will assemble from wood. Next, you will need to cover the building with a material that will not allow wind, moisture and snow to pass through, for example, plastic film or reinforced greenhouse film.
It is strong enough and will withstand a layer of snow; the only question is how to distribute it evenly over the slippery oilcloth.
During the process of assembling the house, we will also talk about internal insulation, which is very necessary.
Installing a frame for a snow house
You need to install several pallets on the finished site, which will become the base.
Thanks to the air gap, the inside of such a structure will be a little warmer, and the children will not sit on the cold and damp ground.
After installing and securing the pallets, we install supports for the frame made of wooden beams. We need a small house, maybe only a meter and a half in height, and therefore we can use cuttings of timber from a previous construction site. There is no need to purchase again.
The frame is built on 4-6 supports, which it is advisable to install evenly around the perimeter of the structure, with equal indentations. There is no need to hammer the timber into the ground, you can only secure the timber to pallets and also tie them together.
The roof frame, which will connect all the component parts into one durable structure, will also serve as an excellent dressing. Now we will have a floor, walls and ceiling, or rather, a frame for these parts of the house.
Insulation and tightness
Since there will be snow on all sides of the winter house, as well as possible wind and quite severe frost, we need to insulate our building. Moreover, if some heating occurs inside, then it is necessary to prevent a massive release of heat, since the snow on top and on the sides of the building may simply melt. Therefore, it is worth thinking about thermal insulation, for which there are already several reasons!
We suggest choosing foam plastic, sheets with a density of 25, 50x100 cm in size, and 5 cm thick. You will also need to buy a container of polyurethane foam, which will hold the foam together and additionally seal the structure being constructed.
It is also advisable to lay polystyrene foam on the floor, which will become a good layer that limits the flow of cold inside. On such a floor, made of pallets and foam plastic, if you also put a mattress or several blankets on top, the children will be warm and cozy.
Increasing the amenities of the snow house
We recommend increasing the comfort of the winter house for children, since every day you are present at the dacha they will ask to play in it. This means that it should be relatively warm inside and definitely light.
Obviously no one will burn wood inside, but you can install a heater or a small oil radiator in the finished room. Even the smallest installation will be enough to keep it very warm inside. The source will warm up a room of 4-6 cubic meters in minutes, and the heat will not go anywhere, because everything is lined with foam plastic.
We recommend installing lighting inside as well. This could be a small lamp somewhere in the corner of the building, preferably with an economy lamp that the kids cannot get burned on.
But for heating and lighting we need electricity, which needs to be supplied at the stage of assembling the frame or installing insulation. An ordinary cable is enough, which must be stretched in a plastic corrugation.
It should be brought into the house or the nearest country house and connected so that you can turn off the power at any time.
You can make a cable that plugs into an outlet, or you can directly install it through a standard switch.
We all understand that the safety of our children is paramount, and therefore if there are concerns about electricity inside the snow house, we don’t have to take it there. In terms of lighting, you can install a small battery-powered lamp, which will be quite enough. But, however, in this case, there will be serious problems with heating. But they can also be solved.
For example, you can warm up the house with any heating unit by connecting it through a carrier, and then, after heating, turn it off and put it away. The resulting heat will last for some time.
Interior design of a children's snow house
We have already decided that it should be cozy and warm inside. This means that it is you who must create this environment. To do this, it is enough to hem the ceiling with the simplest and most inexpensive material, for example, even fabric nailed with staples.
But it’s better to cover the walls with blankets, as well as the floor itself. Now there will be another layer inside that keeps you warm and is also soft and pleasant to the touch.
A mattress should be laid on the floor, as a simple blanket may not be enough. Well, or initially think through better insulation, for example, lay the same polystyrene foam in several layers.
There is one more tip! Before covering the floor with a mattress or blankets, cover the foam with a sheet of plywood or OSB to avoid penetrating or denting the insulation. The material seems to be inexpensive, but every hole in it will lead to “depressurization.”
It remains to decide something with the entrance, on which we also suggest hanging a blanket. This will be enough to create an enclosed space.
Winter snow house: what's outside
We have already decided that our snow house is not entirely made of snow, and we have built a pretty good structure in which the kids can now spend time without distracting their parents. But a house made of snow must have snow, otherwise the fairy tale somehow doesn’t work out.
Therefore, if there is not enough snow outside, you can always take a shovel and sprinkle the structure. If there is a lot of snow, and the blizzard constantly sweeps it, then you don’t have to think about anything else.
The main thing is to try to do everything according to the rules - cover the insulated frame with plastic film and lay burlap.
It happens that the weather outside is too frosty, so something similar for children can be built inside a warm country house. It is clear that there will be no snow here, but no one is stopping you from creating a small hut in which children will be no less interested in playing. And snow can be replaced by the same foam chips or even cotton wool.
Source: https://DachaDecor.ru/detskaya-ploschadka/skazochniy-domik-iz-snega-na-dache
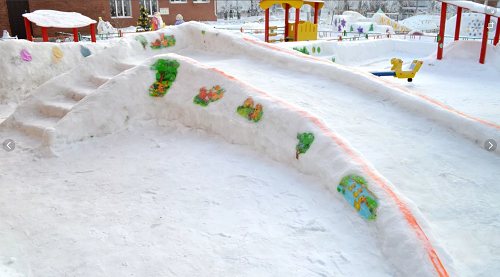
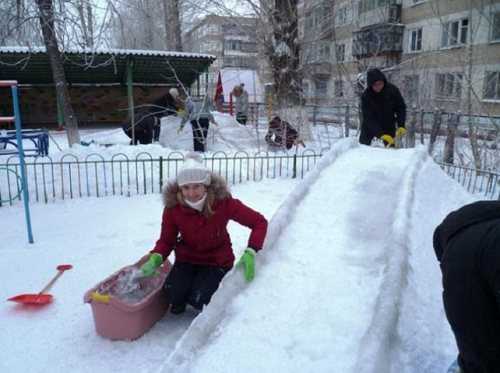
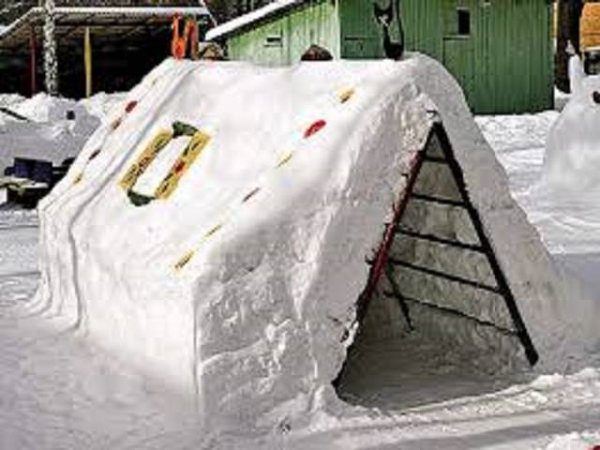
Snow slide
If you have a lot of snow in your yard, and if not, then take shovels and shovel it. The more snow, the higher the slide will be.
For small children we make a small flat hill.
And for older kids, we build it higher and steeper.
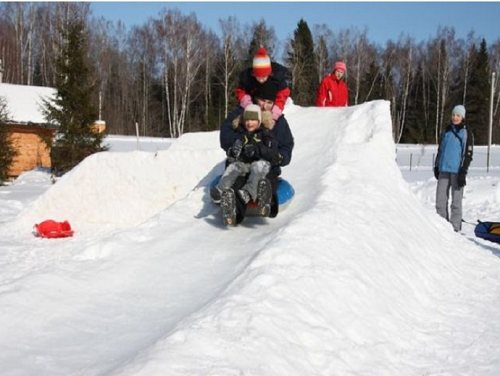
To make it convenient to climb it, we make steps. And for a safe descent from the mountain, we make sides along the edges of our hill, 30 cm high.
It will be necessary to water it several times and at the same time fill up the holes on the surface of the slope with snow.
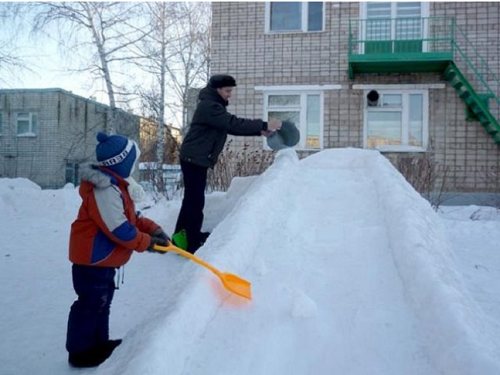
This slide will delight your children for a long time.
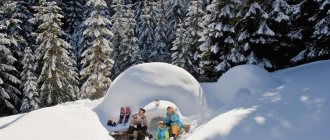
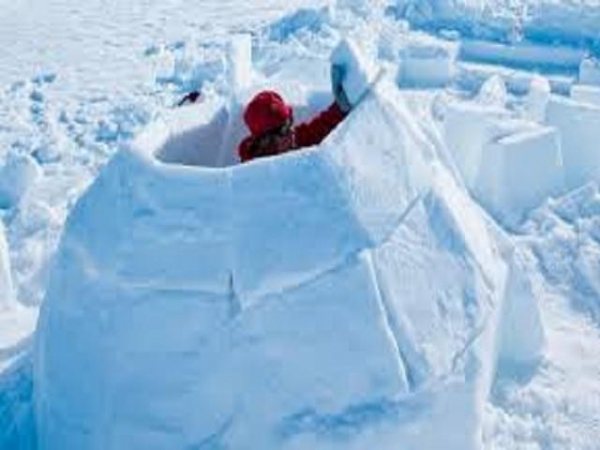
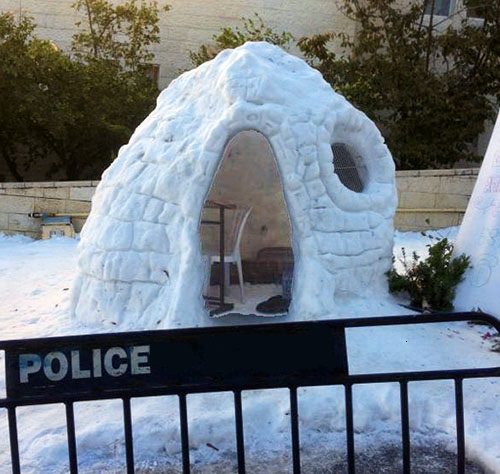
How to build an igloo with your own hands: winter master class
Before finishing a seminar at McGill University, Peter Sijpik gave his architecture class a rather unusual homework assignment. “I'd like to have a drink at the snow bar this Friday,” the teacher said, and his students immediately got to work. They had enough snow, ice and the right skills to build a snow structure for 50 people.
Sijpike is originally from Holland, where winters are usually warm and slushy, and therefore, when he moved to Canada, he was fascinated by the snow-covered expanses and blocks of ice. According to him, frozen water is an amazing, and also completely free, building material. He himself built several very impressive structures from snow, among which was even a model of the Roman Pantheon in a 1:5 ratio. The 10-meter structure, which also had a diameter of 10 meters, was made of 400 tons of snow! 125 students and teachers joined the work.
Now Sijpike will share the secret of how to build an igloo - the winter home of the Eskimos. According to him, the spiral structure along which the blocks of this unusual spherical house are laid is one of the best architectural solutions. There are many ways to build an igloo in your backyard, but here is the easiest and most reliable way:
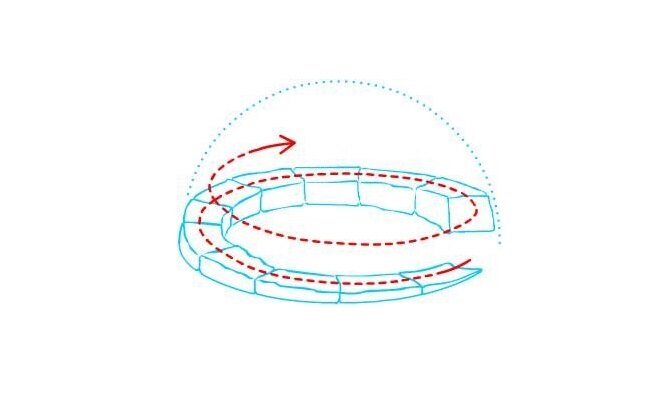
Brick laying scheme
1. Make sure you have enough building materials, that is, snow. According to the architect, many underestimate the amount required: you will need at least a layer of 30 centimeters, taken from the entire site. 2. Use the right snow: not the light grains that cover the crust, but the dense snow mass underneath.
Do it yourself
Don't panic: what to do if a mercury thermometer breaks
3. Draw a perfect circle. To do this, you can stick a stick into the center of the future circle, tie a rope of the required length to it and walk around the stick in a circle. For novice builders, it is not recommended to build an igloo whose diameter exceeds 3 meters - making a reliable dome for such a building is a very difficult task.
4. Use a mold to ensure the bricks are the same size. Traditional igloo blocks are 1 meter long, 40 cm wide and 20 cm high, but smaller bricks can be used for smaller igloos.
5. Next - styling. The blocks should go in a spiral, so the smartest thing to do is to make a small notch on each brick so that the adjacent brick fits into it. This will make the structure of the house much stronger. You will have to support some blocks until the structure is complete and their weight is distributed evenly - you can use regular sticks for this.
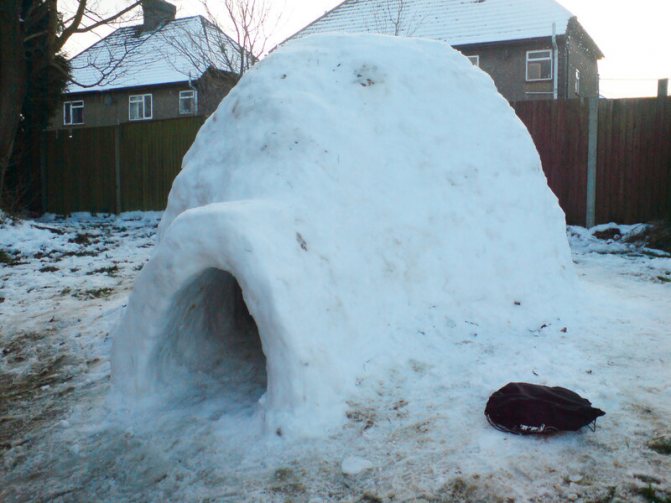
In the end you should have something like this
6. The higher the walls, the smaller and thinner the blocks. Don’t forget to take care of ventilation holes, otherwise there is a risk that there will simply be nothing to breathe in your luxurious ice house. The same wet snow will be suitable as cement for ice bricks - frost will grab it at night and the bricks will not collapse.
7. You can simply make a hole in the wall as a doorway, or you can build a small canopy so that the heat does not escape from the igloo so quickly. It is best to spray the lower bricks lying at the very base with water: ice is stronger than snow, which means the foundation will not crack under the weight of the building and it will not warp.
Snow fortress
After the slide, we’ll think about the fortress. Usually they lay out a wall of snow globes. The children will decide for themselves how high the fortress will be built. The main thing is that it protects from flying snowballs, and so that it is convenient to throw at your friends.
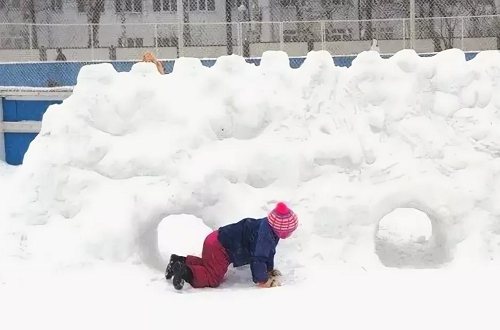
Older children do not stop at this option, and with the help of adults, they make bricks using boxes and build steep fortresses.
How to build a snow fort:
- roll a lot of balls;
- the largest clods will be in the bottom row, we lay them around the perimeter of the fortress;
- the second row of smaller clods so that you have the strength to lift and install them;
- the third row is even smaller;
- We fill all unnecessary holes between the clods with snow;
- We make windows in the walls.
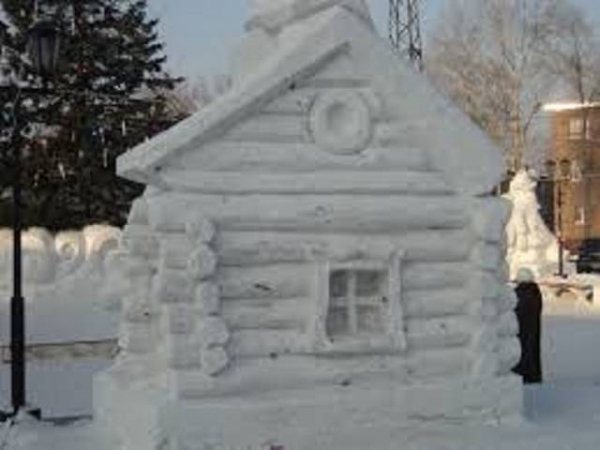
How to make a house out of snow: types, secrets, finishing photos
In the winter season, especially before the New Year, more than ever you want to decorate your area with something unusual and even magical. Everything around was covered with snow, so crisp and fabulously shiny. What if you make a house out of snow? This idea can be brought to life by gathering your friends in nature or while walking with children and having a lot of fun. In order to build a snow house, you don’t need much:
- snow,
- shovels,
- flat ground,
- warm and waterproof clothing,
- and, of course, fantasy.
If nothing comes to mind or you don’t know where to start, then you can watch a video on the Internet and choose the idea that you like best. The house does not have to be made only of snow; you can also use other materials - branches and wooden blocks for the frame, polyethylene film, polystyrene foam, etc.
Snow house in the country
Before construction, you need to decide for what purpose the house is being built. If it will serve only to decorate the site, then more attention should be paid to the appearance of the structure. And if you decide to make it for children, then first of all you need to pay attention to internal comfort and decoration.
Types of snow houses
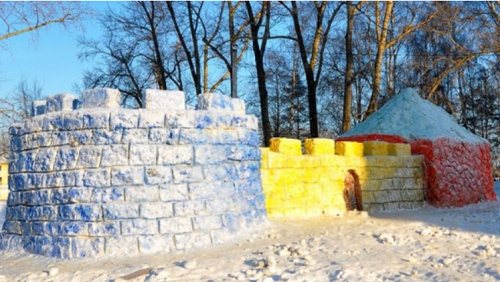
Houses made of snow can be anything: it can be a palace or a fairy-tale hut, a house, a hut or a fortress, or it can look like an igloo - the dwellings of the peoples of the north. It can be either free-standing or resting on the wall of the house. If the house rests on the wall of the house, then the space for creating a unique and original design becomes less than when the snow building is located in an open area. When a snow structure is located separately from other buildings, it can be decorated with an unusual porch, which will give the house a finished and holistic look.
Laying the walls of a snow house
- Well, what's the matter? First of all, we decide on the shape and size of the future house.
- Then we choose a place in your garden to build a house. It should be snowy and smooth. Then we clear and, if necessary, level the area on which your future masterpiece will be located.
- The next step is to draw a projection of your future house in the snow and clear the area of snow. For a more stable position of the house on a snowy base, you can place shields under it. This will ensure both the stability of the structure and additional comfort for the people in it.
- Next, we proceed to the construction of the walls of the house, its frame. This can be done in several ways.
- You can make walls from snowballs. We roll snow balls of different diameters and begin the construction of a snow structure. We start with lumps of larger caliber and gradually, as we lay out the walls, reduce their diameter.
- Or you can make a house out of snow blocks. To do this, cut out even rectangles measuring approximately 50x50x10 centimeters and lay them in a checkerboard pattern. For greater decorativeness, we trim the unevenness with a hacksaw or straighten it with a shovel.
Construction of the roof of the house
It doesn’t matter which masonry method you choose, the construction principle will be the same everywhere. First, we lay out the first row around the perimeter, which will serve as the foundation. It must be smooth and durable. Then we build smooth walls to a height of about a meter. If the house is made of lumps, then we lay out the walls vertically, but if it is made of blocks, then we make a slight slope of the walls towards the center. Then we begin to move towards the middle, thereby forming the roof of the house.
- After you have managed to make the walls, you need to seal the joints with snow.
- Then we cut out an arched hole that will serve as the entrance to the snow house. You can also cut a window on the side or a ventilation hole on top.
- You can melt the snow a little inside. Then the walls will turn out without joints.
- Or you can do it differently and insulate the house. This procedure must be carried out if children will play in the snow structure or if you plan to spend some time there. To do this, the frame must be covered with plastic film. You can additionally put foam or burlap on top. The doorway and windows can be covered with thick fabric.
The entire construction process is shown in the video below.
Secrets of building a snow house
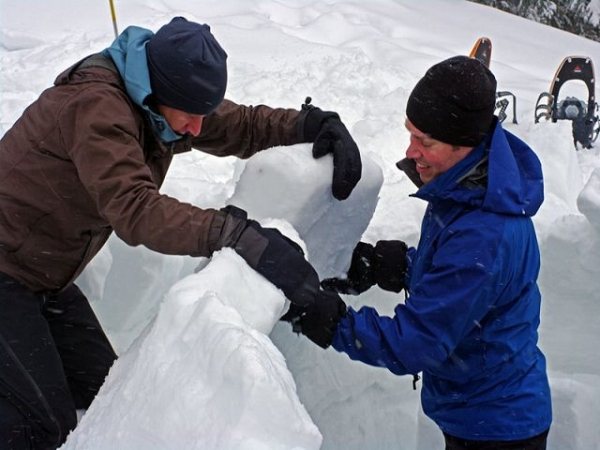
At least two people must participate in the construction process of a snow house. It is almost impossible to do all the necessary work alone. When constructing this work, there must be at least one person inside and outside. The person inside plays a big role in shaping the roof and also cuts the door for access to the outside.
Another option for a finished house
When forming blocks or balls, the snow must be carefully compacted. If the house consists of blocks, then to form a roof they must be made of a trapezoidal shape, and if from snowballs, then with a smaller diameter than for the walls.
After installation, it is better not to move the snow blocks. This will affect the quality of the constructed structure. All blocks must have three anchor points. If you follow this rule, the snow house will be durable and safe.
If your house has a round base and you need to form a dome, then you need to use a peg with a rope. Then it will turn out smooth and durable.
The last block must be laid and trimmed by a person inside the snow house.
And most importantly, never leave children unattended in it, even if you have no doubt about its reliability and safety.
Finishing the finished house
Well, all the main work has been completed. It's time to think about design. You can attach additional ones made from snow, use available materials (fir branches, cones, etc.), paint the house in your favorite color, etc. For interior decoration, you can make snow furniture, hang curtains on the windows, paint the walls... In general, who has enough imagination for what? And the video you shoot will be a pleasant memory of a fun and fruitful time spent.
Decorating the house
Yes, the work ahead will not be easy. But in return you will receive unforgettable emotions, hear children’s laughter and see admiration in the eyes of others - this will remain your most vivid memory of winter.
By the way, the video can also be posted on the Internet to share the experience with others and allow them to enjoy the beauty of your work. Whether to do this or not is still up to you. Good luck and enjoy your work!
Author: S. Rozanova
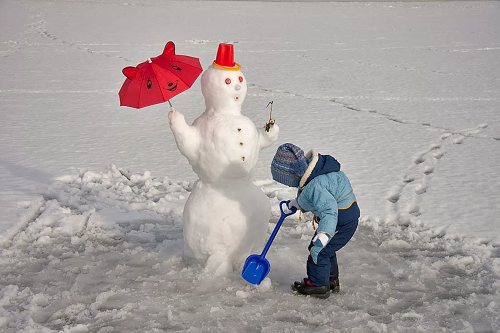
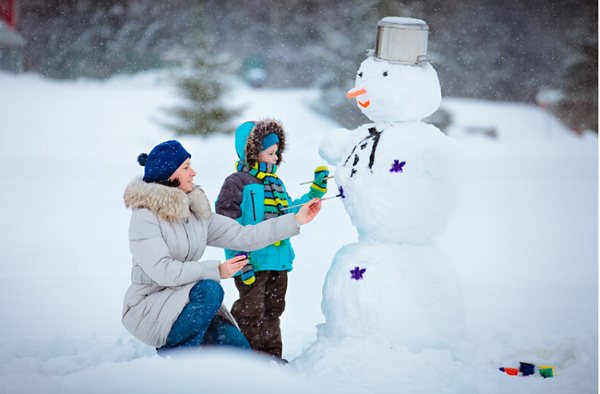
Snowman made of snow, Olaf
Let's start with an ordinary snowman.
Like any craft made from snow, we begin with the formation of snow. In order to make a ball and not another figure, we try to roll it in different directions. And the more we roll, the more massive the ball becomes. We correct all the unevenness on it with snow.
We make the second and third balls the same way, only we reduce the size in diameter.
When all the balls are ready, stack them one on top of the other and secure with snow.
We make hands from branches of trees and bushes. And for the feet, we’ll give you our old shoes so that our little snowman has shoes on.
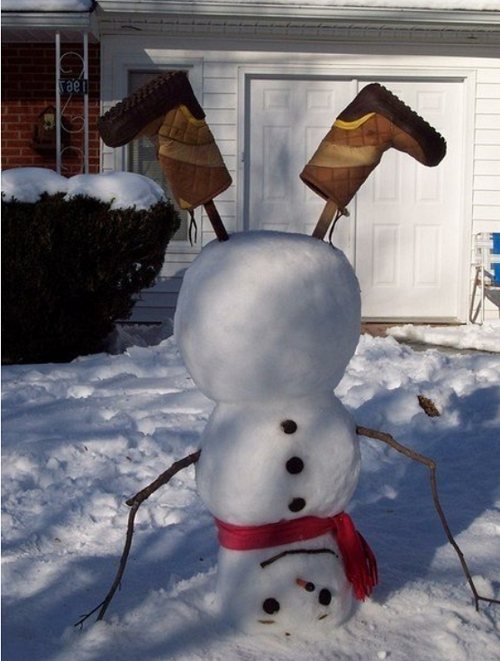
All we have to do is make the snowman's face:
- let's make a nose out of snow;
- for eyes we use buttons, coals, pebbles, bottle caps;
- We’ll make the mouth with rowan berries.
Watch the video on how to make a snowman and an angel here
Another kind of snowman, Olaf. It is made in the same way, only the head is sculpted in the shape of an elongated diamond.

Watch the video on how to make Olaf here
How to make an igloo out of snow: basic rules
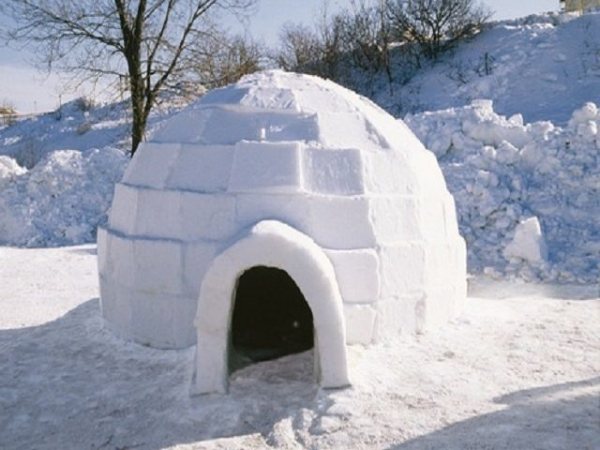
Snow igloo
Tools used to build a snow hut are a knife, a saw, a shovel. If necessary, you can use a regular iron bowl. It is necessary to take into account that the smaller the size of the home, the warmer it is, so you should not make it too spacious. If the group consists of more than 4-5 people, it is better to build two igloos. The gaps between the bricks must be filled with snow. While inside the igloo, you will need to remove your outer clothing to avoid sweating. It is advisable to use waterproof fabric as bedding inside. To cut blocks, you do not need to go far from the designated area, otherwise you may get tired. You need to find the nearest snowdrift at least 1 meter high and start cutting. In addition, you need to follow the basic rules:
- Construction of the igloos must begin before dark.
- Rebuilding the shelter is strictly prohibited at night, as is leaving it at this time of day.
- The entrance should be located on the leeward side
- Inside the shelter you should always have a shovel or other tool to clear the entrance of snow.
- Care must be taken when lighting an open fire inside a shelter, as there is a risk of carbon monoxide poisoning.
- You should not drink alcohol inside the igloo or sleep if you are in danger of freezing.
- The entrance to the igloo should be located below floor level. This will ensure stagnation of warm air, the outflow of heavy carbon dioxide and the influx of oxygen.
- Tip: If you build an igloo on a slope, you will need to spend less effort building walls because there are fewer bricks to form.
Christmas tree made of snow with decorations
Making a Christmas tree out of snow is not an easy task. I want to highlight each paw so that it doesn’t fall off and looks like a real green beauty. But for now we will teach our children to sculpt simpler Christmas trees.
There are several options:
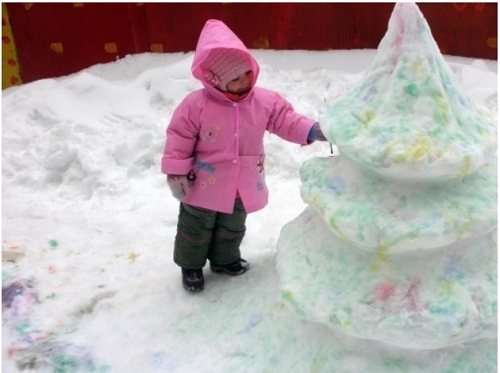
1 option
Because this option is suitable for our kids. We make our first Christmas tree using a children's spatula. Using a spatula, cut out lumps from the dense snow cover and fold them into a Christmas tree shape. Then pour water with green paint.
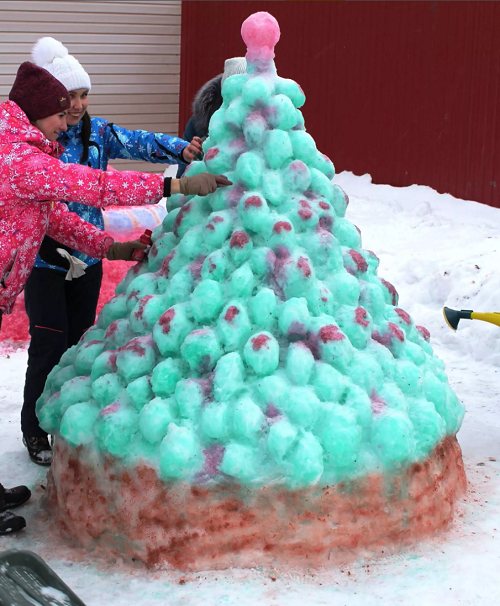
Option 2
The next option is also not very complicated and is suitable for older children.
This is where the help of parents comes in handy. We all shovel the hill together and form a cone, compacting it tightly.
We make tiers from the extra snow and glue them to our future Christmas tree. Therefore, as a result, we paint the Christmas tree in different tones of green paint.
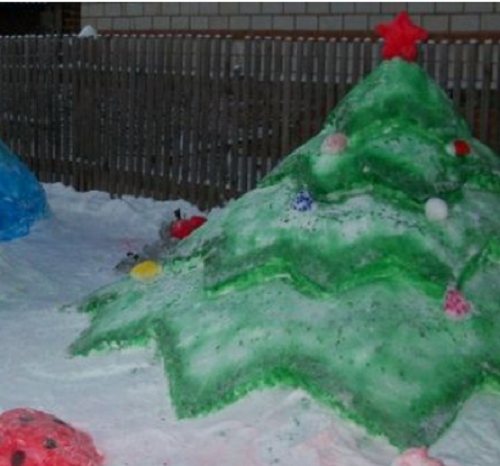
Option 3
A more complex option can be considered a Christmas tree made of ovals; if you use your imagination, you can get an almost real forest beauty.
We repeat all the steps in the same way as for the snowman. Just don’t roll snow balls, but try to make an oval shape.
We sculpt the top for the Christmas tree out of snow by hand so that we get a cone.
You can decorate the Christmas tree:
- Christmas tree toys;
- candy wrappers;
- serpentine, rain;
- ice colored figures.
What are igloos and how to build them?
Igloo is the name of an Eskimo hut built of snow. This is a human-sized dome, consisting of snow blocks and equipped with a low-cut “door”. An igloo can perhaps be compared to a haystack, suitable for spending the night. The inside of the igloo is also romantic, cozy and warm. To warm the air inside without wasting your own heat, just one small candle is enough. Eskimos know how to make entire villages out of snow, using some igloos as housing, others as utility rooms. It is known that Finnish snipers and mountain rangers of the German Wehrmacht were trained in the skills of building igloos. Defending the heights, they easily made frost their ally.
Sleeping in an igloo is much warmer and safer than sleeping in a tent. A snow shelter can protect a traveler from any bad weather and can withstand both blizzards and snow storms. During winter fishing, you can build such a hut right on the ice of the river, above the pit where the fattest and fattest fish spend the winter. If you make an igloo in the forest in the middle of winter, it will last until the end of March.
An igloo is built as follows: first, a flat area with dense and deep snow is selected. Then a circle is drawn along which the first layer of snow bricks will be laid. The diameter of an igloo per person is approximately 2.5 m. It is best to cut blocks 50-60 cm long, 40-50 cm wide, 10 cm thick. The weight of one block is from 20 to 40 kg, and to remove the block, it is trimmed about 10 cm on both sides and, bringing a shovel or knife under the base, swing it. If you don't have a shovel or knife, you can use a metal belt buckle. This, of course, will complicate the work and require a lot of additional time, but it will still make it possible to build some kind of primitive shelter.
The gaps between the laid blocks are covered with snow. When laying rows, each subsequent row is laid with a slight slope, so that the resulting hut will have a more or less regular dome.
At first glance, everything seems simple. Use a hacksaw to cut blocks of snow and stack them on top of each other in a circle. But building an igloo also has its secrets. First of all, you can’t build an igloo alone. Secondly, adjacent blocks should not touch with their lower corners - otherwise the snow house will collapse. It is better to leave a small triangular hole at the bottom of the junction of adjacent blocks, which can then be easily repaired. The vertical joints of adjacent blocks should not coincide. Several coincident joints turn into a long crack, from floor to ceiling, cutting the dome in half. It is also not recommended to move the snow block installed on the wall back and forth, as it will wear off and lose its original shape. It is better to place the block once, and then trim off the strongly protruding parts.
The most difficult thing is to make the vault. A properly constructed igloo is, in the language of geometers, an “infinite ellipsoid.”
With some skills, you can build a snow hut in 2-3 hours. And without them (by trial and error or without a knife and shovel) - in 4-5 hours.
To make breathing easier, a ventilation hole is punched in the dome. Opposite this hole, a bed of snow blocks is arranged. And last of all, a door is cut out in a snow house. Moreover, this is done by a person who is constantly inside the igloo during construction. He's the one who lets everyone in!
It’s interesting that people abroad really like to compete in building Eskimo igloos—Canadians and Finns, for example. The West's desire for maximum comfort at work has had its effect here as well. “Capitalists” are not interested in a simple hacksaw. They prefer to use the so-called IceBox Igloo Tool. That is, a set of tools for building an igloo. The case is equipped with measuring and fastening devices, and even a special frame for squeezing out snow bricks. Even loose snow is used - it is easily compacted into the frame. This thing costs one hundred and eighty dollars, and it comes with a laser disc with video tutorials. You came, opened your suitcase, and got to work. Distributors claim that this same “icebox” speeds up work almost twice.
In Russia, such competitions are rare. In this regard, my hometown Tomsk is a leader. The “Golden Igloo” and “Silver Igloo” competitions have been held annually in Tomsk for 10 years.
Building an igloo is not just an active holiday. This is the romance of the North, this is one of the ancient skills of the art of survival. Just think how great it is: to climb into a cramped but very cozy snow hut, made with your own hands. Groaning and elbowing each other, pour thick, steaming tea from a thermos... And then, burning your lips and fingers on the steamy mug, plunge into dreams: “Here we are, brave and courageous... Here is our igloo, the dearest, most reliable place on earth. And all around - darkness, blizzard, hundreds of kilometers of snow, and not a soul..." Romance!
Well, the igloo is ready. They say that if you wait until dusk and light a candle in the igloo, the whole house will sparkle with millions of lights. The polar explorer Rasmussen (not to be confused with Amundsen) called the igloo “a temple of sunny joy in the white silence of the desert.”
Tags: snow, north, safety, recreation, ice, igloo
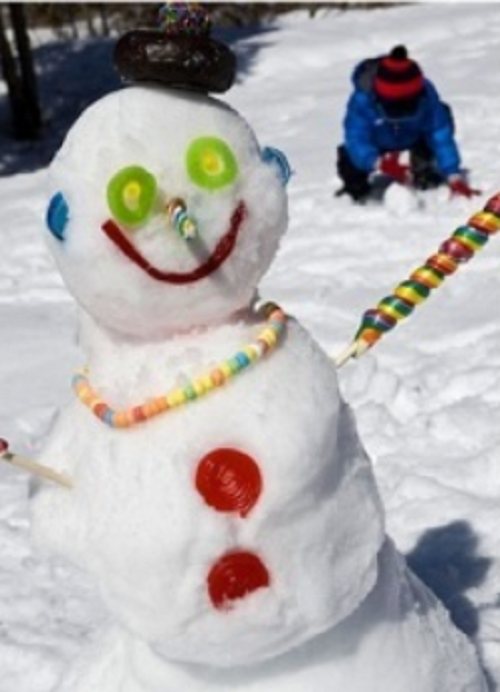
Snow bun
For younger children, it will be interesting to make a hero from a fairy tale, a kolobok, with your own hands.
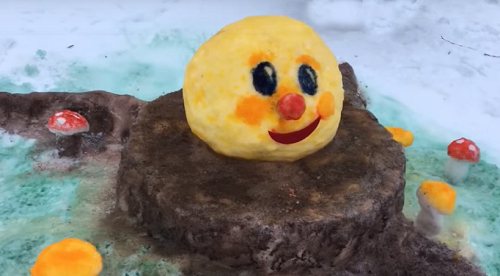
To make a bun, we also need to roll a ball. Its size depends on the child’s wishes; the larger the ball, the larger the bun.
When the child rolls the ball, help him make the ball smooth and beautiful by leveling and smoothing out the holes in the snow.
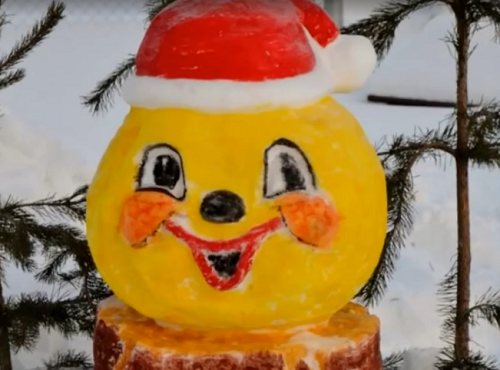
Now we give the child paint and a brush. And we watch how the fairy-tale character comes to life.
Smeshariki made from snow
For older children, we suggest making smeshariki.
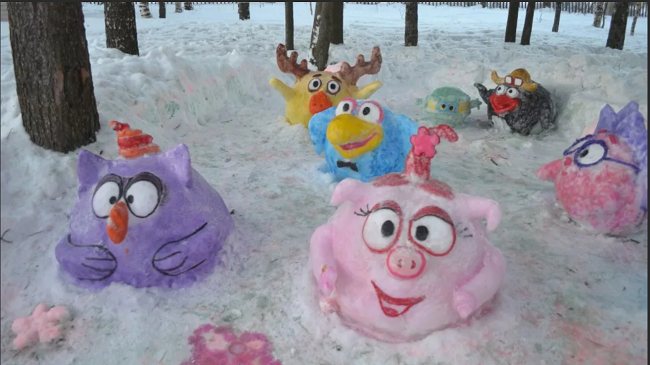
They also have the shape of a ball, but Smeshariki have arms, legs, ears and horns.
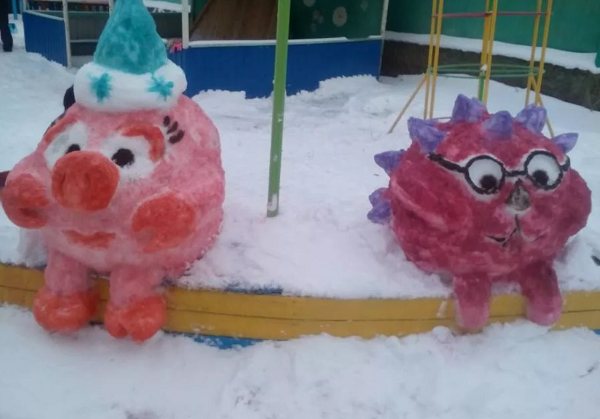
To make a cartoon character look authentic, it is advisable to have a photo or a child’s drawing.
Snow Octopus
This representative of the deep sea will appeal to children of all ages. On the one hand, it is easy to sculpt, but more complex options can be offered for older children.
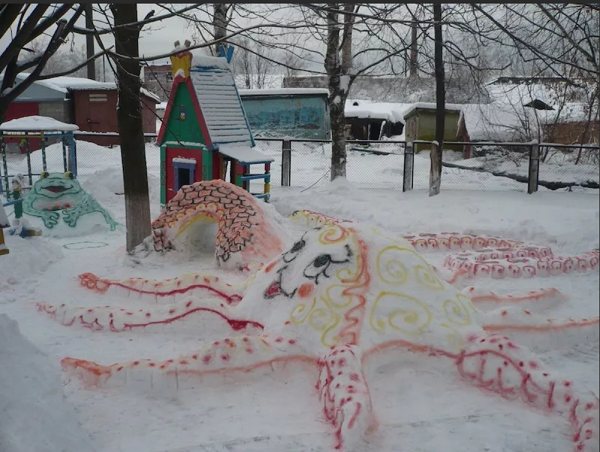
To make the body of an octopus, let's collect more snow in a pile. And when you get a slide, form the body of an octopus. And now we lay out eight tentacle slides from the octopus’s body.
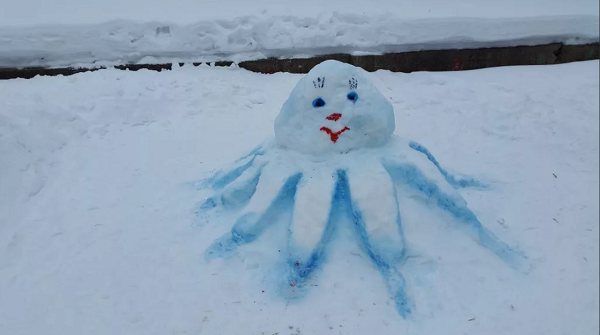
And when the body and tentacles are ready, you can decorate it with colored snowballs and paint it with paints.
Frameless snow figures
Such figures are created exclusively from snow. This method is used when sculpting low figures, no more than a person’s height, as well as a solid form without individual elements (spread wings or raised arms - this should not happen).
If you want to create several figures at once, then the snow for them needs to be collected in advance. It needs to be collected over several weeks, for which the snow masses are raked with a special shovel into formwork or into another suitable container. You can collect this snow as a group, together with your children. This will help prepare you for the fun ahead. Snow that has been compacted for some time becomes more durable, so it becomes much easier to work with.
To understand whether snow is suitable as a material for creating figures, you should press it from above with some sharp object; if the point easily enters the mass, this means that the snow is not yet ready for sculpting. When creating any craft from snow on the kindergarten site, you must always remember that the snow for it is only completely clean, without excess dirt and debris, otherwise the figure will be unattractive, and individual parts on it will be very difficult to sculpt.
Creating individual figures will help collect snow before work. To do this, as when sculpting a snowman, the snow rolls into large balls, which are then placed on top of each other. This game will help to captivate the whole class or kindergarten children. Supplement the narrowing areas with snow, if necessary. You can collect it using this method only if it is quite sticky.
If the snow has a crumbly form, then it can be made sticky; to do this, you need to pour water on it, quickly rake it into a pile with a shovel and squeeze it well, in this case the snow mass will quickly set under the influence of low temperatures and become denser. You can also shovel sticky snow into the formwork.
When the block is ready for work, they begin to shape it. To do this, you need to use a small tool - a spatula , grater or scraper. If they are not there, then you can use improvised objects, you can first take a wooden spatula from the kitchen and a knife from home. If the snow is not very hard, then you can start working with children’s sandbox sets, but in this case you need to do everything carefully, if the snow is too hard, then the fragile plastic may break as a result, which will only cause the child anxiety and frustration.
At this stage of the work, a model of the figure made at home or a drawn portrait will be very useful. Details should be sculpted from it, as from a model. To begin with, a general outline of the future figure is created, and then all the main details are completed.
There is no need to be very upset if something goes wrong, since snow is a material that helps to quickly restore the desired part of the figure, as well as redo an accidental defect.
Ladybug made of snow
It happens that in the middle of winter, children suddenly remembered summer. And then we propose to make a ladybug.
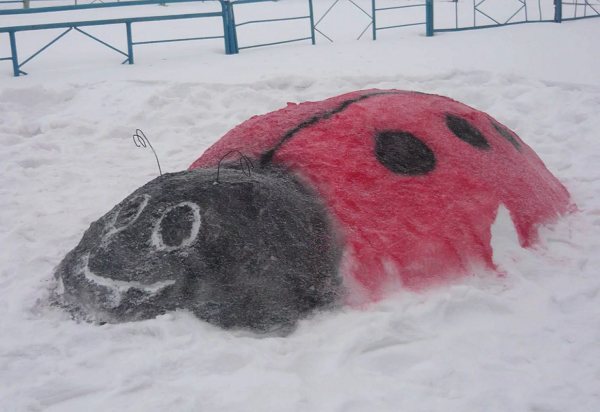
This craft is not complicated and a younger child can handle it.
What you need to do first is pour a pile of snow. Next we form a half ball, now compact the snowball thoroughly with a spatula.

We highlight the head and wings of the ladybug with indentations or simply draw it with paint.
How to make a dog
Before starting creation, you need to accurately determine the body size and location in space of the desired structure, think through all the details of the snow dog’s appearance and create a model of the structure on a sheet of paper .
If you want to create a dog lying on the ground, then:
- shovel the snow so as to design a lying dog;
- moisten the collected mass from a watering can;
- roll a small ball and place it in the place where the planned head of the snow animal will be;
- Give the figure the features of a dog, special attention should be paid to the ears.
There are two methods for sculpting large snow structures. This:
- from wet snow;
- by rolling small balls.
The second method is most suitable for sculptors who have little knowledge of sculpting itself. To do this, you need to roll two balls and process the structure to give it common features with a dog.
When using the first method, you need to thoroughly process the material before sculpting:
- create a mountain of snow and moisten it with water;
- let the mixture sit in the cold for several days;
- repeat the steps until the structure reaches the desired height;
- remove excess snow and create dog features;
- you can add additional colors or highlight the details of the appearance in a different way. For example, insert eyes in the form of coals.
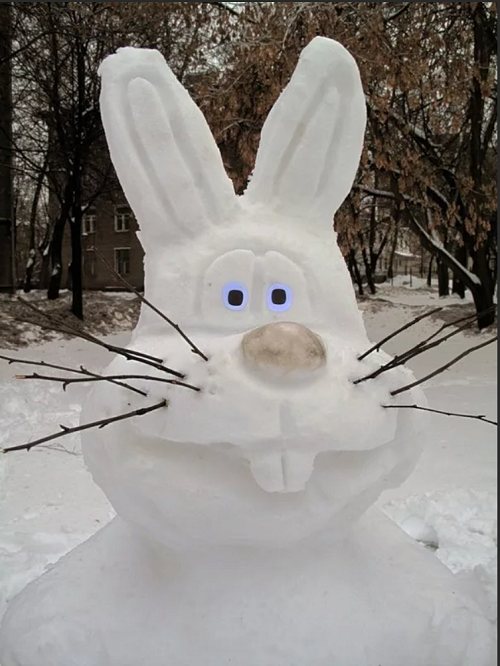
Snow hare
Making a hare will be interesting for kids. There are several options:
1 option
We sculpt a hare according to the principle of a snowman, in the same way, but from two snowballs.
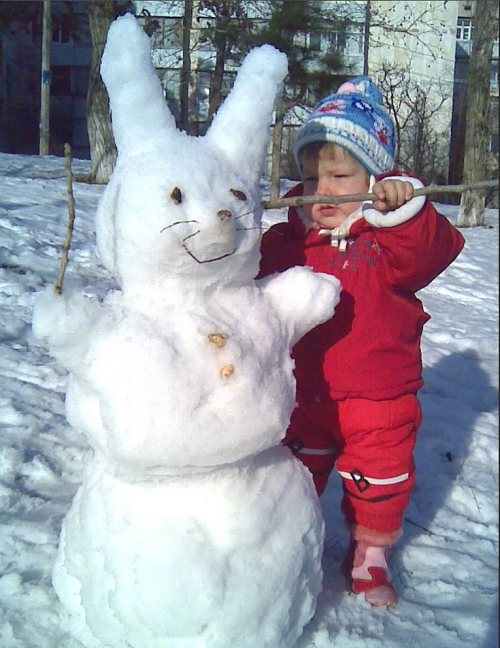
We make the body elongated. A smaller head with bunny ears. We attach a mustache made from twigs to the muzzle. For the eyes we take pebbles or beads. We draw the mouth with paints or lay it out with small twigs.
If you have carrots, give him a treat.
Option 2
While playing in the snow, we make a hare in a tree.
To do this, we arrange a competition to see who gets into the tree.
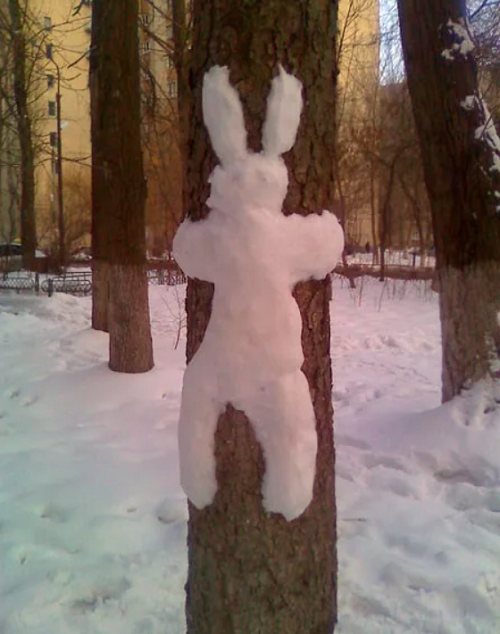
And then, when enough snow sticks to the tree trunk, we make a hare out of it, adding or removing excess snow.
Construction work - where to start
- We clear the area. We level the surface on which our snow structure will be located;
- We draw a projection of the building on the ground. Construction, like any other, starts with a “foundation”. It is very important to ensure sustainability. You can take wooden pallets and make a base from them;
- The next step is to build the frame. It is a desirable but optional element. This is perhaps the most important part of the work. Along the proposed wall of the house, with the same indentation, you need to place supports and firmly attach them to our base (if this is impossible, stick them into the ground);
- Next, you need to fill the frame; again, this can be done in several ways. For the first one, let's roll up more snowballs of different sizes. The big ones will go to the bottom, the smaller ones will go to the top. We place the lumps along the drawn line, fold the rest one by one on top and compact;
- Or you can do things differently by insulating the house, making it suitable for children to play in any weather. Insulation is done as follows. It is necessary to cover the frame with polyethylene, put polystyrene foam and cover it with burlap on top. Burlap is needed to evenly distribute the snow over the surface. If the insulation does not hold as well as it should, try securing it with polyurethane foam. And it’s just great if the floor in the house is also insulated. Doors and windows, if any, are covered with thick fabric or polyethylene.
Hedgehog made of snow
We were making a bun, and the child wanted a hedgehog. Well, if we add spines and a muzzle with a nose, we get a hedgehog.
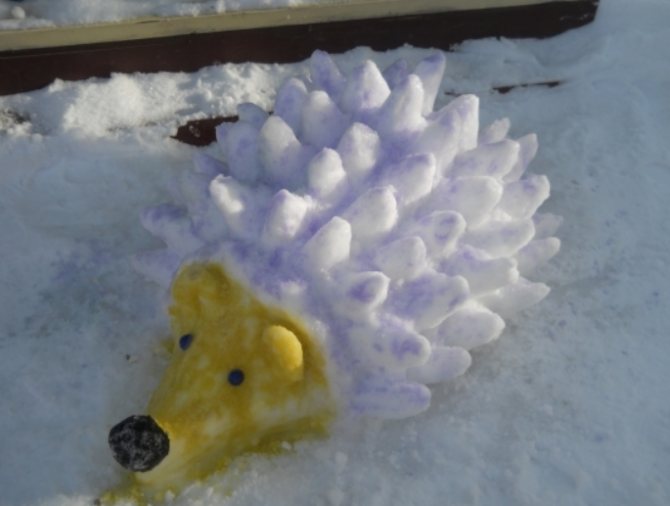
We make spines from sticks or glue snowballs molded into a cone shape.
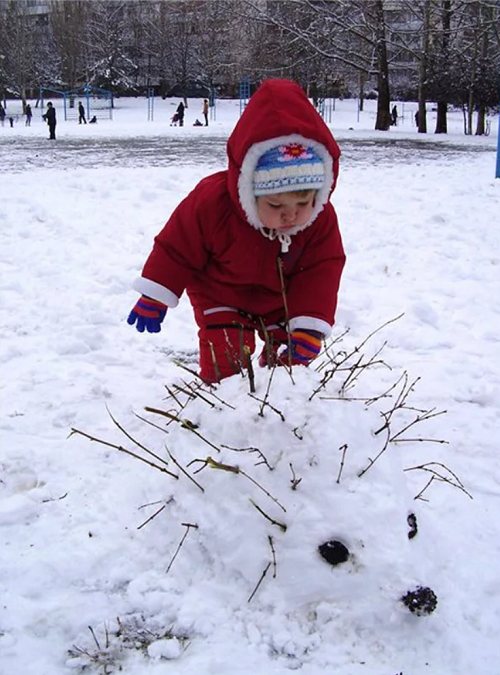
We draw the eyes and nose with paints.
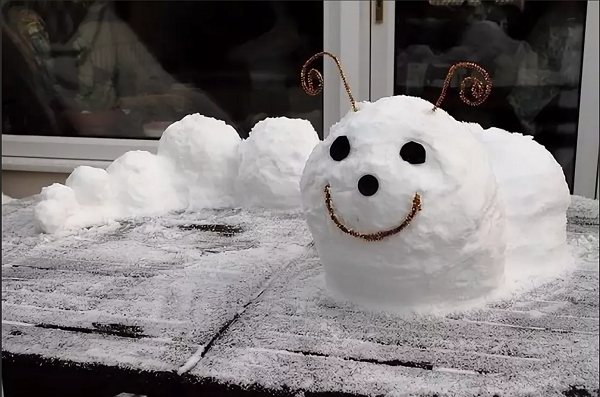
What crafts are made from snowballs?
We made a lot of snowballs, but we were already tired of playing with them.
Then let's make a funny caterpillar. We lay out and at the same time connect the lumps one after another and get a caterpillar. Now all that remains is to make her horns from wire, and her eyes from buttons.
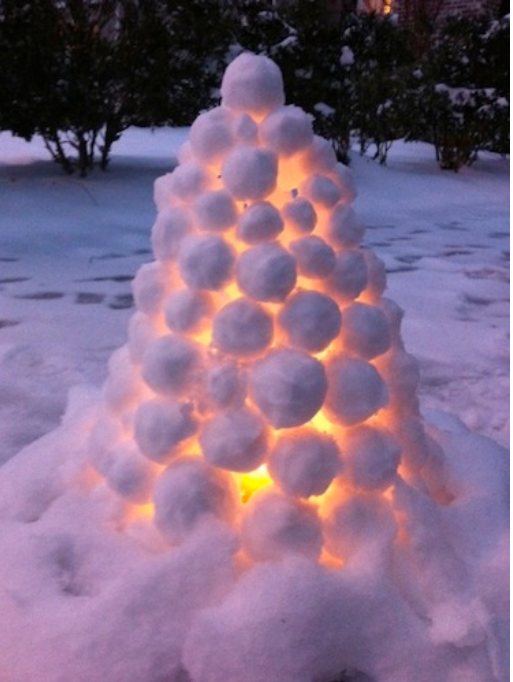
And when it gets dark in the evening, snowball lanterns will come in handy. To do this, we make a pyramid and place a candle inside. To make it convenient to change candles, remove one snowball from the base of the lantern.
What paints to use for snow crafts
A craft made from white snow pleases the children. And if you add colors and decorate the crafts, then there will be no limit to the delight.
What kind of paints are best to use for coloring? Of course, watercolor is suitable for this. Gouache is also suitable, but when the snow craft starts to melt, then the children, playing with it, will get stained with paint.
We dilute the watercolor in water and pour it into spray bottles. There is another option, if you don’t have a spray bottle at hand, take a plastic bottle and make a lot of holes in the lid.
What crafts do children make from snow, watch the video
What types of snow houses are there?
It could be a hut or a fairy-tale palace, a fortress, a hut, a gingerbread house, a dungeon, or, in the manner of the winter refuge of northern peoples, a simple igloo. There are houses either free-standing or leaning on the wall of a house or adjoining building. In the second case, the construction process is greatly simplified, but there are not many options for appearance. The simplicity of the design solution is offset by an abundance of decorative elements, for example, a porch will make even the most extraordinary house unusual. So, let's get to work!