If you don’t want to buy an expensive crossbow (and prices sometimes exceed $1000), you can make a crossbow with your own hands. It's not as difficult as it seems at first glance. The design of the crossbow is quite simple. A crossbow can be made from what is at hand, replacing missing materials with similar ones. A homemade crossbow is quite suitable for target shooting.
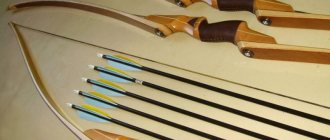
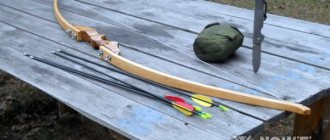
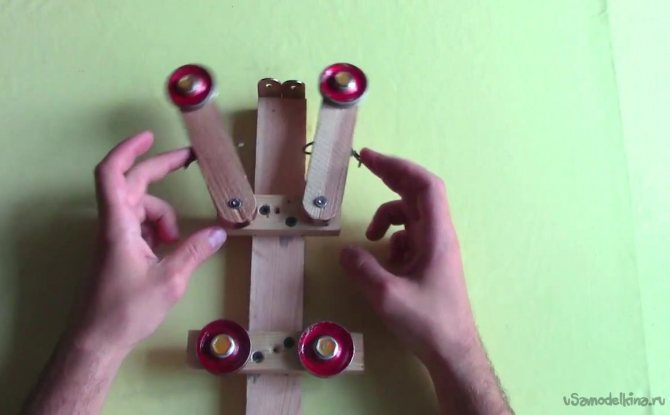
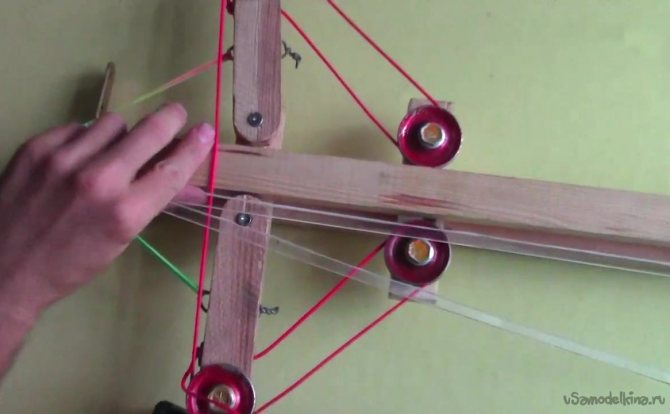
General view of a crossbow that you can make with your own hands according to drawings
The design of this crossbow uses the developments of manufacturers in the field of weapons. The drawings show a crossbow of a block design. If you follow the instructions and observe all the dimensions, you can make a high-quality and good crossbow with your own hands, even at home
General diagram of a homemade crossbow assembly:

To begin with, it is advisable to carefully study the drawings of the crossbow and begin assembling it yourself. Making a crossbow with your own hands is not an easy task. But this increases interest in work! After all, a homemade crossbow can bring great joy and respect to the performer.
Crossbow structure: stock, shoulders, butt, trigger mechanism, sighting devices, block system. To make the stock, natural wood, solid or laminated timber, mainly hardwood, is used. The exact dimensions of the crossbow can be seen in the drawings. You choose the shape of the crossbow yourself, guided by the convenience and ergonomics of the stock and the desired image. When choosing, you must also consider whether you can make such a form correctly.
Vacuum crossbow
A vacuum crossbow uses atmospheric air pressure to fire. The bowstring of a vacuum crossbow has no lateral movement, and the elastic vacuum element never “gets tired.” Without power consumption, such a model can lie in a charged position for several days.
use a vacuum crossbow at temperatures from -40 to +70 degrees. For this purpose, an experiment was carried out: the weapon was left for some time in frost more than 20 degrees. A number of shots were then fired from it. This temperature did not in any way affect the functioning and power of the weapon. In addition, such a weapon does not cause harm if the bowstring breaks. And if an emergency situation arises, then to remove the tension force of the bowstring (discharging the weapon), you just need to unscrew the screw, which is located in the vacuum chamber plug.
Technical features
With a tension force of 62 kg and a projectile weight of 30 grams, the vacuum crossbow fires a shot at a distance of more than 300 m. If the projectiles have a mass of 52 g, the shot range is more than 250 meters. With special projectiles that have a mass of 55 g, from a distance of 50 meters you can pierce a sheet of steel whose thickness is 2 mm.
The convenience of this crossbow model is that the string can be installed both at home and in the field. And when using a vacuum crossbow, you do not need to use any additional pumps to pump out gases. Making a vacuum crossbow with your own hands is quite difficult, but if you have the necessary knowledge and skills, it is possible.
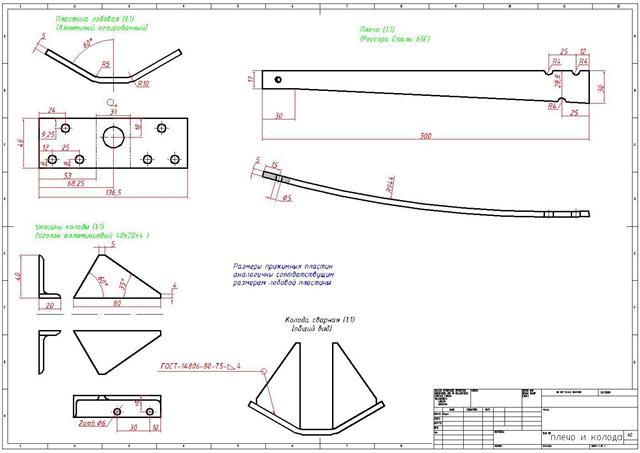
Crossbow shoulders and deck drawing:
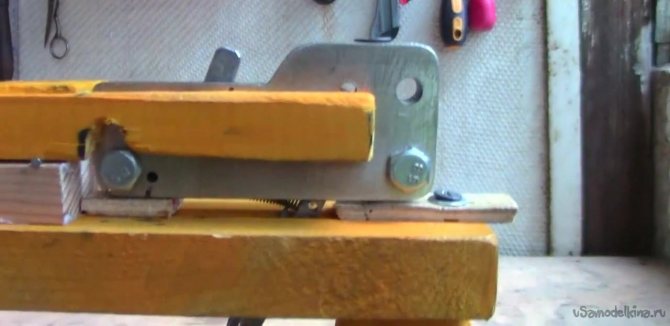
The use of a small arms stock can significantly reduce labor costs for the manufacture of a crossbow. The main thing is to choose the right size. The trace of the trunk left in such a stock must be hammered in with wooden blocks, firmly seated with epoxy glue. The butt and under-barrel pad of a crossbow can also be made of wood. The stock will be attached to the guide and serve as the basis for the trigger mechanism.
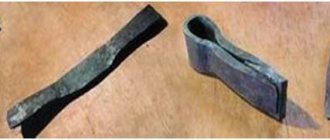
How to make different types of tips
Tips can be either safe or combat. While the first type is suitable for playing with children's bows, the second can cause serious harm. Therefore, it is better to shoot with a bow in places where there are no people or animals nearby. It is not recommended to give such a device to children.
You can make a tip from a nail, match, stone or piece of bone. Feathers here act as a stabilizer and are found on all arrows, regardless of purpose.
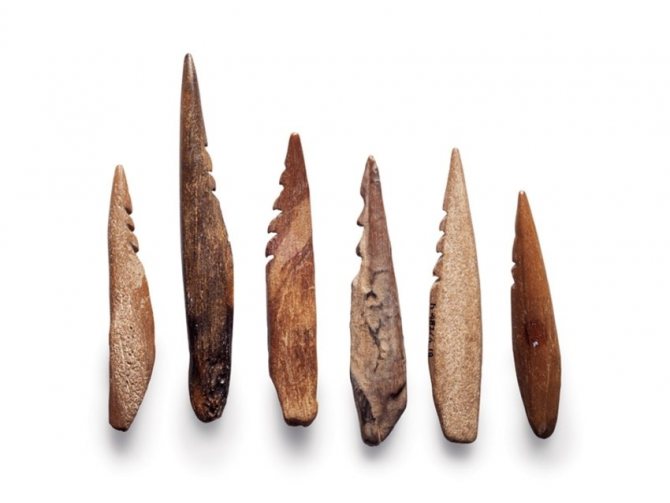
How to make arrows: tips from bone
To create a safe tip you need:
- Tape electrical tape to the edge of the boom so that 3 mm protrudes.
- Place a small coin on top.
- Cut two pieces of ribbon and make a cross.
- Place the center of the cross on a coin, and attach the ends tightly to the arrow.
- Wrap the tip with a small piece of cloth.
- Secure the ends with electrical tape.
- Add feathering to the reverse side using glue or a thin elastic thread.
To create a fighting tip, you will need a sharp pebble or a large piece of animal bone. You can also take a small piece of metal and cut out a double triangle according to the sketch. The stone can be attached by making a groove inside and adjusting the shape. Next, the stone is attached through a groove, which is coated with superglue. For reliability, the tip is tied to the base of the projectile using twine.
If the tip is cut out of metal, it is enough to bend the mount around the base, clamping it with pliers. You can add additional fixation using glue or electrical tape, wrapping it near the arrow.

How to make arrows: feathers
In addition, it is worth making a quiver for weapons to feel like a real warrior or hunter.
By the way, it is not necessary to use natural feathers; they can be easily made from thick paper or thin aluminum strips. But such an arrow would easily injure a person or animal.
There is no need to spend money and buy a real expensive bow or crossbow. In nature and in everyday life, there is everything for creating good weapons not only for children's fun, but also for real hunting for small game. These can be wooden rods, twine, stones, elastic ropes, metal plates, feathers.
The main thing is to adhere to the proportions and basic manufacturing recommendations. And the necessary parts can always be purchased in the store or ordered in special workshops.
Main photo: hobiz.ru
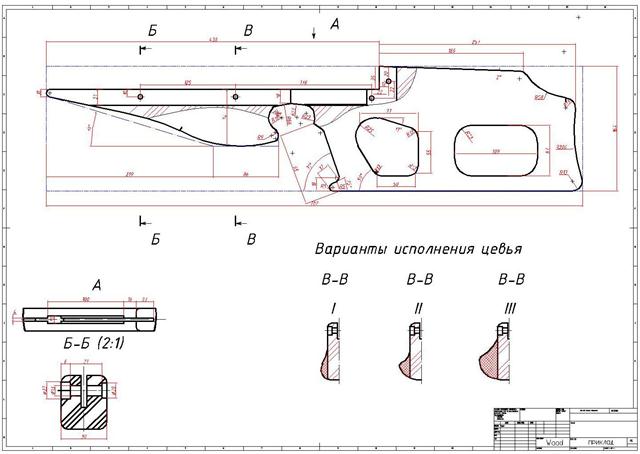
Butt drawing:
Offered for DIY assembly, the crossbow has a block design. This allows you to compensate for the load when cocking the bowstring and maintain power. Compound crossbows are the most popular among hunters because... You can carry a crossbow in a cocked state for quite a long time. Horton actively uses this design in the production of its crossbows.
Making a spring crossbow

Let's continue the theme of homemade weapons.
This article provides an overview of a video on making a compact but quite powerful spring crossbow. Let us note right away that we do not encourage the production and further use of such homemade products for illegal purposes. All materials are provided for informational purposes only. We recommend starting by watching the author's video
[media=https://www.youtube.com/watch?v=CdTPVeDcO04]
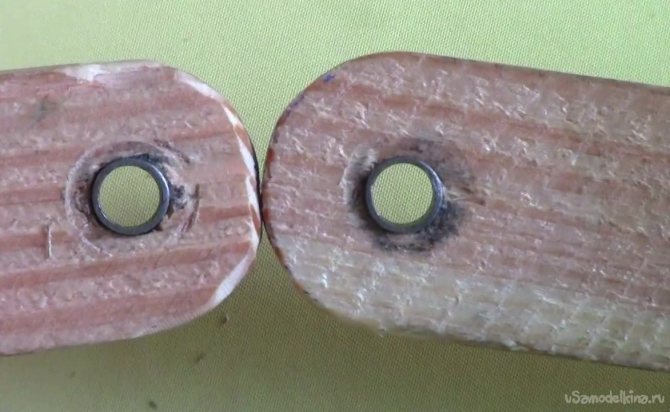
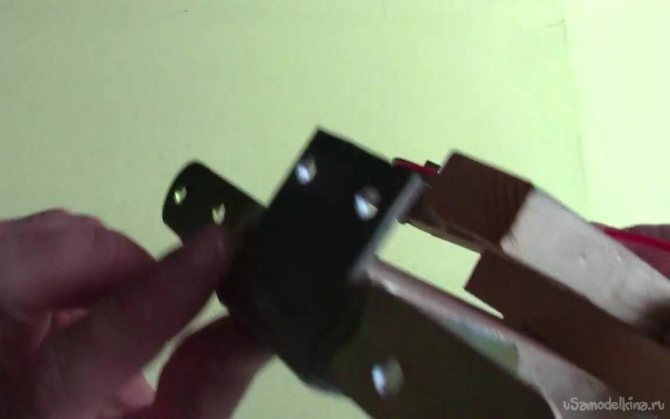
We will need: - a long wooden plank; - furniture corners; - wooden plank 1.5 cm thick and 4.5 cm wide; — 2 strips of 14 cm in length; - metal tube; - rollers; — springs;

At one end of the long wooden plank, which will serve as the basis for the future crossbow, we attach two furniture corners.
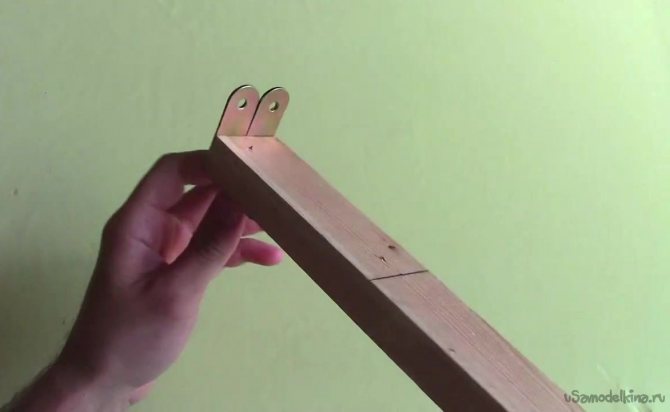
Next, take a short wooden plank 1.5 cm thick and 4.5 cm wide, make holes along the edges and fasten it to the base at a mark of 10 cm from the edge.
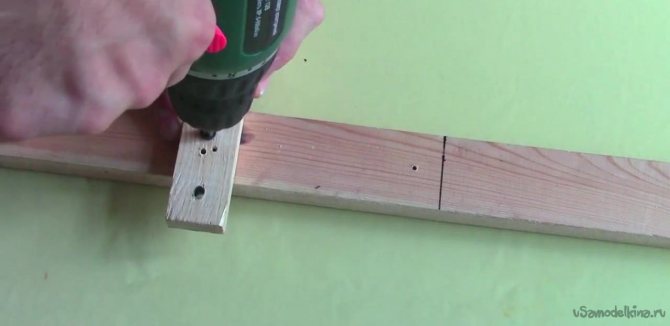
The next thing is to take two 14-centimeter strips and make holes, securing steel wires for the springs. These slats will become the arms of the crossbow.
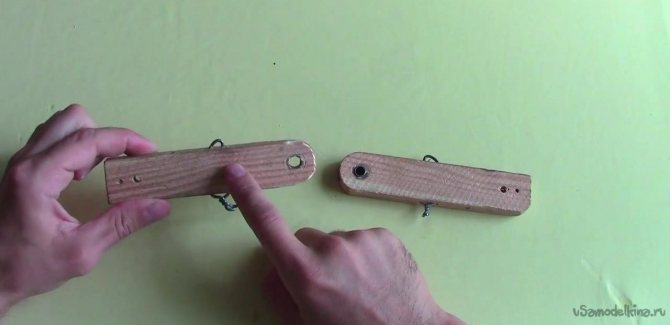
We also make holes at the edges of the plates to secure the crossbow's arms.
To reduce friction in the moving parts of the structure, the author of the idea advises cutting a small bushing from a metal tube to fit the diameter of the bolts.
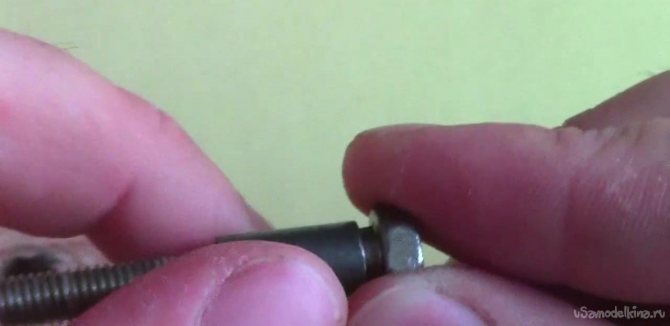
The cut-out sleeve must be threaded into the outer holes of the 14-centimeter strips.
At the other ends of the same planks we make another hole for the rollers.
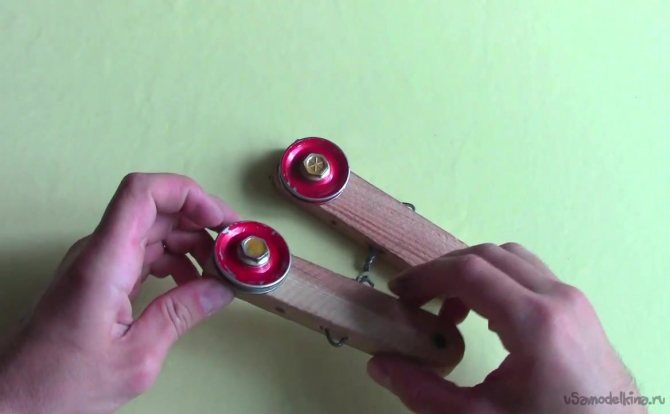
We install and fix in the holes made rollers, which can be purchased at the car market and which we have repeatedly used in similar homemade products.
Now you need to attach the shoulders to the crossbow base.
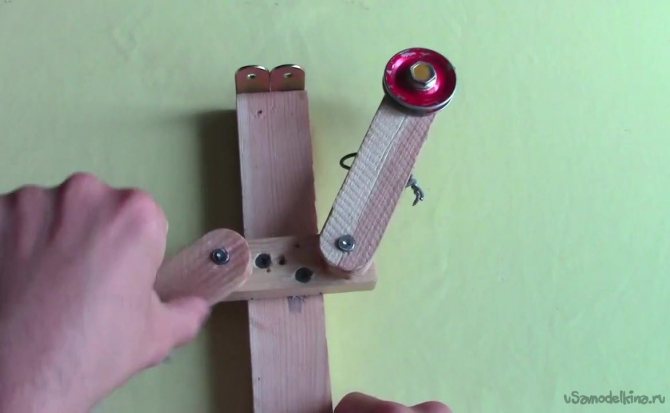
Next, we take short but maximally powerful springs and fasten them with one end to the wires on the shoulders, and the other to the steel corners. The author claims that such springs can also be purchased on the automotive market.

Next, take another piece of the plank and attach two rollers along the edges.
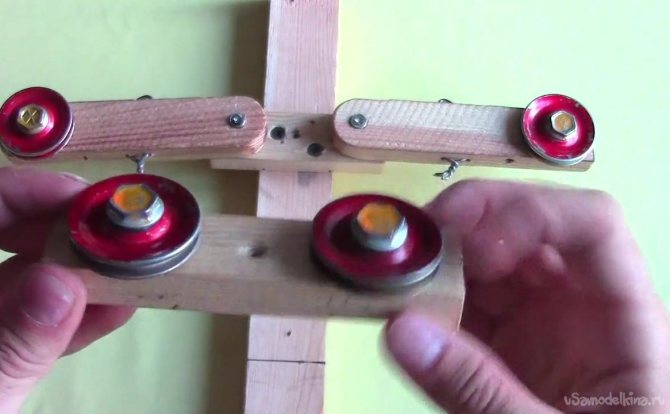
We install this design on the basis of a crossbow.
We take another long bar and attach it between the shoulders on the base. This bar will serve as a guide.
If desired, you can add two more corners to rest your feet.
You can start working on the trigger mechanism. To do this, put on the bowstring and pull it all the way, making a mark at the end point.
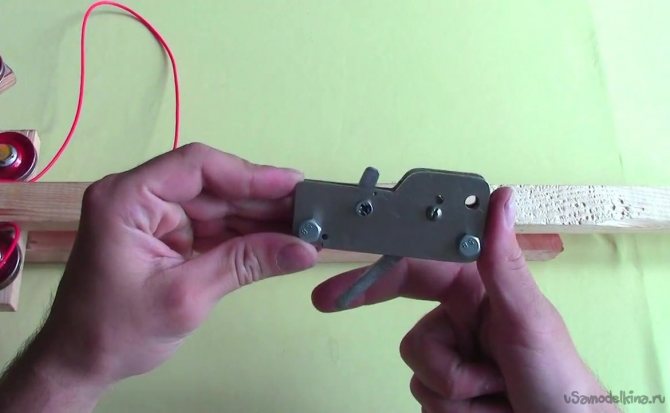
We make a cutout on the planks along the mark.
You can learn how to make a trigger mechanism from previous articles on making weapons.
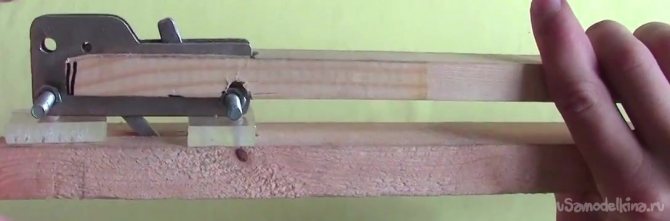
Next, we cut out two thin strips of organic glass or plywood and fix them on the top bar, which we attached as a guide.
All that remains is to attach the handle to the crossbow, a holder for stelae, which can be made from a piece of steel plate.
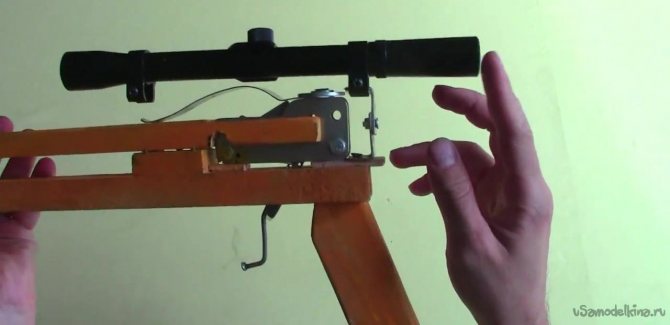
If desired, you can attach an optical sight to the crossbow.
Finally, we pull the string and you can safely organize crossbow shooting competitions.
In the end, we note that despite the compact size of the crossbow, it shoots quite powerfully, hitting the target from a long distance.
Become the author of the site, publish your own articles, descriptions of homemade products and pay for the text. Read more here.
Drawing of block assembly parts:
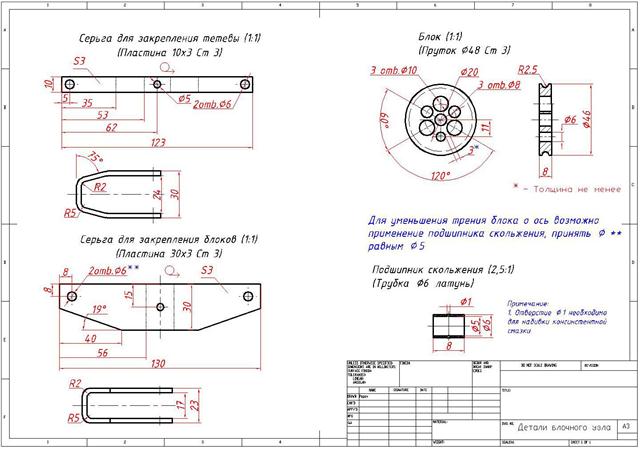
Pay special attention to the processing of the arrow guides and bowstring. The clarity of their finish greatly influences shooting accuracy. The guide lines must be perfectly straight and smooth. The best choice would be grinding on a milling machine and subsequent processing with fine-grain sandpaper. Next comes polishing the guides. You can see the dimensions of the boom guide groove in the drawings. The crosspiece, with the shoulders attached to it, is installed at the end of the stock. It is usually made from an aluminum billet. Wood can also serve as a suitable material.
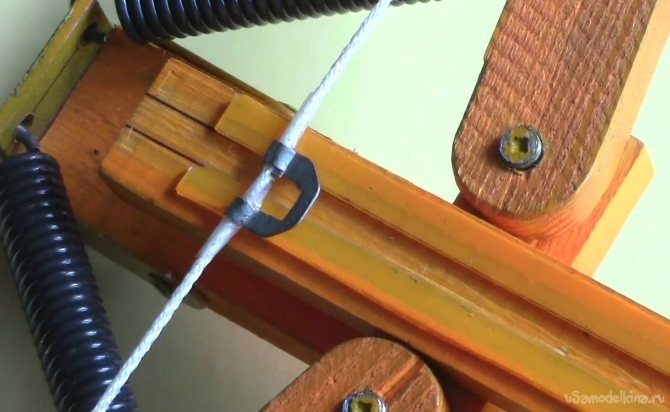
How to wind a crossbow string - the correct way to wind a crossbow string
Before winding the bowstring on a crossbow, decide on the winding thread. It can be a twisted silk thread, nylon or even cotton thread. The safety winding must be tight.
First, windings for fastening are made. Divide the threads in half and wrap about 8-10 cm of each part of the threads in parallel. This way the fastenings will be located at the same distance from the center of the bowstring.
Attach one end of the winding thread to the base and pull it along the base threads to the distance of the winding. Then begin to wrap the base tightly and evenly, turn by turn, towards the attached end of the wrapping thread. You can secure the end of the winding by making a few turns around the base with your finger inserted. Then simply pull the edge of the thread through the resulting rings and tighten. Trim the edges and secure with a lighter.
After wrapping the fasteners is completed, you need to move the wrapped parts to the nails and begin making the central winding. To make the string stronger, remove it from one nail and twist the threads around its axis. After this, wrap all the strings of the bowstring in the manner described above from one end to the other.
Drawing of the guide and trigger mechanism of the crossbow:
A crossbow sight must consist of a rear sight and a front sight. You can also install an optical sight on the crossbow, providing a mount for the aiming bar. Vertical adjustments are made entirely, mounted on the cover of the trigger mechanism, and horizontal ones - with a front sight mounted on the bracket of the elastic element.
There can be many design options for sights and sighting devices for a crossbow, depending on the possibility of manufacturing, the availability of ready-made sights from conventional weapons (air rifles), etc.
It should be borne in mind that the flight path of a crossbow arrow (crossbow bolt) is quite high, so the rear sight must be installed significantly higher than the front sight. The angle of elevation of the aiming line depends on the weight of the arrow, the tension of the string, the shooting distance, etc. In our crossbow at a distance of 50 m it is approximately 6°.
Convenient are the designs of the rear sight, which allow it to be removed or folded during transportation. It will also be convenient if the rear sight can be adjusted manually by raising or lowering the bar. Thus, you will be able to target the crossbow under different conditions (distance to target, weight of the arrow).
The crossbow, the manufacture of which is described above, is designed for shooting bolts with a diameter of 8 mm and a length of 450-470 mm. You can easily make them yourself from a duralumin tube with a wall thickness of 0.5 mm. The tip and liner are attached to the bolt in front, and the feathering is attached to the back, just as they do for archery. It should be borne in mind that the shank of a bolt for a crossbow, unlike an arrow for a bow, should not have a cutout for the bowstring; it should be flat. It can be carved from wood in the form of a cork and inserted into the end of the tube, having previously been lubricated with glue.
Selection and preparation of material
Before moving on to the instructions on how to make a crossbow from wood, prepare your materials in advance. Look around the area and try to remember which of the required tree species grow in the area (Figure 4).
Let us repeat that at home, a wood crossbow can be made from the following species: birch bark, acacia, oak, ash, yew, hazel, bean or acacia. Most often, the listed species are found in local forests and forest plantations. If there is a nearby coniferous forest, we recommend looking for spruce and pine forests. Particular attention should be paid to maple groves. Having found the central maple daddy, look for straightened young trees and select one with a thickness of 5 to 15 cm. The search radius around the main tree is from 40 to 50 meters.
Learn the ax factor, or better yet, the chainsaw factor. Try not to harass the forest area too much. Having cut yourself a log, do not rush to carve a crossbow out of it. First, it will need to be dried and then processed. Drying time in a warm, dry room is from two weeks to two months. Cover all cracks, pores and other irregularities with oil paint and place it on the mezzanine.
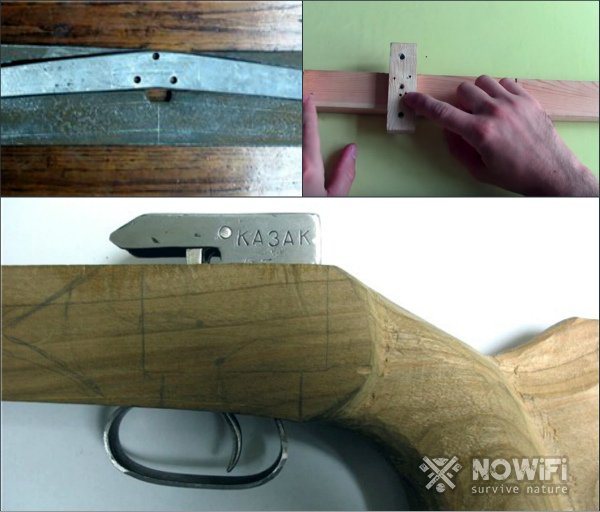
Figure 4. Weapons can be made from wood and metal
If it is impossible to obtain wood directly from the forest, order a block of the species you are interested in via the Internet. A variable advantage will be saving time on wood processing; operators can often clarify the dryness of the beams and the method of processing them. But this negates all the romance of traveling and finding the right snag.
Working on the shoulders will take the same amount of time as creating the stock. Both processes require basic woodworking tools - a plane, knife, ax, files. The bed can be decorated with carved patterns or adjusted to fit your own hand, whatever you like. There are no restrictions on the use of materials; both components can be made from the same rock. It is recommended to coat the timber with special solutions to avoid corrosion and rotting, as well as with wood varnish. The shoulder blank should also be treated with protective solutions, but not varnished.
The next point is what to make a crossbow bowstring from:
- You can make a bowstring from scratch from Dacron or Kevlar fibers, but to do this you will need to knit the rope yourself (Figure 5).
- Of the ready-made models, attention should be paid to durable varieties of ropes: cord, polypropylene, nylon, hemp, hair. Of these, only the last two are vulnerable to moisture.
- The golden rule is to focus on stretchability: it should be minimal.
- The edges of the rope attached to the shoulders should be treated in a special way, but not tied. To do this, the cord is wrapped around the workpiece to obtain a shape, then the end is applied to the base and tightly wrapped with a thread of smaller diameter.
- The recommended indentation is 5 cm. Along the way, each layer of the winding is covered with heavy-duty glue (anaerobic, epoxy resin, hot melt glue), and at the end the entire structure is tightly wrapped with a piece of felt. Any knots fray the rope, worsening its quality and increasing the chance of breaking under load.
The final stage before shooting is to make arrows for the crossbow, or as they are also called, bolts. Making consumables requires blanks from solid wood or straight branches. If you have woodworking equipment, cut out several bolts from the beams. They can also be printed on a 3D printer, but such shells will not last long. Get two sets of bolts - with and without soft ends.
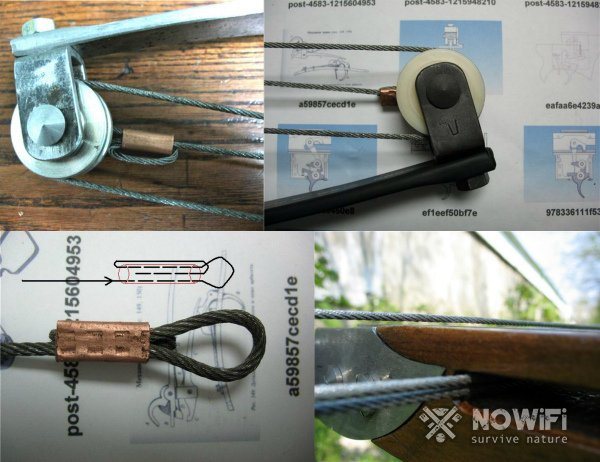
Figure 5. The string should be strong, but elastic enough
The former are perfect for re-enactment and role-playing battles; the pointed tip should only be used for hunting. A hunting point is made of wire, tin or aluminum. Keep it light! For the plumage you will need separate blanks made of wood and plastic.
Tools
The first step is to prepare the machine for winding the bowstring. To do this, just drive 2 nails into the board. They must be placed from each other at a distance that is equal to the length of the bowstring + 1 cm. A stool can also serve as a machine, which you simply need to turn upside down. But these options cannot be called the most successful.
To make winding the bowstring convenient, it is better to drill two holes in a board of suitable length and insert wooden sticks - dowels - into them. They are much thicker than nails, and the material will not slide along them, so winding the bowstring when using them requires minimal effort. Also, for its manufacture, a small diameter spool is useful, on which you can wind thread, wax, rubber glue and PVA.
This is interesting: DIY birch bark knife sheath