People who have a vague idea of throwing edged weapons and edged weapons constantly have the same question: what is the difference between edged edged weapons from tree and plain cold? Absolutely right, in nothing other than the ability to hit targets at a distance. And, probably, even more complex technology for manufacturing these weapons. But in order to to make homemade weapons from wood, something that you are not ashamed to show to others, you need not only to know the manufacturing technology, but also to understand the weapon.
Is it difficult to make homemade weapons at home?
Today, it is generally accepted that the most complex DIY weapon is a crossbow, because it has many interacting mechanisms and parts that are difficult to make at home without the appropriate equipment.
But that's not a problem, is it? After all, if you don’t have turning equipment, you can use a hacksaw, a file and a chisel. If you don’t know how to use a carpentry machine, a vice, a hacksaw and sandpaper will come to the rescue. And drilling holes is actually a piece of cake. And what remains as a result? But this problem can be solved if you order these elements from professionals. All that remains is to force yourself to find time and start making homemade weapons , and this is more than half the battle.
How to make a throwing knife
A hand-made throwing knife must meet certain requirements:
- the design is extremely simple;
- high damaging properties;
- the ability to easily camouflage for a surprise attack;
- unburdened handle (no guard or stop);
- no additional pads on the handle.
Throwing knives are made from metal, paper and wood. In the first case, you will need to prepare the following materials and tools:
- sheet steel with a thickness of 2 mm (not less);
- ordinary vice;
- hacksaw for metal;
- sheet of paper, pencil/pen, regular scissors;
- files with surfaces of different abrasiveness;
- sandpaper.
We recommend reading the article about throwing knives. From it you will learn about the types and shapes of throwing knives, where you can throw knives and how to make a throwing knife yourself. And here is more information on how to make a knife yourself.
Types of knives
After preparing the material, you will need to decide on the shape and size of the throwing knife. There are several types of them with individual quality characteristics.
| Types of throwing knives | Short description |
| "Hit" |
|
| "Cobra" |
|
| "Gadfly" | The length of the entire product is 235 mm, the blade is 123 mm. There is always a hole on the handle, which allows it to be used to hone the skill of continuous throwing with several knives. |
How to make homemade weapons from wood
In general, if you have at least a minimum set of necessary tools and ingenuity, then making a homemade weapon from wood with your own hands is very simple. make with your own hands , and even such an exotic weapon as a boomerang. But as practice shows, the simplest to make is shuriken (asterisk).
Before you make a homemade weapon, you need to assess your strengths and capabilities. After all, not all types of weapons can be made at home .
But most often homemade weapons for children are made wood . After all, boys will always remain boys. And in their genes there is a struggle and a desire for weapons. And the peak of perfection is considered to be a weapon that is made with your own hands. That is why at all times boys work conscientiously, carefully select materials and learn to work with tools in order to make homemade weapons with their own hands .
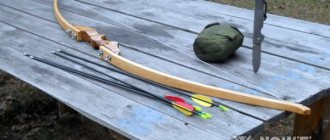
photo. DIY weapon - bow
But do not forget that making and carrying homemade military weapons entails criminal liability (this is only if your homemade weapon is recognized as a weapon). In other cases, it’s just a great way to brighten up your leisure time or please your child.
Homemade weapons for children and how to make homemade weapons from wood of this type with your own hands
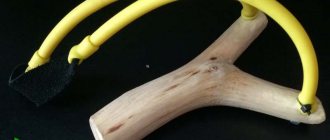
The most common weapon among children was, is and will be a slingshot.
photo. homemade weapons for children
This is the simplest weapon that street hooligans love. Homemade divided into two types:
- Traditional
- Keyed.
Traditional ones are usually made from a thick strong branch with a fork, a wide rope and a small piece of leather. All this is connected to each other using electrical tape or copper wire. Small smooth stones, unripe cherries, plums, apricots, etc. were used as projectiles. The power of such a homemade weapon made at home was enough to break a champagne bottle.
If you didn’t have enough skills to make a wooden slingshot, then you can make a simpler weapon. Such as a keyed slingshot. To make it you will need a thick aluminum wire and a harness. The projectiles for such a slingshot were pieces of copper or aluminum wire bent into a horseshoe.
DIY throwing knife: pros and cons
Throwing knives, like any other weapon, have their pros and cons, for example, they are ideal for long-range combat, but are significantly inferior to firearms in terms of effectiveness in defeating the enemy.
The advantages of the product include:
- they are easy to hide under clothes and even in a sleeve;
- such a weapon will never jam, which is important in combat conditions;
- it is possible to avoid direct physical contact with the enemy.
Some models of throwing knives can be used not only for throwing, but also for maximum close combat: they stick into the enemy, and they can seriously injure him.
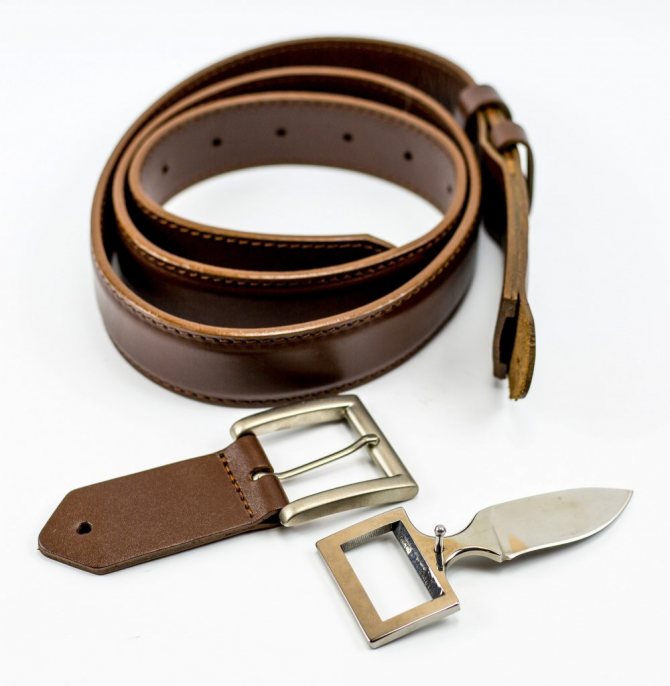
Belt with knife buckle
Homemade weapons of this type also have several “individual” advantages: it is possible to choose the model/shape you like and decorate the handle (individually). In addition, when you make it yourself, a throwing knife becomes several times cheaper, because various parts that have already been in use are used as the main material.
The disadvantages of this type of bladed weapon include:
- “disposable” - after the throw the fighter remains completely unarmed;
- the engagement distance is short, inferior to firearms;
- conducting close combat is extremely inconvenient.
In addition, it will not be possible to throw a bladed weapon correctly and clearly at a target the first time; you will need to master specific knowledge and undergo quite a bit of practice.

DIY throwing knives: drawings and dimensions, blade shapes
To make a throwing knife with your own hands, you will need a drawing - it is made based on standards for the sizes and shapes of blades. A standard throwing knife has the following parameters:
- handle length – 100 mm;
- metal thickness – 4 mm;
- blade length – 150 mm;
- product width – 25 mm.
Most often, throwing knives are simple “skeletons” that do not have a pronounced handle and any cutouts or waves. They are made from a single piece of metal.


Handle material
The quality of the throw directly depends on the comfort of the handle, so the main criteria for the material of this part of the throwing knife are strength and pleasantness to the touch. Others include:
- light weight;
- easy processing;
- availability.
Experts believe that wood will be the best choice. The material is absolutely accessible, easy to process, and after specific treatment has a long service life even with active throws. It is best to use apple, maple or ash to make a wooden handle - these are hardwoods. Growths from birch are suitable, but it is better to avoid representatives of conifers altogether.
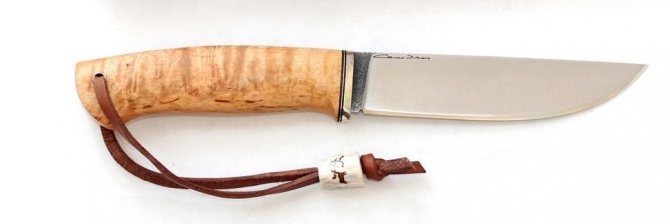
Knife with wooden handle
To prevent the handle from slipping in the palm and to prevent accidental injury to the hand during throws, it must be equipped with a single stop. It should be fixed directly in front of the handle, but it can be done more simply - equip the handle with small protrusions (if it is made of wood and the size of the source material allows this).
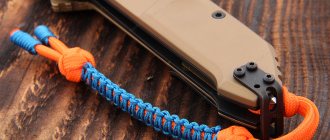
Often, dense cords are used as a material and simply braided around the handle. To do this, several holes or a continuous cutout are made in it. This type of handle decoration is not very practical for combat, but it will not interfere with practicing skills in throwing bladed weapons.
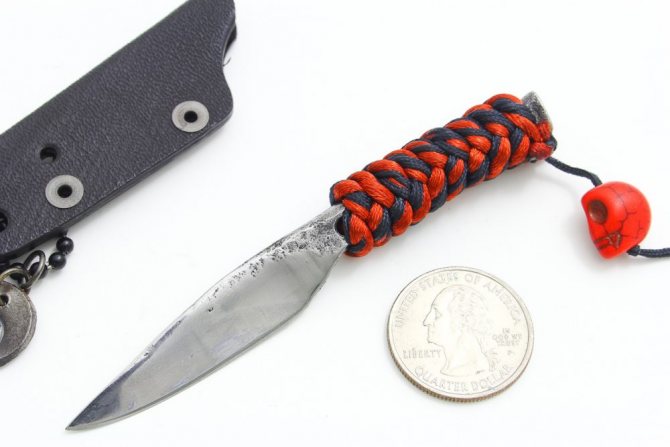
Knife with braided handle
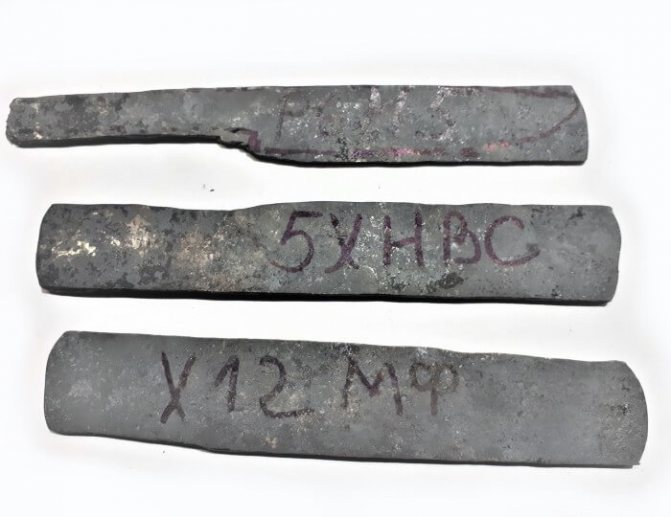
Steel for a homemade knife
For a homemade throwing knife, a solid sheet of steel would be the ideal choice, but if it has uneven surfaces or is of different thicknesses, you will first need to contact a professional blacksmith and have it forged. The result should be an absolutely flat steel plate 4 mm thick.
During the manufacturing process of a weapon, you can make recesses and holes on its surface, but experts do not recommend experimenting. Moreover, during the work process, grooves will form on the surface of the metal and it will be necessary to constantly monitor the thickness of the steel - it should be the same on all elements of the product.
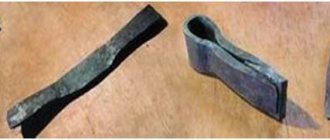
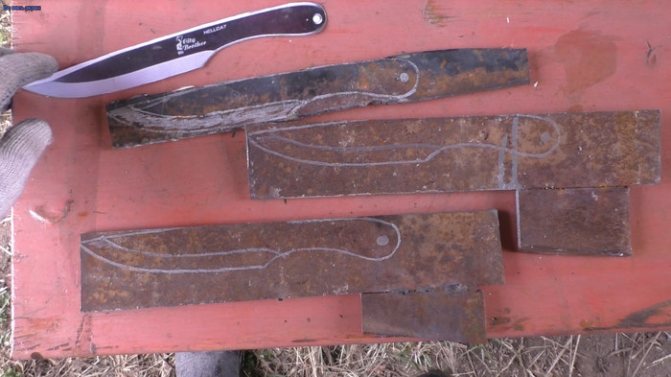
Blanks for knives
How and from what to prepare a pattern
The pattern is made from thick cardboard or thin plywood. It is necessary to apply a drawing of the future product onto a sheet of the specified material, strictly observing the standard parameters. Then the shape of the knife is cut out along the lines using scissors.
Such a pattern should be left “in storage”, because when developing the skills of throwing edged weapons, several knives are always required, since they are lost (for example, during training in nature), and the metal can be damaged. And for practicing it is better to use knives of the same sizes and shapes.
An example of a drawing of a throwing knife
How to make a throwing knife
You can make a throwing knife using the following algorithm:
- Transfer the finished sketch of the knife (pattern) to a steel workpiece. It is better if the starting material is stainless steel.
- Clamp the workpiece with the applied contours of the product in a vice. Cut clearly along the marked lines.
- Use a file to shape the blade.
- Polish the surface of the product on both sides with sandpaper.
The algorithm is simple, but in the work you need to take into account some nuances, for example: correct processing of steel, sharpening of the blade, final assembly of the product.
Watch the video on how to make a throwing knife yourself:
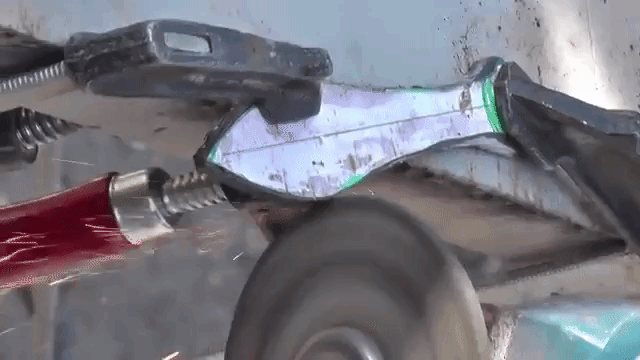
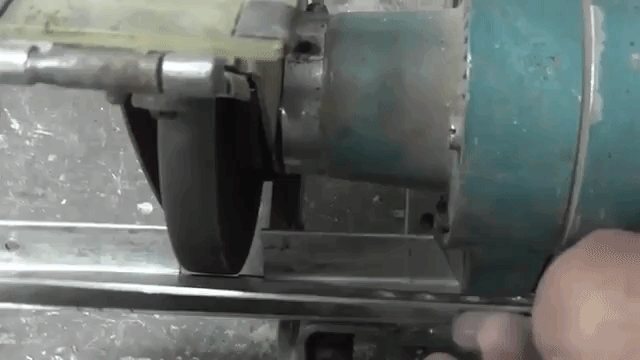
Processing of steel workpieces
The steel blank (already cut out contours of the knife) needs to be processed and ground to the required size. To do this, the metal is clamped in a vice so that the wide part of the product is located closer to the master. The process of turning the workpiece begins from the top side, gradually moving towards the opposite.
Accuracy at the workpiece processing stage is not important. Professionals say that it is enough to sharpen the blade to the approximate thickness according to the parameters. All discrepancies will be corrected during further processing. Working with a steel workpiece takes a long time.
Sharpening a dagger
Sharpening of the steel plate of the dagger (after processing) is carried out from top to bottom and strictly to the middle of the narrow part of the product. The file is used to perform trigger movements; the tool should only pass through the ground side of the knife. As soon as one side is processed, immediately move on to the other. If everything was done correctly, then the “output” will be a knife with a non-sharp tip, because sharpening was carried out only to the middle of the blade.
Using an emery block, the sharpened sides are brought to near perfection, alternately working on one and the other side. The tip of the blade needs to be processed not only from the sides, but also from the top/bottom.
Final assembly
If the throwing knife was made, implying the presence of a full-fledged handle, then the final stage will be the assembly of the product. The handle can simply be placed on the shank, secured with rivets.
If the shank turns out to be much longer than the handle, then the excess is simply cut off. After placing the handle on it, it is recommended to install a nut on the pommel to secure all parts of the throwing weapon. This additional “accessory” can be polished.
Some types of products and their features
Let us note right away that not all products are legal; plywood brass knuckles are weapons that can cause injury, and you may be held accountable for wearing them. We will only talk about those options that can be done without any restrictions.
Constructors
This option is suitable for those who like to collect 3D models or want to make an unusual and interesting gift for their child.
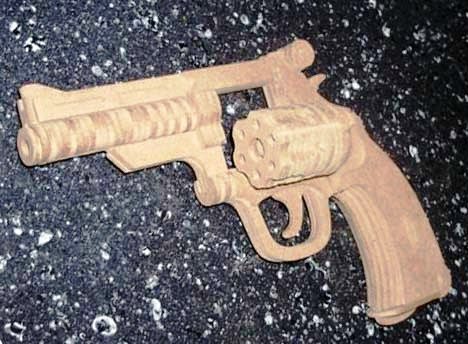
Let's look at the example of a pistol:
- First you need to find all the necessary circuits. As you know, such products consist of many components, so it is very important to find a very high-quality drawing that will consist of patterns of all the required elements. The more detailed it is, the better the final result will be;
Drawings of a plywood gun can be very complex, it all depends on the chosen option
- Next, using carbon paper, you need to transfer the contours of all elements onto the plywood; do this carefully using a pen or a sharp pointer. The lines can be made more distinct with a pencil, it is important to ensure their good visibility;
- Cutting is best done using a hand-held jigsaw for wood or a stationary jigsaw; an electric jigsaw is suitable for rough processing and is inconvenient to work with when cutting out small elements. Try to do everything as carefully as possible;
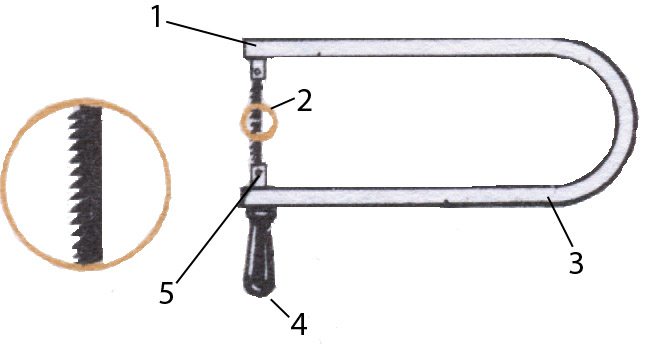
The cutting blade must be installed correctly in the frame
Important! To prevent damage to the ends and cracking when sawing, it is best to treat the surface with a mixture of PVA glue and water in a 1:2 ratio.
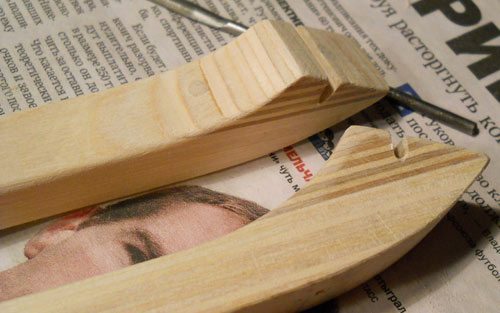
- The easiest way to make recesses is this: first, a hole is drilled in size equal to the width of the groove, after which cutting is done with a jigsaw;
- The last step is to sand the ends so that they are smooth and not scratched during assembly.
Some models even have moving parts
Models
If you are interested in the question of how to make a pistol from plywood or another type of weapon that will resemble a real one, then this section will help you:
- First of all, you need to find the necessary circuits. Moreover, you will not need drawings of weapons made of plywood, but real sketches with the exact dimensions and geometry of each element;

The more accurate the diagram, the better the result.
- Very often it is necessary to glue several elements together; the instructions for carrying out the work are simple: the pieces are connected with glue and compressed using clamps. The fixation is removed after the composition has completely dried;
- Next, you need to give the workpiece the shape of the desired product or part of it. Rough work is best done with a jigsaw, and if there are holes or openings, the holes are first drilled, and then the recess is given the desired configuration;
- Then comes the most difficult and time-consuming part of the process - cutting out various elements and giving the surface a realistic look. To do this, cutters of various configurations are used; it is better to practice on simpler elements so as not to spoil the result of the work and not to redo everything again. As a result, you should get an exact model of the original;
- After this, you need to carefully sand the surface to round all planes and give the material ideal smoothness where necessary. For rough processing, sandpaper M80-M100 is used, for finishing - M180 and finer;
After sanding, you can refine the desired areas
- Finally, in order to give maximum believability, the finished version should be skillfully colored. The coloring, as a rule, is the same as the original, so you can buy paints in the desired colors in advance.
Models of bladed weapons can be made in the same way; the same plywood sword will be an excellent addition to a child’s New Year’s costume, and if you make it life-size, it can be used as a training option for those who want to master fencing.
Luke
You can make a bow with your own hands from plywood, and it will be fully functional and you can shoot at targets from it. Of course, it’s unlikely that you’ll be able to create a long-range hunting option, but you can please yourself and your children with active recreation.
The work is done as follows:
- For the handle, you need to glue two pieces of bakelite plywood 20 mm thick together, the size of the elements should be approximately 60x400 mm to get a complete unit;
- After gluing with a jigsaw, the part is given the desired shape; it is better to find a pattern in specialized literature. Next, you need to use a cutter to give the surface such a relief that it is comfortable to hold during use;
Achieving the desired shape is not easy, so you should understand that a lot of time will be spent
- Holes are drilled on both sides for M6 bolts, which will secure the arms. They are best made from 16 mm thick plywood; if you have 8 mm sheets, you can glue the two elements together using wood glue;
- Pieces of plywood are glued to the ends to make a shelf for the bowstring; after the glue has dried, they are given the desired shape and grooves 3 mm wide and 8-9 mm deep are cut out;
This is what you should end up with
- Next, all elements are sanded and covered with stain and wood varnish to protect them from moisture. The structure is assembled, and a 3.5 mm thick Kevlar sling is purchased for the bowstring from a climbing equipment store. At this point, the question of how to make a bow from plywood can be considered closed.
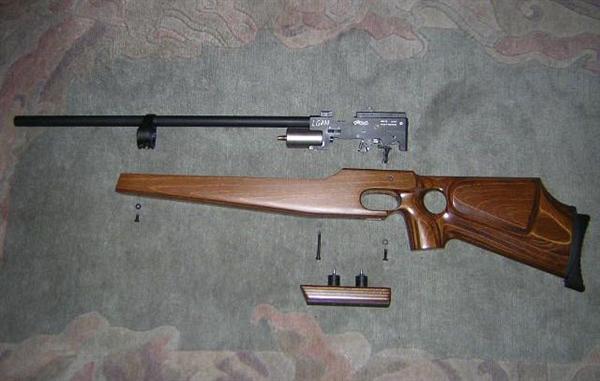
Butts
If you need to make a stock or, as it is also called, a stock, then plywood can also be a great option.
The works are as follows:
- First of all, you need to glue a couple of pieces of the required size to obtain the required thickness, since standard options are not enough;
- Next, you need to outline the future profile of the product and carry out rough cutting using a jigsaw;
- The next stage is cutting out a niche for the mechanism, here it is important to do everything as accurately as possible so that the system is fastened securely and correctly, any shifts will lead to the fact that you will not be able to use the weapon normally;
- Then the surface is given a relief: the bed is rounded, recesses and contours are made, the shape of which can differ significantly. This is meticulous work with a cutter, which takes a lot of time;
- When all the modifications are completed, you can sand the surface and apply a protective compound to it. For example, this is how you make a plywood stock with your own hands.
If everything is done correctly, then assembly will not take you much time and all the elements will fit perfectly into place.
DIY throwing knife at home from other materials
At home, you can make a throwing knife with your own hands from paper and wood, which are more related to toys. They are not considered melee weapons; they are made according to the same principle as full-fledged ones made of metal, but the algorithm has its own nuances.
Made of wood
If you plan to make a knife from wood, then it is better to use apple, maple or ash - hard woods that can be easily processed. A standard template will come in handy, with the help of which a blank is cut out of a board/die. Next, it needs to be processed with sandpaper or a grinding machine so that the thickness of the blade becomes almost standard.
Using fine-grained sandpaper, the final polishing of the product is carried out, the sharpness of the blade is imitated, and the tip of the blade is “extracted.”
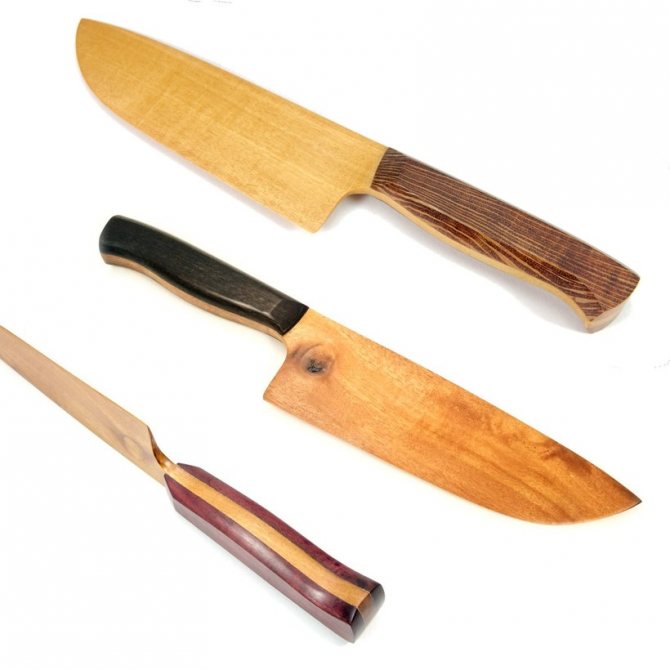
Such a knife must be coated with specific liquids: increasing moisture resistance and preventing cracking. The product can be used to instill primary/initial knife throwing skills in a child. At least, with the help of a wooden throwing knife, it is quite possible to “set up” a throw, to bring the work of the body, hand, elbow bend, and so on to automaticity.
From paper
Knives made from paper can please children who love watching films and cartoons about martial arts. At the very least, their games will be varied and safe. A paper knife is a pattern that is best made from thick cardboard. After cutting out the template, it is simply covered with suitable paint and drawn with a marker or felt-tip pen on the “edges” on the surface.
Watch the video on how to make a knife out of paper:
If a child uses the product too actively in games, then a longer service life of the toy can be ensured by gluing several patterns - the knife will be thicker and denser.
As practice shows, preference should be given to insulation of yellow, orange, red and black colors. We also tried flies of green, white, blue and brown colors, but bites on such bait were rare, very cautious, or even the grayling did not pay any attention to it.Making beads.
The bead can be made from vinyl plastic and other plastics, but it is best to use light plexiglass, as it is easy to process and is more durable than vinyl plastic. The device for making beads can be mounted on old pliers by welding mandrels to them. If there are no suitable pliers, then the device can be made from sheet iron 5 mm thick, the mandrels can be welded or riveted.
First of all, you need to make a recess in each mandrel (at the ends) equal to half the diameter of the bead, for example 4.5 mm (first drill with a drill, and then straighten with a ball or rounded core). Then you need to make blanks for the beads. For a bead with a diameter of 4.5 mm, a blank is made in the form of a cube measuring 4x4x4 mm. The prepared cube is inserted into the mandrels (from corner to corner) and heated, while the mandrels are gradually removed. You need to try to heat the lower parts of the mandrels so that the workpiece does not burn. For this purpose it is good to use an alcohol lamp, a stove or a large soldering iron. After the ends of the mandrels are completely connected, you need to immediately cool them in cold water. Then remove the excess plastic squeezed out of the mandrels, unclench the mandrels, take out the bead and drill a hole in it. In an hour of work you can make about forty beads without holes. For the convenience of drilling holes in the bead, it must be inserted back into the mandrels, having previously placed paper there so that the mandrels do not converge by 1.5-2 mm. If you have nothing to drill a hole with, you can heat a wire of the appropriate diameter and burn the bead with it.
Making beads for spinning lures from polystyrene at home.
One part of crushed polystyrene is poured with two parts of acetone. Within a day, this mixture forms a viscous, pliable mass, from which you can easily fashion beads of the desired size and string them on a needle. The strung beads should be dried for 12 hours until they become hard.
Homemade carbines.
To equip spinners or various leashes, the fisherman needs carabiners that he can make himself.
For frame carabiners you need a strip of any length and width of approximately 3-4 mm, thickness 0.4-0.7 mm. Use the end of a sewing needle to mark holes on the strip and drill them with a drill with a diameter of 1 mm. After cutting the strip into pieces, bend it into a rectangular frame, insert two pins and twist their ends into a loop. To twist the ends, use pliers, and insert a nail into the loop.
For a tube carabiner, you must have a brass or copper tube with an outer diameter of 4-5 mm. You need to drill two holes in it along the diameter, cut the tube into pieces 2.5 mm long, insert two pins and screw them. The result is reliable and durable carabiners.
For a wire carbine you will need steel wire with a diameter of 0.8-1 mm.
DIY knife throwing stand
The simplest stand for throwing knives is a printed picture of a target from the Internet, fixed to any vertical wooden surface with your own hands using a nail or glue. You can make a more serious stand from a furniture panel, but in this case you will need to transfer a standard target to it (paint it with paints).
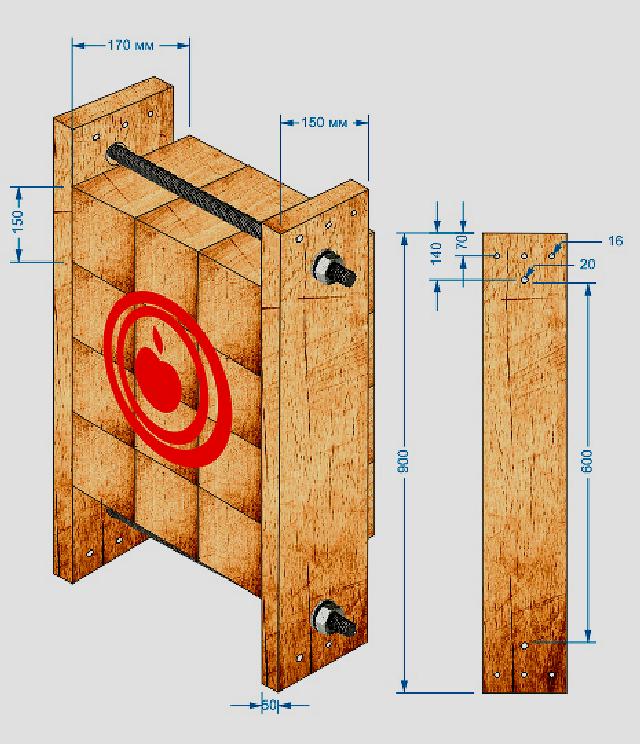
Knife throwing stand option with dimensions
Experts recommend making a kit model:
- from boards - they are connected to each other (carpentry glue + vice), then the finished “panel” is enclosed in a rectangular/square lining;
- from cubes/offcuts from furniture production - they are also assembled into a single layer.
Such stands are not covered with varnish or other impregnating liquids, making it easy to replace especially damaged areas.
We recommend reading the article about the knife stand. From it you will learn about why you need it and what kind of knife stand it is. And here is more information about the options for handles for knives.
Making throwing knives with your own hands is a fairly understandable and even simple process, but labor-intensive. The main problem with products of such handicraft production is incorrect alignment, which leads to problems in the further training of beginners. You can only independently calculate the resulting alignment (closer to the blade or handle) and take this point into account when training for a throw.