Technology for making a taiga ax
Initially, you should choose the material for the axe. The length of this part and its shape will affect performance. For convenience, the ax handle should be curved, while the cross-section should be oval. For reliability, the rear part should be slightly wider and have a certain slope. The wood should be selected in such a way that it can withstand vibrations. Among others, it is recommended to consider:
- birch;
- oak;
- maple;
- ash.
If you will be making a taiga ax, then the wood should be harvested in the fall. The material should be dried and left in a dark place. Fresh wood is not recommended for use, because over time it will dry out and hang around in the eyelet. Such an ax cannot be used.
Basic forging techniques
Historically, on the territory of Rus', there were two main ways in which chopping tools were made. These are Novgorod and Kiev, and there was a significant difference in production technology. Such methods for forging an ax can still be used today in a modern forge.
Novgorod
Novgorod blacksmiths most likely learned techniques and manufacturing methods from their closest neighbors - the Finns (today Finland is one of the leaders in the production of axes and knives). Forging was carried out using the so-called welded method.
To do this, a workpiece was taken in the form of a strip of metal, which was bent in half and welded using a forge. At the same time, an eye for the ax handle was formed at the bending point, and the opposite one was accelerated to the required width, thus forming the blade.
Forging by welded strip method
This product had a small and relatively light butt, a wide blade and a fairly long beard.
In diameter, such a product had a wedge-shaped shape, converging to the blade. The eyelet itself had a triangular or oval configuration, formed as a result of this technology.
Kyiv ax
The origin of the Kyiv ax is often traced to the Caucasus, where similar products were found in settlement areas. The principle of its manufacture was based on punching an eye at one end and straightening the other into the shape of a blade.

The sequence of forging a Kyiv product
As a result, such an instrument did not have such a long blade as the Novgorod one, but it usually had a thick spine, a round eye and a short beard. The shape was wedge-shaped in diameter. You can watch the Kiev style forging technology in the video
Despite the fact that such technologies are over 1000 years old, they can be used as a model of forging. And such a simple product will be quite effective.
So, how to forge an ax at home?
Additional recommendations for making an ax
The ax handle should be as reliable and convenient as possible, because these are the factors that will influence the comfort of work. The holder must be balanced, it must be well polished, it must have the correct geometry, only then the worker’s hands will not be injured. The simplest option among others is still pine. It is quite easy to grind and sharpen, but it has established itself as a not so reliable material, because it is highly brittle. Therefore, a better solution would be birch; this option is optimal and affordable, because this type of wood is easy to find.

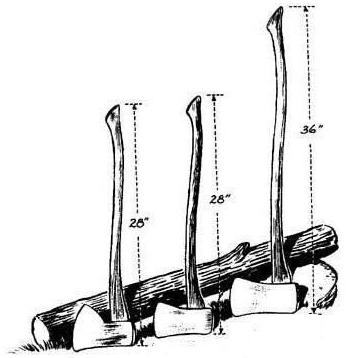
In some latitudes, making a handle from ash and maple will be quite problematic, but these two options are optimal. When choosing sizes, you should consider your own preferences. But there are certain recommendations. The handle should have a length ranging from 50 to 70 cm. These dimensions are universal. The hiking option should be 40 cm, but chopping wood and cutting down trees with such a tool will be quite difficult. If you use an ax to split logs, the length of the handle can be increased to 120 cm, in which case you will achieve productivity and high impact force.
Work on blanks
The next step is to work on the template. To do this, a drawing is applied to the cardboard, which can then be transferred to the material. This will be required for more accurate size detailing. For the ax handle you will need a piece of well-dried wood. The workpiece should be cut along the direction of the fibers. The workpiece should be slightly longer than the planned dimensions.
The part that you plan to insert into the eyelet needs to be made slightly wider. A drawing must be attached on both sides of the workpiece. As soon as all the contours can be redrawn, you need to take care of the allowances. To prevent the handle from breaking off during installation, an indentation should be left in the tail part. Once the assembly of the tool has been completed, you will need to get rid of excess material.
Preparing the ax
If you decide to make a taiga ax, then it is important to make transverse cuts at the bottom and top of the timber. Their depth should not reach 3 cm to the line of the axe. The excess layer of wood can be removed with a chisel. Those places where transitions and corners are needed must be processed with a rasp. At the final stage, the ax handle should be sanded with sandpaper. The taiga ax in the area of the wooden element must be impregnated with a waterproof compound. To do this, use linseed oil or drying oil. The product must be applied in several layers.
piercing part
When making a taiga ax with your own hands, you will also need to prepare the piercing part. It is quite difficult to do it at home, so you can choose it at a hardware store. It is important to pay attention to the marking of the steel; it must be manufactured according to state standards. The eye should be made in the shape of a cone. Pay attention to the blade; there should be no nicks, bends or dents on it. If you look at the butt, its ends should be perpendicular to the blade.
Purchase
If you like constant hiking or hunt, then you need equipment such as a taiga ax. The vacha is the most common model among this family of instruments. Use it to quickly and easily chop and process wood.
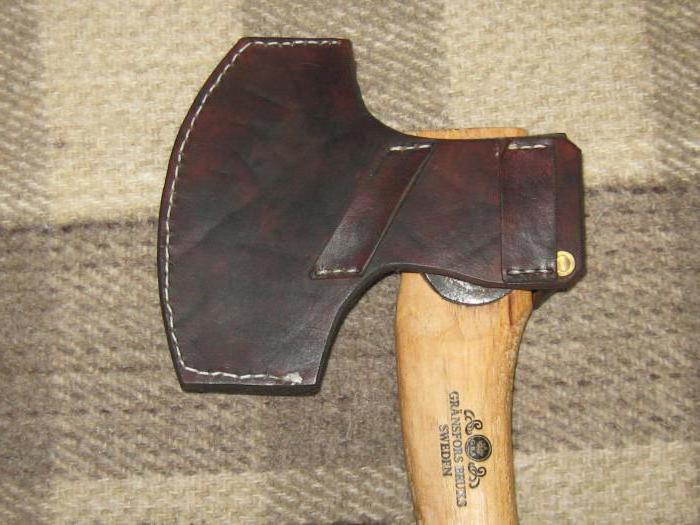
If you want to purchase a forged taiga ax, make sure that the kit includes a protective case. A distinctive feature of this brand of tools is the handle. It is made from strong varieties of birch. The wood is impregnated and processed.
We looked at how to make a taiga ax with your own hands. If you can’t make it yourself, you can always find the product in the store.
Impaling an ax
When making a taiga ax with your own hands, it will be necessary to make longitudinal and transverse cuts on the ax handle, in its upper part. Next, using hardwood, cut 5 wedges. Gauze, which is pre-soaked in resin, is wound over the ax handle to fit tightly into the eye. Now you can hammer the ax handle. Wedges are knocked out into the cuts, and after drying they can be cut off.
Independent production
We suggest supplementing your camping kit with a tool such as a taiga axe. With our own hands we will make a real masterpiece from a carpenter’s tool blank. Before starting work, we will prepare everything you need. This includes:
- carpenter's ax head;
- wooden butt;
- Bulgarian;
- metal wedges.
We present a step-by-step lesson:
- Using a grinder you need to shape the ax. It should look like a taiga specimen. If there is rust, it must be removed. To do this we use a petal disk.
- If corrosion has damaged the metal from the inside, then soak the head in vinegar for a day. We clean off the remains with a brush.
- We are preparing the ax handle. In our case, we suggest taking beech. The tree is considered strong and hard.
- Fasten the head and butt together with epoxy resin. Additionally reinforced with a bandage, drive in beech wedges.
- Cut off all excess and be sure to sand it.
- Sharpen your axe.
Since the butt is primarily a tree that is susceptible to dampness, it is worth treating it. Impregnate with special oil in several layers. Additionally, the product will receive strength and water resistance.
You can also make your own protective case for the ax. It will protect you from unwanted injuries.
What should the blade be like?
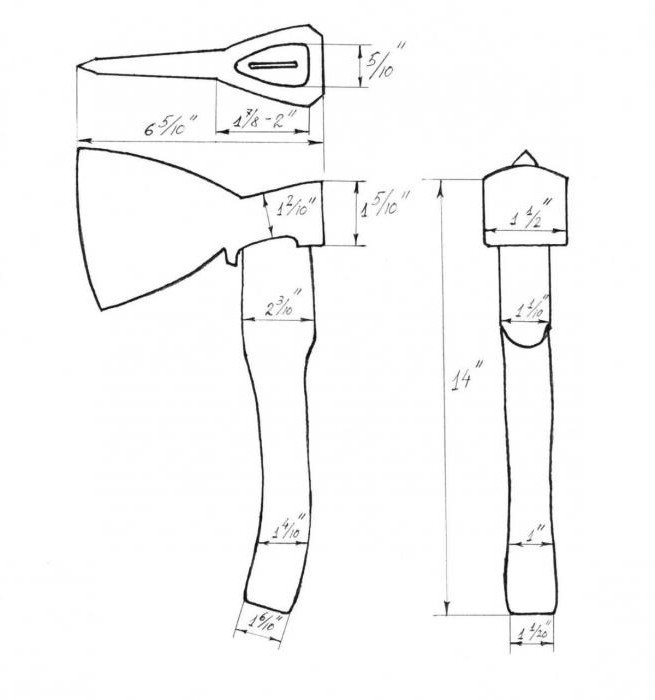
The taiga axe, a drawing of which is recommended to be prepared before starting work, must have a working surface that allows it to be buried deeper into the wood. That is why the tool can be used for chopping across the grain. The working part must have a beard. Its main function is to protect wood from impacts. Up to 60% of the force will be absorbed.
The sharpening must be special. The trailing edge is almost twice as thin as the front. This is done in order to use the ax as a cleaver. The ax head should form a smaller angle with the ax handle. This allows you to increase efficiency; in addition, such a solution will relieve fatigue and increase productivity. The impact is stronger compared to a carpenter's axe, where the blade and head are placed at an angle of 90°.
Before you make a taiga ax, you should know that the angle of inclination of the ax should be between 65 and 75°, this is the main difference. It is necessary to use ordinary wheels for sharpening; the main task is to maintain the difference in the thickness of the trailing and leading edges, because this is what will affect the productivity of the work.
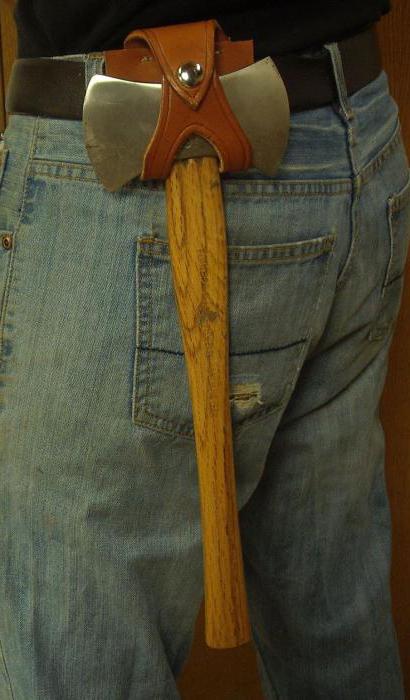
An ax handle mounted with a reverse thrust for a taiga ax
The taiga ax requires an ax handle that is very different from a carpenter's axe.
Shape of the ax
The handle of a carpenter's axe, the so-called “Dutch” axe, is strongly curved and makes it possible to deliver precise and accurate blows.
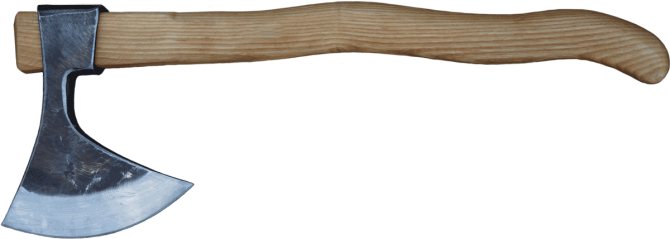
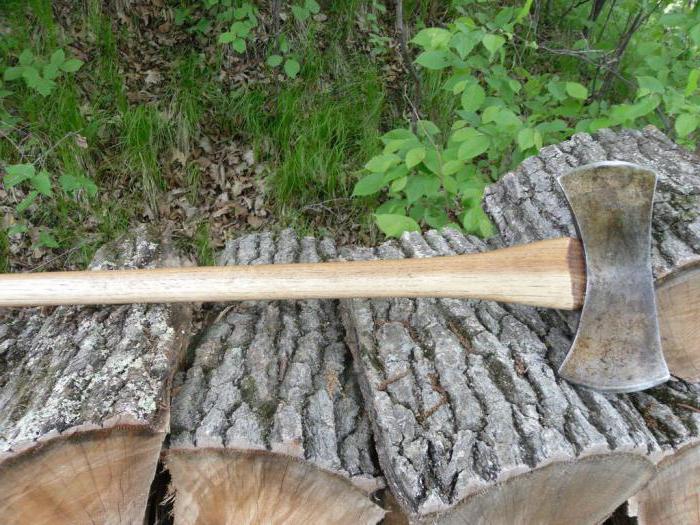
For the taiga ax, a long, almost straight ax is used, which allows you to deliver very strong blows with both hands. Our ax handles are long, the length of the ax is 60-65cm, but, if desired, we can also use a shortened ax handle of 40-45cm. The shape is almost straight, but there are two small bends that allow you to conveniently intercept the ax handle with both hands for chopping from right to left and left to right, and also to hold the ax “under the neck” or, conversely, by the end of the ax handle - when you need to chop off a branch or twig. leaning over. Instead of a fungus, there is a small bend at the end of the ax that prevents the ax from slipping out of the hand. In general, the ax handle is comfortable and safe, allowing you to work in thick gloves in winter. The material is very durable Caucasian ash; we impregnate the ax handles with natural linseed oil for two weeks. The oil polymerizes on top and protects it from moisture, but inside the wood it remains liquid and can melt if you place the ax near the fire, even after a year (There is no need to specifically place the ax near the fire or on a radiator, although an ax with a reverse thrust is very easy to repair if it dries out) .
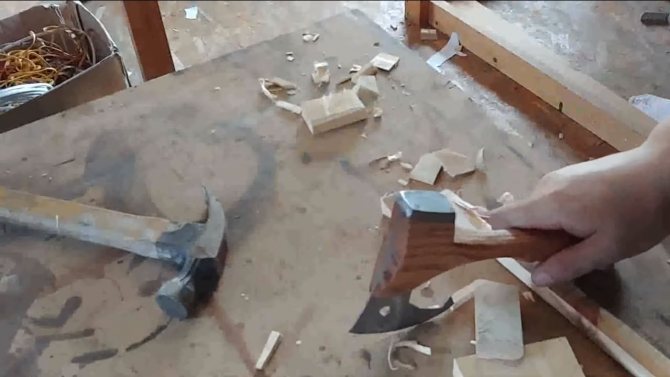
Reverse ax attachment
A carpenter's ax is mounted on a curved "Dutch" axe-handle with wedging, otherwise it is simply impossible. For fitting a forest ax, a reverse insertion is better than a direct insertion onto a wedge. Being in a damp forest, a dry city apartment, in the cold or near a fire will cause the wood to dry out and can lead to premature drying out of the ax. It is not difficult for a carpenter to repair an ax at any time, but in the forest it is better to have a more reliable tool. If an ax with a reverse thrust becomes dry, it is enough to simply knock it down with a strong blow to hard wood and continue working. Also, such an attachment is more reliable during heavy power work: the ax does not become loose, but only settles more tightly up the ax handle. Hammers, pickaxes, and cleavers are also mounted on the handle with a reverse thrust; in this way, ancient battle and lumberjack axes were mounted - all tools for which impact force and reliability are more important than high accuracy and accuracy.
Sharpening the taiga ax
For a carpenter's ax, the ability to carefully remove thin chips and accurately process the surface is important. Therefore, carpenter's axes are sharpened into a razor, the sharpening angle can be up to 25 degrees. There is always a block in the box with carpentry tools in order to quickly correct the sharpness of the sharpening. The master treats his tool with care, he is afraid not only of the blade getting into the ground, but also of working on wood contaminated with sand, which can damage the sharpening. For a taiga ax, accuracy of work is less important, but efficiency and reliability are important. To maintain the effectiveness of a sharpened ax, but to protect the working edge from accidental damage, a little trick is used: the main blade is forged and forms a single wedge with an angle of 12-15 degrees, and the working edge itself (the first 2-2.5 mm) is brought together at an angle of 30 -35 degrees. This sharpening gives maximum efficiency, but also protects the edge from random pebbles and sand, and does not allow the blade to quickly shrink when working on hard wood and bone.
Making the tool head
The shape of the taiga ax must be special, this applies to the head. If you decide to do this part yourself, you can use a carpenter's axe. To do this, take a metal head, the weight of which is up to 1600 g. This option is considered optimal. Next, the front protrusion of the blade is cut off; it should be made flush with the butt. The protrusion can range from 5 to 8°, but it is better to remove it completely.
The back of the blade should be rounded; for this, the metal is sawed off so that the entire surface has no corners. This can be done with a grinder or a medium-grit sanding wheel. If you are making a taiga ax, what is the purpose of the notch, you may wonder. It is required for planing or more precise work. This shape allows you to pull up logs and hang the ax on a branch. In addition, the notch will reduce the weight by 200 g. The next step is to cut out a semicircle in the inner part of the blade. The upper corners of the butt are also removed, this will reduce weight and increase maneuverability. You can refuse to perform this operation.
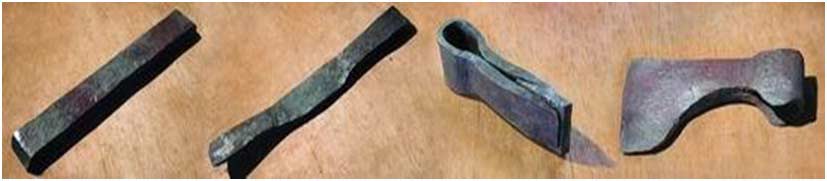
Making a forged ax
If you have special equipment, you can make a forged taiga ax yourself. It will consist of two parts. It is necessary to cut a 170 mm piece from steel with a cross section of 60 x 35 mm. Tool steel is suitable for the blade. In the heated workpiece, it is necessary to make two recesses with ledges to form the butt. The workpiece must be stretched to size and dispersed. Then it is bent on the anvil horn or mandrel so that the mandrel fits into the hole formed after bending.
It is necessary to make a wedge from tool steel with dimensions that will correspond to the ax. The wedge is inserted between the bent and drawn ends of the workpiece, then it should be driven in. The workpiece together with the wedge is heated to welding temperature, then you can do forge welding. After completing these works, the workpiece is put on the mandrel, and the following operations must be performed on it. The beard is pulled back to protect the ax handle. The surface of the ax must be finished, the blade sharpened and hardened using the heat treatment regime for tool steels.
Making a solid forged ax
The handle of a taiga ax can be made solid forged. For this purpose, alloy or high-quality carbon steel is used. The mass of the workpiece must be increased by the dimensions of the wedge. The ax is forged, just like a welded one. The cheeks of the ax are welded and forged to the required dimensions. The blade should be chopped and sharpened using an emery wheel, then it is hardened in accordance with the regime for the selected steel.
Such an ax will have a less stable working part, which means it will become dull faster compared to an ax made using forge welding technology. The connection of the blade to the ax is carried out with rivets, which will be more difficult, so this technique is used quite rarely.
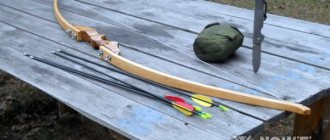
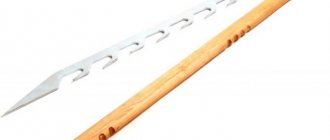
Unusual DIY hatchet
Greetings to crafters, today we will make a simple but unusual hatchet. The homemade product looks quite interesting, and in practice the ax is quite convenient and very ok. The peculiarity of the ax is that its metal part is simply a flat plate, which is clamped in the handle and held on by two screws. The design turned out to be quite strong, but if such a hatchet breaks, everything will have to be done again. Using high-quality carbon steel, you can get a quite decent tool. This particular homemade item has more of a decorative value; of course, you can chop with an ax, but the steel has not been hardened and most likely it is usually iron. If you are interested in a homemade product, I suggest you study the project in more detail!
Materials and tools used by the author:
List of materials:
- a piece of sheet steel;
- screws or bolts; - a thick board or timber for the handle (preferably hardwood); - wood oil; - self-tapping screws. List of tools:
- grinder; - drilling machine; - band cutting machine or jigsaw; - wood file, sandpaper; - vice; - clamps; - marker, pencil, paper; - drill. The process of making a hatchet:
Step one. Main profile
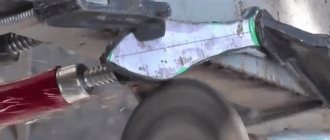
We begin the process of making an ax by cutting out the main profile. First, draw an ax on paper and cut out a template with scissors. The template can be glued to the workpiece and cutting can begin. We will cut with a grinder; everything is done quite quickly if the steel is not hardened and we do not need to be afraid of overheating it. The author did not harden the steel at all, and the ax was apparently made from a piece of profile pipe.
After cutting with an angle grinder, we need to finalize the profile, here we will need a sharpening disk for an angle grinder, we use it to remove what we could not cut off. You can also work with files and sandpaper. The author draws the bevels by eye on a hatchet using a thick grinding disc. Finally, the ax is processed along the contour using a drill with an attachment for installing sandpaper.
Step three. Holes and finishing sanding
We drill holes in the axe, we will need two holes for attaching the axe, and the author also drills another large diameter hole for tactical purposes. Be sure to lubricate the drill, and if you need to drill a hole of large diameter, use several drills in increasing diameter.
At the end, we sand the ax well on fine-grain sandpaper, moisten the paper with water, so it will grind much better.
Step four. Pen
We cut out the handle for the axe, in the upper part the handle is widened and a cut is made for the axe. The ax itself is installed with screws. The author cut out the handle using a band cutting machine. Here it would be good to use hard wood such as oak, ash, and so on. We also install the butt; it is an iron plate that is screwed on with self-tapping screws.
Step five. Impregnation and testing
We saturate the ax handle with oil, now the wood looks great and is protected from water. We also coat the iron parts with oil so that the ax does not rust. That's all, after sharpening the hatchet can be tested. The author easily chops and plans with it.
At this point, the project can be considered successfully completed, the homemade product looks great and everything is done reliably. I hope you enjoyed the project and found some useful thoughts. Good luck and creative inspiration if you decide to do this again. Don't forget to share your ideas and crafts with us!
Become the author of the site, publish your own articles, descriptions of homemade products and pay for the text. Read more here.