- November 23, 2018
- Weapons and ammunition
- Natali Michaelis
“How to blue the barrels of a hunting rifle at home?” – one of the most frequently asked questions on thematic forums. As a rule, novice hunters who have just begun to comprehend the beauty of this fishery are interested in this. From a technologist's point of view, steel bluing is a complex process of applying a very thin coating to metal using various chemical reactions. You will find information on how to do this at home in our article.
Significance of the procedure
Most gun lovers are interested in this issue when they want to decorate the barrel of a gun more beautifully. However, this process has at least two more advantages: coating the metal with a thin film gives the barrel different shades, which increases its camouflage (especially in the sun), and the weapon will also be less susceptible to corrosion in the future. For a true hunter, both of these factors should be truly important. Therefore, it is worth approaching the bluing of hunting rifle barrels at home with great responsibility.
When is bluing necessary?
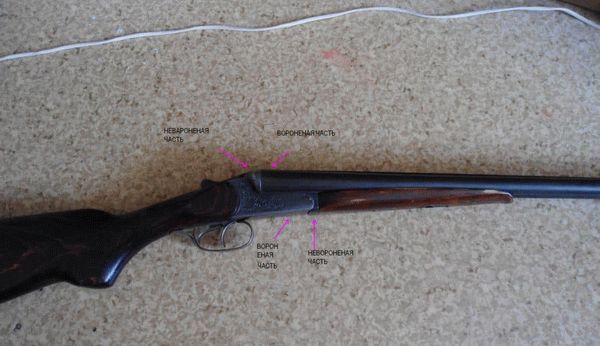
The concept of “blueing” came to us back in 1880, when it was often practiced by the best gunsmiths of that time. Then and now it is the best finishing method for high-quality double-barreled shotguns and modern piece rifles.
Professional and amateur hunters, as well as those who simply take care of their weapons, resort to various methods of bluing weapons. This process is carried out both by specialists and at home. What we get as a result:
- The product is completely protected from corrosion, because rust does not form on the blued layer;
- the product looks more presentable;
- when hunting in sunny weather, the black barrel of the gun is not noticeable;
- resistance to abrasion and other mechanical damage.
This is interesting: Air rifle shooting
Blueing your weapon has many benefits.
If you were not lucky enough to become the owner of a blued weapon initially, use one of the many methods and overcome this unfortunate misunderstanding.
Features of the technology
You can often hear people say that bluing a gun can only be done in a factory setting; however, this statement is only half true. Yes, steel undergoes higher quality chemical treatment during the industrial process. This is explained by the high content of iron oxide in the substances used at the plant.
At home, achieving high-quality blackening of metal can be very difficult. According to some experts, oxidation of steel can only occur at the factory, however, this is not the only way in which a barrel can be blued. Most "home" technologies are divided into three main groups according to the fundamental principles that are necessary to carry out the process.
It is customary to highlight:
- oxidizing agent treatment;
- hot bluing of steel;
- cold blued steel.
Each of these processes has both its pros and cons. Features of the technology, as well as the step-by-step implementation of each process will be described in the following sections. However, first you need to familiarize yourself with the safety regulations, compliance with which is mandatory.
Hot way
If the metal can be subjected to high temperatures, then it is first tarred and then burned with a blowtorch. For the process you need to prepare gun or olive oil. This technology is effective, harmless and low-cost. It is worth noting that the effect lasts much longer than when processed using the method described above. During the work, heating should be carried out slowly, everything starts at 200 degrees and ends at around 400 degrees. If you do this kind of bluing at home yourself, a brown and then a black layer will form on the surface. It is important to avoid using excessive amounts of oil, as otherwise stains may form on the surface.
Preparatory procedures
Whatever method you choose for bluing a gun barrel, you must perform a number of preparatory procedures in a certain sequence, which will be described below.
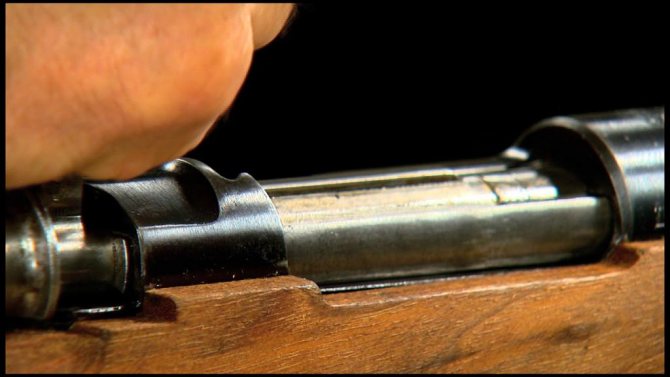
- We carefully clean the surface of the barrel on which the steel will be blued using a cleaning rod.
- We polish the surface to perfect condition.
- We disinfect the surface (after this, all work is done exclusively with rubber gloves).
- We use special substances for bluing metal.
- We re-process the surface with a grinder.
After this, you can start bluing the metal, observing safety regulations.
Burnishing in saltpeter
Burnishing in saltpeter Safety precautions 1. When bluing, you must use household gloves, a mask, and, if possible, glasses; the work will be carried out with chemicals that can leave burns.
2. It is necessary to add reagents strictly to water, and not vice versa.
3. If part of the concentrate has boiled away and you need to add water, then add it gradually
4. Reagents are always introduced gradually.
5. All utensils used must be made of stainless steel, absolutely clean and dried. Never use aluminum cookware.
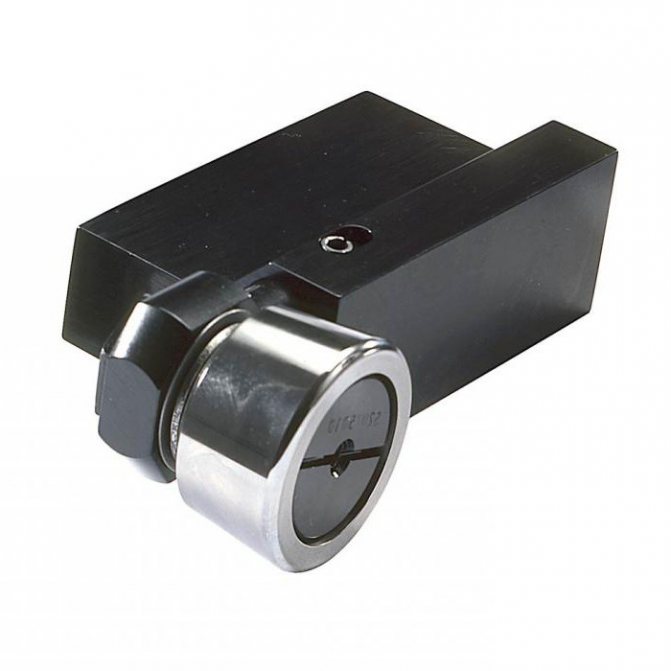
6. The room where bluing is carried out must be well ventilated. Necessary tools, devices and materials. 1. Set for bluing in saltpeter 2. Tool for removing old bluing 3. Sandpaper starting from 320, 600, 1000, 2000 (80, 120, 240 if strong shells) 4. Clean rags; 5. Gun Oil Preparation
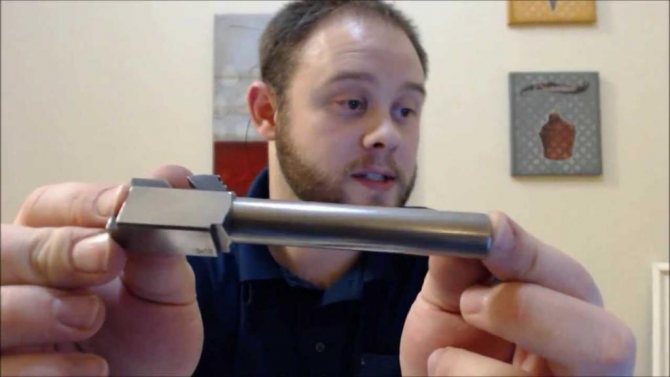
To remove the bluing, use a bluing remover of your choice and remove the bluing according to the composition instructions. After the old layer comes off, the parts must be thoroughly rinsed in warm, running water and immediately dried with a hairdryer or blown with air.
If you want to remove serial numbers deeply driven into the metal, then you need to start processing this place with 80 sandpaper, gradually moving to 120, 320, 400, etc. In this case, you need to clean it to a perfectly smooth state, otherwise after bluing the numbers will appear.
If you don’t need to remove deep numbers, then you should start immediately with 400 sandpaper, then 600, 800, 1000, 2000. This will remove even the smallest scratches and polish the surface, making it shiny. To achieve the best quality, the part must be rubbed without changing direction.
You can process notches on the trunk and other hard-to-reach places using a plastic card; to do this, you need to place a bent piece of sandpaper on its edge.
Degreasing Your kit contains: 1) A large blue bag 2) A transparent bag weighing about 200g 3) The smallest transparent bag is about 30-50g Take two tablespoons of the mixture (50g) from the blue bag and the smallest transparent bag, dilute it all in 1 l of water, and bring the resulting solution to a boil.
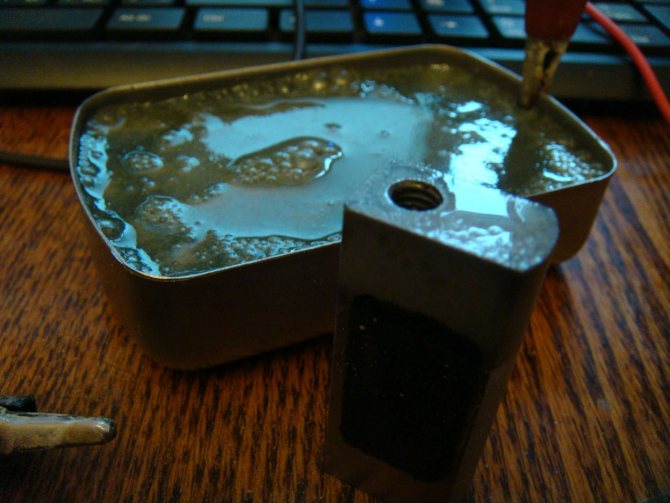
Then place the degreased parts into the solution so that the plane of their contact with the bottom of the dish is minimal and boil the parts for 20-30 minutes. Blueing
While the degreasing process is taking place, it is necessary to prepare a solution for bluing. To prepare it, you must first dissolve the remaining contents of the blue bag in 1 liter of cold water.
When preparing the solution, a chemical reaction occurs, releasing a strong, pungent odor. Also, it is necessary to avoid contact of the solution with the skin, because in this case, you can get a chemical burn. If the solution gets on the skin, it must be washed off immediately with running water and soap.
In the resulting solution, it is necessary to dissolve the entire contents of the remaining transparent bag weighing 200 g. Mix everything thoroughly. In this case, a reaction will occur, releasing heat. After this, place the container with the solution on the stove and bring it to a boil.
After the degreasing process is completed, use any objects or tools that prevent the degreased parts from interacting with your hands, remove the parts from the degreasing solution and rinse thoroughly in warm, running water.
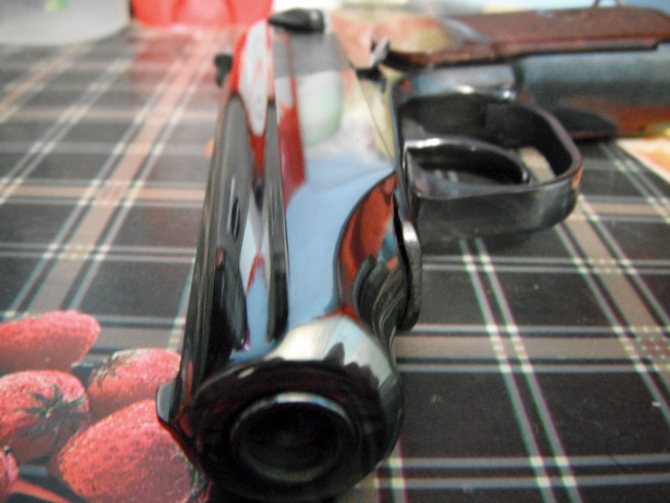
Without waiting for the washed parts to dry completely, they must be placed in the prepared and boiling solution for bluing, be sure to cover with a lid and leave the parts in the bluing process for 30-40 minutes. At a good temperature, the parts will begin to turn black within a couple of minutes, if the reaction does not occur, increase the temperature. After 30 -40 minutes, you need to reduce the temperature if you are using a stove. It is necessary to achieve a temperature of at least 125-140 degrees. You can use a thermometer. We continue to cook, as a rule, after 80-90 minutes of cooking, the parts acquire a deep black color. But you will notice it after the parts are lubricated with oil. After 90 minutes, turn off the solution and leave to cool to 100 degrees. There is no need to remove the parts, otherwise black spots may appear due to temperature changes.
It is possible to burnish parts only until the solution begins to acquire a reddish tint or foam. In this case, the solution will no longer be suitable for bluing. If the temperature is higher than expected, the solution may fail before 90 minutes.
After cooling, without removing the parts from the dish, place them under running cold water; try not to direct the water pressure towards the parts. Parts can be removed after complete washing. Dip them in a pre-prepared boiling solution with laundry soap for five minutes. This is done in order to expel the remaining solution from all cracks.
If the cooking methodology is violated, the coating of the parts may acquire either a matte surface or a rusty surface. If this happens, try washing the parts with a household liquid cleaner (for example, fairy). If the surface still remains matte or rusty, then you can try polishing the surfaces with a soft cloth with goi paste. If the above steps do not help, then the bluing process will need to be repeated by removing the coating again.
After washing the parts in a soapy solution, they must be washed with water, then with acetone, ballistol or VD.
If everything is satisfactory, then we carefully treat the parts with gun or machine oil. It would be a good idea to warm up the oiled parts a little with a gas burner; this will allow the oil to penetrate deeper into the micropores, but you should not overheat. At this point, the bluing can be considered complete.
Restoration of red coatings.
In the case when you need to restore the coating of red milled parts, you need to boil them in the solution for about 30-40 minutes, after which they are removed from the solution like all parts. If you cook longer, they may turn out black.
Safety precautions
It is not difficult to guess that bluing the barrels of a hunting rifle at home is a rather dangerous procedure, so compliance with safety measures must be unconditional. To begin with, it is worth noting that chemical solutions contain a large number of active substances, which must be stored in a place inaccessible to unauthorized people. Also, do not forget that the entire process must be carried out in special containers.
Blueing of hunting rifle barrels at home should be carried out in a well-ventilated room, since breathing chemicals and dust is quite harmful to the human body. To sand the surface, it is best to use fine-grained sand, sandpaper or pumice.
Chemical bluing recipes
There are now many different combinations of chemicals available for blued steel. Let's look at some of them.
Recipe 1
To prepare the solution you will need:
- red blood salt - 2.5 g;
- iron sesquichloride - 2.5 g;
- water - 1 l.
First, two solutions are prepared, the blood salt is dissolved in 500 ml of water, the second part of the liquid will be used to prepare a solution of iron sesquichloride. We combine these parts and pour the resulting solution into a glass container. Fill metal parts with liquid. The bluing of hunting rifle barrels and other metal parts must be carried out until you are satisfied with the resulting shade.
Recipe 2
Prepare the following ingredients:
- sodium sulphate - 70 g;
- lead sugar - 17.5 g;
- water - 1 l.
Dissolve the salts in an equal amount of water separately, then mix the solutions. The solution should be heated slowly to a boil. During the boiling process, metal elements will become covered with a dark blue coating. When the color becomes uniformly saturated, the gun bluing process can be considered complete. Carefully remove the metal parts and rinse them with water.
Recipe 3
This recipe will allow you to achieve a bright brown shade of iron. To prepare the solution you will need:
- olive oil - 500 g;
- antimony trichloride - 500 g.
The ingredients are mixed, resulting in a thick paste. The mixture must be applied to the previously prepared surface of the gun, paying attention to all hard-to-reach places, and left for 24 hours. After this, the paste is removed, the metal is rubbed with a woolen rag and a new layer is applied, which must also be left for 24 hours.
You can reduce the time of exposure to the paste by heating the metal. To do this, you need to maintain the temperature at +220 °C. In this case, the reaction speed will increase significantly, and a few minutes will be enough to blue the weapon at home.
Solution and brush
In specialized stores you can purchase various types of chemical mixtures that are used to blue gun barrels. As a rule, most of them are applied with a regular brush to the metal surface. Among such products, the most popular are “Voron-3” (domestic version) and “Parisian oxide” (imported mixture).
The advantages of this method can be seen with the naked eye. The process is quite simple, and you don’t have to make the bluing liquid yourself. Security requirements are also minimal.
However, this method also has certain disadvantages. Firstly, using a brush it will be quite difficult to penetrate into all the “cracks” of the weapon, due to the complexity of its configuration. Also, to make the product smooth, you will have to resort to additional polishing. Well, the most unpleasant thing is that when barrels are blued using a cold method, even slight chemical damage will leave a strong mark, after which the treatment will have to be repeated.
Damascus steel bluing
Damascus steel is not an independent type of metal. It is just a mixture of steel particles and wrought iron. During the etching process using the sour weed method, a special pattern is formed on the metal, similar in appearance to an ornament, including dark and light lines. Moreover, if the process is carried out correctly, light and dark lines strictly alternate with each other.
There are several ways to blue Damascus steel:
- To make the solution we use the following components: copper sulfate - 8 grams, nitric acid - 30 grams, hydrochloric acid - 2 grams, alcohol - 30 grams, water - 1 liter. First, dissolve copper sulfate in water, and after that add other components. Before use, the composition must be allowed to brew for several days. The output is brown blued steel.
- To get the black color of Damascus steel, you must first polish it. We treat the polished surface with wood oil using cloth, and then sprinkle the metal with ash from hardwood. Next, place the barrel on hot charcoal and let the metal blacken. After the barrel removed from the fire has cooled, wipe it with a rag soaked in water and acidified with sulfuric acid. We wash the product in clean water, dry it and rub it with oil. As a result, we get a barrel where all the points corresponding to the steel grains become light. In this case, the areas where the iron is located become black.
- Blued Damascus steel weapons look very stylish if they are etched “in relief.” With this etching, the steel veins stand out in relief against the background of the areas where the iron nuclei are located. In other words, etching only affects iron. To achieve this effect, we prepare a solution consisting of 30 grams of hydrochloric acid and 1 liter of water. Place the weapon in the solution for 4 hours. Then we take out the metal and wash it in water, wiping it with tripoli. Let the trunk dry thoroughly, and then treat it with oil and heat it over hot charcoal.
The bluing process requires strict adherence to technological standards; it cannot be called simple. Therefore, in the absence of skills, the decision to hand over the barrel to a specialist who will carry out the work quickly and efficiently is quite understandable.
Immersion method
This method involves immersing metal parts of the weapon in a solution. The main advantage of this method of bluing a gun barrel at home is that the liquid will penetrate even the most inaccessible parts of the parts, which is why the coating layer becomes more uniform. Also, the liquid does not splash, unlike the first case, when it is applied with a brush.
You can prepare such a solution yourself or purchase it ready-made in a specialized store. For the first case, you will need to mix the following ingredients:
- FeCl3 (iron chloride) – 75 grams.
- HNO3 (nitric acid) – 20 grams.
- CuSO4 (copper sulfate) – 20 grams.
- C2H5OH (ethyl alcohol) – 30 grams.
After preparing all the reagents, you must mix them one by one in a glass container, waiting for the reaction to take place. When immersing a metal part, you must wear special protective gloves, otherwise you risk getting skin burns from nitric acid. The metal should be kept in the solution for about 30 minutes (depending on the quality of the steel), after which it should be thoroughly washed under running water using any detergent.
Oxidation using the Buturlin method
To prepare a solution using Buturlin’s method, you will need to prepare a saturated solution of copper sulfate. For every 250 grams of vitriol, add 5-6 drops of sulfuric acid. We put the metal in a bowl with the solution and keep it there until its color begins to resemble red copper. After this, remove the weapon from the solution and wash it in clean water. At the end of rinsing, drain the liquid and rinse the container thoroughly.
The next step is to dissolve hyposulfite - sodium sulfide - in hot water. Approximate proportion: 200 grams of substance per 250 grams of water. We filter the solution using a funnel into which we insert filter paper or absorbent cotton wool. Next, add hydrochloric or hydrochloric acid to the solution (2% of the solution volume). The result of mixing should be the formation of a dark yellow liquid.
Heat the solution to a boil and place the metal in it. The time the barrel is in boiling water is 5-10 seconds. After this, remove the weapon and pour cold water over it.
We check the barrel for staining and place it in the bath for no more than half a minute. Then we take out the metal, wash it in clean cold water and again inspect the surface for the quality of painting. When the trunk acquires the desired color, that is, darkens sufficiently, it must be washed very carefully, without touching it with your hands, in cold running water.
Note! The intensity of the color depends on the time the metal is kept in the solution. It is not recommended to keep the barrel in the metal for too long, as there is a risk of the coating coming off. In this case, you will need to repeat the procedure again.
The hyposulfite solution can be poured from the bath into a glass container. This composition can still be useful for re-oxidation if you add hydrochloric acid to it. We thoroughly rinse the bath to remove any remaining solution.
Make a solution of potassium alum in a clean container. To do this you will need 120 grams of alum powder per 1.25 liters of water. We place the weapon in the solution for 12 hours. When this period has expired, take out the metal and wash it in cold water. Let the barrel dry and heat it slightly, and then wipe the surface with a soft canvas rag soaked in machine oil. Then we leave the metal hanging to dry for a week. After the barrel dries, its coating will turn blue-black.
Burnishing with rusty varnish
Such a knife is not suitable for bluing edged weapons, since the steel on most knives is poorly resistant to mechanical stress and wears out quickly. However, if you still want to bury your hunting dagger, then it is best to use rusty varnish - one of the most effective and low-cost methods. The essence of the method is to treat the surface with a corrosive medium - rusty varnish. By the way, this method is also suitable for bluing barrels.
The preparation of rusty varnish must be carried out outdoors or in a well-ventilated area. To avoid inhaling harmful gases during the process, use a special protective respirator. First, you need to place 12 grams of hydrochloric acid in a glass container, then add 20 grams of nitric acid. It is worth paying special attention to the fact that reagents should be measured by weight and not by volume, since they have different densities. Even one extra gram can lead to impaired reactions. Then 30 grams of rust (iron scale) and 5 grams of iron filings are added to the dishes.
After this, you need to wait some time for the reaction to pass. As soon as the process occurs, you need to add 50 grams of medical alcohol (ethyl alcohol C2H5OH) and 50 grams of distilled water to the solution.
The trunks are immersed in the solution for 12 hours, after which they must be treated to remove salts and scale that have precipitated. After this, the parts are re-immersed in the solution and kept in it until the metal turns black. After this, the metal is washed with cold water, and the red marks left by the solution are brushed off. As a result of such procedures, you can get a fairly good result of barrel bluing at home.
As in the case of using a brush, after the procedure the part is washed well under cold water using detergents. If you decide to bury a knife in this way, then the time the blade is kept in the solution should be controlled by you personally, since the steel on knives is different from gun steel. Prolonged exposure to rusty varnish can negatively affect the quality of bladed weapons.
Features of technology and methods of bluing weapons at home
The bluing process is essentially a chemical reaction, so it is carried out under special conditions and in compliance with certain rules. The room in which manipulations will be performed must be well ventilated or have a powerful exhaust hood. To work with acid and other chemical compounds, do not use metal containers, only earthenware, porcelain or glass.
Materials for processing can be sandpaper, powdered pumice, and fine sand. With their help, the surface of the weapon is thoroughly cleaned and polished. Liquids must be used in the correct proportions, because... Most compounds are chemical based and can be harmful to weapons.
Regardless of the bluing method, it is necessary to prepare the following tools and materials:
- steel wool;
- latex gloves;
- protective glasses;
- cleaner;
- weapon oils (lubricating and cleaning);
- applicators (cotton swabs, rags, brushes, toothpicks).
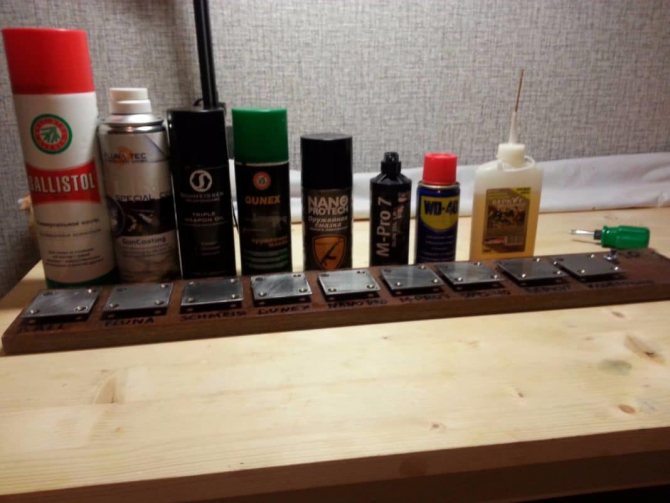
To blue a weapon you will need gun oils.
It is impossible, as experts say, to perform high-quality blueing at home. This is especially true for the oxidation of steel, which requires industrial conditions.
Home metal processing methods include cold, hot, and oxidizer bluing. Let's look at the features, as well as the advantages and disadvantages of each of them.
Cold bluing weapons
This method is widely used among home craftsmen. If the weapon is not subjected to high mechanical loads during operation, they can be cold blued. Cold bluing is carried out in a bath or special container. It is optimal for it to be made of wood or galvanized.
Burnishing takes place without heat treatment using various solutions. There are ready-made mixtures on sale for applying to metal using a brush. For example, the composition “Raven 3”, “rusty varnish” or “Parisian oxide”. “Rusty Lacquer” is a rare mixture, which if anyone has it, it is only thanks to old stocks. It is not recommended to make the mixture yourself without some experience, because... This occupation is dangerous and labor-intensive.
The prepared compounds are applied to the surface with a brush, after which a protective black film is formed on the weapon. It is necessary to ensure that the layer is uniform and that the weapon bluing liquid gets into all hard-to-reach places. After finishing the work, the part is washed and polished.
There is another method - complete immersion in a weapon bluing agent. Immersion in “rusty varnish” is the most effective and less expensive method. After all procedures are completed, the blued parts are thoroughly washed using detergents.
The advantages of the brush application method are obvious. The compositions do not need to be prepared, they are already prepared. Simple application allows even inexperienced beginners to blue a weapon, especially since there is no need to follow special safety precautions.
Their disadvantages include the difficulty of lubricating parts with a non-standard product configuration. After processing, the surface needs additional polishing. Cold bluing is not suitable for products subject to constant mechanical stress, because the resulting protective layer is quickly erased.
Hot bluing weapons
Many, especially experienced burners, prefer the hot processing method, considering it the most accurate and reliable. The coating made in this way is durable and lasts much longer.
The general principle of hot bluing is simple: heating-oiling-baking. In more detail it looks like this:
- the product heats up to a high temperature;
- Place it completely in the oil for 10-15 seconds or lubricate it with a cotton swab generously soaked in the composition. The best effect is achieved with flaxseed and hemp oil. Machine oil and drying oil behave worse;
- after application, excess oil is allowed to drain naturally so that there are no smeared streaks;
- The oiled part is baked using a blowtorch, gas heater or old stove. A hair dryer will also work.
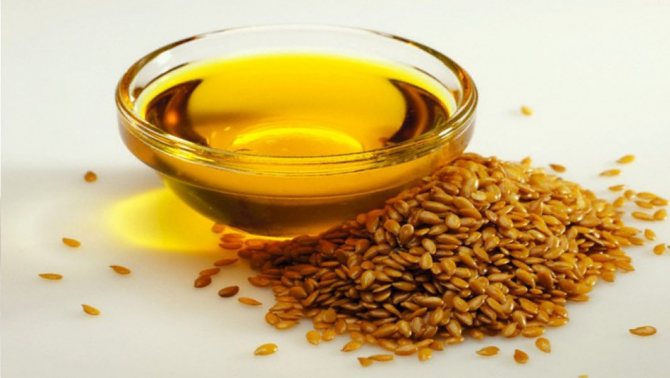
Burnishing weapons achieves the best effect with linseed oil.
Baking continues until the surface of the part begins to change its color to black. It is recommended to repeat the procedure of soaking in oil and baking 2-3 times to achieve a high-quality result.
Hot bluing has more advantages than disadvantages. Firstly, this is a method that has been proven for decades. Secondly, the coating allows you to keep the weapon intact for a long time. Thirdly, the absence of chemical impurities eliminates the presence of harmful fumes. The disadvantage of this method is that it requires minimal experience to get an even, spot-free coating.
Hot bluing
Are you interested in how to bury a gun at home? Many craftsmen prefer to use the hot method, considering it the only correct one. The arguments are quite simple. For a product that has been blued using a hot method, the protective coating lasts much longer, and the absence of harmful fumes during the procedure is an additional advantage.
This method is also commonly called oil bluing, since the technology involves the use of this substance. This method is quite simple. First, the part is heated to a high temperature, after which it is immersed in oil. Gun oil, olive linseed oil, or even machine oil can serve as a quenching liquid - this is not so important. The part is kept in the container for about 10 seconds, after which it must be removed, otherwise the metal will become covered with various stains.
The next step is to “boil” the oil on the surface. For this purpose, you can use a blowtorch or a stationary gas stove. An important point in blueing steel is determining the moment the part is “ready”. Experienced gunsmiths say that you need to stop heating the liquid the moment the gun barrel turns black. Oil is one of the oldest and most effective means for bluing the barrels of hunting weapons. Reviews about this method on thematic forums indicate its effectiveness.
What methods are available to perform at home?
Complex technological operations are not possible at home, but simpler procedures are quite possible. There are several basic bluing methods:
All three methods can be done at home, for which you need to acquire all the necessary materials and equipment, as well as study and understand in detail the physical and chemical essence of the processes. It is not recommended to get down to business without understanding the meaning of the operations being performed. Any method consists of the same steps:
- Cleaning, removal of old coating and rust.
- Grinding, removal of cavities, small scratches, dents.
- Degreasing. The surface layer of fat is removed, for which various chemical reagents are used. After completing this stage, work with metal only with rubber gloves.
- Actually bluing.
- Finishing the metal surface.
The most important point (apart from the coating itself) is degreasing. After this you can start bluing. Let's consider the possible options.
Cold bluing
The principle of cold bluing is simple - a special liquid is applied to a previously prepared surface. There are ready-made formulations:

All this is dissolved in 1 liter of distilled water, not immediately, but gradually:
- A third of nitric acid and a third of chips with scale are carefully poured into hydrochloric acid. The reaction will begin, you must wait for it to subside.
- Repeat the procedure and wait for the end of the reaction again.
- Pour out the remaining chips and scale, pour out the last third of the nitric acid. Seal and leave for a day. Then add a liter of distilled water to the resulting brown solution, after which the rusty varnish is ready. You can use it for a long time, it becomes harmless and does not require special precautions.
This is interesting: How to make a wooden knife
The composition is applied with a regular brush . It is necessary to ensure the uniformity and penetration of liquids into all corners and crevices of the parts. After finishing the work, the part is washed and polished.
Hot bluing
This method is the easiest. First, the part is heated, after which it is immersed in oil (as an option, the surface is smeared with a swab dipped in oil). The best option (as it is believed) is linseed or hemp oil, somewhat worse - drying oil. Mineral (machine) oil can also be used, but after it the results are considered the worst. Some masters advise waiting a while after applying the oil, then removing the excess. Others recommend baking the butter with a blow torch, which creates a thick black coating.
There is definitely no best recipe, since everyone has their own conditions for heating and applying oil, different temperatures and other nuances that affect the result. Everyone agrees on one thing: after the first application of oil and a short exposure, it should be thoroughly wiped off. This allows you to remove residual fats, which in any case cannot be dissolved during degreasing. The procedure of heating and applying oil is then repeated several times until the best result is achieved. In this case, you must act carefully, since the properties of the metal change when heated, and you can loosen the barrels too much.
Oxidation
Various types of nitrates or nitrites are used for oxidation. The procedure consists of immersing the prepared part in the molten mixture. The temperature is quite high, which is a serious limiting factor for use, since strong heating is contraindicated for critical parts, and gun barrels are such. There are many recipes for oxidizing agents designed for different temperatures, but to obtain the maximum effect, you must have strictly dosed heating that promotes an optimal reaction regime. It is difficult to organize this at home, so self-blueing by oxidation in artisanal conditions is rarely used.
Oxidizing agent treatment
For a person who understands chemical processes, the question of bluing barrels should disappear by itself. The first thing that should come to mind is the need to treat the trunks with a special oxidizer. The only disadvantage of this method is that the mixture must be heated to the melting point, however, it is not always possible to do this at home. Most often, the processing is carried out using various nitrates, which is why the second name of the process came from - bluing of trunks in saltpeter. Although the choice of oxidizing agents is not limited to it, saltpeter is most often used at home - safely and effectively.
Types of bluing
There are a large number of types of bluing. A variety of means are used. Some of them can be used at home, others are used on an industrial scale by weapons manufacturers. We list the most popular bluing options that an ordinary user can carry out:
- Alkaline. It is carried out using oxidizing agents. The process itself is performed at a temperature of +140-150 °C. It is better to carry out the process outside the living space, since when metal is blued, a toxic, unpleasant odor is released. A thin film of oxides forms on the metal surface. This is what protects the product from rust.
- Acidic. The metal is immersed in an acid solution for a certain time.
- Thermal. The oldest type of bluing. The process involves strong heating of the metal in the open air. The metal reacts chemically with oxygen and oxidizes.
Each type of metal bluing at home includes several subcategories, which may differ in the compositions or processing technologies used.
Methodology
Immersion time in the chemical composition does not exceed 30 minutes. During this half hour, you must carefully monitor the immersed parts and remove them as soon as they are completely blackened. This technique allows you to blue barrels at home, obtaining a hard metal coating that will not violate its integrity.
The metal oxidation method is considered quite effective, but very expensive and difficult for beginners. The process will require a certain skill and good knowledge of chemistry from the gunsmith. It should also be noted that bluing of stainless steel must be carried out with other reagents.
Popular bluing methods
The most common methods of bluing at home are:
- alkaline;
- thermal;
- acidic.
The alkaline method is well suited for self-use at home. It will require
- water;
- precision scales;
- sodium nitrate and hydroxide.
For the coating to become durable, the process must last at least an hour and a half.
Alkaline
The technology for bluing steel using the alkaline method at home is divided into the following operations
- Degrease the surface with a solvent or special degreaser.
- Pour 100 g of water into a stainless steel container with a capacity of at least a liter.
- Add 120 g of caustic soda and 30 g of sodium nitrate, stir thoroughly until completely dissolved.
- Heat the solution to 130-145 °C.
- Place the product in the dish, avoiding touching the walls.
- After 20 minutes, after the part has turned black, rinse it in distilled water.
- After drying, generously lubricate the product with machine oil and wipe thoroughly.

Steel bluing with alkali
Careful adherence to proportions and parameters will allow you to obtain a smooth and abrasion-resistant coating that does not require polishing.
Important! The product must be completely covered with the solution throughout the treatment. Otherwise, coating inhomogeneities, color transitions, etc. are possible.
Acid
This method involves the use of acidic solutions.
Before starting processing, you should carefully remove all rust from the surface of the object. To do this, use ordinary sandpaper, and in hard-to-reach places and with severe rust, use a grinder or a screwdriver with a wire brush.
Means for degreasing steel before processing
Next, chemical cleaning is carried out. It is used for
- sodium triphosphate;
- ethanol mixed with kerosene;
- or pure kerosene.
The product is placed in a container with the solution so that it completely covers it and kept for at least a quarter of an hour. After cleaning, the product is washed with plenty of water and dried.
The composition for acid bluing consists of:
- water: 1 l;
- tannic acid: 2g;
- tartaric acid: 2g.
After thorough mixing and complete dissolution, the composition is heated to 150 ° C and the workpiece is completely immersed in it. Leave for 15 minutes, then rinse with running water and briefly dip in boiling water for complete and high-quality rinsing.
Components of the solution for bluing
The last stage of the process is soaking in machine oil for an hour. After drying, the product is ready for use.
Thermal
Thermal bluing is the oldest and simplest method for home use. The whole process boils down to heating the steel in the open air. It lasts until the upper layers of steel react with oxygen in the air and result in an oxide film. The more a part is heated, the darker it becomes.
Thermal bluing
It should be remembered that heat treatment also changes the physical properties of the steel of the entire product.
Video
If you are interested in the process of “home” barrel bluing, we recommend that you familiarize yourself with the following video. It will help you more clearly understand all the stages of cold bluing.
In conclusion, it is worth noting once again that bluing barrels at home is a rather hazardous process for health, so it must be carried out only with unconditional adherence to safety precautions. When using various reagents, be sure to use protective gloves, and carry out all work in a well-ventilated area.
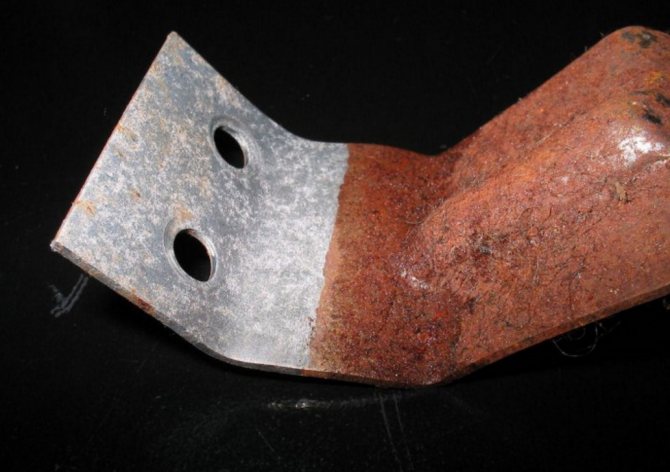
What can be achieved by bluing
As a result of chemical or thermal treatment, a layer of iron oxide with a thickness of 1 to 10 microns appears on the surface of a steel part. The thickness of the layer is determined by the selected processing technology.
Blueing of metal allows you to achieve two main goals:
- Increasing the corrosion resistance of the product. Treated parts do not rust.
- Improved appearance. It is especially important for those parts that, due to operating conditions, cannot be painted.
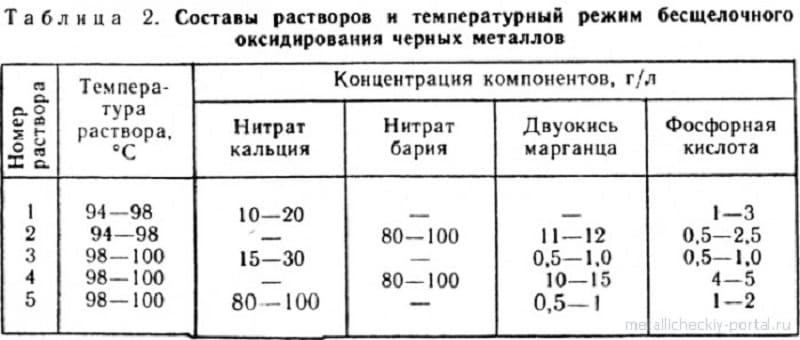
Temperature conditions for bluing
The treatment does not affect other properties of the steel.
Blueing of steel is possible not only in production conditions, but also at home. There are many methods and compositions, almost all of them involve the use of chemically active substances that can cause serious harm to health. To successfully and safely use these substances at home, you must follow the following safety rules:
- Use a protective mask and gloves.
- Ensure ventilation of the room in which work is carried out.
- Use stainless steel utensils.
- Do not exceed the recommended processing temperature.
Recommendations
Are you wondering how to bury metal objects yourself? To do this, you can use one of the methods that suits you. Using professional advice, you will get the perfect color of the metal, and the process itself will be carried out in a way that is safe for you.
Cold bluing involves the use of a bath or special container. But it cannot be made of any material. A wooden bath or galvanized container is optimal.
It would be good if the container was additionally equipped with hangers-hooks for placing parts in the solution. These elements can be made in the form of curved racks or mounted on a wall. Everything is determined by the height of the sides of the container and the dimensions of the workpiece.
To blue the steel, the container must be properly degreased. The best solution for this is an organic-based solvent. This can be acetone, perchlorethylene or B-70 gasoline. The base remains inert towards these compounds. But for each type of metal it is necessary to select the optimal solution. Only with its help can you obtain the optimal color and maximize the characteristics of the product.
Even if you are doing cold bluing, the work should be done outdoors or in a room with good ventilation. This is due to harmful fumes and a strong chemical odor.

If you cannot clean the surface well with a brush or abrasive, use etching. Each type of metal has its own remedy. If you have a ferrous metal product, the bluing liquid includes 100 grams of nitric, 50 grams of sulfuric and 150 grams of hydrochloric acids per 1 liter of distilled water. The surface is treated for at least 2.5 hours. Chemical polishing is used to give a smooth surface.
Thus, you can do the bluing of a steel object yourself. To do this, it is important to choose the most suitable processing method and adhere to a clear sequence of actions. As a result, you will get a corrosion-resistant surface in a suitable shade.