Advice from professionals
Before you make a knife sheath with your own hands, you need to select all the materials and tools correctly. The practicality and attractive appearance of the finished product will depend on their quality.
Another important factor in the success of creating a sheath is strict adherence to the entire sequence of actions and taking into account the advice of people who are professionally involved in the manufacture of this accessory. They will help beginners not only avoid most mistakes, but also make the most beautiful and practical thing possible. Professionals advise the following:
- Before you start making the sheath, you need to take care of protecting the handle. To do this, you need to treat it with any water-repellent composition that will help it not lose its appearance when in contact with liquid.
- To create a sheath, you need a hard liner, which can be made from cotton fabric impregnated with epoxy. In addition to this material, you can use a medical bandage rolled up in several layers, but the liner will be softer and more brittle.
- It is very important after polymerization of the epoxy, dip the workpiece in boiling water and boil in it for several minutes. This will help remove stearin (a substance used to make candles and soap) that is harmful to the knife.
SCABAD: materials, technologies and everything connected with them...
Let me bring to your attention my version of the manufacturing technology of a Finnish-type scabbard with a one-sided insert. I apologize in advance for the extensiveness of the message - the professional deformation of the teacher’s personality.
So: First part.
It all starts with a knife and a sketch.
According to the sketch, we mark the contours of the liner and the internal cavity on a pine board (do not confuse which hand we are making the sheath for). Using a cutting router on a Dremel, we cut the outline.
Use a chisel to select the internal cavity
Place the blade into the cavity
And check whether it protrudes beyond the dimensions of the sides of the liner
On a Corvette 51 rim equipped with 80 grit abronet, we grind out the outline of the liner.
I decided to make a “faceted” liner. Therefore, I mark the future edge on the plane
We also mark on the end
On the same “Corvette” we form the facets of the liner. The smaller the insert is, the better it is.
We wrap the knife in three layers of cling film (carefully because it will have to be wetted)
Place the knife into the insert and secure it with tape
The following is my know-how (I do not claim royalties). To obtain a pattern, place the knife with the liner on food foil
Carefully wrap the knife around it
Pinch the seam locations
Trim the foil along the seam line
Carefully unfold the foil (if it's torn a little - no big deal. The main thing is the shape of the pattern), place it on a sheet of paper (do not mix up the sides) and trace
We give an allowance (standing seam). We mark the side of the mezdra.
Place on the skin, mark and cut out.
Here we need to make a retreat. The main secret in making a sheath is to use good leather. Vegetable tanned. 2-2.5 mm thick. My skin is 3mm thick. That’s why I mark the lines of thinning skin.
Again, the Corvette makes my skin thinner. Dust, dirt...brrr. So what to do ?
The result is that the skin gradually reduces its thickness to 1 mm.
Next, soak the pattern, strap and trimmings (as witness samples for further experiments) in warm water.
While the leather is soaking (about 2 hours), we prepare equipment for molding the shape of the sheath. I use plastic clothespins
And office clips. Attention !!! The jaws of office clips must be covered with electrical tape or tape. Otherwise, they leave unsightly black spots on light skin.
The skin is wet. Test - the pattern is easily crumpled and fits in your fist. Place the knife on the skin.
Using clamps, we begin to form the sheath. Take your time - the skin will remain flexible for a long time. We control the position of the seam. We use plastic clothespins on curved areas, and clamps on straight areas.
Result
Press the shape of the edge with your fingers.
Don't forget to fold and tighten the suspension strap
A day has passed. The skin has dried out, but not hardened. We remove the clamps, take out the knife (remove the film and check the blade for rust). We mark the seam lines according to the marks of the clamps
I like to make the mouth of the sheath with a fold of leather (it grips the handle more securely, more aesthetically pleasing). On the folded mouth we mark the lines for turning and trimming the mouth.
Trimming
Mark the folding area on the inside of the sheath mouth
Using these markings we again thin the skin (Corvette, dirt, dust....). Result
Use your fingers to fold the skin under and press it together.
Coat the gate with Moment glue
Focusing on the previously marked inflection line, we clamp the glued and tucked mouth in a vice, between the gaskets
Result (after 2 hours) of cooking.
We press grooves along the marked seam lines (for ease of drilling holes)
We check the coincidence of the seam lines in the mouth area. We make adjustments if necessary.
Mark the holes for the seam. Step – 4 mm (for this skin thickness). I mark specials. Roller. You can use a fork with broken tines, a ballerina from the kitchen, etc.
Using a Dremel with a flexible shaft and a 1.25 mm drill, we drill holes according to the markings. Here it is important to be like a sewing machine and drill holes with the same angle of inclination of the drill to the plane of the workpiece
Since the seam is located in the tip area along the radius, one side of the seam will be longer than the other. You can, of course, tediously count the holes on one side with your finger, mathematically calculate the increase in the pitch of the holes along the long side of the pattern and mark it with something (the goal is to get an equal number of holes on each side of the pattern). I just don’t drill the last 1.5 dozen holes on the short side of the pattern.
Everything is ready to sew. We remove everything unnecessary, wash our hands and prepare them for testing (band-aid)
I sew with nylon cord threads (hard), needles with faceted tips and wide eyes. We begin to sew three ties from the mouth towards the mouth
Then we return. (The goal is to get a double seam at the edge of the mouth). We sew with two needles, towards each other.
We approached the undrilled holes at the tip. We count the number of holes on the long side (14 pcs) and markings on the short side (12 pcs). We make adjustments to the marking of the short side (shorten the step) until we obtain 14 marking points.
Carefully drill these holes in one layer of skin
Manufacturing options
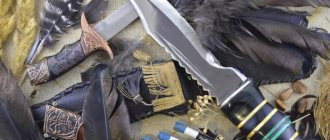
As a rule, all quality knives are made from Damascus steel, so they need a strong and reliable sheath. This is necessary not only for your own safety, but also to maintain the cutting object in proper condition. In most cases, a self-made leather knife sheath meets all these requirements, so you can prepare all the necessary items and feel free to start working.
In the manufacturing process, a minimum amount of inexpensive and affordable materials will be used, which can be easily found in stores for fishermen and hunters. All this allows you to make such sheaths even for people with modest financial resources.
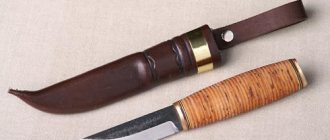
Leather for hunting knife
Today, many ways have been invented to make a leather sheath with your own hands. All of them are quite simple, but require accuracy and the ability to work with this material. Beginners need to be extremely careful and not miss even the smallest details of the process. In order to make a high-quality leather sheath for a hunting knife , you need to prepare the following materials and tools:
- a sheet of white A4 paper;
- a simple pencil;
- scotch;
- sharpened scissors;
- brush;
- an ordinary fork;
- office clips;
- quick-drying leather glue;
- PVA glue;
- sandpaper;
- a suitable piece of leather;
- drill with a drill bit with a diameter of 1 mm;
- vodka;
- shoe wax;
- stain.
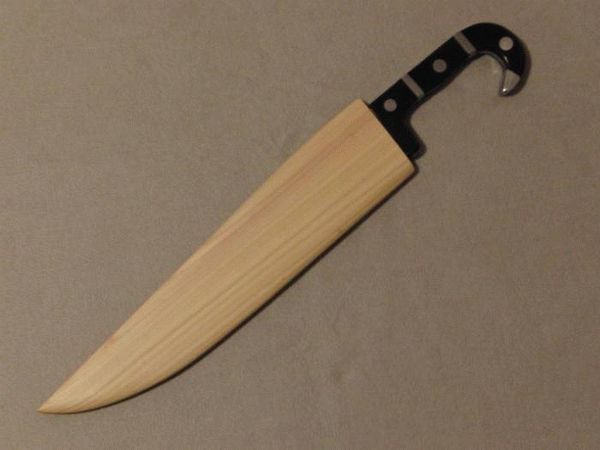
Wooden scabbard - step by step instructions
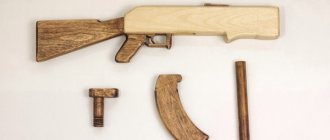
Creating wooden knife sheaths is much more difficult and requires some carpentry skills. You can make them from birch bark or solid wood - at the request of the master.
Tools and materials
To work you will need:
- one large or two small planks approximately 10-15 mm thick (the size of a knife);
- epoxy glue;
- jigsaw;
- awl;
- clothespins;
- bit;
- file;
- PVA;
- file;
- woodworking machine with different attachments;
- wooden pins;
- vice or press;
- leather for hanging;
- rivets, riveter.
Procedure
How to make a scabbard out of wood? First you need to sketch a sketch, finding a suitable option on the Internet or inventing it yourself. Cut the board in half (or take two at once), put a knife between them, and outline the diameters of the mouth on the end. Measure the depth of insertion of the knife into the future sheath. Using a suitable cutter or regular chisel, make a recess under the handle of the knife, then place the knife again and outline it. Repeat all steps on the other half, adjusting them as accurately as possible.
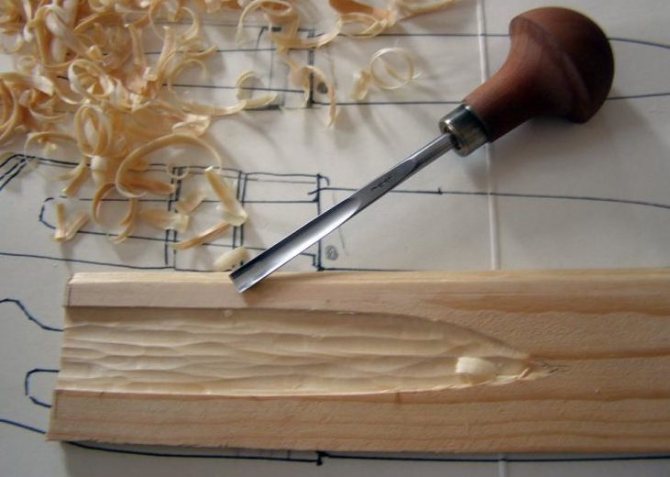
Next, you should give the planks the shape of the future knife. It should fit freely into the case, but not dangle. Sawing is done with a jigsaw, saw, or file. Both halves need to fit perfectly together. If space for the blade is needed, the handles are deepened with a chisel. Next you need to work like this:
- Place the pins on the epoxy glue. Lubricate the two halves of the workpieces and press them with a vice or other press. Leave for a day, then clean off excess resin.
- Cut out of leather a suspension strip and two more strips for the loops for attaching the sheath strap and attaching to the belt. Soak the leather parts overnight in water in which PVA is dissolved (approximately 2:1).
- In the morning, squeeze out the skin and trim a little along the folds. Wrap the sheath, secure with a vice, and leave until dry. Fold the loop straps in half and overlap, and also place under a press to dry. Then the skin will be ready for stitching.
- Connect the sheath strap end to end and sew it to the applied leather. If necessary, pierce holes for the needle with an awl. To make sewing easier, use clothespins.
- Sand the wooden product. Then apply drying oil to the finished sheath and leave for a day. Wet the leather parts again and stretch them wet onto the wood. Secure the leather with metal rivets.
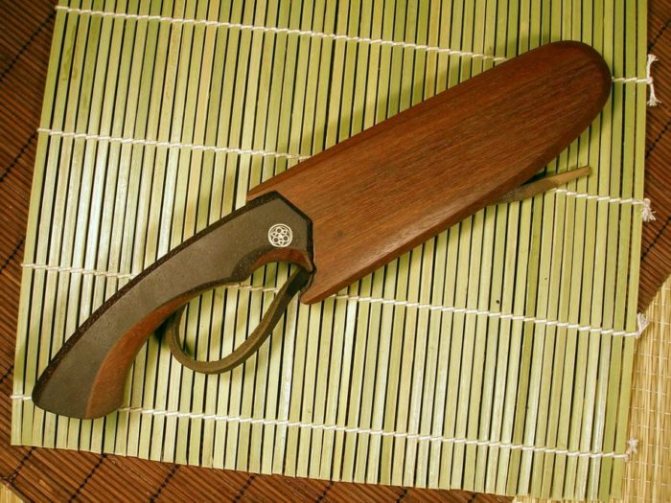
Some people cover the outside of the wooden scabbard with leather, but it can be left in its original form. A product with a printed pattern or a carved pattern also looks interesting.
Making sheaths using Ural-Siberian technology
The process of making a wooden sheath takes place in several stages:
- select small planks (2 pieces), the vertical size of which will correspond to the length of the knife, and the horizontal size will be equal to two thicknesses of its handle;
- carefully process the boards, ensuring they are tightly adjacent to each other;
- place a knife on each of them and trace its outline;
- On the end part from the handle side, mark the sampling depth for it;
- the wood should be selected along the contour, the finished sample should take the shape of a funnel, evenly tapering from the mouth of the sheath to the tip of the blade;
- between the sheath and the blade, provide a small gap (3‒4 mm).
This is interesting: Types of air rifles
If you couldn't fit the mouth to the handle perfectly, don't despair. From the inside at the mouth, glue a strip of fabric, having previously impregnated it with epoxy. Wrap the knife in plastic and press the fabric well against the mouth of the sheath.