Drying stages
Drying fish at home has been around for a long time. The process removes moisture and increases shelf life. Various dehydrators are suitable for this.
Fish dehydrators
There are many ways to organize the process, but in factories and at home there are 3 simple stages:
- pickling;
- soaking;
- drying.
Drying fish or meat is easy step by step. However, it is necessary to understand each stage of drying. You can't make mistakes. The fish will begin to disappear and rot. It will not be possible to correct the situation later.
Salinization
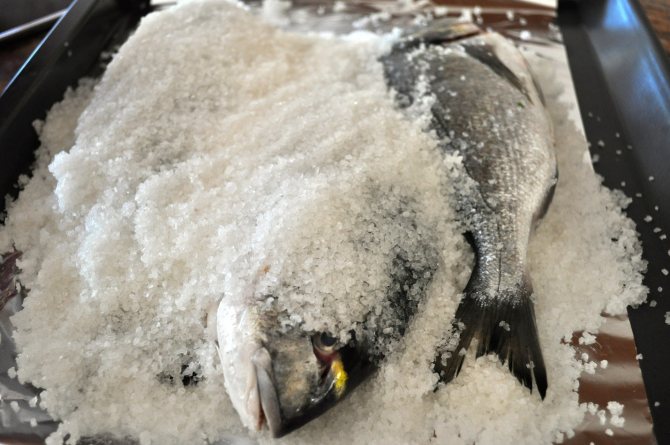
It is impossible to properly dry fish without careful selection of salt. Coarse salt is excellent for this process. It retains moisture better, creating maximum dehydration. Fine grinding will not be able to cope with such a task. The fish meat will remain moist.
Before salting, let's look at 3 important questions. They concern:
- fish size;
- fat content;
- removal of intestines.
Fishermen recommend drying small fish. Large representatives are more difficult to dry. Pike, roach, chebak, rotan, bream, white bream, perch, yellow striper, and roach are excellent choices. Sometimes crucian carp, carp, flounder, smelt, rudd, silver carp, grayling, tuna, shamaika, cape, catfish, taranka, sabrefish, and bluefish are also dried.
Salting fish
If the fish is large, then before drying and salting it is necessary to make a horizontal cut along the back from head to tail - or the product will turn out to be raw. Dryness will not happen either in an air fryer or in a gas or electric oven.
Many also advise not to use excessively fatty fish. However, there is no fundamental difference.
The situation with the removal of intestines is ambiguous. Some people recommend making an incision along the belly and removing all the insides (guts, caviar) with your hands. Others advise abandoning this stage. Removing the entrails has 2 advantages:
- with an open belly, the fish dries out faster;
- the intestines will be bitter and can spoil the taste.
Drying fish at home does not involve first removing the head or tail. The product must be processed as a whole. It is important to preserve the scales; they cannot be peeled off.
Before salting, fish should be washed under running water. Then it is advisable to place the product on a paper towel. The material will absorb excess liquid. You should not salt wet fish.
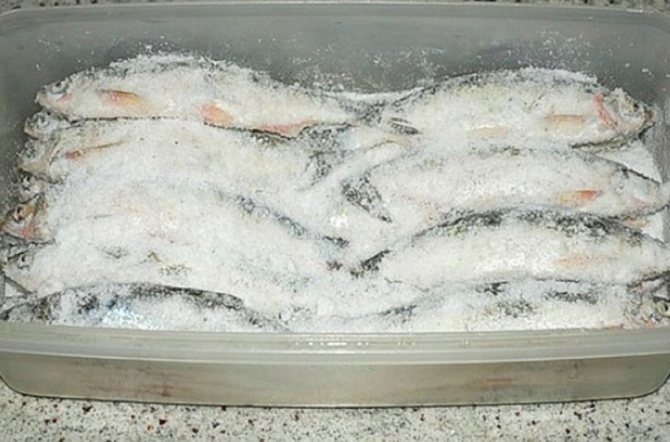
You need to pour a little coarse salt onto the bottom of a basin or other dish and lay the first layer. Fishermen recommend laying out larger carcasses first. After laying out the first layer, you need to pour salt again and place the second one. However, it must be laid strictly perpendicular to the first.
The scheme must be used before the laying out process is completed.
Then you need to sprinkle the semi-finished product with vinegar. Some recipes also recommend that fishermen spray a small amount of this liquid directly onto the fish itself. Using vinegar is the easiest way to repel flies. In principle, they will not fly up. Sometimes insects even leave their larvae in the semi-finished product.
The last stage is the installation of oppression. It is enough to place a wide plate on the carcasses and place a jar filled with water on top. The pickling needs to be refrigerated for 3 days.
How to salt fish
Some recipes recommend using sugar along with salt. Dried fish will have a slightly sweet taste. “Dessert” is not for everybody.
An important issue is the choice of the amount of salt. The answer to this depends on personal preferences. If you like tough and firm fish, then you need to use a lot of salt. The product is perfect as a kind of beer snack.
Soaking
The container with the semi-finished product must be removed from the refrigerator (some people store the product in the freezer), rinsed under running water and placed in a basin. Then you need to start soaking. To do this, you need to fill the basin with water and immerse the fish. Typically, the entire process of removing excess salt takes no more than 3 hours. However, you should not focus solely on time. The fish should lie until the tails begin to float.
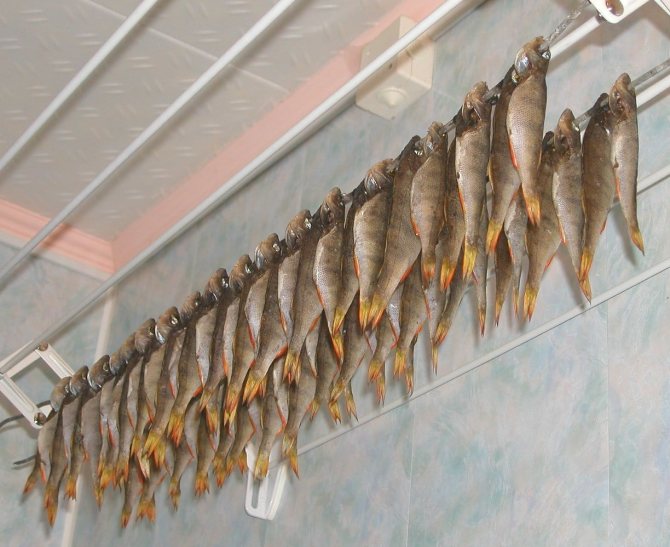
Drying
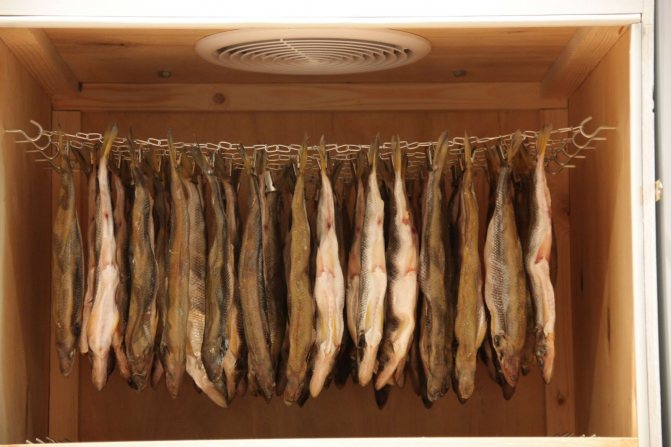
Now all that remains is to hang the fish and put it in the sun. To protect against rainy weather, the semi-finished product can additionally be placed under a canopy. Drying time – 2-3 days. It is necessary to cover the product with gauze or mesh. This will get rid of flies and other flying insects and prevent the appearance of maggots. They will not sit on the product. This method of protection is the simplest. There is no need to come up with additional devices.
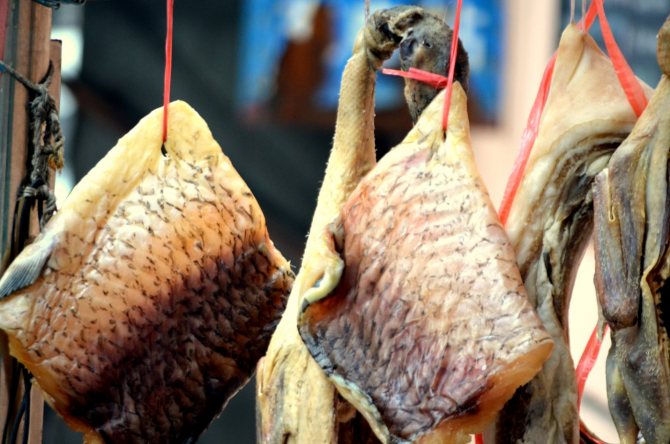
Drying fish
You can dry fish at home in the summer using the head or tail. The result depends on the drying method. When the fish's body is secured by the tail, excess liquid will flow down and exit through the gills and mouth. The product will be saltier.
If you put paper clips through the eyes and hang the fish by the head, much less liquid will drip. More fat will remain inside the fish. The meat will be moist.
Before choosing a method that allows you to properly dry fish at home, you should understand the taste. Fishermen in the instructions note the importance of choosing the drying time. If a person does not want to put it off and wants to get the desired result quickly, then the fish should be kept for 2-3 days. It will become dry.
However, dried fish can also be cooked in a similar mode. You need to hang the fish immediately for 4-5 days.
Have questions? Ask them to an expert!
Leonid Grachev
Fisherman with a lot of knowledge and experience
Ask a Question
How to salt and dry fish
We invite you to familiarize yourself with a method of drying without frills and nuances that anyone can master.
- Cut a large fish along the back (do not remove the scales), remove the insides, rinse the cavity, and also cut out the gills. Do not cut small fish.
- Place a layer of salt at the bottom of a container, such as a pan or basin.
- Lay the carcasses, sprinkling each layer with plenty of salt.
- Leave large fish under pressure for 5-7 days or small fish in the palm of your hand for 2-4 days.
After salting the carcass, string it on a wire or rope, if desired, shake off the salt or soak in water for 2-3 hours, hang the “garland” in the designated place. Separate the halves of the cut carcasses with skewers.
The readiness of the product is checked as follows:
- the structure of the fish is visible in the light;
- no protruding salt;
- The meat is elastic and not moist.
Drying season
Drying fish at home can be delicious during any season. However, it is necessary to take into account external environmental factors. Without this nuance, it will not be possible to obtain the desired result. The product may smell, and the pickling itself may deteriorate.
Summer
Drying fish at home in summer is easier than in winter, spring or autumn. If the temperature is high, there is no rain and there is no forecast, then you can work directly on the street (for residents of the private sector).
Drying fish in summer
In hot weather, it is important to consider the speed of manipulation. The fish disappear quickly. The rules of action are simple. If we managed to catch something, we begin to dry it. This scheme allows you to avoid damage to the product.
For the most attractive result, drying is best done in the shade. Suitable for this:
- balconies;
- attics;
- sheds;
- basements.
Any room that creates shade will help cope with this task. Some fishermen even prefer to dry their catch in greenhouses. Those who like the product to be as dry as possible like to hang fish in such structures. Naturally, opening hours will have to be adjusted. They are judged not by the amount of time spent, but by the appearance of the fish.
It should not smell, the shade of the scales will change to gray.
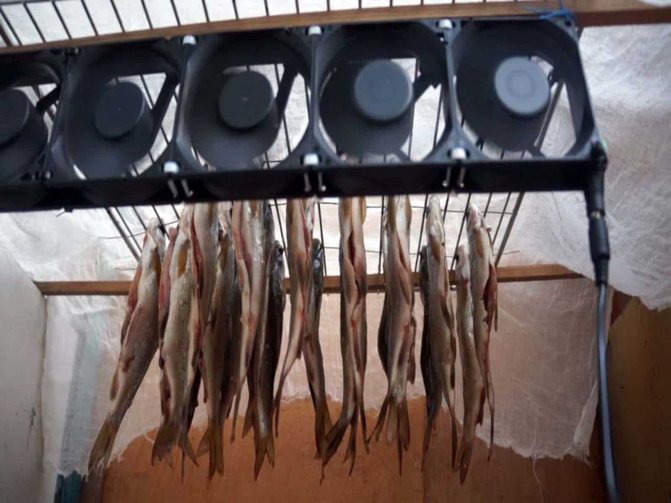
If the process takes place indoors, then it is better to create an additional breeze. You can use the same fan. Fish must be protected from insects. In the summer they will start up most actively. You cannot put the semi-finished product in the dryer or thread it and hang it without additional protection from flies. Regardless of the type of drying, you should not leave fish open.
Winter
In winter, salting with special features. There is no need to take the product out into the cold. It's better to work indoors. It is important to monitor the temperature. The thermometer should not fall below 0. Sometimes, to ensure this condition, it is necessary to install additional heating.
In winter, fresh fish can also be dried in an electric oven or electric dryer (some models are only suitable for fruits and vegetables, but there are also universal models). The devices can be used all year round.
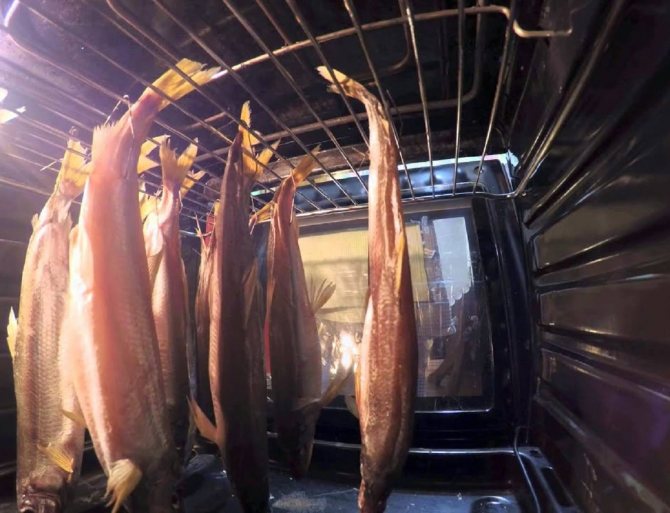
Drying fish in an electric oven
With their help, you can dry “trifles” without any problems. However, it is better to first cut large fish into small pieces.
Autumn
You can dry fish in the fall. The rules of action are the same as in winter. You can work in the spring, for example, in March. There is no fundamental difference.
Where to dry
You can dry fish to prevent flies from landing in a variety of household appliances or simply on the street. There are no fundamental differences. Some fishermen claim that natural drying produces more attractive results.
On the balcony
When drying, a natural shadow is created on the balcony. If the process is carried out in winter, it is better to install a heater. Frost will be of no help.
Drying fish on the balcony
In summer, this process has a different feature. A fan needs to be installed. Otherwise, the fishy smell will enter the apartment.
In the oven
To cook fish in the oven, a different technique is used. You need to rub the carcass with salt, pepper and other seasonings. After this, it should be removed under pressure for 48 hours. Then the semi-finished product is washed, laid out on a paper towel (plain newspapers are not suitable) and transferred to the oven.
It’s good if the household appliance has convection. In this mode, the hot air moves not only upward, but also throughout the volume of the cabinet.
Temperature +40 degrees Celsius. The semi-finished product is kept at this heating for 2 hours, taken out and allowed to cool. Then they are put back into a heated cabinet for 3-4 hours.
In the vegetable dryer
There are other nuances when preparing dried fish in a fruit and vegetable dehydrator. You need to focus on the color of the semi-finished product. The finished product will be gray or even black.
To change the taste, you can additionally put various herbs on the bottom of the device.
Cooking time depends on the size of the fish. The capelin is dried for 4 hours; the finished mackerel can be obtained in 10 hours.
In a refrigerator
A refrigerator is also suitable. You need to salt river fish for drying at home according to the specified recipe. Then the soaking procedure is carried out.
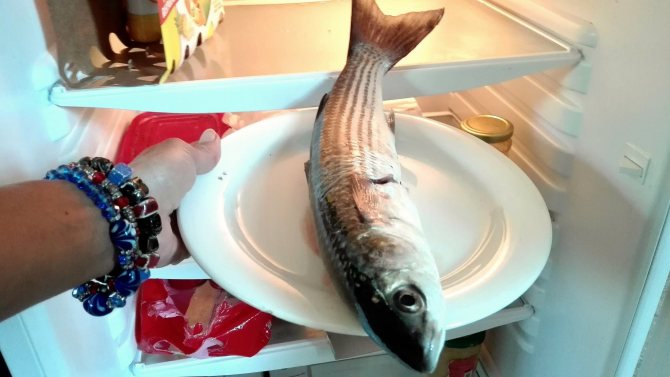
Drying fish in the refrigerator
At the final stage, the semi-finished product just needs to be placed in the refrigerator. You should first wrap each carcass in a paper towel.
In the greenhouse
The rules for working in a greenhouse do not differ from the recommendations for the street. It is only important to correctly track the work time. In hot weather, drying is faster.
Under the fan
The fish is dried under a fan in the apartment or on the balcony. The device is necessary to remove unpleasant odors.
How to dry river fish
Before the drying process begins, the fish is first salted. Dried river fish turns out to be especially tasty if it is salted in artificial brine. To do this, add enough salt to a liter of boiling water so that an average raw potato can float on the surface. Also add 1 tsp to the water. sugar, coriander, bay leaf and other favorite spices. Place the already strung carcasses into the cooled solution, which should cover the entire area of the fish. Leave fish weighing up to 500 grams for 2 days and fish weighing more than 5 days. Then send the “garland” to dry in a convenient way.