Since ancient times, people have used different units for household needs. Today this craft has not lost its relevance - tying knots is successfully used in fishing and mountaineering. One of the most famous types is the bowline knot. The arbor connection used by climbers is knitted very simply, but is reliable, durable and highly functional. Depending on the purpose of the knot, different knitting patterns are used.
Node characteristics
Archaeological finds indicate the use of the first knots by the Egyptians and Phoenicians more than 3,000 years ago. John Smith's textbook Seamanship, published in 1629, contains patterns for knitting a bowline knot. The resulting non-tightening loop at the end of the rope made it possible to use this device in shipping on small sailing ships.
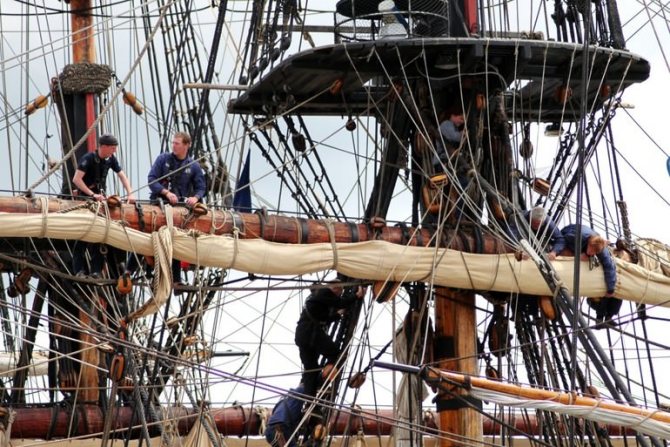
With this connection, sailors attached ropes to sails . Several decades later, this option became famous among mountaineers, rock climbers and speleologists. Athletes use a bowline knot to attach ropes to a support, even one on which it is impossible to put a ready-made loop.
Sometimes this knot is used for belaying - the athlete thus ties himself to the rope. Experienced climbers are able to tie a bowline with one hand. This property is indispensable when carrying out rescue operations, where you can throw one end of the rope to a person. This knot will hold firmly even when tying ropes of different diameters.
A variety, the running bowline, is often used to construct traps in wild survival situations. Despite its small size, the bowline combines several types of fasteners: simple, weaving, straight, half-bayonet. This combination makes it universal and allows you to get a product that:
- It ties naturally.
- It will not drag on even if excessive physical effort is applied.
- Will not bloom spontaneously.
- Protects cables from premature wear.
- Will not slide on the sling during operation.
- If necessary, you can quickly dissolve it.
The main purpose of the gazebo in mountaineering is to secure the human body for the purpose of insurance during ascent or descent. But it can also be used during rescue operations on a ship or during repair work.
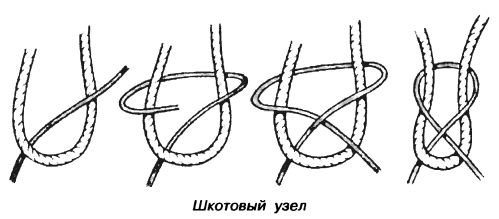
How to tie a clew knot?
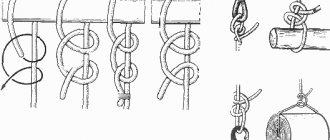
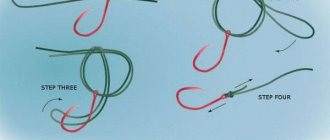
What if we need one long rope, but we only have pieces of rope of different thicknesses? For this we need a clew knot. It is suitable for permanent loads, i.e. may come undone when released.
A reinforced version of the clew is the clew knot (a thin rope is wound).
Varieties of gazebo bowline
Today you can find many options for knitting this product. For the strength of the knot, it is important to determine its purpose. The analogues have a slight difference from the knitting technology of the classic version, but in many cases they are able to prevent the rope from unraveling. The most famous options are:
- classical;
- back;
- double;
- water.
When tying wet ropes, it is recommended to use the water method of joining raw materials. This option involves passing the running end not into one peg, but into two at once. The result is a “stirrup” that prevents the loops from spreading on a wet product.
Classic way
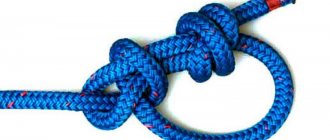
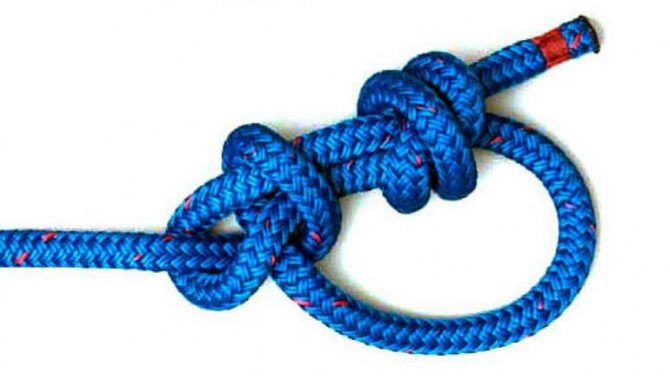
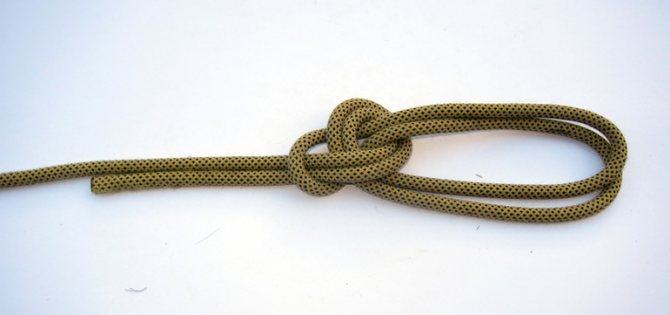
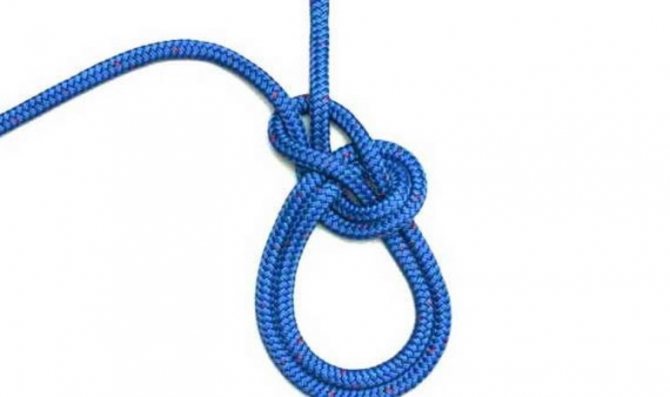
The classic connection is a loop at the end of a rope. It is able to withstand impressive loads and not come undone. It is important for a novice climber to know how to tie a bowline knot. It is a fairly simple and at the same time very reliable type of connection.
Practicing climbers often supplement this option with a control knot in case of variable loads to be on the safe side. This is explained by the possibility of spontaneous unraveling of the connection under such conditions . It’s not at all difficult to learn how to knit a classic bowline knot according to the pattern:

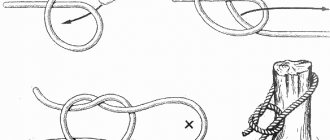
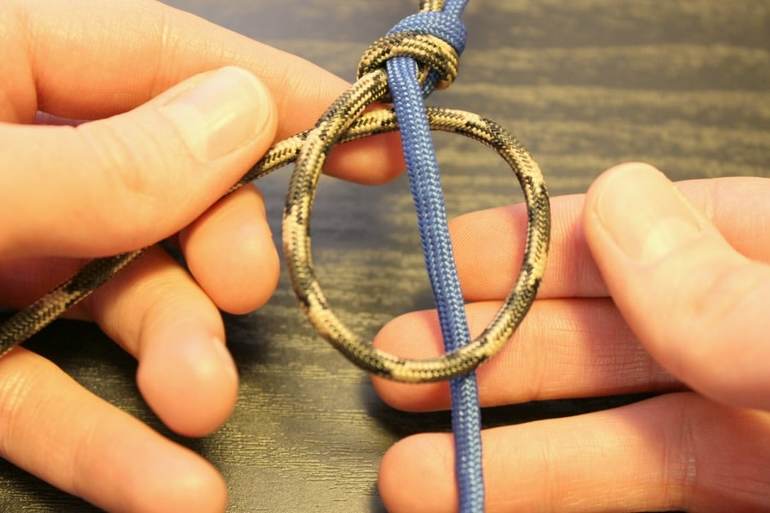
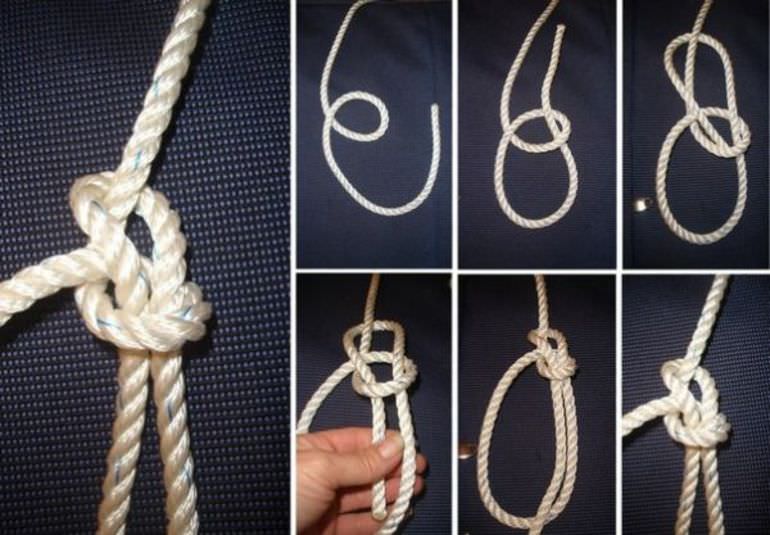
- Take a rope with one free end with your hands and make a simple loop without additional turns. If possible, it can be wrapped around the support to which the connection will be fixed.
- The free end of the rope is pulled through the loop, holding it with your fingers. The running end is wrapped around the free part of the rope and threaded through the loop again. The result is a large and small loop.
- Next, tighten the connection by the large loop on one side and the free part of the rope on the other. The free end that remains after work is used to adjust the size of the large loop.
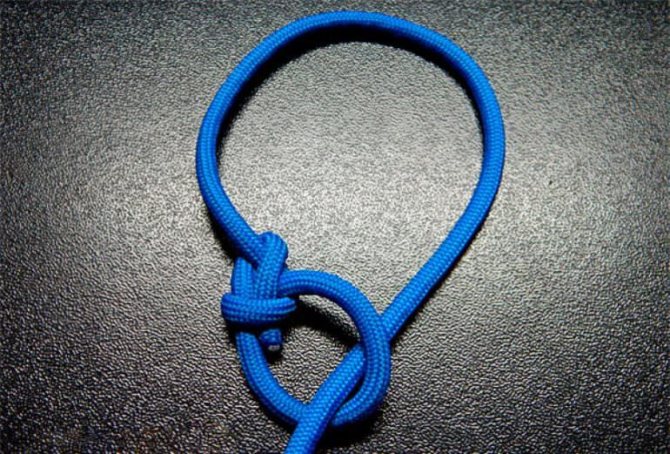
After fully tightening the connection, a free loop is obtained that can not be tightened or unknotted under the influence of load. To obtain the correct node, you must follow all rules and recommendations.
Reverse method
If the weight of the load exceeds 80 kilograms, then it is recommended to use the reverse method of connecting the rope. This method is a variation of the classic version, but is recognized as more reliable.
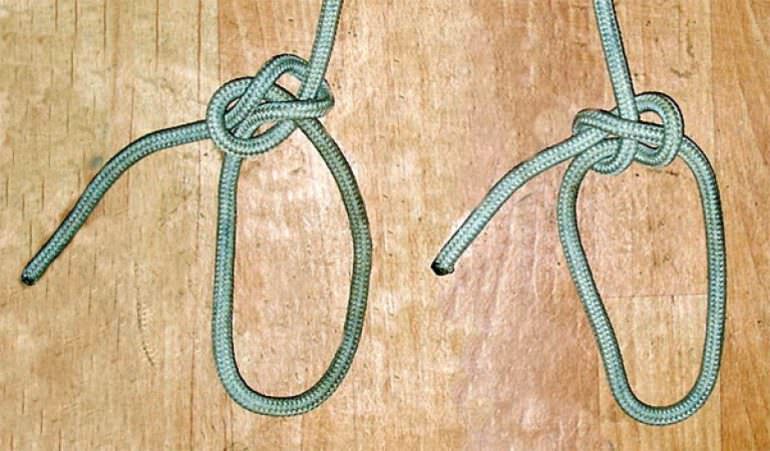
Knitting a reverse bowline is somewhat more difficult than the classic version, but the possibility of spontaneous untying is reduced to zero. This pattern is explained by the process of tying a knot, where first one loop is created, and then a second one is inserted into it from the opposite side of the loaded end of the rope.
As a result, it is not pinched by the loop, which reduces the load at the inflection point. This approach minimizes the likelihood of breaking the connection or the rope itself. In this case, one of the loops creates two points of application of force and distributes the weight more evenly.
Double way knitting
The double bowline is, by and large, intended for rescue operations or work at high altitudes. When carrying out rescue operations, the climber must know how to tie a double bowline to safely lift a person to the desired level . Knit a double arbor knot according to the pattern:
- One loop is performed less than the second. This allows a person to fit into a loop of a larger diameter, and use a smaller one to secure the body in the armpit area.
- The working end is passed around the person's body, but is led in the opposite direction until the second loop is obtained.
- Pass the end of the working rope along the body, but using the opposite direction. The result is a double knot.
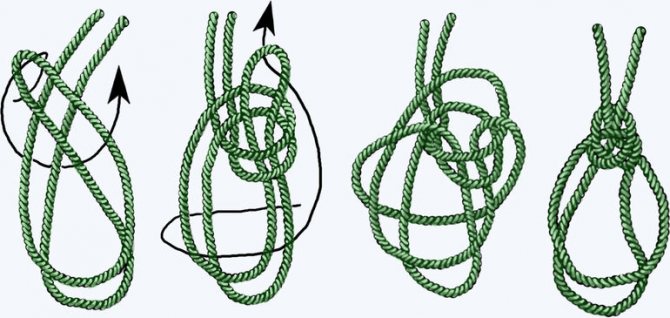
Another method allows you to tie a knot in the middle of the rope, which is folded in half. Next, a straight knot is performed by creating a peg. Then the end of the working peg is passed from bottom to top. A loop is pulled out from the resulting loop of the running end of the double rope. At the same time he is being pulled in the opposite direction. The resulting loop is stretched in such a way that the running end passes along the root until a double bowline is formed.
Advantages and disadvantages
Like any other node, a double conductor has its advantages and disadvantages.
Among the advantages are the following:
- easy to remember;
- knits quickly;
- reliable and does not creep;
- the size of the loops can be made different and changed even after the knot is tightened;
- Compared to a double bowline and a double top knot, when one loop is loaded, the second loop in the “bunny ears” creeps less.
A little about comparing bunny ears with a figure eight - in the video:
This is interesting: List the basic requirements for tourist equipment
The main disadvantage of this knot is that when loaded it becomes very tight and after that it may be difficult to untie it. Nevertheless, this junction continues to be very popular among tourists, and even professional speleologists and climbers have not abandoned the double guide to this day.
Making the device with one hand
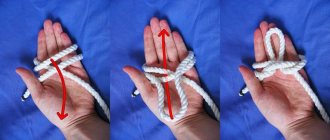
Professionals can quite easily tie a bow knot with one hand. This method is often used during rescue operations. Schematically, the sequence of work looks like this:
- Take the end of the working rope with the palm of one hand. The main cable is wrapped around the thumb.
- Make a turn with a brush to create a loop on the main cable.
- The end of the working rope is clamped into a fist and passed into the resulting hole.
- The running end of the rope is wrapped around the main rope from the reverse side.
- At the end of the work, intercept the end of the working rope and pass it back into the loop.
Then tighten the knot by pulling the running end and the root part of the rope. This results in a reliable and durable connection.
Loop tightening requirements
Special requirements are placed on tightening the rope when tying it with one hand, especially in the case of measures to save the life of another person.
To create a stronger connection, insert the end of the working rope into a small loop. Afterwards, it is pulled out, passed around a large loop and threaded into the upper part of the resulting knot.
To tighten the loop to the desired size, you need to pull the right side of the double large loop, holding the root part of the cable with your palm. Such connections serve as an alternative to a control unit, but during operation it is necessary to ensure that the loop does not fall apart.
Easy way
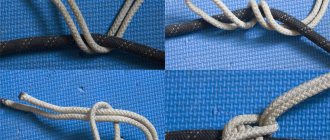
We bring to your attention another way to help tie a weaving knot. It is slightly different in design from the schemes described above, but the properties remain the same.
First, we will work with only one thread; to do this, wrap it around your index finger, and then hold the resulting loop. The tip of the thread should remain on the left, and thread the right one into the loop. Pull slightly to create a small loop with an open knot below.
Now let's take our second thread, which we need to attach to the first. Pass it through the top loop so that it is perpendicular to the right warp thread. It turns out that the tail of the first thread is on the right, and the second is on the left.
Slowly pull the two warp threads, a knot should appear and slowly move to the right. Tighten the resulting knot until it stops so that both tails remain on top of the main thread. All that remains is to cut them off and continue working.
The most common mistakes made by newbies
Very often, beginning climbers place one of the loops incorrectly when tying. The correct version of the classic bowline looks like this: the small loop is located at the root end of the rope, and is not located on one of the branches of the fastener loop.
Frequent deviations from the technology of performing a node can cost a human life. For this reason, novice climbers are advised to strictly follow all the requirements of the instructions and the sequence of tying a bowline. If the knot is used to secure a load on a support, then the technology for its implementation does not play a special role.
If a classic bowline is knitted for rescue work or climbing a mountain, then you should not leave the end of the working rope very short.
Due to its reliability and ease of execution, the bowline is often called the royal knot. People involved in tourism or mountaineering need to know how it is tied. At the same time, it is not necessary to memorize all the analogues unless there is a special need for this.
Personal opinion
Despite the popularity of the double guide, I prefer to tie other knots, such as the double bowline. And although it takes a little more time to knit a double bowline, nevertheless, if the rope was under load, it will be much easier to untie a double bowline than a double conductor. It turns out that when knitting, the double conductor wins in time, and when untied, it loses in time and effort expended to the double bowline - 1:2 in favor of the double bowline.
In conclusion, I would like to note once again that hare ears are a good reliable knot that does not weaken the rope too much. It is not difficult to tie, which is why it is still very popular among tourists to this day.
Due to its simplicity and reliability, this unit can be recommended for study for all lovers of outdoor activities.
Author: Maxim Chechetov