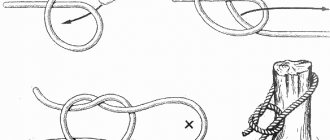
Node history
The knot received its name “fist of the monkey” in the distant times of filibusters, that is, the first “gentlemen of fortune” - pirates. Served as the end of the throwing rope.

Throwing a simple end while mooring a ship to a ship in distress during a storm is quite a difficult task. Without resorting to weighting the rope, it’s almost impossible.
One of the first objects used to add additional weight to throwing ends was cannonballs. To install such a ball, a kind of fastener was invented.
This method (other inserts are used instead of the core) is still used today when mooring ships.
The name of the knot was given by the method of catching monkeys. Primates were caught using jars with a narrow neck. By putting treats there, people attracted animals.
Having stuck its paw through the neck, the monkey could no longer unclench its fist with the bait and fell into the hands of the hunters.
The knot used by the American “hobo” became a symbol of their brotherhood. They wore a talisman around the neck as an amulet.
The knot was also used in the form of a fairly effective bladed weapon. This brush, in different versions, is still used today.
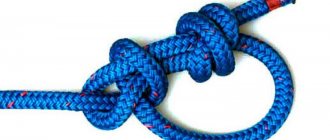
Weaving a decorative knot “Monkey Fist”
Hello, dear masters!
In this master class I will teach you how to weave a decorative “Monkey Fist” knot.
It got its name because of its resemblance to a clenched fist. Used as a locking unit in the sailing fleet.
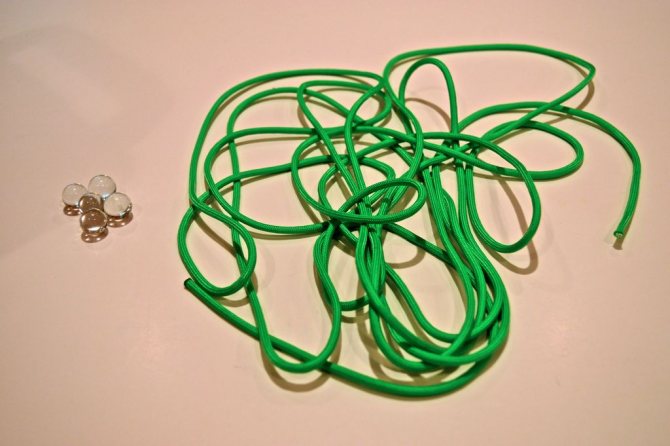
For work we will need:
- a small ball. Any one will do: steel, glass, wood or plastic.
- rope.
- a tool for tightening the knot (a regular knitting needle will do). I use a homemade spike tool.
- hand as a frame for weaving.
Let's transgress.
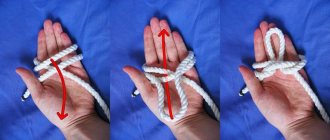
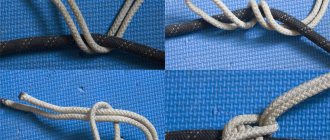
We take our cord, press it with the little finger to the palm, throw it over the thumb and pass it between the little finger and the ring finger:
We make several turns in the manner presented below:
The required number of turns depends on the diameter of the cord and the diameter of the ball. It is determined as follows: the ball should almost completely disappear behind the cord if it is wrapped along its axis. In our case, 5 turns are needed:
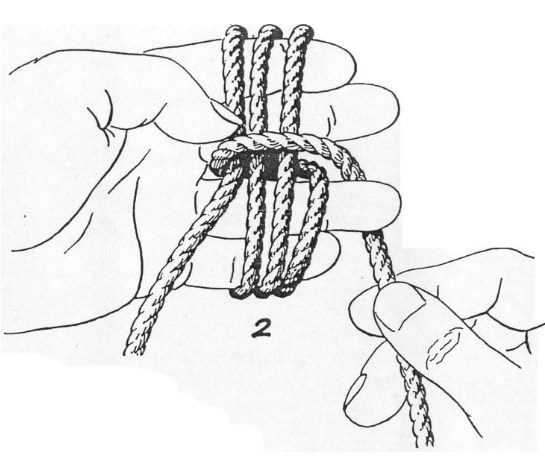
Having made five turns, we wrap the cord around the little finger:
Now we need to make the same number of turns of the cord around the first five:
there are five more turns:
At this stage, it’s important to insert our ball into the resulting “socket”
and begin to twist the next five turns:
Please note, the last group of turns should capture the section of the cord that went around the little finger (see fourth photo):
finished the last batch of turns:
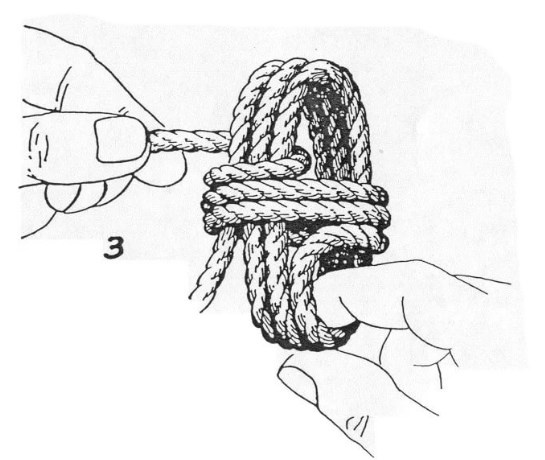
Now we need to tighten our knot. To do this, first release the thumb...:
...and tighten the loose loops:
each turn in turn:
Having pulled up the first five turns, remove the product from the little finger:
tighten the loose loops again:
You shouldn’t tighten it too much right away. It's better to do this gradually.
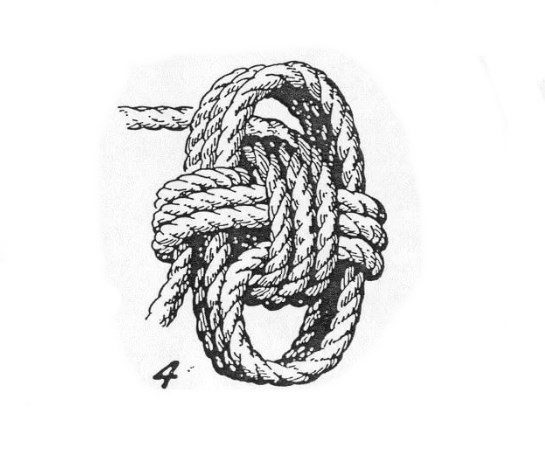
after we have tightened the first batch of turns, we tighten the second:
turn by turn, all five pieces:
and the last batch of turns:
one after another all five pieces:
the result should be something like this:
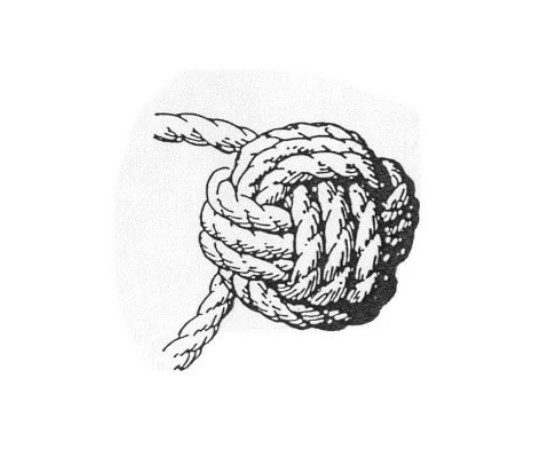
I use the spike tool to make the final tightening.
I remind you that the final tightening should be done in several stages so as not to distort our “layers” of turns.
node is ready:
The ends coming out of the knot can be trimmed, but only one end can be trimmed. Or you can leave them and continue weaving if you plan to weave, for example, a keychain.
To do this, I make this transitional knot, which is called the “Diamond Knot”:
I will tell you how to weave a diamond knot in my next MK.
Thank you for your attention.
How to knit Monkey Fist?
You can make a node using several options:
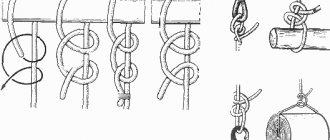
Single rope knitting method
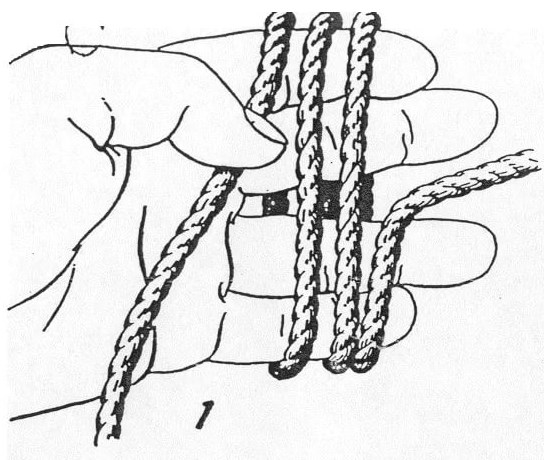
| The cord, about 1 meter long, is taken in the left hand, the end is pinched between the fingers. 3-4 turns are made from the base of the fingers. |
|
| After the last turn, the end of the cord is wound across the wound turns. |
|
| 3-4 turns are made. After finishing, the cord is wound inside the initial loops. It is removed from the fingers, holding the wound loops. |
|
| Make 3-4 turns across the wound loops. The knot secures its shape. |
|
| For a more beautiful knot shape, it is recommended to place something round inside. It is also possible to tie a knot at the running end and hide it inside the resulting Monkey Knot. The “monkey fist” is tightened by alternately tightening the loops until it is tight. |
|
How to make a paracord knot using the monkey fist technique: step-by-step master class
The monkey's fist is a long-known locking knot, so named due to its visual resemblance to a clenched fist. Previously, it was used on sailboats in the navy as a locking knot, then they began to use it as an anchor in mountaineering by fixing it in a crack. Nowadays it serves most often as a decorative knot, since it looks really very nice.
To tie a monkey's fist yourself, the weaving of which is not so simple, you need to master the weaving technique: it is quite complex and requires the development of skill and accuracy. If you want to learn how to weave a monkey fist, we will show you how to do it step by step, with detailed photo illustrations, in this master class.

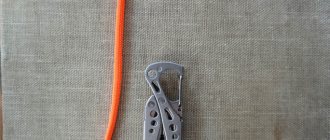
Materials and tools required for work:
- about 1 m paracord
- metal, glass or stone ball with a diameter of about 1.5 cm
- lighter (for melting the ends of the cord)
- pliers to tighten the knot.
Step 1 : Melting the ends of the paracord
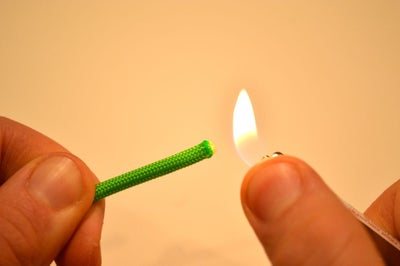
When you cut a piece of paracord, the ends fray and the fibers unravel unless the ends are melted. The most convenient way to do this is with an ordinary lighter. Light it and hold it so that there is a distance of about 2 mm between it and the edge of the cord - so that the edges do not burn, but melt.
Step 2: Starting the Monkey Fist Knot
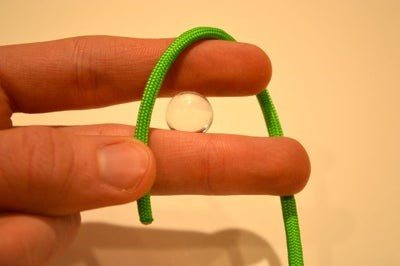
1. Place and hold your round stone between the index and middle fingers of your hand, as shown in the photo. 2. After this, press one edge of the lace with the thumb of the same hand to the bottom of the middle one. 3. Form 3 consecutive and parallel turns of the cord around the fingers holding the stone ball.
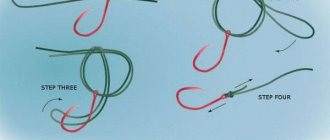
Step 3: Continue weaving
Step 4: Forming a Knot
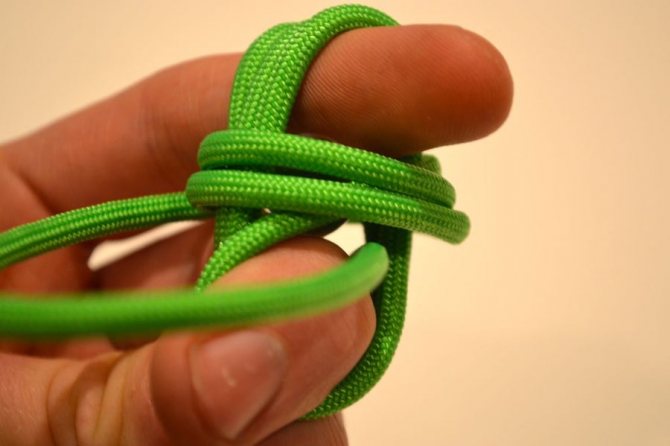
1. Holding the loose part of the running end of the cord over the work, pull it through the hole formed between your middle finger and the formed turns. The end of the cord should go to the middle finger, as shown in the photo. 2. Now pull the end up through the hole created by the middle finger and the coils. 3. Continue to pull the cord sequentially through the holes indicated above until you have 3 parallel turns on both sides. As a result, if you do everything correctly, both ends will be next to each other, as shown in the photo.
Step 5: Tightening the Knot
1. Hold the end you used to tie the knot with one hand. At the same time, pull the other end of the paracord with your other hand. You should not tighten it too tightly at this stage (you can first place a suitable metal or glass ball in the core of the knot). 2. Pull each loop individually to the other side of the knot. 3. Continue to consistently pull the slack loops through the knot. Having tightened one side, follow the paracord to the other, not yet tightened side.
Step 6: Retighten the Knot
To make the knot look better, pull your wraps very tight at this stage. You can use pliers at this point if your coils are too tight to pull out the loose loops by hand. Start this step from the same place as in the previous step, and go around the entire node sequentially, as you have already done before. Your work should end up looking like the last photo: like a tight ball with perpendicularly directed turns of paracord.
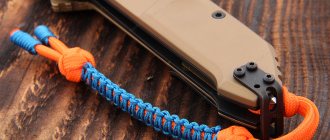
After finally tightening the knot, you can trim off the loose tails. They can also be used to knit a chain or loop to wear the resulting monkey knot as a decoration or keychain.
Step 7: Weaving a Loop for Hanging the Monkey Fist
Take the longer end of the paracord coming out of the finished monkey's fist.
1. Wrap the end of the cord around itself (see photo). 2. Pass the end through the loop you just formed, leaving a little length. 3. Pass the end behind the cord coming out of the finished knot. 4. Pull the end back through the loop you just went through. 5. Tighten the loop by pulling on the monkey fist and the large end of the cord.
Step 8: Attach your product!
Complete keychain and can be attached to a key ring, backpack or bag. You can also weave the same keychains for your friends and relatives as souvenirs. After all, such a compactly braided cord can be used in case of an unexpected situation when you need paracord to survive.
In addition, you can make wonderful and useful items from the monkey fist knot:
- Lanyard.
- Begleri anti-stress toy.
- A toy for a four-legged pet.
- Original cufflinks.
- Toy figures.
- A tool for self-defense.