Handle shapes
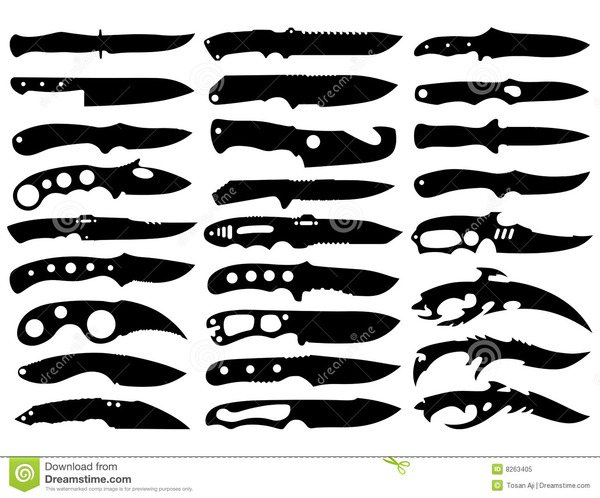
The design of every knife, from hunting to carpentry tools, is simple - blades and handle. The remaining parts - the flow mechanism and decorations - are not the main ones and are not present in every instrument. When buying, most people pay attention to the quality of the blade, but not everyone thinks about the convenience of the handle. The shape of the handle often indicates the area of use, and it should fit well in the hand:
- Straight - such handles are more common on the cheapest kitchen knives. The brush gets tired after prolonged use and when used for other purposes.
- Oval - this handle shape is considered one of the most convenient and is used for the production of hunting and table knives. It is easier to hold the tool in the palm of your hand for a long time.
- Conical - the handle has a narrowing on the side closest to the blade or edge. The second option is more common - the hand gets tired less and slips off the tool less often.
Materials and tools
When choosing a material for turning a knife handle with your own hands, you need to look at the intended purpose of this tool. You can choose from plastics, metals, leather, synthetic fibers, birch bark and wood. The latter are more often chosen due to ease of processing and high prevalence. The material for the knife handle is selected from the following types of trees:
- oak;
- nut;
- sea buckthorn;
- maple;
- beech;
- Rowan;
- acacia;
- cherry;
- ash.
Among the exotic and expensive varieties, amaranth, wenge or rosewood are purchased - they have a special texture, color and high strength. You don’t need a lot of lumber, but be sure to take into account the supply that will be irretrievably lost. When making a handle, you need not only a sized wooden block and a knife blade, but also a processing tool with additional materials:
- holdfast;
- chisels;
- oblique knife;
- durable wood glue;
- Grinder;
- sandpaper or paper;
- needle files and files.
Birch bark is also classified as a wood material, but this name does not mean ordinary birch bark. It is more like a moisture-resistant composite, which is cheaper than natural wood. The material is made from finely chopped birch bark, tar and epoxy resin under pressure. If you make a handle for a knife from birch bark, you need to supplement the set of tools with others, as in the case of other options.
Everyday knife with leather handle
Attention!!!
This homemade product is posted for informational purposes only.
The creation and use as a bladed weapon is prohibited; according to Article 223.4 of the Criminal Code of the Russian Federation, it is punishable by imprisonment for up to two years!
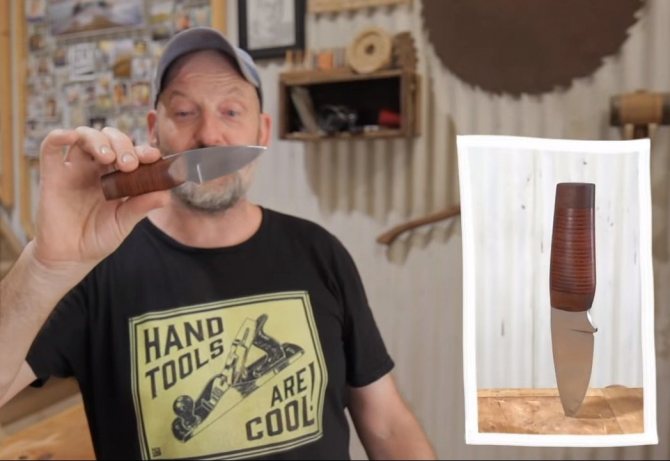
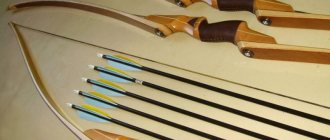
Hello crafts lovers, today we will look at how to make a high-quality and convenient knife for everyday use. The knife is distinguished by its small size; the author made the handle to fit his hand, and the blade is also short in length. To make the knife, 1075 steel, popular among Western craftsmen, was used, and the handle is made of leather. In theory, such a handle will be quite light and warm in the cold season, and it looks amazing, somewhat similar to a birch bark handle. The handle has wooden inserts, these are the tail part and the bolster. Assembling the knife is quite simple; the author used fairly simple tools for manufacturing. If the project interests you, I suggest you study it in more detail!
Materials and tools used by the author:
List of materials:
— blank made of steel 1075;
- threaded rod or bolt, nut; - leather, wood; - epoxy adhesive; - wax. List of tools:
- grinder; - drilling machine; - hacksaw for metal; — orbital sander or any other; - sandpaper (from coarse to fine); - pencil, paper, scissors; - vice, file, clamps; - stove, oven, oil (for heat treatment); - miter saw, drill, etc. Knife manufacturing process:
Step one. Cutting out the main profile
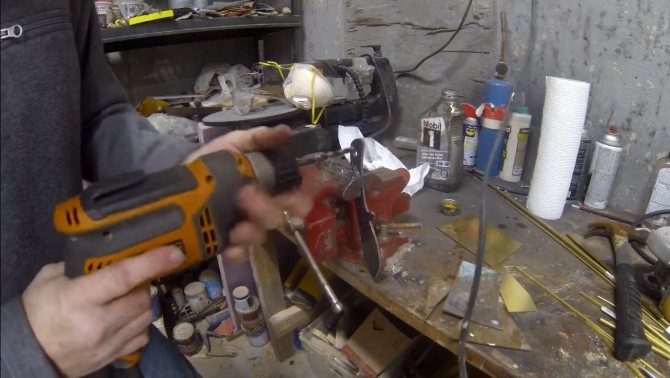
The author draws the profile of a knife on paper with a pencil, and then cuts it out of cardboard. The name is a template, you can now hold it in your hands to determine whether it will be convenient. The main profile can be cut, we work with a grinder, holding the workpiece in a vice. After this, we finalize the shape of the blade with another tool; here a file, a hacksaw for metal, a belt grinder and any other available tool will come to the rescue.
Next, it’s time to form the bevels of the blade, some do this by eye, but the author has a simple homemade manual sharpening machine. The point is that the file can move at a certain angle. The bevels must be symmetrical, so we need to first divide the blade into two halves. There is no need to sharpen the blade yet, since we still have to harden the blade.
Step three. Shank
We are finalizing the shank of the knife; a threaded rod will need to be installed here, which in combination with a nut will allow you to tighten the handle. To install the rod, we drill a hole in the shank, and then cut a slotted hole for it; its width should be less than the diameter of the hole. As for the threaded rod, you need to chamfer it so that the rod fits into the slotted hole made in the shank. As a result, there will be a wider part in the hole, which will allow the rod to hold securely in the shank of the knife.
Step four. Heat treatment and cleaning
Let's start heat treatment, first we harden the blade, it will gain maximum hardness. You need to heat 1075 steel to a temperature of 830 degrees Celsius, and then cool the blade in oil.
After hardening, we do a tempering, the author uses an oven, the knife is baked at a temperature of 210C for two hours. If the hardening is successful, the metal should no longer be taken with a file.
Step five. Making a pen
We have a combined handle, it is made of leather and wood, first we cut out the bolster, and by grinding we set the desired shape. We make a slotted hole in the bolster so that the shank of the knife can fit tightly. If the bolster dangles, this is not very good; the connection will no longer be as strong as it should be.
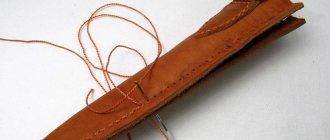
Next, we cut the leather into rectangles of the required sizes; in each part you need to make a slotted hole. To cope with the task, the author found a tube, sharpened it and pressed it in a vice. Now we place the tube on the skin, remove it with a hammer and get an excellent slit hole.
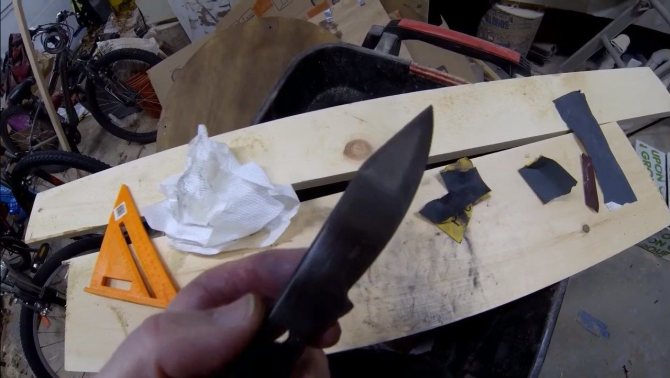
Step six. Refinishing the handle and sharpening the knife
The glue has dried, now we set the desired profile of the handle with a rasp, and for finer processing we use sandpaper. The handle should become absolutely smooth, after that we saturate it with transparent glue and let it dry. The author applies several layers of glue, sanding before each new layer.
Finally, the handle is polished with beeswax, the author applied 10 layers of wax, the handle became transparent and looks amazing.
Attention!!!
This homemade product is posted for informational purposes only.
The creation and use as a bladed weapon is prohibited; according to Article 223.4 of the Criminal Code of the Russian Federation, it is punishable by imprisonment for up to two years!
Source
Become the author of the site, publish your own articles, descriptions of homemade products and pay for the text. Read more here.
Handle mounting type
There are only 2 options for attaching the handle to the blade - mounted (“rat tail”) and overhead (the two halves are secured with rivets or screws). Regardless of the material taken, the features and shaping of the blade are taken into account. If the blade was originally made for a mounted handle, then it can only be converted into linings by welding on an additional area near the fastener, and this reduces strength. Otherwise, the excess metal is simply cut off. The advantages of the “rat tail” include:
- Visual appeal. When making a handle with your own hands from wood or horn, the handle remains solid on the outside, and in the case of a set of several species, you can add individuality.
- Convenience. The closed type of the handle reduces the weight of the final tool, is easy to replace, and reliably protects the owner’s palm from electricity and contrasting temperatures.
- Practicality. The riding handle can be made in any shape and any size. The “rat tail” allows you to replace the handle with any piece of wood in an emergency.
For a handle of 2 plates, the blade is specially prepared - an expanded part of the metal, the shape completely (in rare cases not completely) coincides with the handle. The linings are fixed with rivets or bolts through holes in the blade itself. This option is more durable, but easily conducts current and temperature. Making grips is more difficult, but most hunters, tourists and fishermen choose this handle format.
Attention!
In the case of a folding knife, there is no choice - an overhead handle is the simplest option. Otherwise, you need to redo the design of the blade, which will reduce its strength as a whole.
Making a handle: instructions
A non-folding knife is simple in its design - this simplifies the process of making a handle. An example of such a need is a finished blade with a broken handle. It is not difficult to make a replacement from scrap materials - such a knife will be restored. You can try to choose an option according to your preferences and get a good handle for a multifunctional blade.
Required Tools
The tool for making a knife handle with your own hands is selected based on the material - most often it is wood. To process lumber, you can use electric woodworking machines, chisels, and files. If the choice is made of metal, then you need another auxiliary tool - a vice, abrasive stones, a drill or a metalworking machine. The list is changed accordingly, but there is a general principle - everything available for processing is prepared before work begins.
Requirements for size and shape
The minimum length of a normal handle for a knife, for example a hunting knife, is from 11 cm to 13 cm - it depends on the width of the owner’s palm. The form is set depending on the goals, based on the principle of a more convenient option. In the case of a hunting tool, they often prefer to make a convex handle. If you need greater reliability during operation, then pay attention to the need for expansion at the end and the location of the lanyard attachment.
DIY knife with an interesting design
Attention!!!
This homemade product is posted for informational purposes only.
The creation and use as a bladed weapon is prohibited; according to Article 223.4 of the Criminal Code of the Russian Federation, it is punishable by imprisonment for up to two years!
I welcome those who love to craft and work with metal. In this instruction we will talk about the simplest homemade knife that you can easily make with your own hands. Making such a knife is not difficult, it is even very simple. Of the most complex and expensive machines that the author used, this was a belt sander. But it is needed mainly to make bevels. In general, this procedure can be done with files, and sanding is done manually using sandpaper. This knife is interesting for its unique design; it is made by etching. This pattern will be durable and will make your knife unique. You can make an inscription or any pattern at your discretion. And for a knife to be of high quality, you need to use good steel, it must contain as much carbon as possible, then it can be hardened. Similar steel can be found among various cutters, tools, and so on. The key feature of this steel is that when cutting it produces very dense sparks. If you work with ordinary steel at low speeds, you may not see a spark at all, but carbon steel will produce sparks. Abroad, craftsmen use O1, 1095 and other similar steels. So, let's take a closer look at how to make such a knife!
Materials and tools used by the author:
List of materials:
— carbon steel; - wood for linings; - brass rods, tubes, etc. (for pins); - epoxy glue and dye; - oil for impregnating wood.
List of tools:
- Bulgarian; — belt grinder; - Bulgarian; - marker; - drill; - vice; - clamps; - drill; — power supply, saline solution, etc. (for etching); - sandpaper; - files; - a tool for sharpening knives.
Knife making process:
Step one. Cutting out the main profile
We simply cut out the main profile using a grinder. We cut out the concave areas in pieces, making transverse cuts. If you have a band cutter, it will handle this task much faster.
Well, then we proceed to polishing those places that we were not able to cut. For these purposes, we again work with the help of an angle grinder. This time we will need a thick disc for sanding work. Using it we bring the contour to an almost finished look. For finer finishing we use a belt sander. We also grind the planes of the blade.
Step two. Drilling holes for the pins
In the area of the handle we drill holes for the pins. They should be of such a diameter that the pins fit in with minimal clearance, then the handle will hold as securely as possible. The author clamps the blade in a vice and drills holes with a regular drill. The steel should not be hardened, otherwise it can only be drilled with a special drill with a carbide tip.
Step three.
Forming the bevels Now we have to form the bevels on the blade. Thus, we will set the basic cutting characteristics of the knife. For a knife to cut perfectly, the bevels must be as smooth as possible. But to improve the rigidity of the blade, they can be done at a more right angle. For such work, the author uses a belt sander; this is done simply and conveniently. First, we take a drill of the same thickness as the thickness of the workpiece and draw a centering line along the blade. And so that it is clearly visible, the metal can be pre-painted over with a marker. We will use this line as a guide so that the bevels are symmetrical.
Step four. Heat treatment of metal
Heat treatment includes two stages: hardening and tempering. We select temperature conditions and the quenching medium depending on the steel grade. In most cases, knife steels are hardened in oil, and they need to be heated to a red or sometimes yellowish glow. If the hardening is successful, the blade will no longer be taken with a file, and the metal will be brittle.
After hardening, a procedure called tempering follows.
To understand what temperature to heat the metal to, it is advisable to grind the blade before tempering. When its color changes to straw, this will indicate that the vacation was a success. On average, the blades are heated for about an hour at a temperature of 200 degrees using an oven. The steel should cool smoothly, along with the oven. Step five. Grinding
After heat treatment, a dark coating forms on the metal, which is the result of oxidation.
This whole thing needs to be cleaned up. To do this, use sandpaper soaked in water. You can also go over the blade with a belt sander. As a result, the blade can be polished, thereby preparing it for etching. Step six.
Assembling the pen Dark tones predominate in the pen, as the author intended. To make it look interesting, we take a drill and make cuts along the handle on the blade. Once these parts are filled with epoxy and black dye, everything will look great.
You can also come up with interesting pins. You can take a copper or brass tube, come up with an interesting filler, and then fill the tubes with epoxy resin and a dye.
We clamp the handle with clamps, this will allow the overlays to be evenly glued along the entire length. Well, then we wait a day, after which we can confidently handle the handle.
Finally, we begin grinding the handle and forming the desired shape. This can be done with a grinder, with a drill, or even by hand using files and sandpaper. Making the handle perfectly smooth. Finally, the handle needs to be soaked in oil, so the wood will be protected from moisture and the handle will look great.
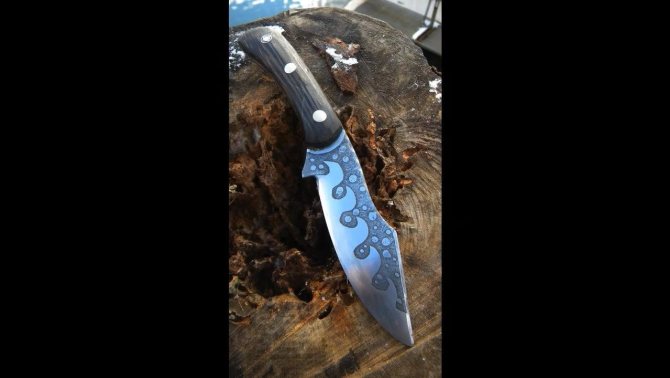
Step seven. Etching the drawing
The pattern on the blade makes the knife unique. For this procedure we use a power supply, and we will also need water with regular table salt, the concentration should be maximum. We draw a design on the blade, paint over everything else with varnish or paint. Where the metal surface is exposed, etching will occur.
We apply a plus to the blade, and attach a nail or something similar to the other contact by wrapping some cotton wool.
We wet the cotton wool in salt water and move it along the blade. Each time the drawing will become brighter and deeper. The cotton wool will have to be changed. Do not breathe in the fumes that will be released, they are harmful. At the end, the knife will need to be washed. That's all, the knife is completely ready, it would also be nice to make a sheath for it. If you used rusty metal, it would be good to coat it with wood oil, this will prevent it from rusting and darkening. Sharpen the knife to a smooth blade using sharpening tools. Many craftsmen use Japanese water stone for this. I hope you liked the project and found useful information for yourself. Don't forget to share your ideas and crafts with us!
Attention!!!
This homemade product is posted for informational purposes only.
The creation and use as a bladed weapon is prohibited; according to Article 223.4 of the Criminal Code of the Russian Federation, it is punishable by imprisonment for up to two years!
Source
Become the author of the site, publish your own articles, descriptions of homemade products and pay for the text. Read more here.
Handle decor
A homemade knife handle can be made unique - any material suitable for such use can be decorated. In this case, you can show your imagination and accuracy - real handmade work. An engraving sketch or photo is prepared in advance, calculating the size of the handle. You can apply such a pattern to all materials except typesetting, but each has its own technique:
- Burning a design is suitable for wood, plastics, rubber and composites.
- Engraving is more versatile, but such a design requires a tool and a fair amount of perseverance.
- Etching is only suitable for metal handles, but other parts need to be protected.
- On soft materials, different patterns can be cut with a carpenter's knife, but such work is difficult.
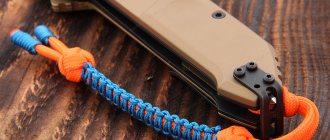
If there are no such opportunities or desires, then we make the drawing with paint. You can decorate the handle using a paracord braid or leather cord. Simple options do not look unique and are quite common, but there are patterns with interesting patterns that need to be woven according to the instructions. Examples of braids that will add grace to the handle:
- snake knot;
- Turkish head;
- ear;
- cobra.
By combining several individual options and colors of cord, you can get a new beautiful type of weaving. Paracords for braiding come in two or three colors from the very beginning, which will give the pattern greater depth - you just need to show your imagination and work with your hands for an interesting result. A braided handle will slip less, and the cord can absorb sweat and other foreign liquids. Some craftsmen weave an interesting pattern directly onto the shank of the blade and fill it with epoxy resin or make artificial amber as a base for the handle.
Making a knife handle with your own hands is not difficult from start to finish. The simplest way is to braid the shank of the blade with a cord or carve it out of a wooden block. But the choice of material depends on general aesthetic views and the required strength. Depending on the manufacturing and fastening method, the handle must be fixed with adhesive compounds. After the work is done, the finished handle is decorated with ornaments, covered with leather or braided with cord.
How to decorate a wooden knife
Another product, from idea to implementation. Honestly, I'm delighted with how easily you can get something that previously had to be cut out with a jigsaw over long evenings.
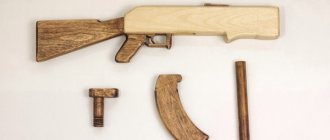
At the beginning of summer, I made a wooden knife for my son to play in the yard, all according to his mind: the “blade” is made of 6-piece plywood, separate handle linings are made of 3-piece with a groove, painted with silver. I cut it out with a jigsaw. He was very proud of the knife. but, as expected, “lost” it in the yard (like many other things, I’ve already gotten used to it). Then I realized that I didn’t have enough for a second copy and decided to order cutting from specialists.
I chose it online and drew the layout in vector:
And after a couple of days I received the blank:
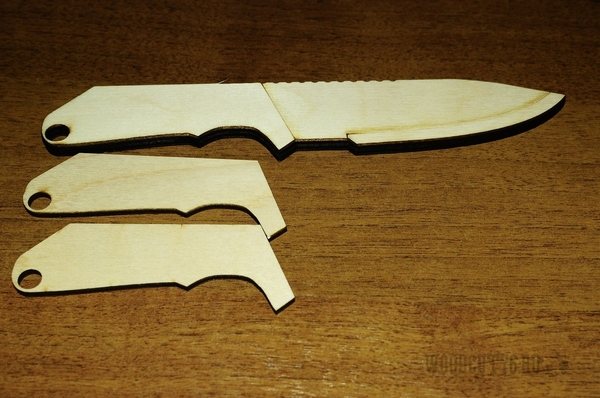
The blade is made of 6, the lining is made of 3 and a little smaller (below you will see why this was planned). I chose the size to suit my son's hand, of course it is too small for me, although it fits nicely in the hand. But this is a vector, you can always stretch it and cut it to fit any paw