Types of huts and choice of location
Depending on the needs and available resources, different types of shelters are built. Usually huts are built on a flat surface, but they can also rest on a tree - in this case, make sure that it is alive and healthy, otherwise its dead branches may fall on your head. The support can be a mountain slope, but this option is associated with the risk of landslides.
Important: When choosing a location, avoid dry river beds, especially in the mountains, as in the event of a rainstorm, a powerful rushing stream of water can appear, which can cause serious injuries and even death. Even a dry stream can cause a lot of problems if it rains.
You should not install a shelter close to the shore of an unfamiliar river or lake, as the water level can change rapidly and flood you. In addition, many insects live near water, including those dangerous to health. Build your hut as far as possible from open sources of water. It is better to choose hills rather than lowlands.
Definition and purpose
A hut is an artificial structure that can be quickly erected in any camping conditions or just for fun in your yard. You can use boards, branches or tree roots as materials.
Such devices have always been made by mushroom pickers, hunters or gamekeepers to protect themselves from sudden rain, as well as in cases where they had to do without the benefits of civilization for a long time.
In addition, many children often build them for their games. It is worth noting that with great pleasure they not only build structures, but also spend a lot of time there, imagining that they are in the headquarters of a secret organization or the control room of a spaceship. Modern children need to be taken out into nature as often as possible so that their eyes can rest from the TV, and their bodies can rest from sitting for a long time in one (usually incorrect) position.
The hut will interest the child, and communication in nature will improve the baby’s well-being and teach him useful skills. It’s quite easy to build a hut for children with your own hands.
Main types
There are several types of huts. All of them will differ in their design depending on the simplicity, as well as location. There are the following options:
- Single pitch hut. This is the simplest structure that can be made from branches and leaves that will rest on a tree.
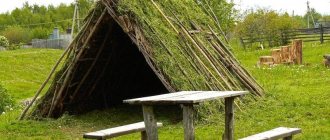
- Gable. Externally, this variety will be very similar to an ordinary tourist tent. It consists of a frame, which is covered with branches, moss, and spruce branches.
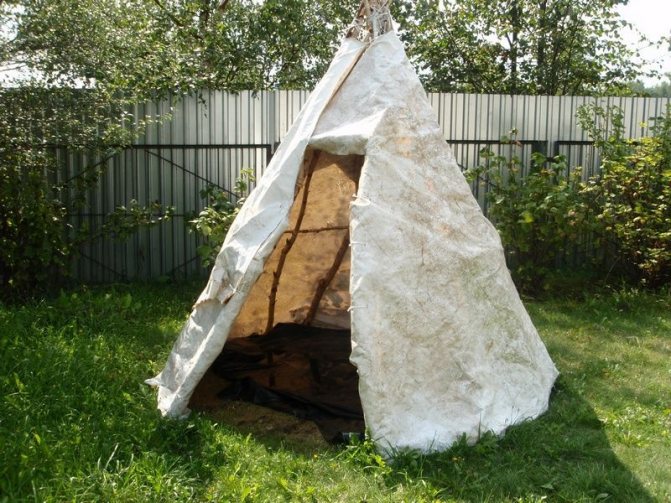
- Circular. The most difficult option is in the form of a tent. Outwardly it will be very reminiscent of an Indian wigwam. It is necessary to build around a tree or a stake driven into the ground.
There is also another type that is installed in a recess below ground level. This is a dugout, the living part of which is located in an insulated and covered pit.
Composition of structures
Absolutely any hut consists of certain elements . This is just the basis, which can be supplemented from your own experience:
- Skeleton This is a frame that must be assembled from poles.
- Lining material. Typically any moss, straw or branches are used.
- Fasteners This can be done using tape or nylon threads. On a hike, they usually use available materials: freshly cut tree bark, dug up roots and bundles made from grass.
These structural elements will be required in all types of huts. It is worth noting that the lining material should be quite reliable. Otherwise, it will let water in when it rains.
What is needed to build a hut
A hut can be built from different materials, depending on the area. Usually this:
- branches and sticks;
- spruce branches;
- straw;
- leaves;
- tree bark;
- plant stems;
- earth and clay;
- snow.
You can use “artificial” materials that you brought with you or found in the forest. At a minimum, it will be helpful to bring plastic sheeting in case of rain and some thin rope to secure the joints of the structure.
How to build a dugout in the forest with your own hands
The roof is covered with moss, branches, leaves
- Ruberoid for covering roofs and floors. Instead, you can use branches, leaves, grass, bark, spruce branches. If spruce branches are used, about 5 m3 will be needed.
- Poles (approximately 70 pieces of 6 meters and 120 pieces of 5.5 meters).
- Wire (8-10 kg). If this material is not available, you can use bast and thin willow branches.
- Iron for covering the roof. For an ordinary dugout, two sheets will be enough.
- Timber, boards, chipboard, insulation, and other building materials that may be useful for building a warm home. Instead of ready-made insulation, you can use dry moss.
- Windows and doors can be made from lumber, or installed ready-made, if such a possibility exists.
- A stove if you plan to build heated housing.
- Nails, self-tapping screws of various diameters and lengths.
We invite you to familiarize yourself with the Sauna in the basement of a private house.
The tools you will need are: axe, hammer, knife, saw, construction tape, level, shovel.
Preparation
To build a dugout in the forest, you need to draw up a detailed drawing of it. If conditions do not allow, and time for construction is very limited, you can do without it.
It is necessary to consider the outer and inner diameter of the room, as well as its height, then begin preparing the site for construction. The place is cleared of branches and grass, then a depression of approximately 6 by 7 meters, 50 cm deep, is dug.
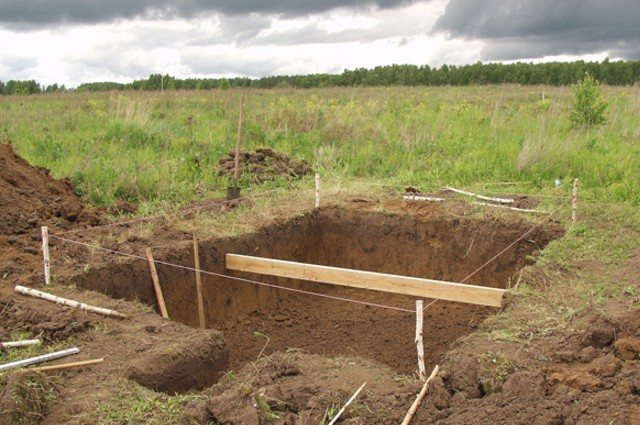
A hole for a dugout
After this, a depression of another 50 cm is dug along one of the walls; this will be the floor of the future dwelling. A meter deep depression leads to the exit from the building, which is equipped with steps. An elevated strip 50 cm above the ground forms a place for a couch inside the building.
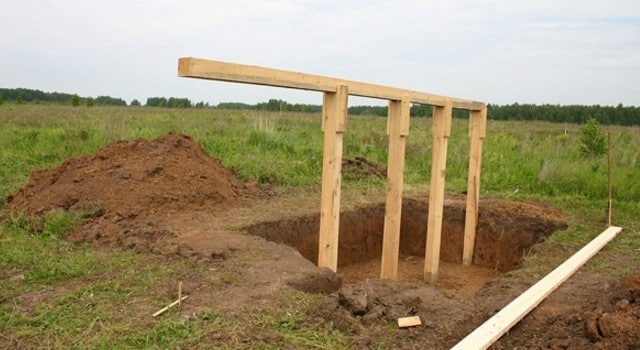
The next stage is the construction of rafters from wooden beams. The first way to install them is to rest the pillars directly on the ground, and the second is to cut them into a beam or metal pipe laid around the perimeter of the home. If there are anti-corrosion, antiseptic substances, they should be used to treat the places where the timber comes into contact with the ground.
We build walls and ceilings
If it was not possible to obtain even poles, you can use branches, reeds, and reeds tied into bundles. The walls are covered with roofing felt on top, and the gaps between the poles can be filled with soil, clay, moss or any available insulation. Roofing material will not allow the soil between the poles to crumble or be washed out by rain.
The end of the roof is covered with the same materials, and a window and a door are installed on the sides. It is best to install the doorway and window at the stage of installing the rafter system, this will remove part of the load from it. If it is not possible to install a good-quality door, you can cover the entrance with any vestibule, the main thing is that it tightly closes the opening and does not allow rainwater to penetrate inside.
We suggest you familiarize yourself with How to properly make a roof on a bathhouse
After laying the poles on the roof, it is necessary to insulate it and at the same time form a protective layer. The frame is covered with several layers of soft clay, each of which must dry before laying the next layer. The end part must also be covered with clay. Instead of clay, you can use turf covered with roofing felt. To prevent leaks inside the building during rain, drainage channels made of clay should be made along the perimeter.
The walls and ceiling inside the shelter can be insulated with foam boards.
The ground on the floor is covered with roofing felt, on top of which wooden boards, chipboard sheets or plywood are laid. You can lay wooden joists and then make the flooring.
How to build a hut in the forest in winter
The main task of a winter shelter is to preserve heat. Materials with low thermal conductivity should be used: snow, spruce branches, straw. In addition, it is important to reliably protect yourself from the wind.
The simplest solution in winter is a snow cave:
- You need to find a large enough snowdrift and dig a hole in it. It is better not to make a large hole, otherwise it will be difficult to warm it up.
- You should lay spruce branches or straw underneath, otherwise your clothes may get wet from the melting snow;
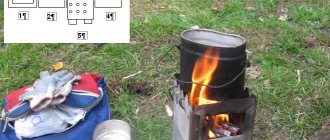
- You can heat the interior with fire (it is better to use gas or dry fuel, but you can also try to make a fire), then you should make a hole in the roof for ventilation;
- In case of strong winds, the entrance can be closed, leaving small openings for fresh air to enter, although in this case there is no constant possibility of getting out.
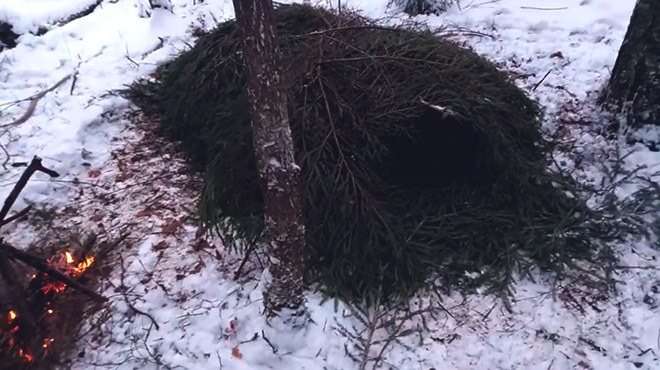
The main task of a winter hut is to keep warm.
A more comfortable, but also more complex option is the famous Eskimo invention - the igloo . A well-built igloo allows you to survive frosts down to -40°.
- You will need to cut blocks from dense compacted snow and build a house from them. To save time and effort, it is best to build an igloo on a slope, then fewer blocks are needed;
- Usually the blocks are laid in a circle, so that the top blocks gradually move towards the center, forming half a sphere. In this case, the builder himself is in the center of the building, laying blocks around himself;
- At the end there is an exit, and do not forget about the ventilation holes.
Dugout in the forest: features of the structure
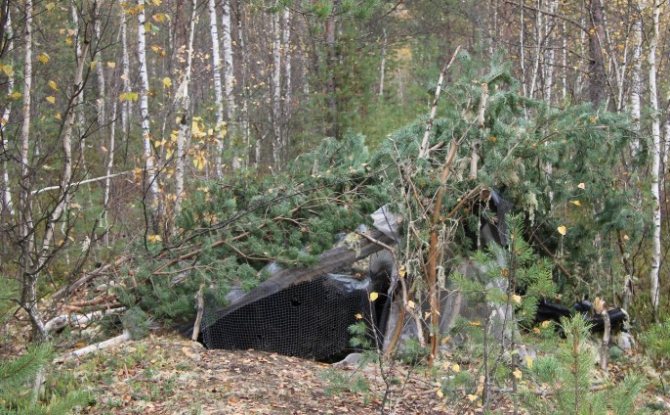
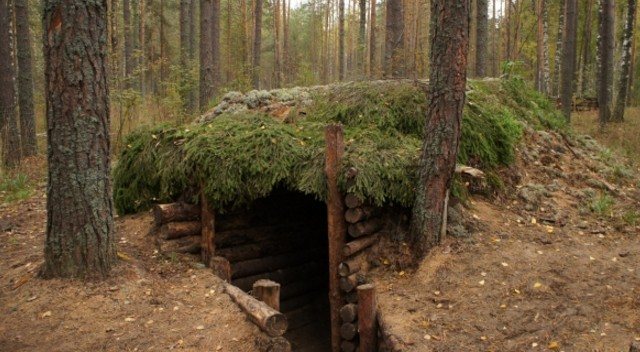
Dugout in the forest A dugout is a structure sunk into the ground, covered with logs, poles, and sprinkled with soil, grass, and leaves on top.
This is an ideal dwelling for survival in the forest, but it is not built as quickly as a hut or other temporary shelter. The special location below ground level allows shelter from the wind inside this structure. The dugout has its advantages over other temporary structures:
- High level of thermal insulation, the dugout is warm in winter and cool in summer.
- It provides good protection from gusts of wind and from snow in winter.
- The inconspicuous location of the structure allows it not to stand out against the backdrop of wild nature. For a hunter, this is an advantage for obtaining trophies; for a forester, it is an opportunity to observe the inhabitants of the forest without frightening them with your presence. In addition, an inconspicuous dwelling in the forest is difficult to find for other people who may loot the house while you are away.
- If the correct construction technology is followed, a dugout can last a long time.
- To heat a building you do not need to spend a lot of energy resources.
The main advantage of a dugout is that it is, in a way, a simplified version of a real house in which you can safely spend the winter.
Winter hut in the ground
If there is little snow on the ground, you can make a shelter with a depression. Earth is a good thermal insulation material that will provide shelter from the cold. But frozen ground is extremely difficult to dig (digging, chiseling).
Your best bet is to find an existing hole in the ground, such as a hole left by a large old tree falling (when the tree falls along with its roots and soil). Adjust this hole to the required size, and build a canopy of one kind or another on top. To make the frozen ground more pliable, you can light a fire and warm it up.
Important: The construction of such a shelter in winter is associated with a lot of physical activity, as a result - clothes become wet from sweat, and then hypothermia may follow. In this case, it is better to take off some of your clothes in advance.
How to build a dugout correctly
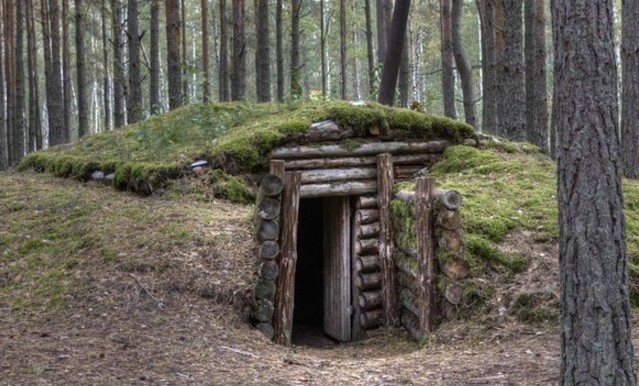
The dugout should be on a slight hill
- When choosing a place for construction, you need to proceed from certain parameters: it is better if it is some kind of hill. Then the home will be dry and warm, because all the water flows into the lowland (both rain and when snow melts). Building on a hill will save building materials and time for constructing a shelter. In addition, the place should be with soft soil, without rocky soil or roots that would interfere with the construction of the dugout.
- The entrance to the dugout should be on the leeward side of the hill to retain heat inside it.
- During construction, it is necessary to take into account the proximity of vital resources to housing - water, food.
- If the dugout is a temporary shelter on the way to finding a way out to people, it should be erected in those places where it is possible to send a distress signal at any opportunity.
- Swampy areas should not be chosen for the construction site.
- The roof of the dwelling should be pitched, repeating the slope of the hill, in order to avoid cases of flooding, retaining heat inside the shelter.
By observing these simple conditions, you can begin to take action on how to build a dugout.
Monday, March 19, 2012
Winter hut
Winter hut.
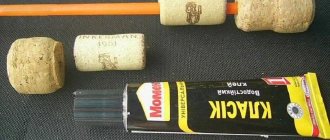
The secret of this hut was revealed to me by my great-grandfather. The whole property rests on the properties of moss, an excellent heat insulator and moisture smoother. The special thermal insulation characteristics of moss make it possible to reduce heating costs in winter by 3–4 times compared to brick and 8 times compared to reinforced concrete. Construction will require nails; with a certain amount of ingenuity, you can do it without nails, but it’s easier with them. In the forest we choose a place where four trees grow, as if forming a room. The trees will serve as corner posts for us. It is not so important whether it turns out to be a square or a rectangle, or some other shape. We chop ordinary poles, not very thick, any girl or child can handle this, and begin to sheathe from the inside and outside. So up to the height of an outstretched arm. The last upper poles should be thick; they will hold the ceiling and roof. The poles should be as even as possible so that there are no large gaps. We fill the gap with moss. If the moss is very wet, then it must be dried. On the south side we make a window by knocking down a frame from the same poles. There is a door on the north side. Then the ceiling. Preferably made of thick poles to support your weight. We also lay moss on the ceiling, the thicker the better. Then the roof. With a slope. The roof covering depends on the material available in the area. Bark, reeds, clay, turf. If you have an even better film, you can collect packages at any village dump or along the road. We make both the roof and ceiling with an overlap. The preliminary stage is over. You can live in such a house until winter.
But our goal is to live in winter. So we start adding layers. We nail the poles in the corners and also begin to sheathe them.
We do not fill the 2nd layer with anything - an air cushion. The 3rd layer is moss again - it will take the main blow of the frost.
Each layer must be at least 10cm. It is more convenient to lay the moss all at once; this is enough for the middle zone. I spent the night in this at -15. (with a stove, of course) For Siberia and the far north, layers can continue to be built up. This work can be done throughout the summer, devoting 1-2 hours. There will be a wonderful atmosphere in your hut. Moss is able to accumulate and release moisture depending on the external humidity. Moss has excellent bactericidal properties and prevents the appearance of various types of fungi. The tree will not rot. Yes, in the same way we will definitely build a vestibule in front of the door. The main heat loss will be due to the door.
In the future, other rooms can be built on the side of the door. Unsightly - but cheap, fast and practical.
Absolutely not subject to rotting. Moss creates natural ventilation of the grooves, while retaining heat and microclimate in the room well. Mosses have strong bactericidal properties because they contain a special anti-rot substance - sphagnol. Scientists claim that all objects trapped in peat formed by dead sphagnum are preserved almost unchanged for many centuries.
That is, when in a thousand years your hut is opened, you will lie as if fresh.
A dugout is not a temporary shelter, but a structure that allows you to spend several months in the forest. Dugouts are usually built by hunters, rangers, and foresters. This complex device requires materials, time and effort, but it can protect from rain, snow, and cold for a long period. How to build a dugout with your own hands to create a reliable shelter will be described in the information below.
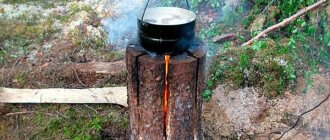
How to build a dugout with a stove
A dugout with a stove is practically a full-fledged house for wintering, sometimes even warmer than an ordinary wooden house, since it retains heat inside well and for a long time after the stove goes out. To install the stove, even at the stage of installing the rafter system, it is necessary to provide a place for it and the pipe outlet.
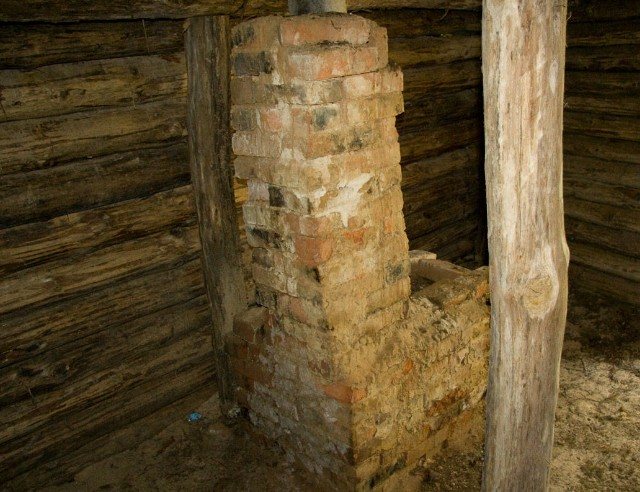
Dugout with a stove
Pipes for ventilation and for the stove are installed in front of the roof covering, and two pipes are installed for ventilation - one at the highest point of the roof, the second at the lowest point, near the ground. The chimney pipe is installed above the place where the stove will be located; it must be made of non-combustible material, usually iron.
The stove is usually made of brick or a camp stove is installed. The simplest version of the stove is made from a barrel. It is installed at a level below the floor so that moisture does not accumulate on the ground and the floor is warmed up. To reduce heat loss, it is necessary to install controlled ventilation and carefully seal all the cracks between the logs of the wall and ceiling cladding.