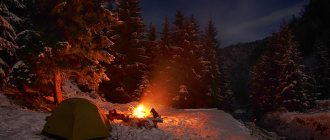
In the wild, be it a camping trip or a regular picnic, sometimes a situation arises that requires organizing fire protection. The fire mainly has to be protected from precipitation and wind. Despite such a small number of factors dangerous to a fire, there can be a lot of options for protecting it, since it is necessary to cover it in different conditions using different means, from special barriers to shelters made from scrap materials. Moreover, in such cases, a fire under an awning is not always the ideal solution. It happens that a homemade rain canopy or wind wall will be more preferable and effective.
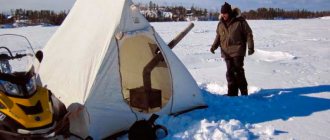
Tent awning as a canopy for a fire.
Fire protection classification
I divide the protection of a fire from adverse environmental factors into two main types - protection from wind and protection from precipitation.
Each of these types, in turn, is divided into natural and artificial shelters.
Artificial ones in my classification are divided into:
- made in production;
- made with your own hands from artificial materials;
- homemade shelters made from natural materials.
Let's take a closer look at all these options below.
Other meanings of this word:
- "Rookery" of a fighter
- "Mobilized" ditch
- "Mobilized" ditch.
- "wrinkle" on the battlefield
- "Wrinkle" on the battlefield
- "Ditch" for soldiers
- "Pit" for a fighter
- "Pit" for the shooter
- soldier's "pit"
- "The Pit" where the soldier is hiding
- (Belogorsky district) a village in the Belogorsky district of the Khmelnitsky region of Ukraine
- Attribute of war
- Defense attribute
- Battle pit
- Combat Shelter
- Combat shelter in the field
- Furrow for non-germinating seeds of war
- Militarized ditch
- Military "pit"
- military ditch
- Military ditch.
- military trench
- Military "ditch"
- Full length military amulet
- ditch military rank
- Dug up by a soldier
- Dug with a sapper's shovel
- trench dug in the ground
- A shelter dug by a soldier
- Where is the infantryman hiding?
- They dig it from the fence until lunchtime
- dugout without a roof
- Earthen structure for combat operations
- Earthwork
- Earthen fortification, shelter from bullets, shells, etc. in the form of a ditch with an embankment
- Both trench and sapa
- What ditch are they shooting from?
- What kind of trench is dug with a shovel?
- what kind of trench is dug with a sapper shovel?
- Military ditch
- Ditch in "military service"
- defensive ditch
- Front-line ditch
- A ditch dug for himself by a soldier
- Ditch conscripted for military service
- Lice feeding area
- Don't dig a hole for someone else, so that he doesn't use it as
- An inevitable attribute of defense
- An indispensable attribute of defense
- Firing position in the field
- Infantry gun trench
- he's behind the parapet
- Field military shelter
- Field earthen shelter for personnel
- Soldier's field shelter
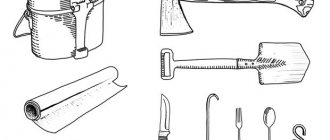
- Production of a sapper's shovel
- Ditch for infantry
- Ditch on the battlefield
- Ditch with embrasures
- Sapa
- Sapa essentially
- Modern trench
- Soldier's trench
- soldier's result of activity with a shovel
- Soldier's Shelter
- The soldiers dug
- Soldier's Escape Ditch
- saving man-made pit on the battlefield
- Rescue pit
- Special military ditch
- Strategic Ditch
- Shooting or gun
- infantry cache
- Silent sap essentially
- Trench defense attribute
- Field Soldier's Trench
- Field soldier's trench.
- Trench dug with a sapper shovel
- trench dug by a soldier
- A trench dug by a soldier.
- Trench shelter.
- Marine's Hideout
- Soldier's Shelter
- A depression in the ground that protects unit personnel and military equipment from damage by various types of weapons. There are rifle and gun trenches
- Soldier's hideout
- Shelter in the ground
- warrior's hideout
- Shelter for a soldier
- Cover for shooting
- A shooting shelter in the form of a ditch with an embankment
- Shelter for shooting and protection from fire
- Cover for shooting.
- Cover on the battlefield
- Shelter on the battlefield
- Shelter from enemy bullets
- Shelter from tanks
- Infantryman's Shelter
- Soldier's Shelter
- Fortification structure, shelter for shooting in the form of a shallow ditch with an embankment
- What does the German word “schanze” mean, from which the concept of “entrenching tool” comes?
Wind protection
In windy weather, starting a fire may be difficult.
First, the wind can blow out a burning match or lighter and prevent a person from igniting the kindling. And even kindling or brushwood that has begun to burn can be easily blown out by a strong wind.
Secondly, cooking over a fire whose flames are blown away by the wind will be problematic. The flame zone with maximum temperature will fluctuate and spread along the ground instead of fully heating the food container.
Thirdly, sparks and fragments of burning coals can be carried by the wind outside the safe zone and cause a fire.
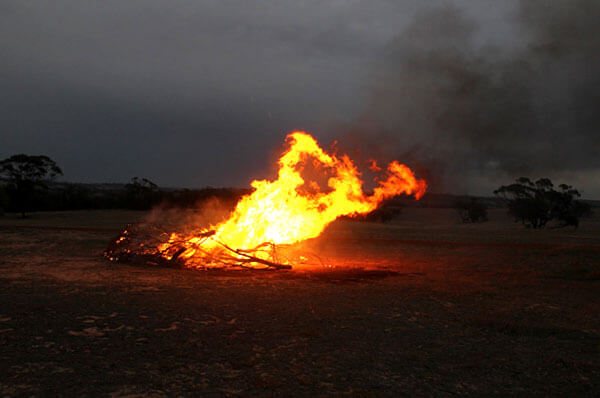
In a strong wind, the flame is almost uncontrollable and it is difficult to cook food with it.
These inconveniences can be effectively eliminated with the help of a windbreak.
Commercially available windbreaks
Today, special equipment has been produced to protect the fire from the wind.
On the open market you can find the so-called “hearth shield”. It consists of movably interconnected metal plates that can be compactly folded and placed in a backpack, and, if necessary, to protect the fire from the wind, it can be unfolded to form a kind of mini-fence.
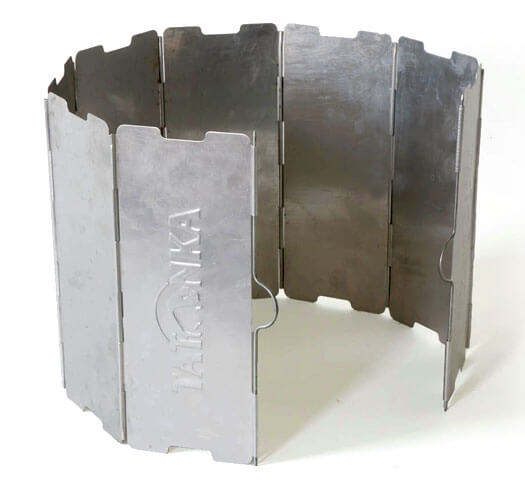
In reality, such a wind barrier will only help to ignite the kindling with a match, or protect the burner flame from the wind.
Thanks to the reflective surface of the plates, the fireplace shield not only protects the fire from the wind, but also serves as a kind of screen, reflecting infrared (thermal) radiation and thereby increasing the efficiency of the fire.
The dimensions of each cell of the shield that I saw on sale are only 135mm by 75mm. Such a shield can only protect a small fire or burner flame from the wind.
The cost of such a product ranges from twenty US dollars.
As for me, this product is not suitable for hiking trips where you plan to light fires due to its small size.
Also, some equipment that was originally intended for other tasks will be quite suitable for protection from the wind. For example, a karimat (tourist rug), designed to protect a person lying on the ground from the cold, can be effectively used as a windbreak. To do this, the karimat is twisted into a wide pipe and placed on the ground so that the fire is in the middle.
You will have to hold the karimat with your hands, otherwise the wind will knock it over onto the fire. However, several pairs of thick sticks, driven into the ground at some distance from each other and capable of withstanding the pressure of the wind, taking into account the area of the karimat, will free up the hands, becoming the backbone on which the improvised shield will be supported.
At worst, you can use a backpack as a windbreak, placing it on the windward side of the fire pit, or any other equipment at hand.
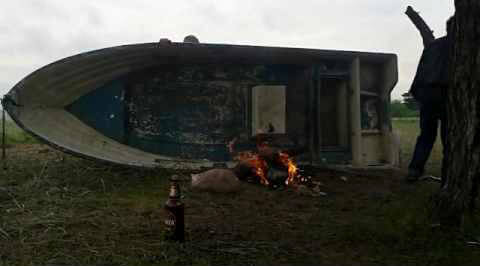
A boat is an effective protection from the wind.
But what to do if you don’t have any equipment suitable for organizing wind protection? In this case, you can try to make a wind barrier from natural materials.
Canopies with PVC coating
Canopies can be made of various sizes and configurations from fabric with PVC coating 630-650 g/m2 GOST 29151-91 from rubber-coated fabric TU 38-10565-91 or tarpaulin with water-repellent impregnation
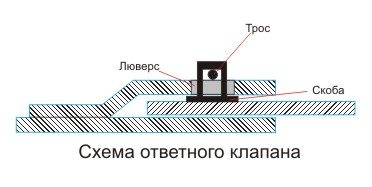
To cover areas of more than 200 square meters, it is possible to manufacture canopy sections with a check valve that allows you to hermetically connect individual panels into a single canopy.
A large canopy can be used: for storing building materials on construction sites (cement, timber, dry mixes, bricks, etc.), for protecting various construction projects from wind, rain and snow.
All trucks, according to the rules for the transportation of bulk cargo, must be equipped with auto-rails. We supply the auto canopy from tarpaulin and PVC-coated fabric. Autopologs can be manufactured with a mechanical drive for quick installation and removal.
Windbreaks made from available natural materials
If you don’t have a ready-made windbreak at hand, you should first look for a suitable place for a fire. In windy weather, it makes sense to light a fire behind natural shelters, such as a rock, a large boulder, or a thick tree (subject to fire safety rules).
Also, when choosing a place for a fire, you need to remember that the wind, as a rule, is weaker in a ravine than at the top of a slope, and in a forest weaker than in open areas: vegetation and folds of the relief themselves are protection from moving air masses.
A well-chosen place, reliably protected from the wind, will save time and effort on making a wind barrier and will reduce the cooling of the body (other things being equal, hypothermia occurs faster in the wind), which is important for the cold season.
If, nevertheless, the parking place is far from ideal, and the wind does not subside, you will have to build a shelter from scrap materials.
For example, reliable wind protection for a fire can be made from wooden poles (for example, from young dead pine wood). To do this, two pairs of poles are driven into the ground, and the remaining poles or brushwood are placed between them perpendicular to the wind in a horizontal plane to create a fence. The cracks in such a fence can be covered with wet clay.

Shelter and windbreak rolled into one
In windy weather, you can light a fire in a pit. The walls of the pit themselves provide protection from the wind and do not allow air currents to extinguish the flame. We talked about some underground fires that are not afraid of even the strongest winds in a separate article.
A wall protecting the fire from the wind can be made of turf. To do this, the turf is cut into bricks and laid in the same manner as brick buildings.
In mountainous areas, where digging a hole or sticking poles into the ground is not possible, a pile of stones laid in a semicircle can save a fire from the wind. If you have stones of a suitable shape, you can even make some kind of stove out of them.
A homemade mini-oven can also be made from clay. But before placing a pot on such a stove, the clay will have to be fired to harden it.
In principle, even the human body can act as a windbreaker. This is clearly seen in the example of lighting a match in a strong wind: before lighting the match, a person turns his back to the wind and only after that strikes the match on the box. Read more about how to light a fire with one match even in windy weather here.
It should be noted that some fires do not require wind protection if the wind is unidirectional and does not change over time. Such fires include a node and a hunting fire. If the wind constantly changes its direction, you can make a fire called a “Finnish candle”. In such fires, the fuel itself protects the flame from the wind.
Such a fire is not afraid of any wind, although making it is not the easiest task.
Many of the described options for protection from the wind, except for fires in a pit and some options for specialized fires (the same Finnish candle), can increase the effectiveness of the fire as a heater, since they reflect the heat onto the person in front of the fire.
Campfire tents
Recently, rain awnings have become widespread among tourists and other outdoor recreation enthusiasts.
Their variety is such that everyone can choose an awning that best suits their requirements.
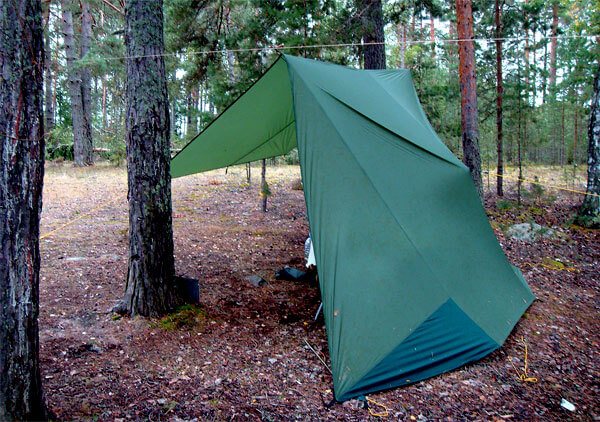
A very convenient and functional awning, which, however, is not suitable for hiking conditions due to its size and weight.
The production produces awnings of various sizes that can protect not only a fire, but also a group of people sitting around it from precipitation. Typically, the size of the sides of such awnings ranges from 3-5 meters.
The size of the awning can also be important if it is intended to be used as a tent. In any case, for a group of two people a square tent with a side of at least 3 meters will be enough.
Awnings also differ in water resistance. Some can only protect you from drizzling rain, while others allow you to feel confident even during prolonged downpours. This value is measured in millimeters of water. In order to stay dry in the pouring rain, you need to use an awning with a water resistance of at least 3000 mm.
No less important is the resistance of the awning material, which is supposed to cover the fire, to high temperatures. Special tents designed for fires do not become deformed, even if their fabric is exposed to fire for some time, while simple tents can catch fire even from sparks flying from the fire.
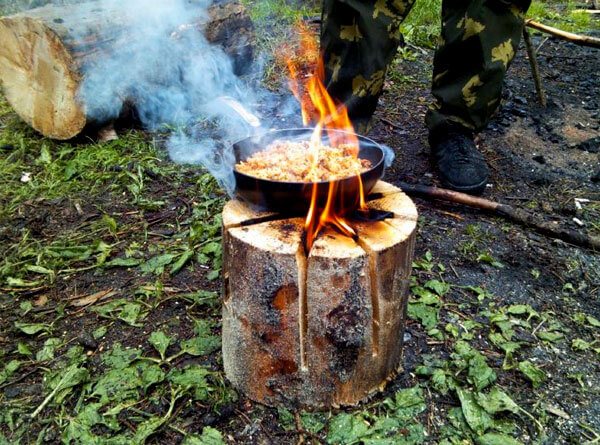
If you have to burn a fire under an awning that is not intended for this purpose, the awning should be pulled as high as possible above the fire, and the fire itself should be lit so that neither the flames, nor the sparks, nor the temperature can damage the fabric of the awning.
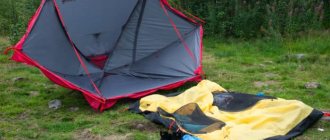
The photo below shows a situation where a fire is built too close to the awning - even if in most cases nothing bad happens, even the minimal risk of making a hole in the awning is grounds for some movement of the fire to the side:
Usually the awning fabric is made resistant to high loads and damage, but here everything is individual.
An important characteristic of an awning is its weight, because the tourist will have to carry all his equipment on his own back. The weight of most awnings varies between a kilogram and two. There are also special awnings for light-duty tourists, the weight of which is a few tens of grams, but they, as a rule, are the least resistant to sparks, moisture, and wind.
Prices for different awnings vary greatly, depending on the characteristics, sizes and manufacturers, and range on average from 50 to 150 US dollars. Although, of course, you can find cheaper tents.
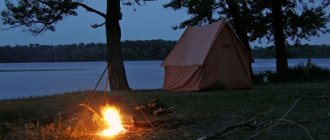
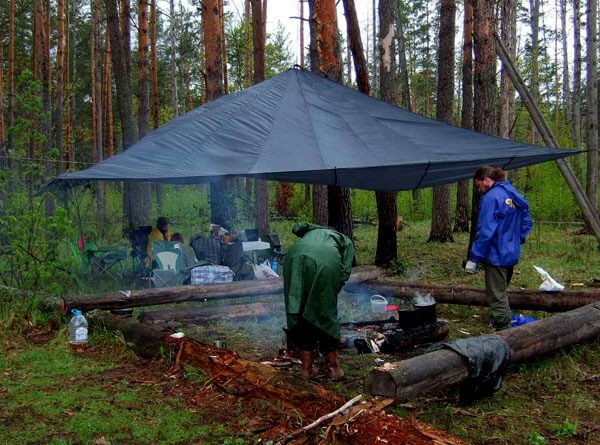
The photo shows a universal awning for protecting a fire from wind and rain:
On the contrary, “easy-moving” awnings are very expensive - their price can exceed 300 USD.
Most often, the awning is stretched between trees so that water can flow freely from it without accumulating in the deflection of the fabric. If the water does not have the opportunity to drain, its mass may reach critical values - and the ropes or the awning itself will break.
Exit from the forest - orientation in the forest.
So, this is the final point in which you will learn how to get out of the forest. By the time you leave, you should already be able to make a fire, get food and water.
To begin with, you should stop and take no further action. Sit on a tree stump and think about landmarks (railway road, lake, river) that you might have noticed before. Remember the direction of movement, for example relative to the sun or moon. Next, it’s worth listening, because the noise of a tractor can be heard 3 kilometers away, railway roads 10 km away, and the barking of a dog 2-3 km away.
If everything is in vain, then just follow the stream to the river, and the river should lead you to people. If there is a big tree and you want to climb it, then look at what’s around. It is also worth paying attention to the road; if you see that there is a path, then feel free to follow it. The main thing is to determine in which direction you need to move. If you keep bumping into branches, then most likely this is an animal path. If there is a fork in the road, then it is better to take the one that is more trodden.
Now about orientation. If you know approximately where to move (for example, before entering the forest, you looked at its approximate position relative to populated areas), then you can try:
It is worth remembering that many “wanderers” walk in circles, because a person is designed in such a way that often the right leg takes a step wider than the left and, accordingly, over time a circle is formed, so it is worth making notches and creating landmarks
.
Now let's talk about animals. You can meet animals in the forest, but more likely they will find out about you sooner and simply leave. The only thing is that they can attack you if:
- they are injured;
- frightened by your appearance;
- protect their young.
In this situation, you should run away or try to scare away the animal with fire. You can knock a stick on a tree. In any situation, of course, you should avoid direct contact with animals, because they may be infected.
This concludes my article. I tried to put in it everything that I considered necessary and that I learned from other resources dedicated to survival. If you have questions, you can write in the comments.
Since ancient times, the most important skill has been building a home. Housing saved people from cold, heat, and wild animals. Even now, a tent is a must-have item when camping. But if you find yourself in an extreme situation, you will have to find and equip shelter yourself. In this article we will look at how to arrange a temporary shelter in the forest.
Shelter classification
Shelters can be divided into the following types:
1) According to the construction method. Open (canopy, flooring) and closed (dugout, wigwam, hut).
2) By capacity. The shelter can be designed for 1 person or for a group.
3) By purpose. A shelter can protect from cold, rain, snow, animals, and insects.
4) By time of use. The shelter can be temporary, used for spending the night, resting, or shelter from bad weather. Capital shelters can be used for long-term living.
5) According to the expenditure of effort. They are divided into prefabricated (usually temporary shelters) and labor-intensive (capital, long-term shelters).
6) According to the materials used. To build a shelter, you can use many different materials: - Fabric shelters (tent, canopy) - Frame-fabric (wigwams, tents) - Frame-deciduous. In the absence of fabric, branches, grasses, and ferns are used to cover the shelter. - Earthen ones. Such shelters are dug in the ground. - Snowy ones. Caves are dug in the snowdrifts, and igloos are built from snow blocks. - Stone.
7) By origin. There can be natural (caves) and man-made.
Summer forest shelters
A shelter consists of three main elements: floor, walls and roof. Depending on environmental conditions, some of these elements may be discarded. Let's consider the main types of forest shelters in the summer.
A canopy is the simplest type of shelter. It is built quite quickly, but the functionality is very limited. A canopy can help provide shelter from precipitation and nothing more. To build a canopy you will need polyethylene or a piece of fabric. Find two trees standing next to each other and attach a ceiling pole to them, or string a rope. Place polyethylene on top and press down the ends with stones. If there are no trees, then several poles will do for construction. Drive 2 poles at an angle to form a triangle. It will serve as the entrance. Place the third pole on top of the formed fork with one end, and lay it on the ground with the other end. Place a film or cloth over this pole and press it down with stones.
Wigwam
It is a frame building. Able to protect from rain, wind, and help keep you warm. If you are going to make a fire, then take care of the hole for the hood. For construction you will need poles. On the ground they are lined up in a circle, and connected at the top into a bundle. The resulting structure is covered with film or cloth. If they are not at hand, then tree bark can be used as a covering material. They begin to lay it from below and fasten it with willow twigs. The frame can be built around a tree trunk. But in this case, you shouldn’t light a fire inside.
Adyghe house
To build this type of shelter, you will need flexible branches or bushes. Flexible branches must be dug into the ground in two parallel rows, and the tops must be fastened together. You should get arches. Attach branches horizontally to the arches. Spruce branches are placed on the resulting crate. If the area where you want to build an Adyghe house is overgrown with bushes, then instead of branches you can use nearby bushes. To do this, tie their tops and you will uproot everything between them.
Winter forest shelters
In winter, a shelter can be dug directly in the snow. You will need a snowdrift; if there is none, then you need to rake the snow into a pile.
Trench
In deep snow it is very convenient to dig a trench as a shelter. If you don't have tools, you can trample it with your feet. The width of the trench must be at least 1 meter, the length depending on the covering material. After digging a trench, place rafters on top; skis and branches are suitable for this. Cover everything on top with film, cloth, and cover it with snow 20 cm thick.
Cave in the snow
On slopes with very thick snow cover, it is most convenient to dig snow caves. Be sure to make sure that the terrain has minimal chance of avalanches. For construction, knock out a hole in the snow with your feet and start digging a tunnel. Dig the end of the tunnel slightly at an angle to the top and expand it to the desired size. This will help the warm air stay inside.
Den
Another good shelter in a snowy forest is a den. You can build it in deep snow among windbreaks and roots. Make sure the trees won't move and start building your shelter. A den is built by analogy with a cave.
Snow dugout
Building a snow dugout is very similar to building snow trenches. For a snow dugout you need dense snow. Using a hacksaw or other tools, snow slabs are cut out and placed on top of the trench.
In order not to get smeared in the comments, I’ll add to the topic both my review of Norda’s publication and my experience in constructing winter shelters. Firstly, regarding the polyethylene shelter: why not? True, polyethylene causes some rejection for me because of its camouflage characteristics, and it’s uncomfortable in an aquarium. But this is all subjective. In addition, using, for example, polyethylene foam, we obtain protection from “Teletubbies” (l/a with thermal imagers).
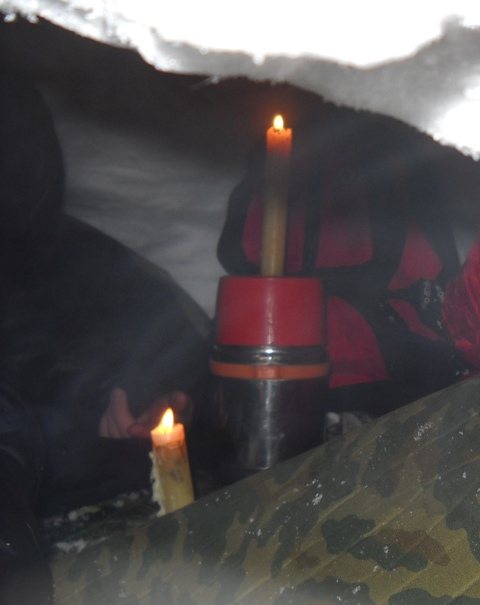
Now about other types of winter shelters. Let me make a reservation right away - all options are for the forest (taiga, mountain taiga zone). Everything is tougher in the tundra. If you can’t make a fire (for reasons of camouflage) and the temperature is -15 - -20, a one-sided canopy for a group or a snow trench for an individual will do.
The snow is raked to the ground, compacted on the sides, and on the bottom - a spruce blanket, a rug, a sleeping bag. On top - a raincoat tent, sprinkle the edges with snow, you can also insulate it with snow on top. Inside - a candle. On one side there is a snow wall from blowing in, with your head towards the entrance. Construction time - 20 minutes. For security, there are the same trenches, only with the ability to view one’s sector, and not in a sleeping bag, of course.
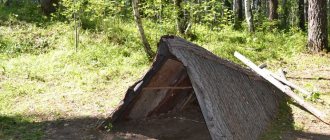
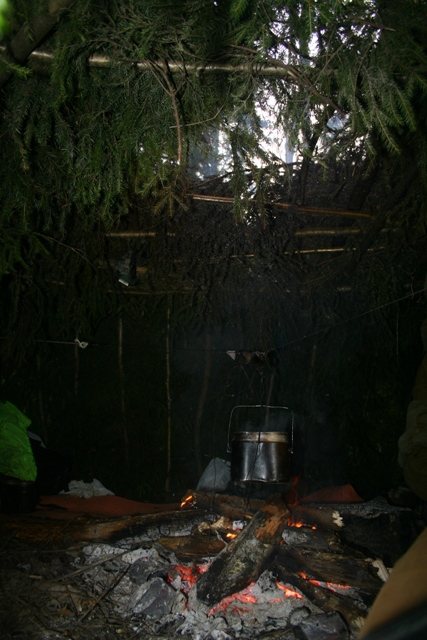
If a fire is allowed, there are many options. In the absence of an ax/saw, we make shelter on trees bent in an arc.
Poles are placed closely on the support (dead wood, dead wood - everything that can be broken and collected with your hands), and the top is covered with snow. The entrance can be covered with a raincoat. Construction time, depending on size, is 2-4 hours.
For long-term stays of a group, a “chumik” is suitable - a frame shelter covered with spruce branches, raincoats and tents with a fire inside. You need trees arranged in a quadrangle, poles for the frame, spruce branches (a lot!). Construction time - from 4 hours.
“Chumik” for 6-8 people
At temperatures below -20, it is better to use closed snow shelters. In others, the risk of frostbite is high. In general, there are many known snow shelters, probably the most famous is an igloo, or snow hut. In the middle zone it is very difficult to do due to the lack of snow of suitable density. We were able to either press the snow and then cut out the blocks, or cut the already pressed one (a couple of times we dismantled 200 meters of ski tracks). There are subtleties in construction, for example, blocks are placed in an upward spiral. The cracks on the outside are covered with snow.
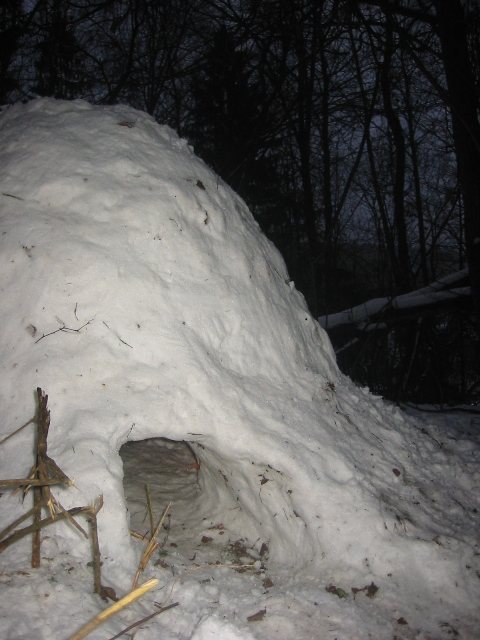
In general, hemorrhoids, and igloos are classified as block shelters (i.e., the insulation is worse than that of closed ones). It is much easier to construct a “snow hive”.

It is built regardless of the depth and density of the snow. Capacity - 2-3 people. Construction time is 2-3 hours. First, we shovel a pile of snow onto the chosen place, periodically compacting it, for example, using a raincoat. Dimensions for a “troika” - diameter at the bottom - 4 m, height of the heap - 1.5 m. After pouring and compacting, dig a tunnel, not reaching the wall opposite from the entrance by half a meter. We expand the blind end of the tunnel, making a vaulted room inside. Nuances: digging and starting to expand the tunnel is the most unpleasant thing. The snow falls and you have to shovel it out from under you with your hands first. Clothing should be changeable, preferably a waterproof top. Digging while lying on the rug. The most unpleasant thing is to break through the vault and it cannot be repaired. Therefore, to control the entire dome, thin branches are stuck to a depth of 20-30 cm (the thickness of the arch). How I reached the branch from the inside - good in this place. There must be a dome inside, otherwise it will collapse. The inner surface is smoothed, otherwise there will be drops. Inside there are spruce branches, rugs, sleeping bags. Heating with candles. Be sure to have a vent! If there is heavy snowfall, periodically clean the ventilation. There are a lot of burnt people in snow holes! Close the entrance from the inside with an RD. The colder it is outside, the more comfortable it is inside. At temperatures above -10 it makes no sense; it thaws through ventilation and in thin places. The same shelter can be built without shoveling snow, if you find a snowdrift of suitable depth, for example, in a ravine.
When building a shelter, don’t forget: it’s better to spend 4 hours building it and relax for an hour in comfort, than to put together something in an hour and spend 4 hours regretting that it was even born.
I continue my review of the construction and use of winter shelters. Conditions: snow cover 20 cm, fine-grained loose snow, air temperature -8 dropping to -12 at night, construction of “snow beehive” type shelters for three people with the periodic diversion of one to guard. Tools: small shovels and raincoats.
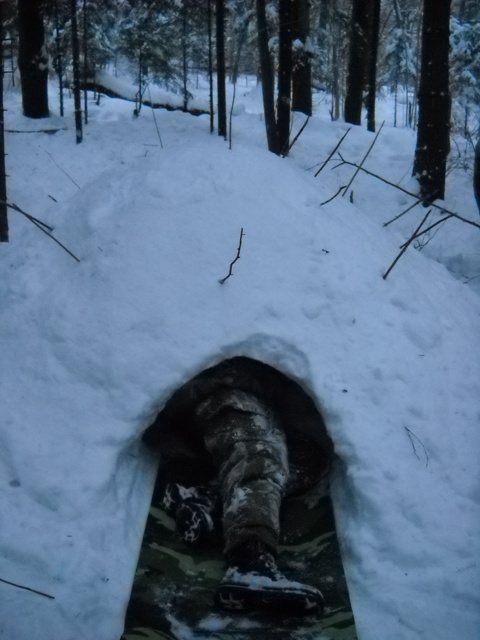
The snow is pulled onto a selected flat area using raincoats until a snow pile is formed with a height of 1.5 and a diameter of 2.5 m. As it is poured, the snow is compacted by its own weight and with the help of raincoats the shape of the dome is leveled.
After preparing the pile, a tunnel is dug on the leeward side. Beacon sticks are installed across the entire area of the dome to a depth of 15-20 cm. The passage is carried out by one person, it is optimal that he is dressed in a “russhun”, because snow is falling from all sides. The blind end of the tunnel breaks through to the center, after which it expands in all directions. Those remaining outside shovel away the snow that is pushed out.
It is necessary to ensure that the ceiling inside has a vaulted shape; a flat one will collapse. Upon reaching the ends of the beacon sticks, snow removal in this area stops, and the ceiling is carefully smoothed. As the space increases, be careful and careful; if the vault is broken, do it all over again; the holes are not repaired.

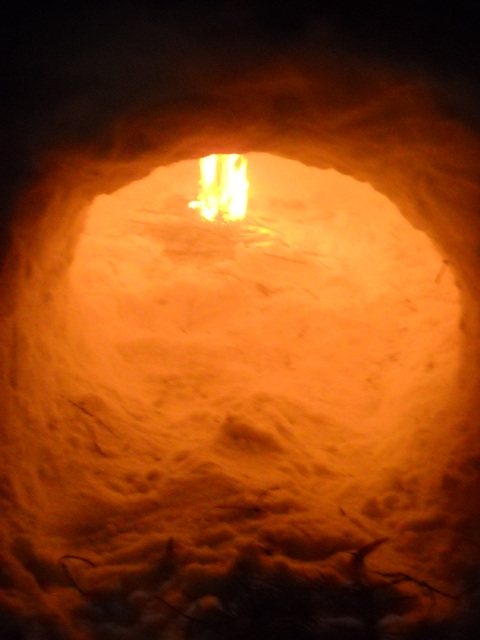
At the entrance, the snow is cleared to the ground, the floor inside should be raised. There is a small ventilation hole in the dome. After clearing the internal space, a fire is lit in the hive for about 5 minutes, after which the thawed walls freeze together, increasing the strength of the dome.
Inside - spruce branches, rugs, sleeping bags. The entrance from the inside is closed by a taxiway. The temperature inside rises with candles.
When the temperature outside was -11, the temperature inside the hives was raised to +7. The colder it is outside, the higher you can raise the temperature inside without fear of the roof thawing. Construction time by UNPRAINED people is 3 hours. Construction time is reduced with greater depth of snow and the presence of snow (avalanche) shovels. For comparison: under the same conditions, in a two-layer tent lined with snow - +3, In a closed lean-to canopy - -3. In the shelter with a fire (“chumik”) the temperature was raised to +12. The temperature was measured at the level of the sleeping place.
Lovers of outdoor recreation need to know how to act in unforeseen situations, have basic survival skills and setting up a camp. This is especially true for those who love outdoor recreation in the winter. When going on a hike in the forest in winter, you need to prepare in advance and take more useful things that will come in handy. One of the important knowledge needed to survive in the forest in winter is to know how to stay warm and not freeze. It is necessary to build a winter shelter and know how to properly heat and build it.
An alternative to an awning
If you don’t have enough money for an awning, you can use a piece of polyethylene instead. Although polyethylene is less durable and not as convenient to handle, it is usually much lighter than an awning (except, perhaps, for lightweight awnings) and is much cheaper.
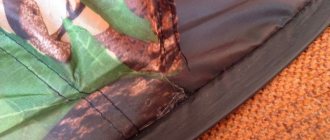
It is recommended to tie polyethylene to a rope with a blind loop or a stirrup knot, and to prevent the polyethylene from slipping out, a smooth round pebble or pine cone is first wrapped in it. I once used burdock baskets molded into balls for these purposes: they are softer and during gusts of wind they partially absorb the shock, protecting the polyethylene from tearing.
In extreme cases, when there is no time to search for stones and burdocks, you can do it even simpler: tie the polyethylene to a rope using a “boa constrictor” knot. The polyethylene, well clamped with this knot, does not slip out, unless, in parallel with the rain, such an improvised awning is not torn from the rope by the wind.
The video below shows a rather complex awning made of polyethylene:
Having invented and tested this option for attaching rope to polyethylene several years ago, I now always use only it. The main disadvantage of this method is the difficulty of untying the knot after use. But these are minor things.
If neither an awning nor a piece of polyethylene were included in the things you took on a hike, a canopy can be made from a large garbage bag cut lengthwise, which is often used as a waterproof liner in a backpack to protect things from moisture. But in this case, you need to weigh the pros and cons so as not to end up at the fire, but with a backpack full of wet things.
In the old days, instead of an awning, a canvas raincoat could be used, which, if necessary, could easily be transformed from a cape into effective protection of the fire from rain. Although, as far as I can tell, raincoats are still quite popular today, especially among former military personnel.
A “space blanket” will do just fine as a mini-awning. It is durable, lightweight and very compact. Its disadvantages include its small size and loud noise created when used in the wind.
To protect the fire from rain, various options for tents, awnings and other stationary structures are also used, but these are more options for urban and country conditions than for tourism and survival conditions, so we will not consider them in this article.
If a person is left bare-handed in the middle of a forest or other wild area, then you need to know how to build a shelter from scrap materials.
Shelter from rain made from natural materials
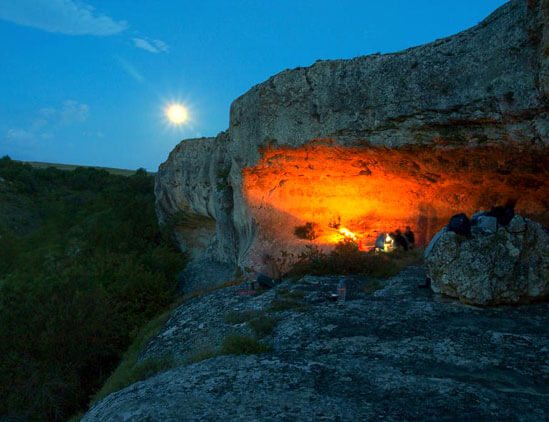
As in the case of protecting the fire from the wind, here you should first of all choose the optimal place to make a fire. The best places in this regard would be places hidden from precipitation, for example, an area under overhanging rocks or at the entrance to a cave. For example, the photo below shows a tourist camp with a fire in one of the “caves” on Mount Mangup in Crimea:
Separately, we told you why you shouldn’t light a fire in the cave itself...
A place under a large tree with a lush crown is not the best option in this regard: although it shelters the fire from precipitation, it can cause a fire or electric shock to a person during a thunderstorm. If we are talking about the winter period, then a cap of snow heated by the warmth of the fire may fall from the branch and extinguish the fire.
If the chosen location does not provide protection from precipitation, you need to build a shelter from natural materials. Reliable protection from rain and fire safety are two criteria by which you should evaluate the chosen type of shelter before you start building it.
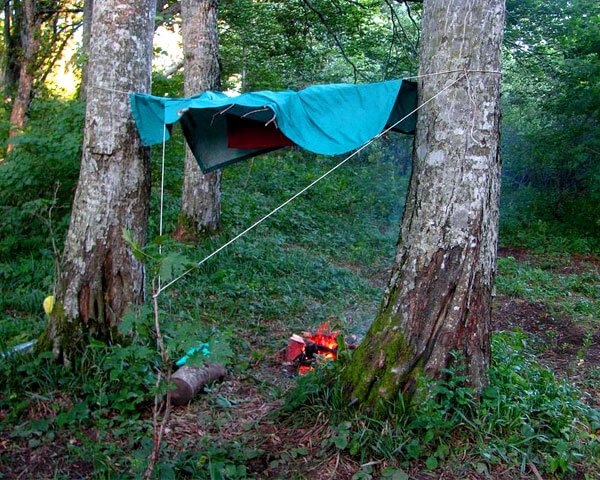
A good shelter is obtained from level poles laid on a horizontal crossbar located at some distance from the ground, covered with moss on top. The poles should lie close to each other at an angle of at least 45 degrees relative to the ground. If the angle is smaller, rainwater will drip from the poles directly into the fire, which is not very good. Also, to prevent leakage, all twigs, branches and protruding pieces of bark on the lower surface of the poles should be removed.
An example of such a shelter is shown in the video by Grigory Sokolov:
Instead of moss, you can use branches with foliage or spruce branches, and these materials are laid from bottom to top like tiles to reduce the likelihood of water penetrating through the structure. In this option, you need to carefully monitor the fire so that the fire does not spread to flammable shelter materials.
A small fire can also be built under a similar type of shelter, in which sticks are laid on the trunk of a fallen tree.
It wouldn’t hurt to talk about fires that are resistant to rain and snow.
Thus, a node made of two logs withstands snowfalls well, since its combustion center is protected from snow by the upper log, and a Finnish candle, covered with a pot in which food is cooked, can withstand even the heaviest and longest rainfalls without an additional canopy.
Also, the Dakota hearth is a type of fire that is not afraid of rain if a cooking utensil is installed above it.
In general, speaking about fire shelters suitable for tourism, it can be noted that fire protection from bad weather should be compact, lightweight, fully cope with its task and ensure maximum safety for both tourists and the environment. When going to areas where there is a high probability of strong winds and frequent rains, such shelters are a guarantee of coziness and comfort. If the group goes on a trip to their native places, and weather forecasters promise good weather, then you can save space in your backpack, taking into account that the equipment includes a tent and a raincoat (you always need to be prepared for the worst).
As for the situation of survival as a result of an emergency, the person who finds himself in it most likely will not have comfortable gatherings around the fire under a branded awning from Tatonka, which means he needs to act according to a different scheme. First of all, you should look for a protected place, secondly, try to build a protection for the fire from existing equipment, and only lastly, make a shelter from natural materials.
Author: Maxim Chechetov
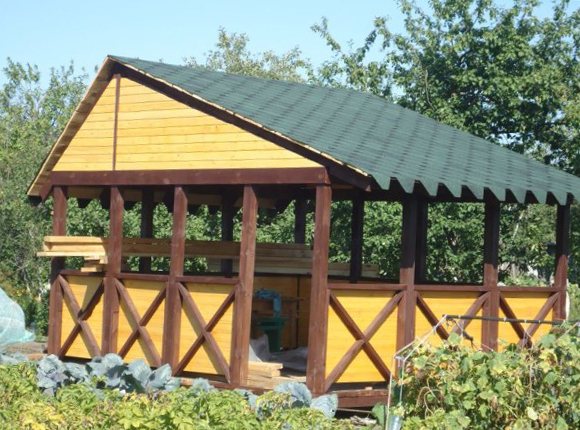
What factors to consider when choosing a shelter?
Having visited any hardware store, you can note the fact that there are various materials on sale that can be used in private construction to protect the garden gazebo from the elements. Since the developer is faced with the task of turning an outdoor gazebo into a structure that is shaded and protected from rain and wind, he needs material that meets the following criteria:
— ease of installation;
— possibility of use on the street;
— resistance to the action of the environment, absence of deformation during the process of getting wet, heating and drying;
- a light weight;
— high rigidity and decent strength characteristics;
- aesthetic appearance and economical material consumption.
The price of the material in the construction center also matters, so before making a final choice in favor of a particular option, it is worth arming yourself with a calculator and calculating the costs required for its purchase and installation work.
Covering the walls of the gazebo with clapboard
Attention to these details will allow site owners to choose the best option for sheltering the gazebo from the environment. This can be polycarbonate, film, plastic, roller shutters and other materials, the use of which for the outer cladding of the sides and walls will increase the functionality of the garden gazebo, expand the scope of its use and make the room suitable for hanging out throughout the entire season. The specifics of using each option in garden construction will be discussed below.