Burnt bonfire site
This is a way to spend the night in the forest during the cold season without additional structures. Hunters often use it this way. First you need to clear an area measuring two by two meters and light a fire on it. It is necessary for a large fire to blaze for at least two hours, and preferably three. Then you should remove the coals to the side and lay a bed in their place. It is definitely recommended to insulate your lower back by wearing a woolen scarf or other item over it. You also need to add pine branches and dry bedding.
Types of snow shelter and description
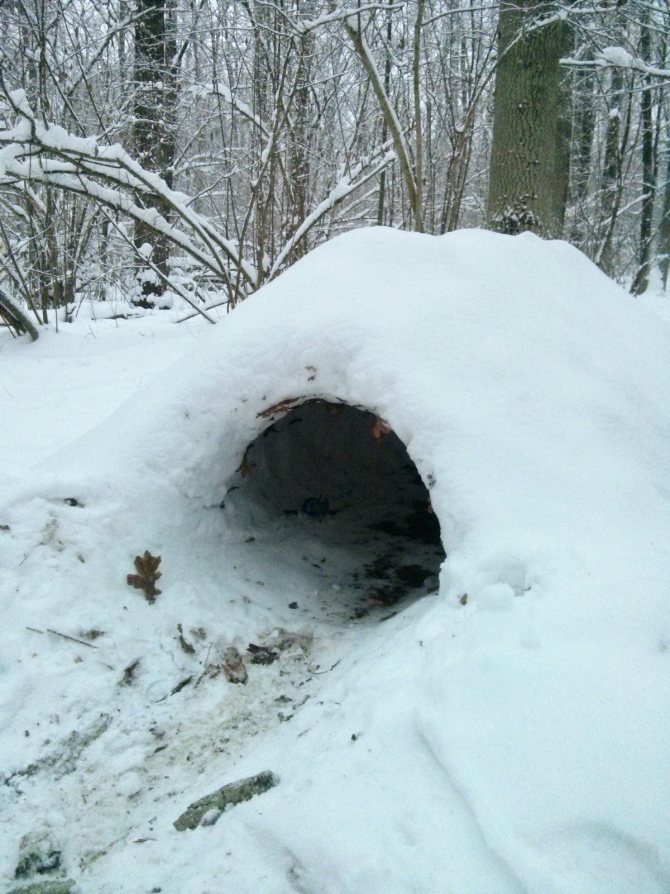
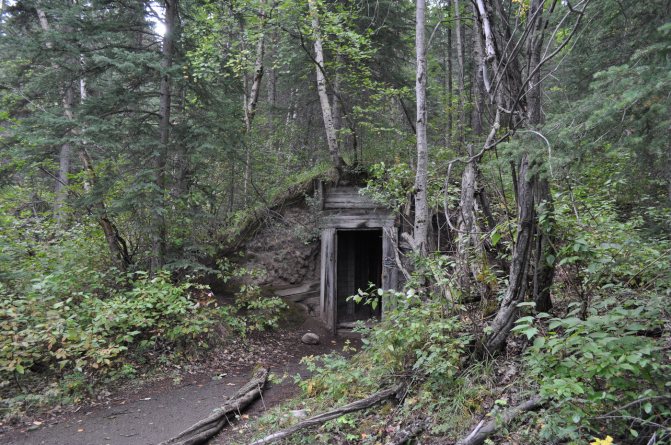
Underground shelters
If the area around is fairly flat, not mountainous or rocky, if you have to spend the night in the forest, you will most likely have to build an underground shelter. Find a small slope and dig a cave in it, leaving a decent layer of snow at the top of the slope. Or try to find a gap and fill it with branches and leaves on top, leaving space underneath. The result should be a cave. If there are no suitable places, simply dig a hole to the ground and cover it with branches on top, leaving air access. You can put dry branches and leaves halfway around the cave.
We recommend reading:
Sights of Venice
So, your cave is ready, the next step is heating it. There are basic rules for starting a fire in a snow cave. Build a small fire or light candles (if available). With a small fire inside the cave, the temperature will quickly rise from 25-30 C to 0 C. When the fire flares up, the walls of the cave will begin to melt slightly and “seize”; you only need to monitor the cracks that appear and cover them with snow. Soon the walls will be completely strengthened, and the higher the temperature outside the cave, the better for you. The fact is that the temperature difference only enhances the adhesion of snow.

Underground shelter
After warming up the cave, you need to dry your things to warm up if necessary. It is worth noting that heating a smaller cave is much faster, so when choosing its size, be guided by the number of people.
Above ground shelters
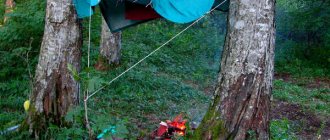
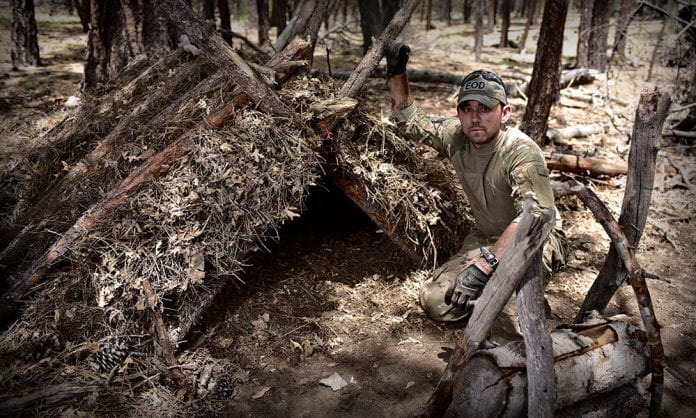
This type of shelter will take you much more time and materials, but if the situation allows you and does not urgently require shelter, then this option makes sense to consider. To start building, you need to choose a good place - you can use the crown of trees, leaning towards the ground or a place between the trees. You will need plenty of branches and leaves and material to tie or tie the sticks together.
Build a structure from branches, sticking them into the ground or leaning them on nearby trees - you need to create a shelter frame. Cover everything with leaves, grass, branches, and possibly snow on top.
Above ground shelter
The hut is ready and standing firmly; you need to take care of heating the shelter. Light a small fire, be careful not to start a fire or get it too hot. There is no need to be afraid of smoke; after a few minutes it will begin to seep through the branches. Now warm up and dry your clothes if necessary.
We recommend reading:
How to light a fire without matches
If you find yourself in an emergency situation, do not rush to panic; panic is the main enemy of such situations. Soberly assess the situation, review your inventory, and get down to business. The main thing is not to be afraid of failure.
Author of the publication
offline 2 years
Nika
7
I am interested in hiking and traveling, photography and videography. I have been going hiking since childhood. The whole family went and went - sometimes to the sea, then to the river, to the lake, to the forest. There was a time when we spent a whole month in the forest. We lived in tents and cooked over fires. This is probably why I am still drawn to the forest and, in general, to nature. I travel regularly. About three trips a year for 10-15 days and many 2 and 3 day hikes.
Comments: 0Publications: 668Registration: 10/23/2018
Nika Survival in the wild, Articles, Shelter
Igloo
This type of winter shelter is considered one of the most reliable. This is the traditional home of the Eskimos, who are accustomed to the harsh climatic conditions of the north. It has the shape of a dome and is made of snow slabs. The diameter of the structures ranges from 2.5 to 4 meters, and its height reaches two meters. They get inside through a hole in the floor, where a trench leads. It is dug in the snow below floor level. Thanks to this, the room remains warm and there is an opportunity for exhaled air to escape. Light enters the igloo through the snow walls.
To create such a structure yourself, you must first select a site with a flat surface and dense snow. Its depth must be at least 60 centimeters. Soft snow is not suitable for such purposes. Using a rope and a knife, draw a circle. He will determine the size of the future structure. For one person it is recommended 2.4 meters, for two - 2.7 meters, for three - 3 meters. Do not forget that the larger the diameter, the more difficult it will be to build. Therefore, for a large group it is better to make several small igloos.
The second stage is the production of snow slabs. To do this, you need to determine the leeward side of the selected site and remove them from the dense snow. Each brick has dimensions of 70 by 50 by 20 centimeters. The foundation will require from 15 to 20 such slabs. They are laid along the circle so that its line remains inside. The top layer of the first row of slabs is partially removed, forming an inclined line from the last block to the first. The result is a step between them. The next row is made so that the next block is on the bottom step, and the middle is at the junction of the lower slabs. This requires a slight inward tilt. The vault is built gradually, in a spiral. The slabs are gradually becoming smaller. The gaps between them are sealed with snow. The most difficult thing is to lay the top block. If this does not work out, you need to cover the resulting hole with any fabric, secure it with blocks, and then simply cover the canvas with snow.
If the situation or lack of the required amount of snow does not allow the construction of an igloo, there are simpler options for winter shelters.
How to make a snow shelter in the forest
You should proceed from considerations of what material you have. Most likely, you are absolutely unprepared for the emergency construction of a shelter and do not have the necessary materials, this is not scary, because the material is around you. It’s a paradox - in order to escape the cold and snow, you need to build a shelter from it. In general, materials other than snow can be used: polyethylene, tents (if available), and tree branches. Look around the area and decide what type of shelter there will be.
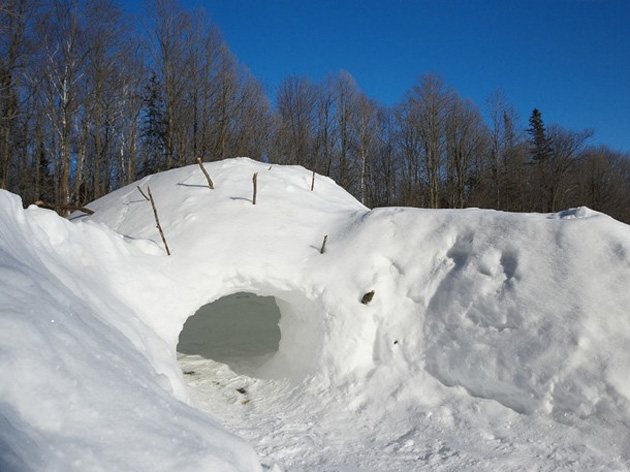
Snow cave
This shelter is dug in a slope or large snowdrift. The cave has a dome shape and a ceiling height of about one and a half meters. At the end of the work, the entrance is blocked with snow blocks so that the floor inside is higher than the entrance. This is necessary so that you can breathe - this allows access for carbon dioxide to escape.
The floor is covered with polyethylene or other bedding with high thermal insulation. A small hole is made at the top for ventilation. In the cave, as in the igloo, a small fire is allowed. This keeps you warm inside.
The ability to build a shelter in the forest during the cold season becomes extremely important during a winter hike.
Construction of a shelter for an overnight stay in a winter forest
Dear visitors to the site “Visiting Samodelkin,” the material presented by the author will clearly show and explain how to make a shelter in a snowy forest so that you can spend some time in it and spend the night.
Using for construction only those materials that were found directly in the forest itself, the author shows us that even in the most difficult and extreme situation there are positive aspects. This material will be useful to lovers of hunting and fishing, as well as tourists, and you just need to know survival skills in the wild, everyone without exception, “you never know what can happen in life”
And so, let's take a closer look at all the stages of construction, and also get acquainted with what and how the author used.
Materials
1. spruce branches (coniferous tree branches) 2. poles 3. sticks 4. snow 5. rope (bark can be used)
Tools
1. ax 2. sapper shovel 3. knife
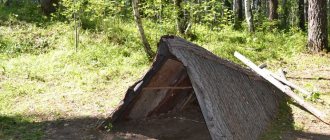
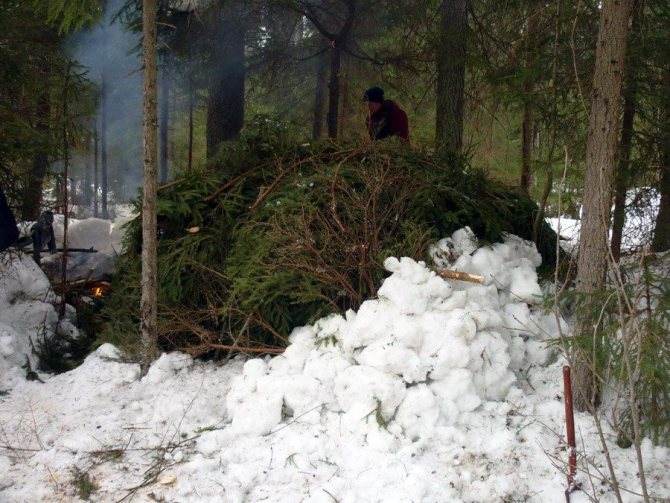
The process of creating a shelter in a snowy forest.
And so, construction will take place on a small hill in a cold, winter forest, all materials for construction will be taken in the immediate vicinity of the parking lot. This type of shelter construction is intended specifically for extreme situations, when you do not have a tent with you to shelter from the raging weather and spend the night, and you also have a minimum of tools and materials.
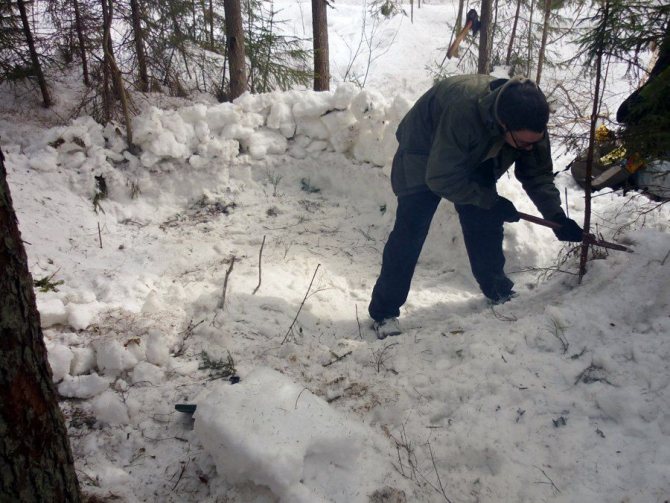
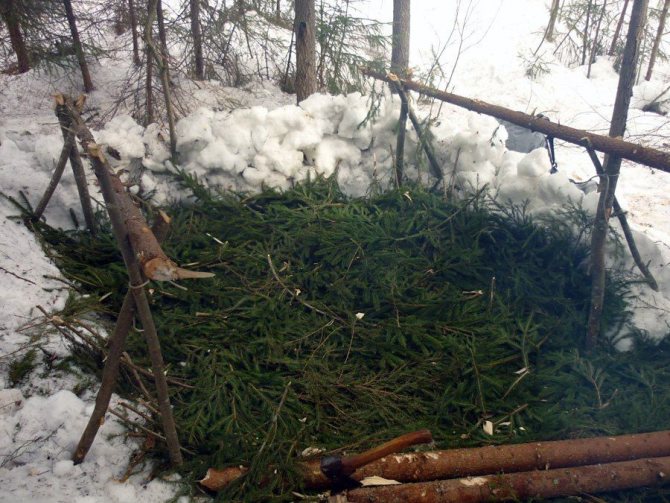
The first step is to choose a suitable location for your future shelter, preferably if it is built on a hill. Then you should clear the snow cover down to the ground, digging a kind of small trench in the snow; you can lay out a parapet from the snow for greater reliability and subsequent strengthening of the walls of the home. Here is an example of how the author did everything himself.
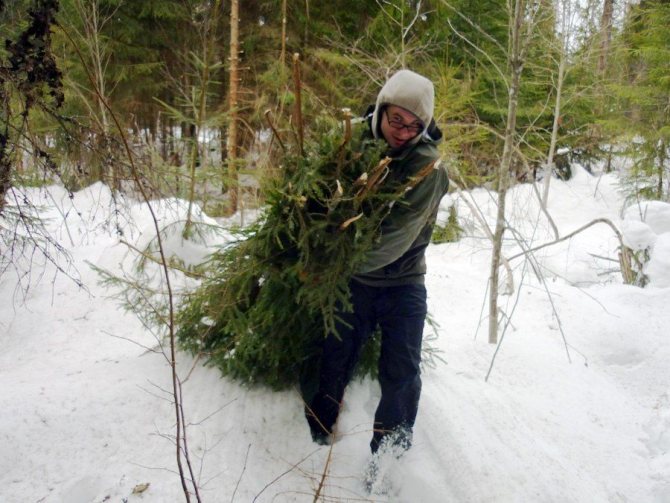
After the hole in the snow is completely dug, our tourist begins to collect branches of coniferous trees (spruce, pine, cedar) around the area; in common people this material is called (spruce branches)
ATTENTION!
Branches should be cut from the lower parts of the tree; under no circumstances should young trees be broken! Take care of nature first!
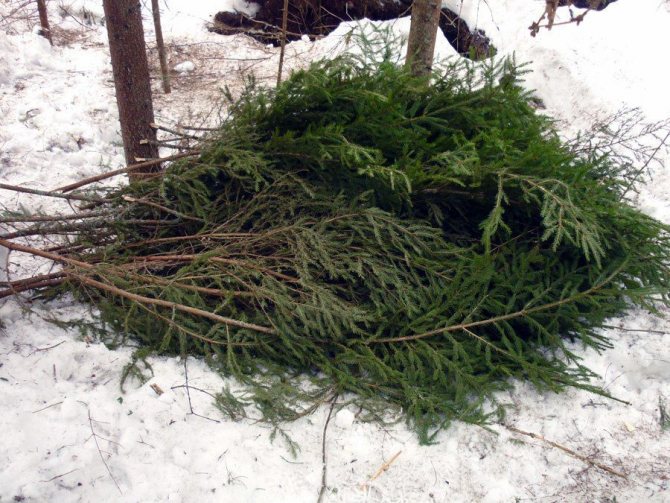
From the prepared branches brought by the author, a flooring is made on the ground - this is done so that there is a layer between the icy ground and the feet of travelers. As they say, “Keep your head cold and your feet warm.” Because if your feet get cold, you can get pneumonia, or at best, just catch a cold, which is extremely undesirable during a hike.
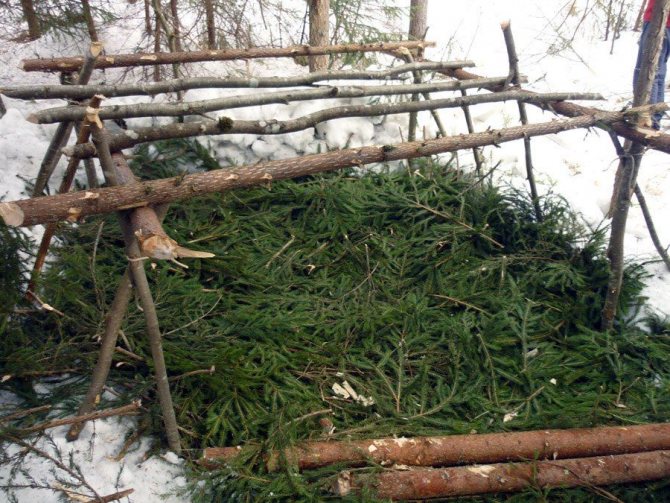
Next, the frame of the future shelter is made from pine poles, the required length of the trunk is cut off with an ax or knife and stuck into the snow, and a jib is also installed for reliability. If you don’t have an ax with a knife, you will have to break the branches thinner and preferably dry, it will be easier to break them.
Then the roof is made, if you can call it (lathing), the sticks are laid next to each other at a small interval and tied to the frame with a rope. If you don’t have rope with you, you can use thin twigs (hazel, willow) or other wood, as long as they are not brittle in the cold, and they should also be warmed up a little by the fire.
As soon as the frame is ready, it is covered with spruce branches, starting from the bottom up.
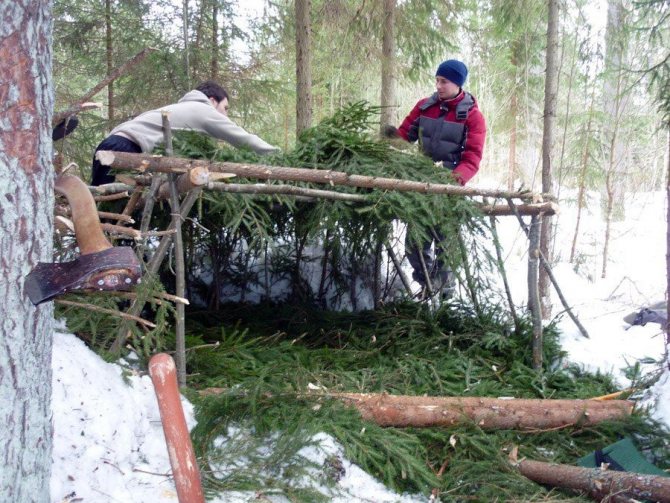
Next, the roof is completely covered with branches; it should be done so that the branches fit tightly to each other and there are no gaps left.
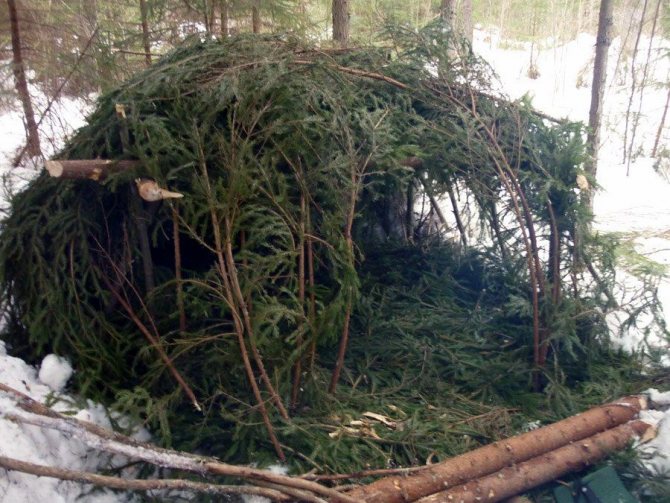
The walls of the home should be sprinkled with snow for safety; this will also help retain heat inside the room.
ATTENTION!
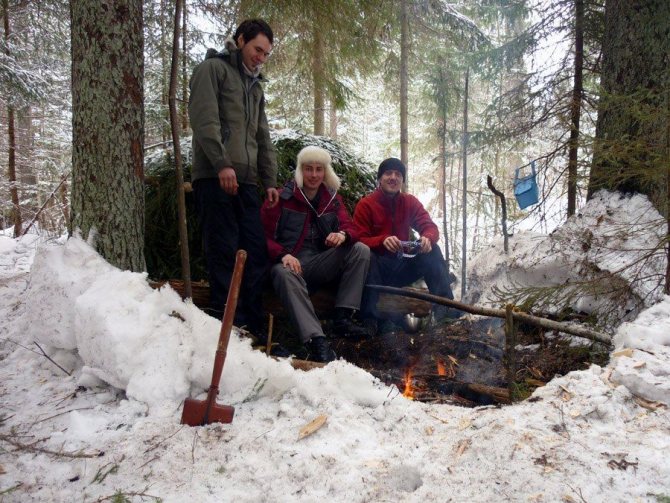
The fire should be lit at a more or less safe distance from the hut and, if possible, surrounded with stones, “although it is unlikely to find them under the snow.” You also need to build a wind protection for the fire from sticks so that it does not blow in different directions. Follow the rules of “Fire Safety” because branches of coniferous trees, even damp ones, can burst into flames like “gunpowder”
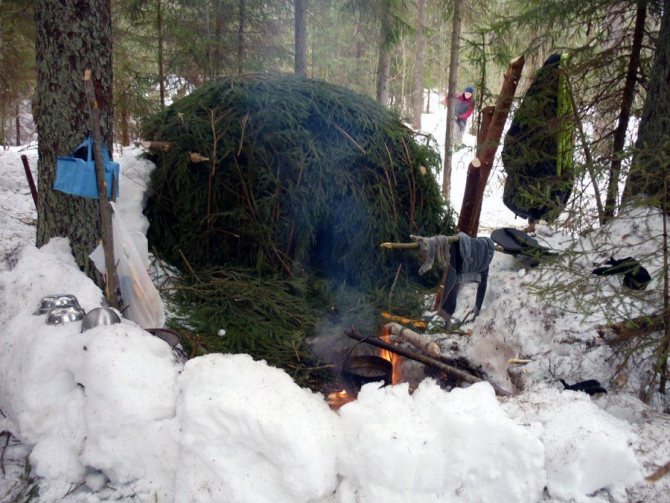
According to the guys who built the shelter, they had a great night, the temperature was between -7 and -9 degrees. You can also completely cover the shelter with snow and the temperature inside will remain stable, but you should leave a small vent at the top so that fresh air can circulate.
This concludes the article. Thank you for your attention! Come visit more often, don't miss out on new items in the world of homemade products! The article is presented for informational purposes only!
Source
Become the author of the site, publish your own articles, descriptions of homemade products and pay for the text. Read more here.
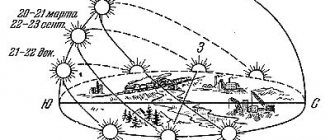
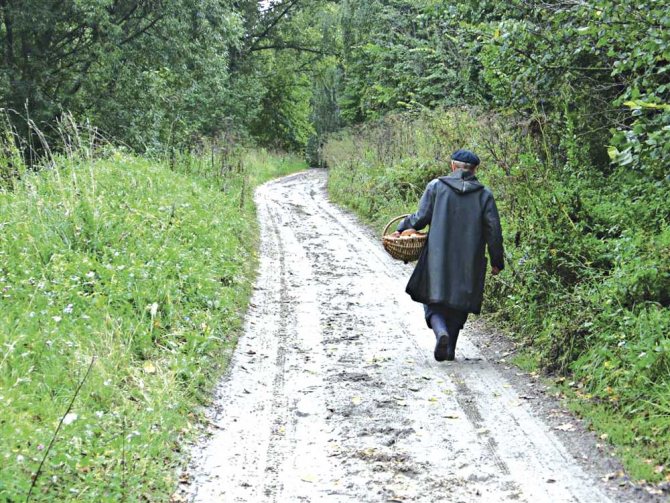
Exit from the forest - orientation in the forest.
So, this is the final point in which you will learn how to get out of the forest. By the time you leave, you should already be able to make a fire, get food and water.
To begin with, you should stop and take no further action. Sit on a tree stump and think about landmarks (railway road, lake, river) that you might have noticed before. Remember the direction of movement, for example relative to the sun or moon. Next, it’s worth listening, because the noise of a tractor can be heard 3 kilometers away, railway roads 10 km away, and the barking of a dog 2-3 km away.
If everything is in vain, then just follow the stream to the river, and the river should lead you to people. If there is a big tree and you want to climb it, then look at what’s around. It is also worth paying attention to the road; if you see that there is a path, then feel free to follow it. The main thing is to determine in which direction you need to move. If you keep bumping into branches, then most likely this is an animal path. If there is a fork in the road, then it is better to take the one that is more trodden.
Now about orientation. If you know approximately where to move (for example, before entering the forest, you looked at its approximate position relative to populated areas), then you can try:
- Orientation by stars and moon
- Sun orientation
It is worth remembering that many “wanderers” walk in circles, because a person is designed in such a way that often the right leg takes a step wider than the left and, accordingly, over time a circle is formed, so it is worth making notches and creating landmarks .
Now let's talk about animals. You can meet animals in the forest, but more likely they will find out about you sooner and simply leave. The only thing is that they can attack you if:
- they are injured;
- frightened by your appearance;
- protect their young.
In this situation, you should run away or try to scare away the animal with fire. You can knock a stick on a tree. In any situation, of course, you should avoid direct contact with animals, because they may be infected.
This concludes my article. I tried to put in it everything that I considered necessary and that I learned from other resources dedicated to survival. If you have questions, you can write in the comments.
It is difficult to imagine a situation where a person finds himself in a deep forest at night without any tools or means of communication. However, even for such a scenario you need to be prepared - you never know. Therefore, such a skill as constructing shelters for survival in the forest from scrap materials with bare hands is a rather useful skill. And now we will focus on the simplest shelter options that anyone can build.
Housing made of snow
The first option for overnight accommodation is a snow hut.
To build such a shelter, you must first find a good place. The most optimal terrain options:
- one or a group of fallen trees;
- roots turned out of the ground;
- hillside (preferably facing south).
The shelter will be located precisely under the cover of these trees or roots.
To start building a hut, you need to prepare the foundation - dig a hole or make a small depression in the ground. Next, you should make a frame from branches (coniferous ones are best), and if you have a piece of plastic film, oilcloth or cloth with you, cover the frame with it. Then you can pour a layer of snow on top.
Read also: Gnome pine in landscape design
Build an improvised “mattress” by laying fir branches on the bottom of your shelter. If you don’t find any, you can use dry grass or hay.
At night, the entrance to the snow hut must be covered with branches.
Despite the fact that such a dwelling is made of snow, it will be much warmer in it than in a wooden hut.
Principles of building a dugout in the forest
Most often, dugout houses are built so that they are hidden from prying eyes as much as possible. Camouflage is equally important for hunters, gamekeepers, and survivalists.
For the sake of speed, it is easiest to build with a pitched roof. In this case, there is less engineering work and log preparation.
The shelter should be erected so that the entrance to the room is in the direction of the flow of water so that it does not flood into the home. At the same time, if possible, you should take into account the wind rose to save heat (the wind should not constantly blow directly on the door).
When constructing temporary housing, you need to take into account that the room will be smaller by exactly the area that the thickness of the walls, ceiling and floor will take away. But this does not mean that the shelter should be made for standing at full height. Physical capabilities and limited construction materials can make their own changes.
Step-by-step creation of a shelter in the snow
- 1. Choosing a place for shelter.
The easiest shelter to construct is a snow hole. But it can be created only if the thickness of the snow cover is more than 0.5-0.7 meters. Various snowdrifts are also suitable for this purpose. If such a place could not be found, then it is necessary to spend a lot of effort to collect snow from the surrounding area and throw it into one pile. - 2. Creating a niche.
The snow hole should not be too deep (no more than 1.5-2 meters) so that you do not accidentally get buried under the mass of snow. It is necessary to create a recess at the very edge, and the entrance hole should not exceed 0.5 by 0.5 meters. At the same time, if the thickness of the snow layer allows, you need to create a niche with an upward slope. In this case, the far part of the niche should be approximately 0.5 meters above the entrance hole. Firstly, this will allow the formation of a thermal cushion (as warm air accumulates at the top). And secondly, it’s easier to choose if the entrance is blocked with snow. - 3. Flooring.
Lying in the cold snow is not the best idea, of course. Therefore, they line the bottom of the snow hole with spruce branches, branches or dry grass. But if this is not possible, then remember that it is better to sleep in the snow than on frozen ground. - 4. Inlet.
During an overnight stay, the entrance to your shelter must be closed. This can be done using a piece of fabric, film, or spruce branches well reinforced with snow. You can also cover yourself with a pile of snow, but in this case leave a decent hole (to allow air to pass through).