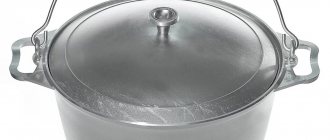
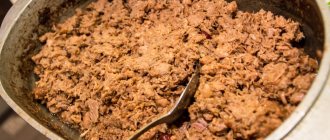
What is a wood chip stove?
The wood chip stove is a small mobile structure. This unit is perfect for cooking food and heating liquids in a pot. And any brushwood can serve as fuel.
A DIY wood chip stove has the following properties:
- A properly manufactured stove has excellent draft. This means that any flammable composition is suitable for complete ignition.
- The camp stove-wood chipper does not emit sparks and does not form coals after use. Therefore, such equipment can be used in places where open fire is prohibited.
- The compact structure allows you to take the stove wherever you need it.
Design and principle of operation
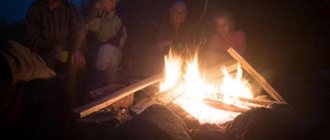
The primitive wood chip stove system operates on a burning flame. The principle of operation of such a device is long-term combustion. The main advantage of a flame-burning stove is that you can use fuel that burns difficult - solid fuel (branches, roots, etc.). The efficiency in this case is low, because the work uses oxygen, not gases.
Such a device can be constructed at home in a short time. A high-quality DIY wood chip stove must use pyrolysis. Such stoves are economical and practically omnivorous. A wood chip stove that operates only on the decomposition of natural compounds is called a turbo wood chip stove.
Fuel consumption in this equipment occurs only with a certain amount of air. A diagram of the operating principle of this stove is presented below:
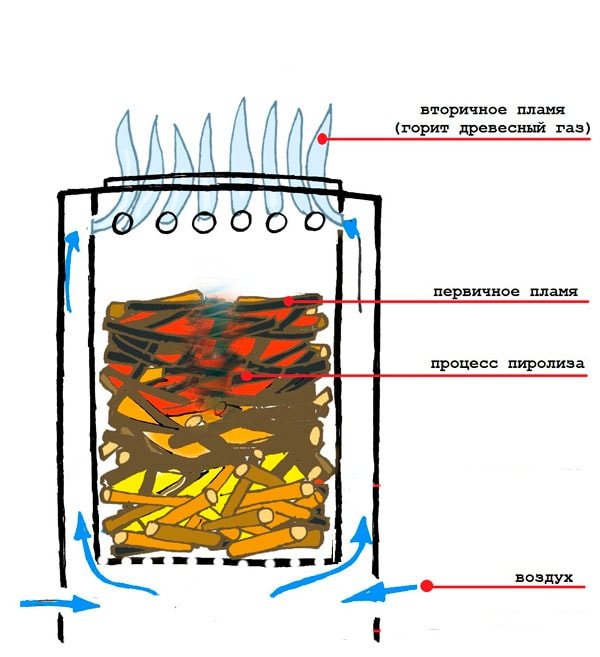
At the first level, there is a full supply of air, then, after about 10-15 minutes, it quickly decreases. The oven enters the smoldering stage. At the same time, even gases produce energy.
This camp stove does not have a convenient shape, but it has many useful characteristics:
- The fuel can be dry fuel.
- With a small amount of fuel you can cook food for several people.
- Even if the basis of a pyrolysis stove is a tin can, the device will still last a long time. High temperatures accumulate on the axis of the unit.
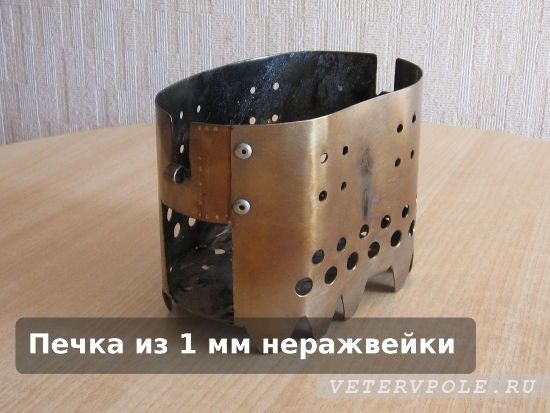
Stainless steel
Stainless steel is a much heavier material and is very difficult to drill. The stove, made of stainless steel 1 mm thick, turned out to be very heavy, although quite durable. I would not carry such a piece of iron on foot))) In addition, a lot of time was spent on drilling holes and processing the edges. But stainless steel about 0.5-0.6 mm thick should have a more acceptable weight and sufficient strength. Well, drilling it will, of course, be a little easier.
Manufacturing options
With a certain set of equipment and skills in working with metal, making a wood chip stove will not be difficult. There are several current options.
From the drum of a washing machine
It’s possible to adapt a worn-out washing machine into an excellent outdoor fireplace. To install the stove you will need a washing machine drum. The holes around the perimeter of the drum will provide a constant flow of oxygen and also serve as decoration.
The diagram shows the possible dimensions of the manufactured furnace.
Materials and tools:
- Drum.
- Angle grinder and grinding wheel.
- Wire brush.
- Cutting wheel for metal.
- Metal corners and flat workpieces.
- Heat-resistant paint.
Instructions:
- First you need to remove the drum and remove all dirt. You should also clean the rim of any plastic parts.
- Cut off the main spindle and the fold at the top to make the piece look better.
- Use a sander to remove any uneven surfaces at the bottom.
- Remove any remaining old foam.
- Make legs from fasteners so that the stove is at a distance from the surface.
- The final stage will be painting the stove.
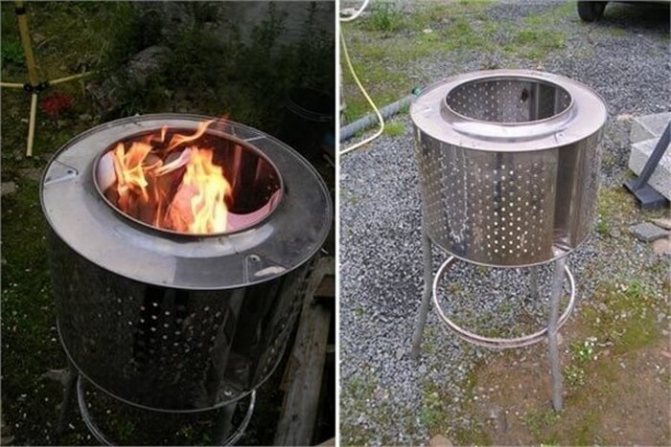
Wood chips from a washing machine tank
From the cutlery stand
Using an ordinary cutlery stand you can make a simple wood chip stove. The design will last a long time, because This kitchen item is made of food grade stainless steel with thick walls.
To make such a structure, you need to take:
- four bolts with nuts.
- metal rods.
- marker for marks.
- Bulgarian
- steel partitions, metal chain (optional).
Instructions:
- The legs will be bolts that need to be attached to the bottom of the stove. The rods are inserted through the upper holes. This is how you get a tray for dishes.
- The system can be improved using a variety of stands. To do this, four markings are made on the rim of the stand and cuts are made using a grinder. The cross stand is strengthened into the formed grooves.
- The same action should be performed with the bottom of the stove. This is necessary for the formation of greater lift and good access of oxygen.
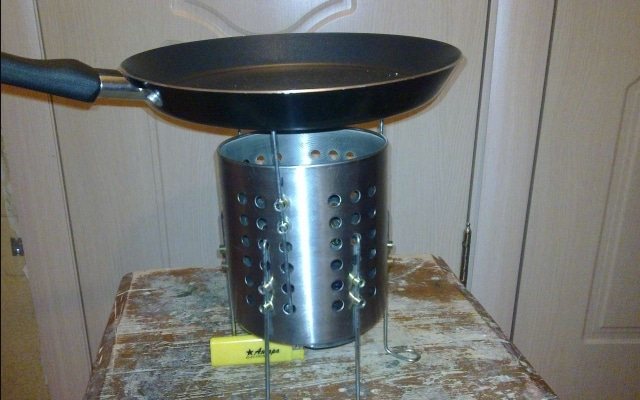
Option 1
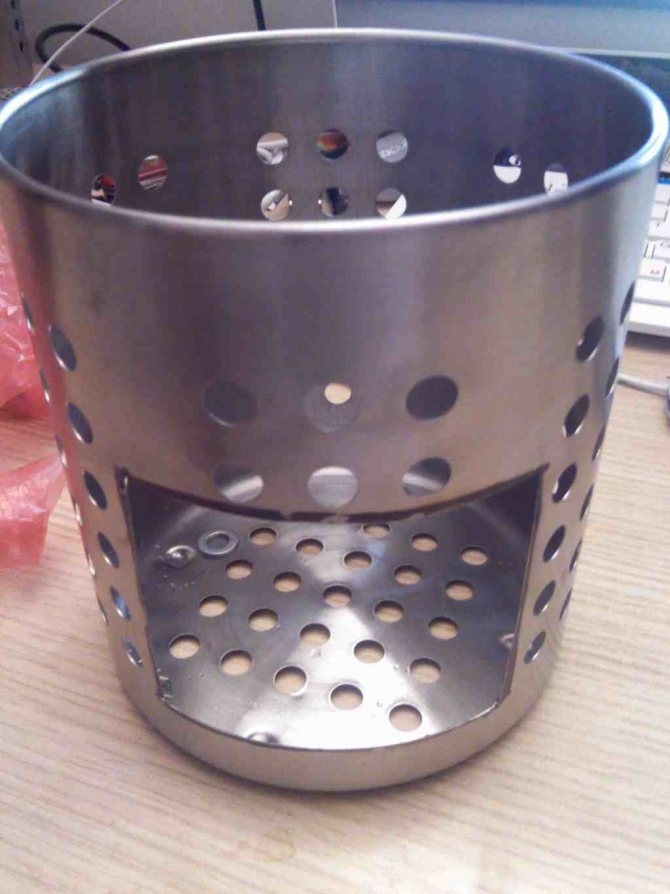
Option 2
From a can
A good solution for tourist events can be the use of a wood chip stove made from cans. The advantages of this design are that assembly requires a minimum set of tools and a small amount of time.
To work you will need:
- Two tin cans of different diameters.
- Knife.
Manufacturing instructions:
- To begin with, in a smaller jar you need to make holes at the bottom and sides, near the rim.
- Then take a second can, make holes along the rim and remove the bottom.
- Insert a smaller jar into the hole formed.
- Make a stand for the heated dishes.
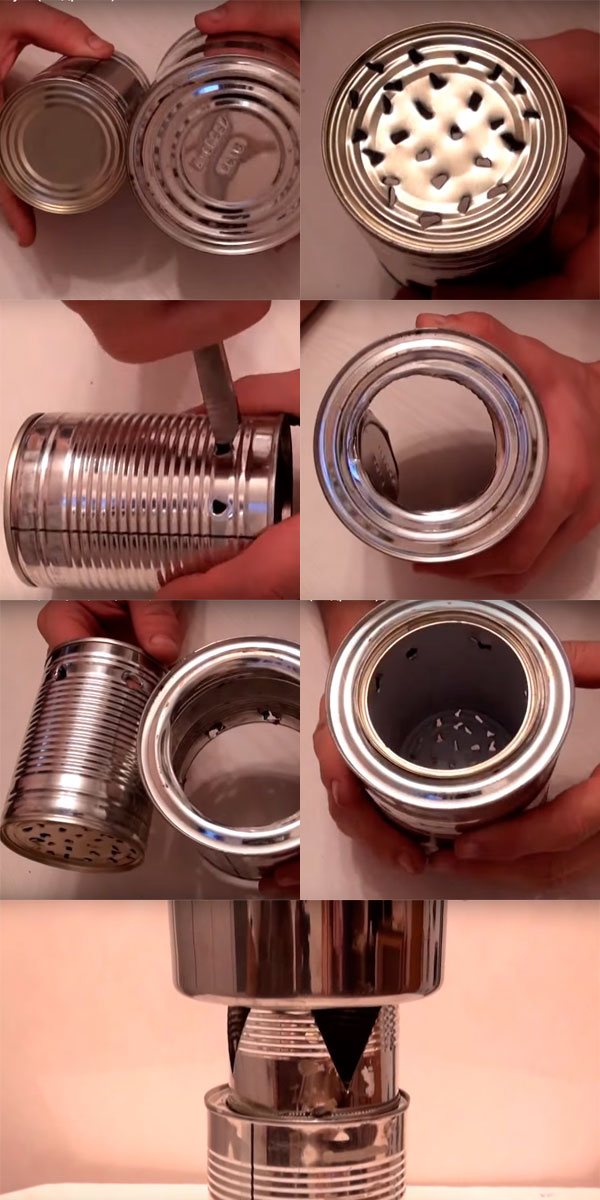
Stages of making wood chips from a can
This stove would be an ideal solution for use by one or two people. Despite the simplicity of the design and small dimensions, a fairly strong hearth is created in a stove made from cans. It is also worth noting the environmental friendliness of such equipment.
Foldable design
The folding camp stove-wood chipper is compact and easy to carry.
To assemble such a stove you will need flat metal parts. When assembled, the folding stove looks like a small square package. It should be remembered that the corners of such a product are sharp, so folding wood chip stoves must be placed in a special bag or container.
Materials and tools:
- Sheets of steel (no thicker than 2 mm) and wire (no thicker than 3-4 mm)
- Metal hacksaw, file.
- Drill, hammer, for bending steel.
- Pliers
- Bench punch.
- Suitable fasteners.
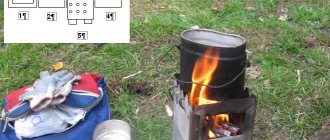
Drawing:
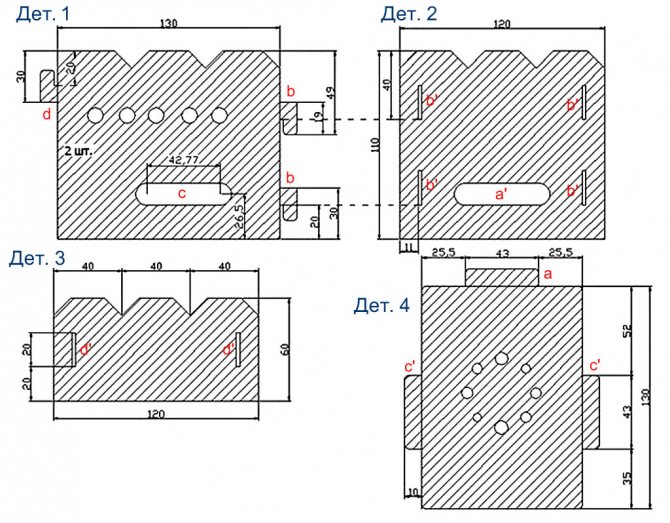
Manufacturing instructions:
- Using the drawings for making a wood chip stove with your own hands, you need to make a plan on a paper sheet.
- Transfer the design to the metal and correctly cut out all the necessary elements.
- Drill holes for the wire on all parts of the walls of the future stove.
- Using wire, assemble the walls and bottom of the stove.
- Make a mesh for dishes.
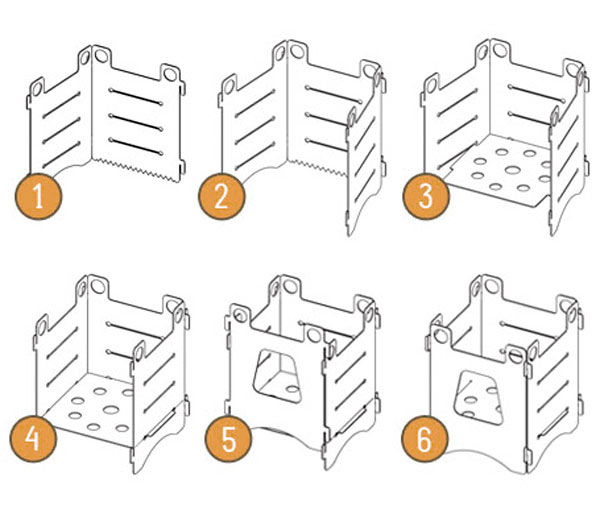
Parts assembly diagram
It is not difficult to make such a unit with your own hands. The advantage of this design is obvious: the stove is easy to assemble, like a construction set. Using the drawings greatly simplifies the construction of a wood chip stove with your own hands. Basic skills and tools will allow you to create an always-in-demand structure for heating and cooking food in camping conditions.
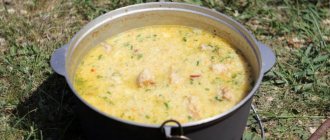
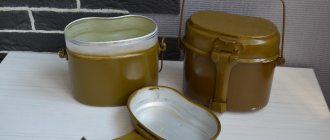
The theme of mini stoves for pots and mugs will probably not die for centuries. Everyone who makes a stove himself makes changes to the design and considers it a sacred duty to share this invaluable information with his colleagues. I am no exception, so now I will share - keep me seven! Carefully! Traffic! I once saw a topic on the Hansa about wood chip stoves. If anyone hasn’t seen it yet, here it is: Camping stove. I liked the design of an army bowler hat.
My hands itched wildly, I couldn’t stand it any longer, I had to act. Moreover, the apocalypse of December 2012 was just around the corner, and I was without a stove. “What is life without a piano stove?” I didn’t have any stainless steel and I couldn’t even imagine where to get it. An idea instantly came to me - I need to open the pan! There is nothing suitable at home, everything is either enameled or with convex edges. In addition, I would have to explain to my wife the loss of the dishes, stage a robbery, etc. Therefore, I bought the pan at the market. I took aluminum as an experiment, only 150 rubles. I tore off its handles, sawed off the bottom, cut it and got a strip of the size I needed. I drilled everything according to the pattern from the Hansa, bent it and riveted the bottom. It was cut from a piece of aluminum that I had. The bottom of the pan doesn't fit - it's not enough. But if you take a larger pan, you can get by with just that. Actually, this is what happened.
Pros. Easy. Well drilled, cut, processed. Cheap. Minuses. With a wall thickness of 1-1.5 mm. The design is still a bit soft. You can literally crush it with your hands. I don’t know how quickly it will burn out. Used it several times. I made tea. There are no signs of deformation or melting, it’s a little smoked and that’s it. By the way, when there was no gas at home, I put the stove on the stove. Two tablets of dry fuel inside (not into me, but into the stove). On top of the frying pan. Prepared an omelette easily and simply. I made coffee using another tablet.

Then I opened the Klondike. This is the place to find anything metallic. I even saw the inside of a ball valve there, 1.5 meters (or so) in diameter. This establishment is called “Metal Reception Point” . There, my friend and I bought a sheet of millimeter stainless steel 1 x 0.6 m for 350 rubles. In the garage we cut it out with a grinder and made several stoves, slightly changing the design. The main difference from the previous one is a closed circle and an enlarged firebox opening at the end. This is what happened.
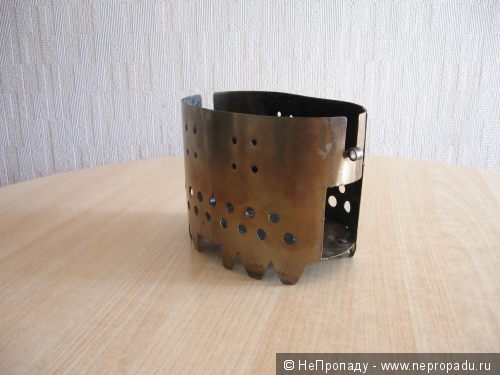
Pros. More rigid design. Doesn't lead. It definitely won’t burn out in the next 100 years. Durable. Minuses. Heavy. Nothing to weigh, but more than half a kilo. Drilling is a pain. You need to drill additional holes along the top edge or raise the pot. Otherwise, it blocks the outflow of hot air and the flame becomes smaller, and there is more smoke and soot. I placed the pot across the stove. It burns just fine. A full pot of water boils in 5 minutes at +25 outside and a weak wind. The stove should be placed on stones or damp sticks. Otherwise, the legs crash into the sandy soil and it sinks to the bottom. If the sticks are dry, they light up before the pot boils.
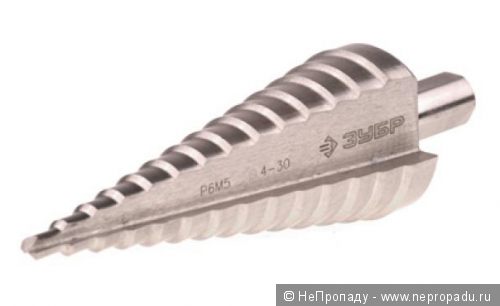
Now I often ride bicycles with my wife outside the city. We took the stove with us. In a small backpack there is a stove with a pot, water, crackers or bagels for tea, and so on. In general, I decided that such a stove would be good for a motorcycle, but I needed something lighter. Well, we need to make changes to the design once again. You can’t keep rationalization to yourself! There is a 0.4 mm stainless steel strip. Thickness. But it’s somehow a pity to experiment. I decided to try making a galvanized stove first. It is 0.3 mm. This time I did everything a little differently. I drew the pattern on thick paper. I cut out the bottom. I glued it all together and tried it on the pot, at the same time marking the mounting holes. Then I transferred everything to galvanizing. Cut and drilled. A step drill is best for this type of thing.
I bent everything, tried it on the pot, and marked the axes with a marker (just in case, for control). I assembled the structure using bolts. And again he tried it on the bowler hat. There is no infection! Too tight. I re-drilled the holes and reassembled them - fine. I finally secured everything with rivets.
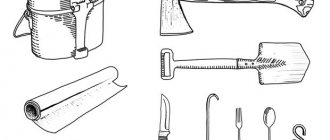
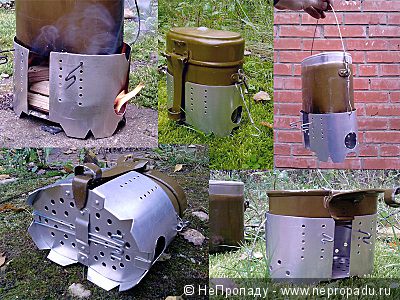
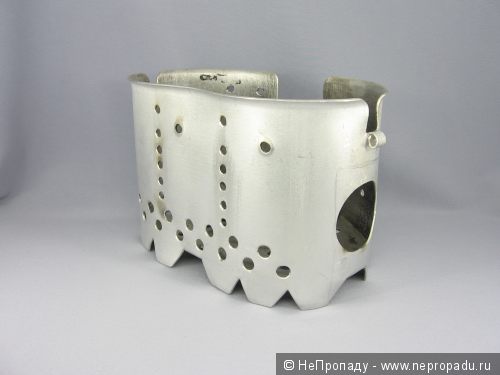
Changes. I drilled a series of holes along the top. Slightly widened the firebox opening. Reduced the diameter. This stove fits quite tightly onto the pot. On the previous ones there was a gap between the walls of the stove and the pot of about 5-7 mm. I did not make holes for the pins on which the pot was placed. I made stands from a wide blade of a hacksaw. They are inserted into small grooves from above, and a pot is placed on them. The upper edge of the wood chipper was bent by 5 mm. for greater rigidity. I didn't make the legs like the previous ones. From 3 mm. electrodes bent the legs for the stove. They are inserted through the bottom and exit through the side walls. The stove has risen higher, but is more stable. If you place it on stones, you don't need legs. If you noticed, where the pot has hinges, the strip of metal on the stove was not cut off, but twisted into a tube. If you attach the cables with hooks (as in the author’s design), it will be possible to connect the pot to the stove and hang the entire structure on the handle. Pros. Easy. It is done on the knee in 2-3 hours with the simplest tools. Compact - does not exceed the dimensions of the pot. Doesn't rattle or wobble. Doesn't work when heated. Minuses. The metal is thin. I don’t know how long it will last. If it lasts for a season, the labor costs can be considered completely justified. The other day my wife and I went out of town. The stove passed the tests perfectly. Photos are attached. Surely someone will want to make such a wood chipper. I’m sharing a drawing. Here is a link to the Yandex disk Sliver scanner for some reason doesn’t fit here. If something is not clear, ask. A couple of tips. It is better to drill mounting holes only on one side (in the drawing on the right). And then mark the opposite ones along them, bending the workpiece along the pot. It's exactly the same at the bottom. Due to the curvilinearity of the bottom it is very difficult to calculate all the holes. In any case, it didn't work out for me. Therefore, we first drill the walls on the workpiece, then we bend the petals and drill the bottom through them. It is better to rivet each hole immediately, then drill the next one. Well, make sure the axes match. I made the bottom pattern by tracing the bottom of the pot with a pencil and then adding another couple of millimeters. Folding it across, you get the centers of the sides of the pot. A few words about laying out the pot. When equipped, the bowler weighs about a kilogram, maybe a little less. I sewed the cover myself.
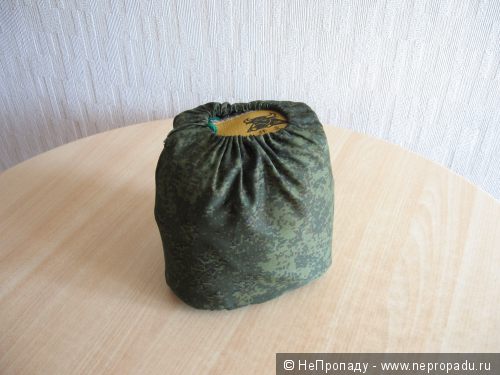
I tried different designs, but settled on a simple bag with drawstrings. It's more comfortable for me. The photo shows the contents of the pot.
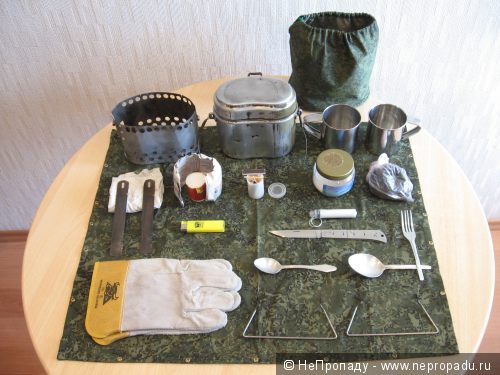
From left to right, top to bottom. Wood chipper. Bowler hat. 2 stainless steel mugs 300 ml each. A cloth for wiping mugs and pots dry. 3 tablets of dry fuel, wrapped in newspaper. In a jar from a photographic film there are matches and 2 chirkash from the box, glued to a piece of wooden ruler. Plastic jar with sugar. A bag of tea. Kettle stands made of hacksaw blade. Lighter. Salt in a container from a syringe. Knife with completely knocked down pads (to reduce weight). Aluminum teaspoon. And the mutant is a homemade spoon. Split gloves. Legs made of electrodes for the stove. I put the canvas on which everything lies on the bottom of the cover. Gloves on the side. Everything else goes into the pot. The pot is in the stove. The stove is in a bag and in a case. Backpack case. Matryoshka, damn it. There are different styling options. With different mugs, with a can of stew, with cereal, for one, for two, etc. But this is a separate topic, talking is not talking. There are already “many books”. I wasted half a day on this writing. “Not for the sake of self-interest, but for the good of the world!” Thank you for your attention to everyone who read this far. Criticism, advice, suggestions are welcome. “May the force be with you!”
Addition. January 2020 I have been using the stove described above for several years now - the flight is normal. Nothing burned, fell off, or got lost. The only drawback revealed during operation in cold windy weather is the lack of wind protection for the pot itself. In the process of figuring out how to remedy the situation, the idea of a stove with wind protection for a round pot was born. I described everything in detail in this article - “wood chip stove 2”
The best ready-made models
Ready-made stoves can be purchased on any suitable website or in construction stores. Another interesting solution would be to buy a stove from the well-known Aliexpress website.
Turbo oven PS1500T
This option showed excellent results at low temperatures.
The stove does not require large supplies of firewood and saves a lot of time and effort. The blower in the furnace system allows you to gain high power in a matter of minutes. Even raw wood can be used as fuel.
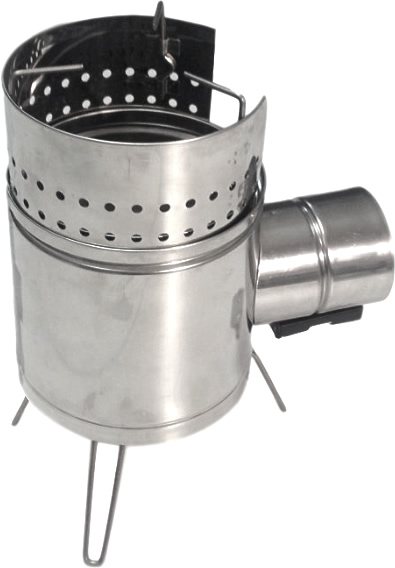
The PS 1500 T turbo stove kit includes the following parts:
- electric air blower,
- stainless steel housing,
- the combustion chamber,
- stand.
The supercharger runs on two AA batteries. Operation is possible in three modes:
- High fan speed (3000 rpm).
- Low fan speed (1500 rpm).
- Off — when switching off, the supercharger must be removed to avoid overheating. In this case, the oven will continue to operate thanks to natural draft.
On one set of alkaline batteries, in different modes, the oven will work for about 50 hours.
The price range of the PS 1500 T turbo oven is 2500-3000 rubles.
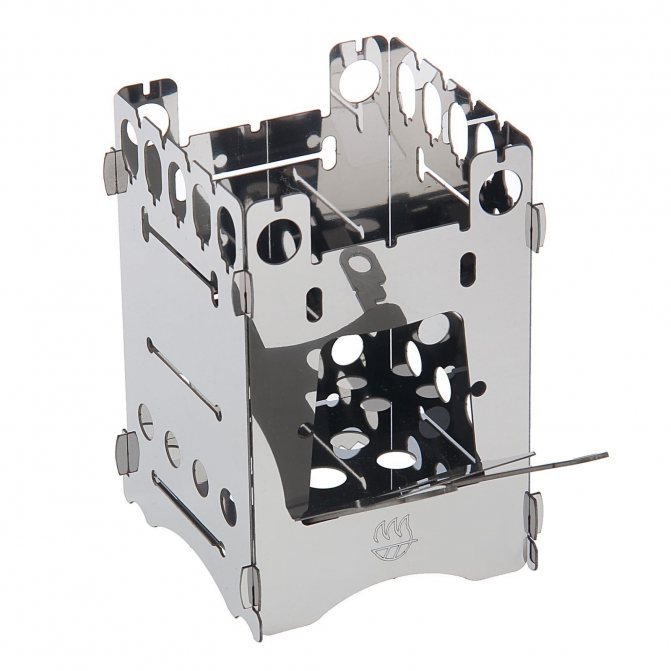
Forest gnome
This is a compact, prefabricated oven. To assemble and disassemble this option, no tools are required. The oven is made of high quality stainless steel.
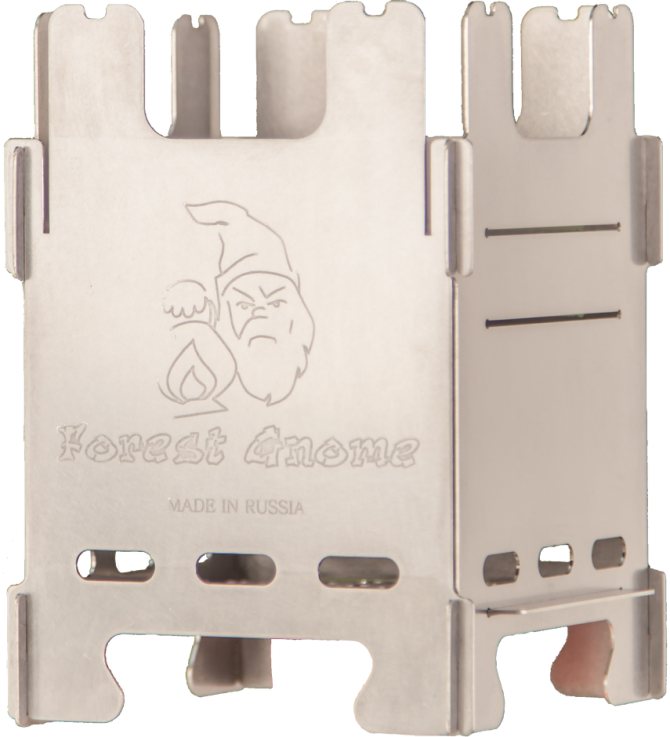
The main advantage of the Forest Gnome is its versatility. The unit is equipped with three grate compartments. Low for wood fuel, medium for alcohol. The upper compartment is used for dry fuel.
Advantages of the Forest Dwarf stove:
- The grate rises above the ground, providing air access to the flame.
- It is also noteworthy that the design can be supplemented by installing walls for pyrolysis.
- This version of the folding stove is safe to use, because its design is a closed space.
- There is no need for a large supply of firewood; you can use any forest debris, including cones.
- Quality of materials. The thick food grade steel used to create the oven will last a long time.
- The set of the Forest Gnome stove includes a folding stove and a cover. The cost of the device is about 1000 rubles.
Biohit 123
- This stove is a non-separable structure that can be used as a stand-alone stove.
- The equipment is supplemented with special crosshairs.
- The structure consists of three parts:
- The first part serves as a stand and is necessary for stability.
- The second part is the firebox.
- The third part is the second crosshair on which the dishes are installed.
- In the combustion part there is a tray for wood fuel. The design also has an additional slot with a door for storing firewood.
Advantages of the Biohit 123 stove:
- No assembly required.
- Always ready to work.
- Long service life due to bent structure.
- The stove can be used as storage for small items.
- An additional fuel tray is included in the package.
- Dry fuel is suitable as fuel.
One of the disadvantages of the stove is its inconvenient dimensions.
The cost of a non-separable stove Biohit 123 varies in the range of 1500 - 2000 rubles.
Survivor #2

- This option has a large set of positive qualities:
- The continuous operating cycle is 10 hours.
- Long service life.
- The ash pan is designed like a full-fledged stove. Equipped with a large door.
- An improved type of fastening that increases the strength of the structure.
- The volume of the installed container is up to 30 liters.
- Due to the high efficiency coefficient, fuel consumption is minimized.
- Convenient system. The door is equipped with grooves made in the form of a slide. Therefore, the door can cover both the firebox and the vent.
- It is worth noting the material used to make the stove. The stainless steel alloy contains nickel and is non-corrosive. The product is resistant to various chemical environments. Also, the wood chip stove “Survival No. 2” has high mechanical loads.
- The price of the stove is about 1000 rubles.
Biolight

- The device represents an innovation in the market for similar products. The stove is equipped with an electric generator, which allows you to charge various equipment via a USB connector. In addition, the stove perfectly copes with its intended purpose. The oven is easy to carry and convenient to use.
- The furnace structure consists of a combustion chamber and a power supply. In portable conditions, the unit can be placed inside a metal combustion chamber, which increases mobility.
- The combustion chamber is double-walled, which indicates the reliability of the design. Thanks to the double structure, the outer side will heat up much less.
- At the bottom of the stove there are folding legs. During operation, they do not heat up much, which allows you to handle them with your hands if necessary.
- The power supply is made from thick-walled, fire-resistant plastic.
- The Biolight wood chip stove can operate in slow and fast mode. The second option is only available after the oven has heated up. The stove is controlled using one main button. An additional convenience is the presence of a USB connector through which you can charge the battery and other devices.
- The cost of the Biolight stove is about 10,000 rubles