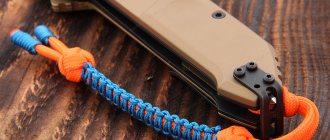
The scope of application of plastic containers is extensive. In addition to whole containers, tape cut from bottles is actively used in everyday life. It is impractical to do all the work manually; it is much more practical to quickly build a bottle cutter with your own hands. Depending on the chosen design, the operation of the bottle cutter differs. One machine provides for holding a plastic bottle by hand, while another design does not require this. There is a manual compact bottle cutter that is convenient to take with you outdoors. A description of the assembly process and a video will help you easily make a bottle cutter with your own hands.
How to cut plastic tape
People who are accustomed to “garbage compositions” often do not think that really beautiful things can be made from plastic bottles. To do this, you don’t need to look for any complicated devices. For most crafts, you only need a special tool - a bottle cutter - to quickly make plastic tape of various widths. You can also cut a bottle with scissors, but this takes much more time. It’s not difficult to make a bottle cutter for plastic bottles with your own hands. There are several options, the most popular of which is considered to be a machine made from an iron angle and the blade of a stationery knife.
Assembly of the structure
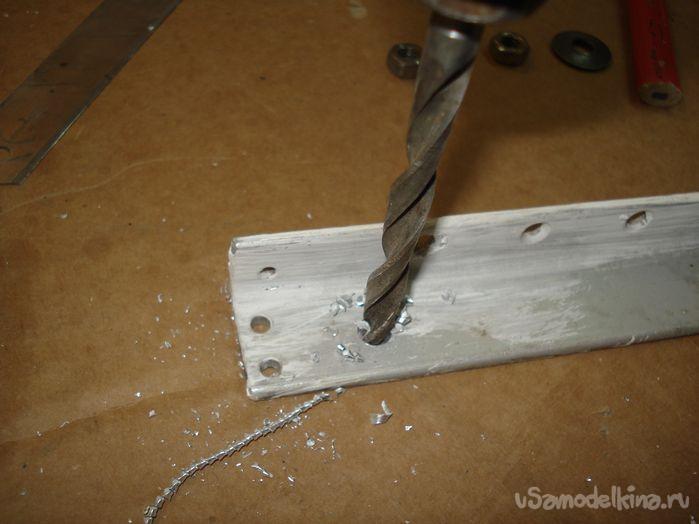
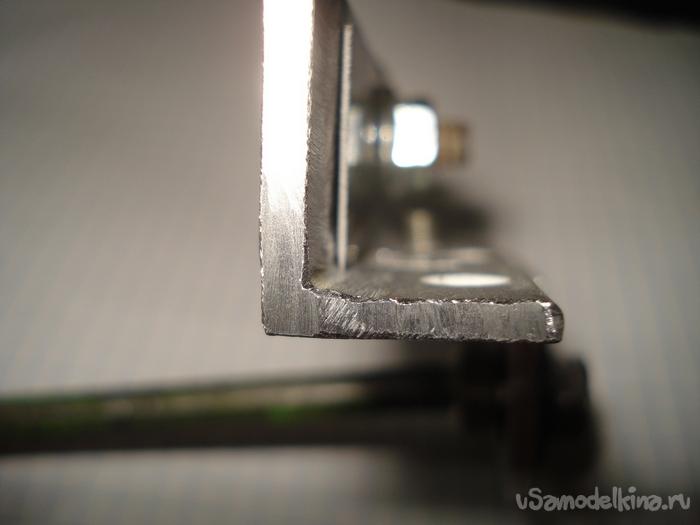
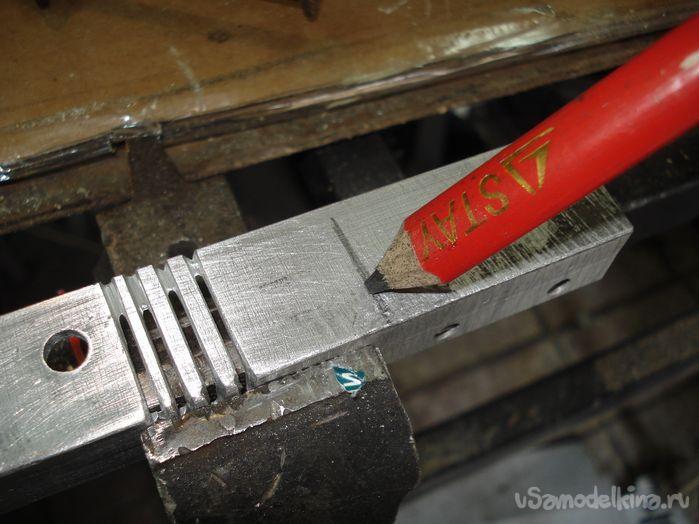
The schematic diagram of this device is visible in the drawing. Do-it-yourself bottle cutters begin by attaching the knife to the corner. To do this, the blade is applied to the corner from the inside. Mark the location for the hole through which the fastening will be carried out, and the length of the knife (to remove the excess part of the corner). In the marked place, a hole is drilled in the workpiece (6 mm in diameter). The excess part of the corner is cut off.
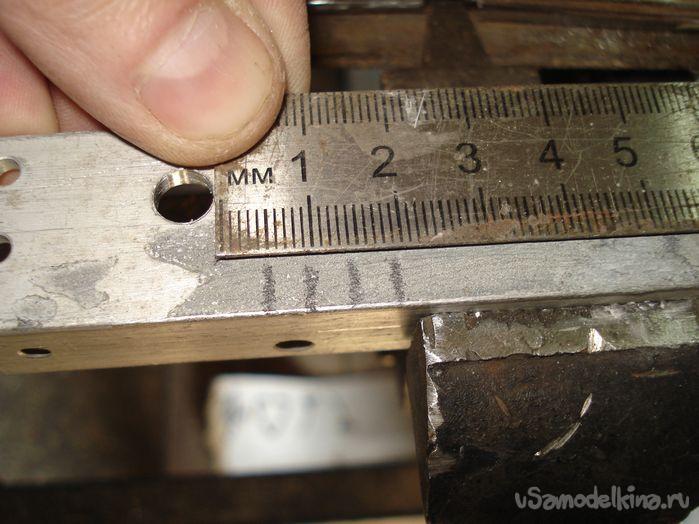
Near the hole (with a distance of 5 mm from it), cuts are made at the corner at intervals of 5 mm. Their length should correspond to the desired thickness of the tape. The slots are thoroughly cleaned of burrs and chips.
A nail is used as an axis. A thread approximately 15-20 mm long is made on it. The edge of the thread is bent slightly so that the axis sets the angle of cutting the tape and feeds the bottle. A threaded nail is inserted into the hole prepared initially. The DIY bottle cutter is ready and can be used.
Plastic bottles are currently the most common container in which water, kvass, beer, juices and other drinks are sold. In any home, these bottles accumulate from time to time, after which they are thrown away. But it turns out that this used container can become a useful material for use on the farm. Without much difficulty, by carefully cutting the bottle, you can get strong shrink tape. But it is absolutely impossible to complete this process with scissors; you need to build a bottle cutter for plastic bottles, the drawing and design of which is completely simple and can be done very quickly.
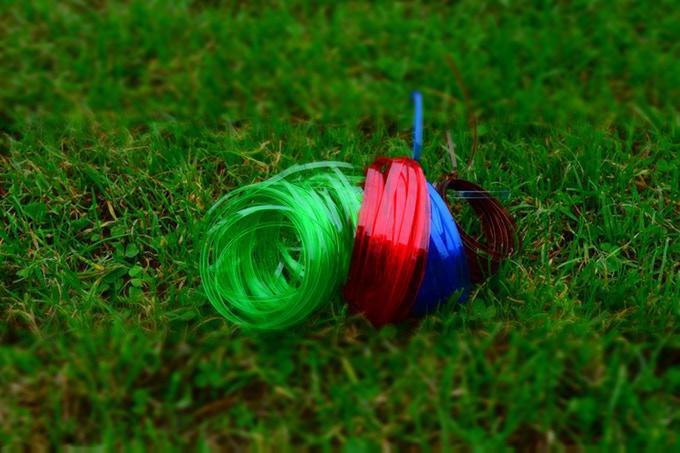
Using a bottle cutter, you can efficiently cut shrink tape from plastic bottles in a short period of time. She will be simply irreplaceable in the household and at the dacha. Due to the excellent properties of plastic, they came up with the idea of using the bottle again - in the form of a ribbon. When heated, it melts, shrinks, becomes very strong, and is almost impossible to tear.
The tape can be cut to any size: from thin as a fishing line to one centimeter wide. And it can be even wider, if desired. After tying various elements with tape, it is enough to warm up the place of the tie with a hairdryer for a few seconds, and the effect of shrinking and tightening of the tape will be visible right before your eyes. The structure becomes very durable.
The main, basic detail of the entire structure is a sharp blade; it can be easily removed from a stationery knife.
The cutting surface of the knife is quite sharp. It does not require additional sharpening. The gap, on the side of the cutting surface, will coordinate the dimensions of the strips being cut.
The resulting heat-resistant tape is used for:
- tool handle windings;
- weaving panicles, brushes, fishing rods;
- used as a rope for tying various elements during household work, gartering plants in the garden;
- for decorative purposes, making spiral garlands.
When using a 2 liter bottle for cutting, about 35 meters of tape, 1.5 mm thick, comes out.
Bottle cutter made from iron corner
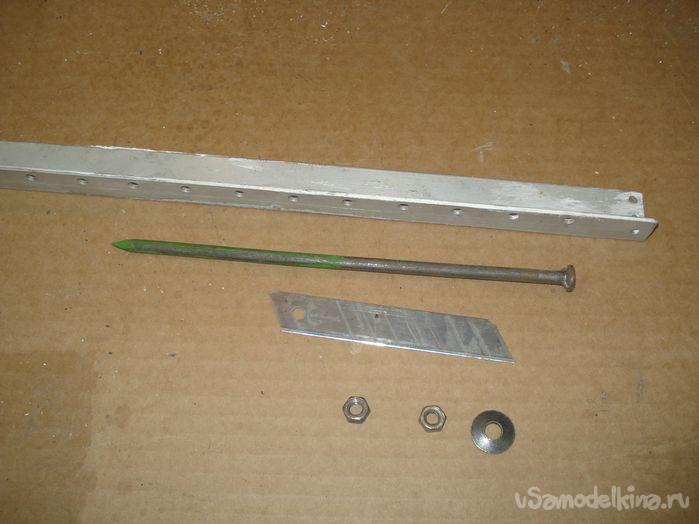
To make a simple bottle cutter with your own hands, you will need:
- corner made of durable metal;
- blade from a stationery knife;
- screws and nuts;
- die for cutting threads;
- knob;
- steel pin with a diameter of 6 mm;
- hacksaw for metal;
- drill.

Manufacturing process of bottle cutting machine:
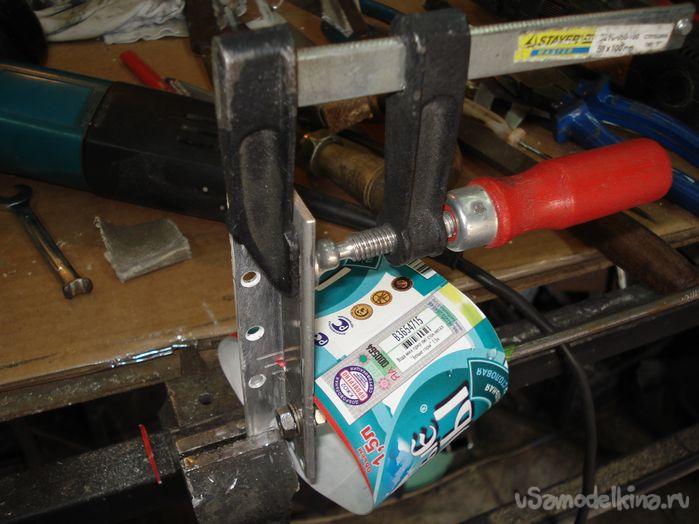
- The diameter of the steel pin must coincide with the hole in the stationery knife, so you need to cut a thread on its lower part using a die and a wrench. The end of the pin should fit easily into the hole, but not slip out.
- A hole is drilled in the corner of such a diameter that the knife can be pressed tightly against it with a pin.
- On the reverse side of the corner, cuts of various sizes are made using a hacksaw. The width of the resulting ribbon from a plastic bottle will depend on their size and depth.
- All holes must be sanded on both sides of the corner, otherwise the tape will get tangled or cut unevenly, clinging to the metal burrs with its edges.
- The internal parts are leveled with an awl and then sanded again.
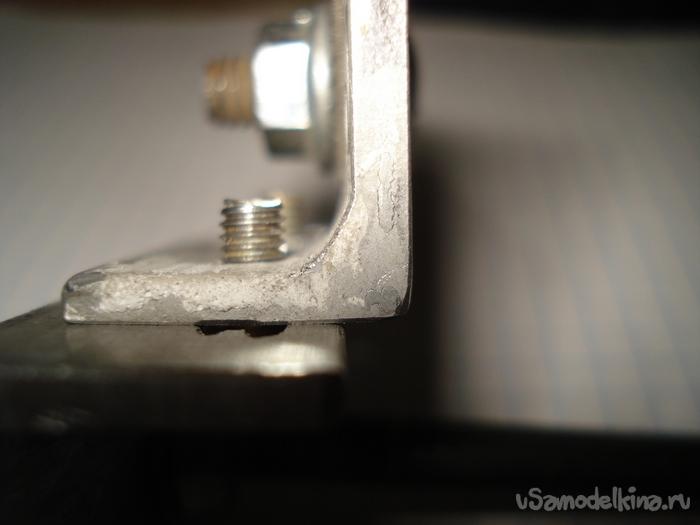
- All that remains is to assemble the structure with bolts, attaching the pin to the corner.
- To prevent the knife blade from moving, it is advisable to add a stop for it from an iron bracket or a wooden block inside the corner.
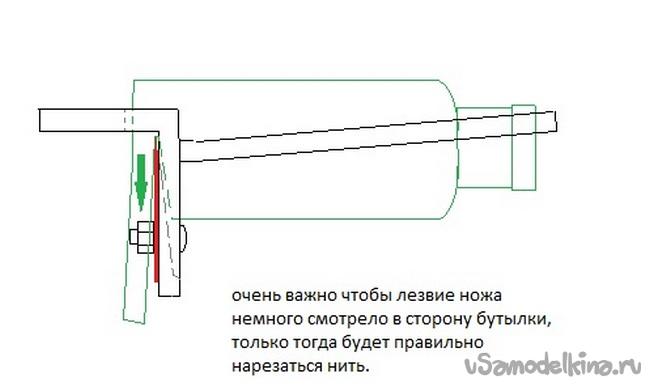
- The pin needs to be bent slightly to the side, then the bottle will be pressed against the corner due to its own weight.
Bottle cutter for shrink rope
Spring has come, and the need for garter material in your yard or country house has increased greatly.
On the Internet there are quite a lot of descriptions of homemade devices for unraveling plastic bottles onto wonderful shrink ropes. All these devices have the same principle of operation, but different types, materials and manufacturing methods. Video:
Test, the width of the resulting lace is 2 mm.
I also decided to repeat one of the most successful and simplest, in my opinion, options, but unfortunately for some reason its work did not suit me, the thread constantly broke, the width of the cut floated. I had to modify the design to suit myself, having obtained the desired result of the mechanism’s operation, and as a result, another option was born for public viewing.
PARAGRAPH 1.
List of required materials and tools. 1. Aluminum corner 2. Nail 200 mm, M6 die 3. Blade from a construction knife 4. Nuts, washers 5. Drill, drill bit d=6 mm, d=3 mm 6. Grinder 7. File, needle file, sandpaper.
Point 2.
Manufacturing.
Scheme:
Principled.
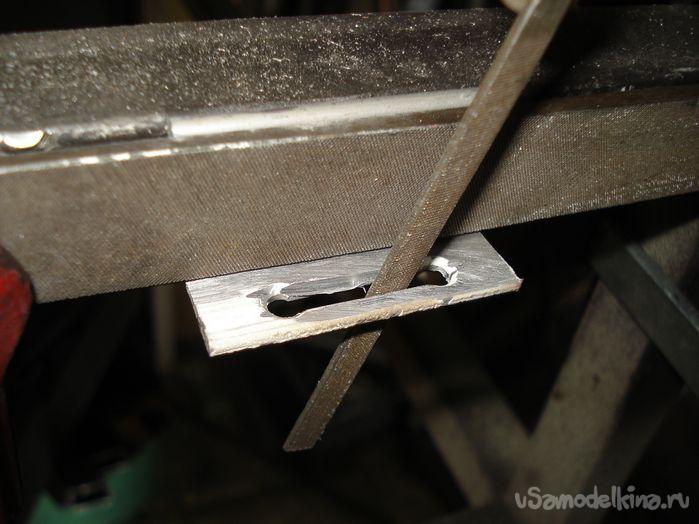
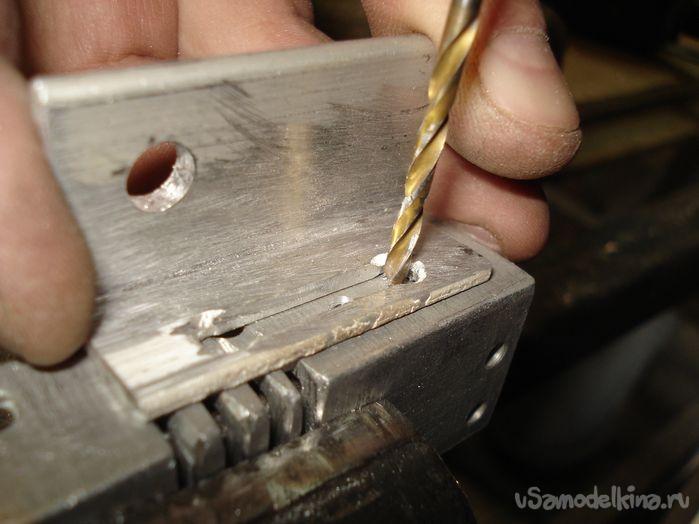
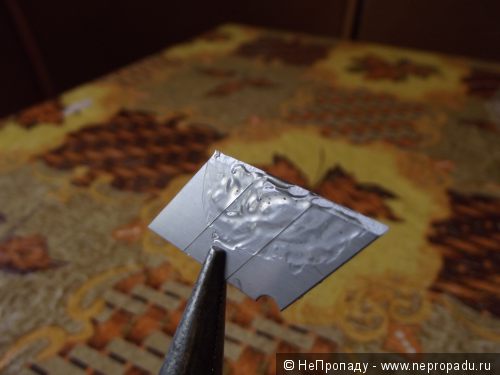
We place the blade on the corner, sharpening it close to the corner, and mark the drilling point for the mounting hole.
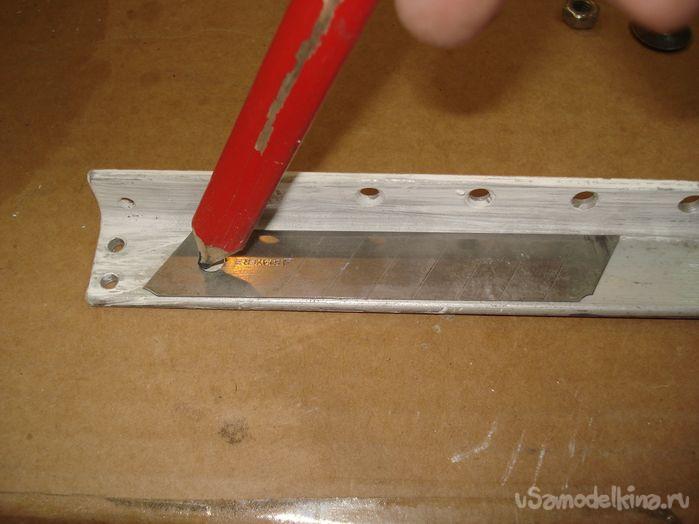
Mark the cutting line.
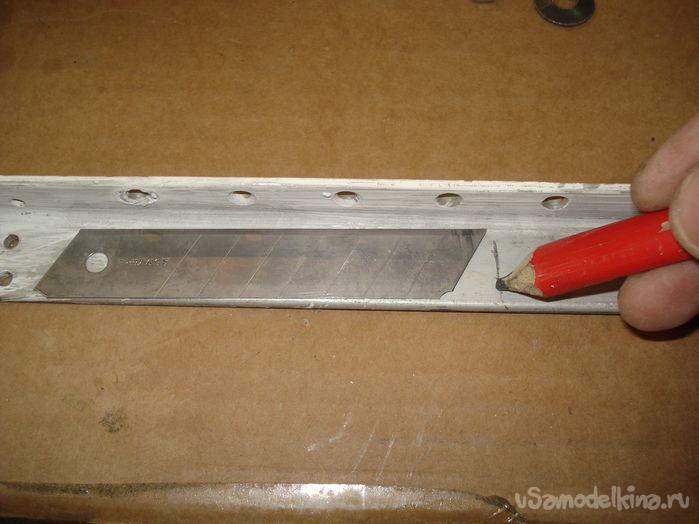
Drill a hole d=6 mm. and saw off the workpiece.
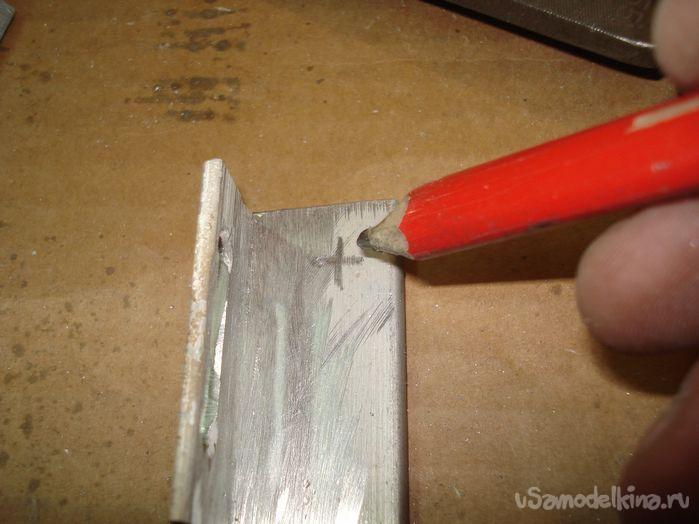
We make markings for cuts in increments of 5 mm from the edge of the hole.
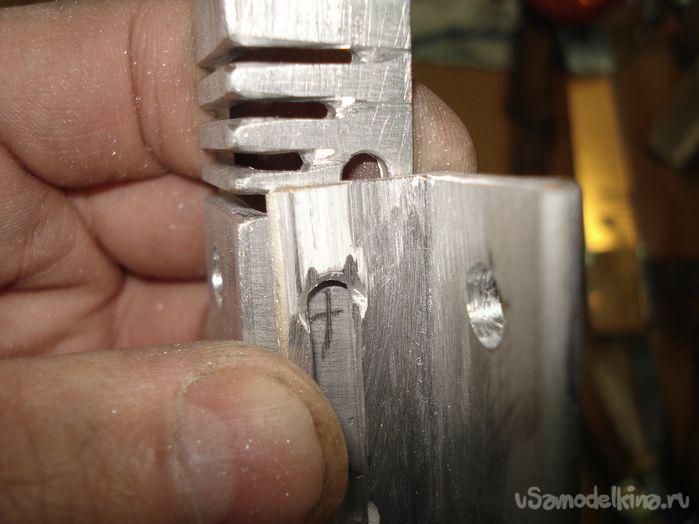
We cut it with a metal saw or immediately with a grinder (disc 1-1.2 mm thick). On one side of the corner, the cuts should correspond to the dimensions of the expected (desired) cutting width of future threads (ropes), the photo shows approximate dimensions, everyone makes it for themselves. On the other side, the cut is made to almost the full width of the corner, leaving 1-2 mm. jumpers.
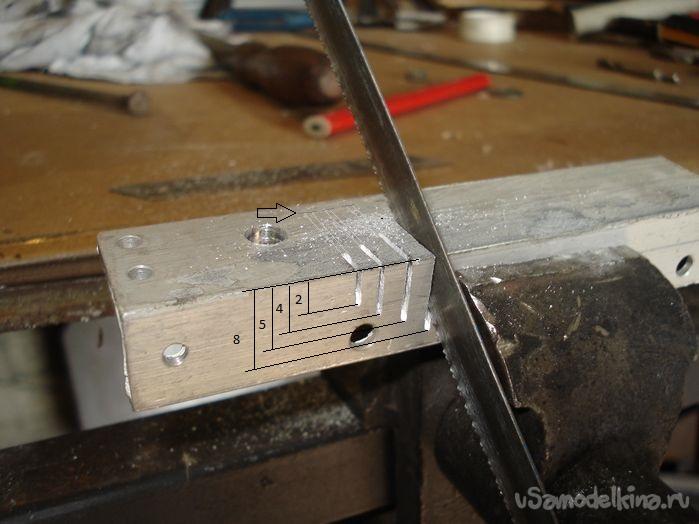
We finish the slots with a grinder.
A stiff metal brush removes chips well.

On the diagram:
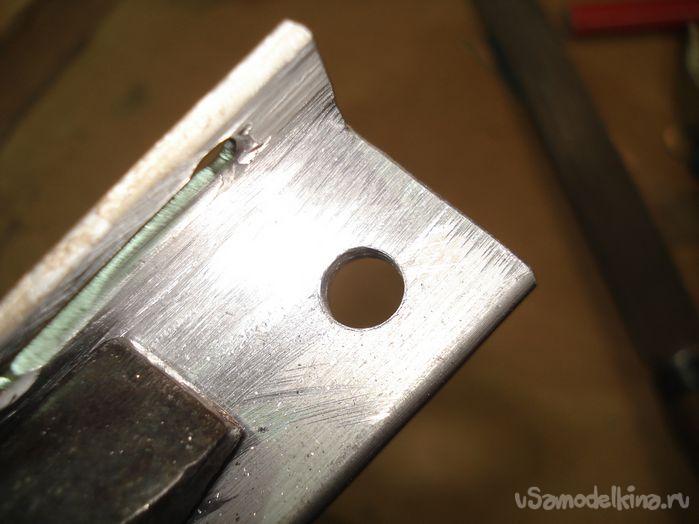
It is advisable to use a grinder to remove the rounding inside the corner so that the blade rests against the wall and not against the rounding.

View of the corner before the groove.
View after cutting the fillet.
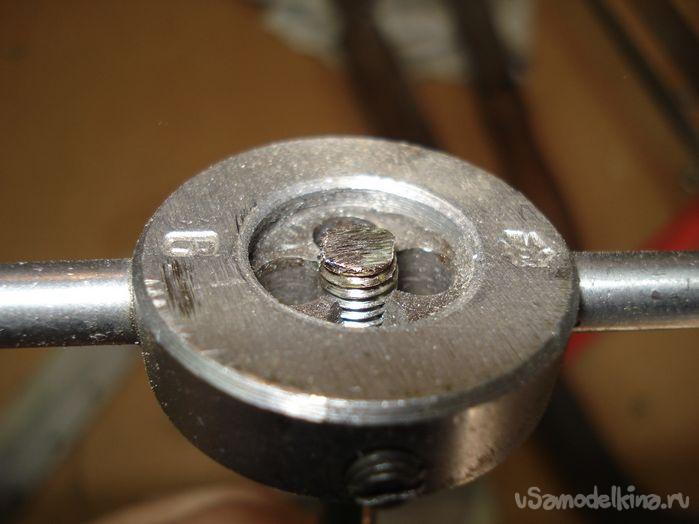
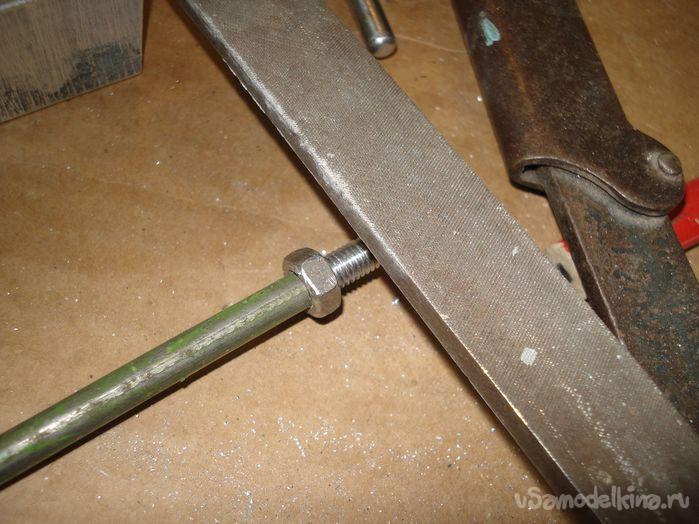
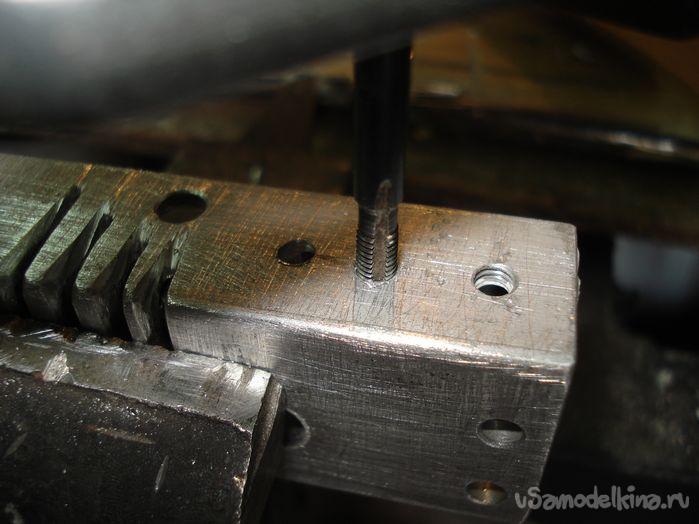
Let's make an axle from a two hundred nail, its diameter is 6 mm. Cut 15-20 mm. M6 thread.

We sharpen the edge without removing the die.
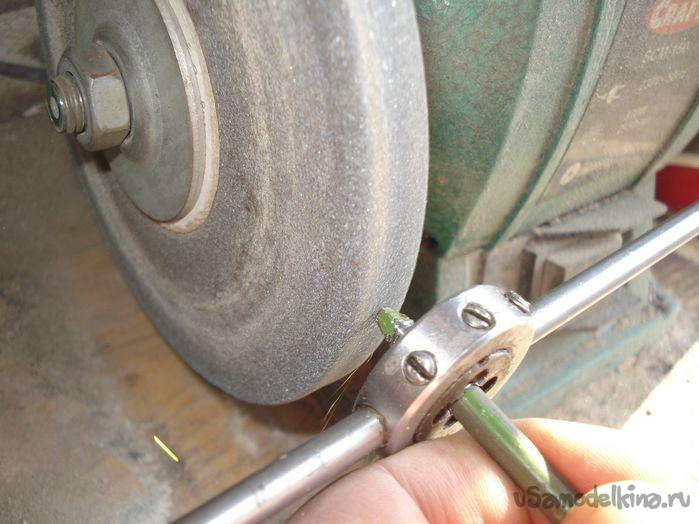
We will immediately correct the damaged thread.
IMPORTANT
- bend the axis slightly, this should set the cutting angle and at the same time automatically feed the bottle blank.

If the thread does not fit into the hole of the knife, then you can sharpen the thread a little.
Or bore the hole in the knife a little with a homemade drill and sandpaper.
Ready.
POINT 2.
Check at work.
The result was unsatisfactory, the thickness of the resulting thread constantly changes and, as a result, frequent breakage.
I think the reason for this is the slightly incorrect angle of attack of the knife, if you add 0.1-0.2 mm. lining behind the blade, then when cutting the thread, the material of the bottle will itself ask for the knife, and not try to jump off it.
But I didn’t take the easy route and redesigned the bottle feeding mechanism into a cutter.
If everything worked out for you right away, everything cuts perfectly, then congratulations. For those who have problems, read on.
POINT 3.
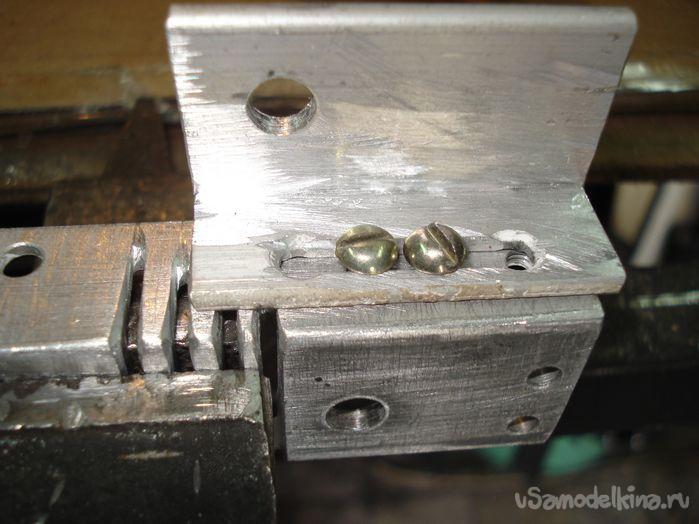
Finalization. We saw off a corner 45 mm long.
We drill two holes d=4 mm. We outline the slot lines.
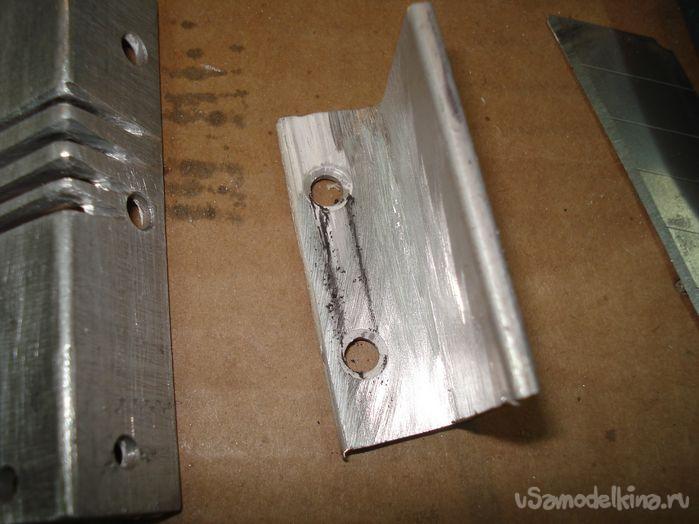
Using a grinder, cut out the middle on both sides.
We process the edges with a needle file.
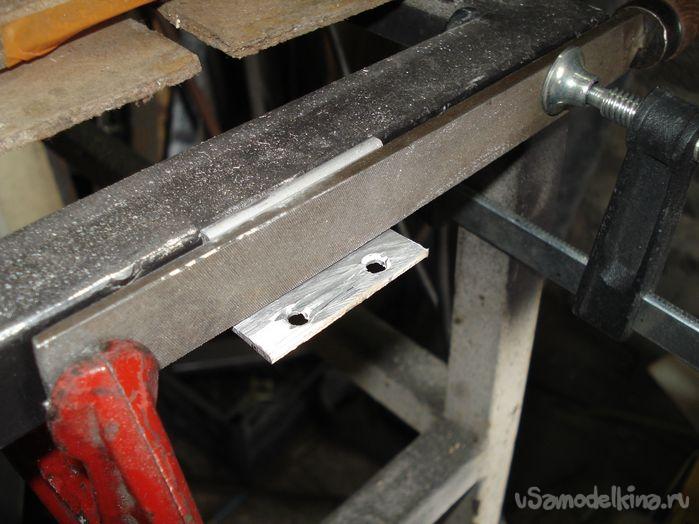
Mark a hole for the pin.
Drill D=6 mm.
We mark holes for two M4 bolts.
Let's select the appropriate two bolts.

We drill holes with a drill d=3 mm.
We cut the M4 thread.
Let's try on how everything fits. Now you can make adjustments, depending on the intended width of the rope, and adjust the axle with the bottle there.
At first I tried to decorate the Axis like this, but then I didn’t like it and removed it.

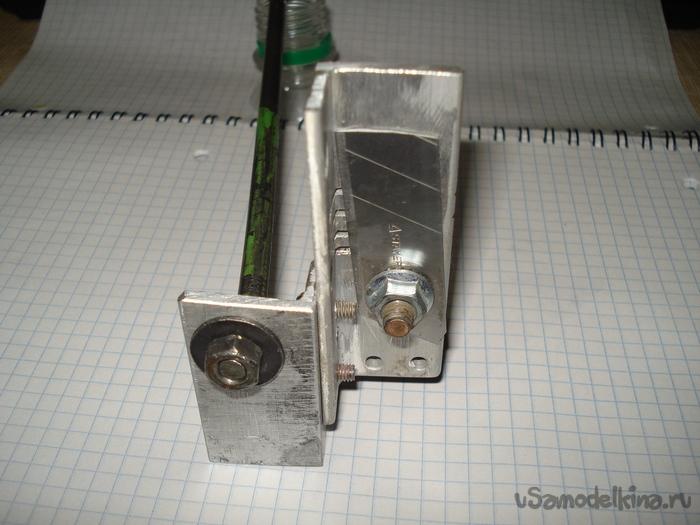
We install the axle in place.
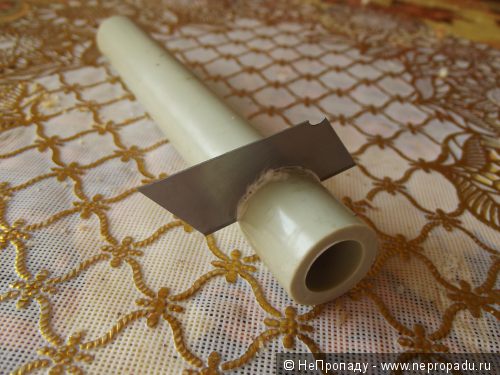
To cut a whole bottle, a 30 cm metal-plastic pipe d=15 mm is put on the axle. (seen in the video), if you want to loosen the neck, then you need to remove the pipe so that the axle does not pinch the neck of the bottle. Everything worked out, you can check it.
POINT 4.
We make a 2 mm rope.
Everything is fine now.
Become the author of the site, publish your own articles, descriptions of homemade products and pay for the text. Read more here.
Preparing containers for slicing
Before using a self-made bottle cutter, the container should be cleared of labels and glue using a knife or any other method. Then the bottom is cut off. The edges need to be carefully trimmed with scissors. It is advisable to secure the bottle cutter vertically in a vice, otherwise your hands will quickly get tired of holding the tool. After this, the bottle is placed on the pin, the tip of the future fishing line is cut off from the bottom edge, and threaded through one of the holes in the corner. After this, just pull the end of the strip, and the container will cut itself.

Bottle cutter for perfectly straight tape
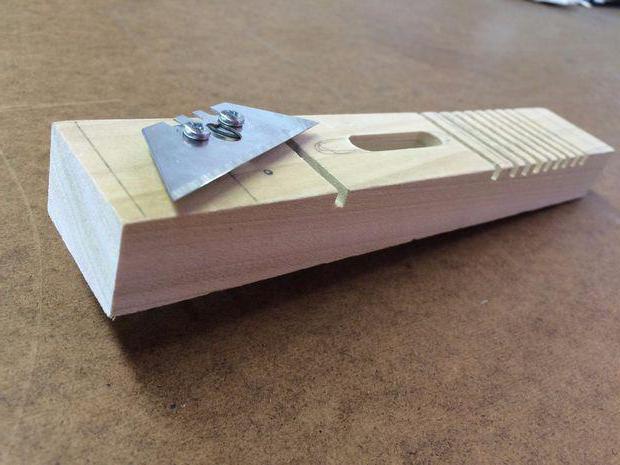
Another option for making a bottle cutter with your own hands is less common. It is made from scrap materials, but the process of creating such a tool takes longer and is more labor-intensive. The advantage of such a product is that the tape made with its help is perfectly smooth and is suitable for making crafts and jewelry.
To make such a cutter you will need:
- wooden block;
- hacksaw;
- pin;
- sharpened knife blade;
- several screws with washers;
- a piece of PVC pipe with a diameter of 2 cm.

The process of making a bottle cutter with your own hands from a wooden block:
- The block is sawn into two parts, 10 cm and 5 cm in length.
- The main part of the cutter is a 10 cm long block.
- The pin must be placed in the block at an angle of 7 degrees, bending it or drilling a hole obliquely. You need to put a PVC pipe on the pin. This arrangement makes it possible to produce a tape with a width of 5-15 mm, depending on the presence of a nozzle.
- Then you need to make several cuts on the main beam with a slope, using templates for this. This will allow you to produce strips of different widths on one cut.
- A knife is attached above the cuts using screws.
- To ensure a stable position of the bottle, you need to attach ribs from the second part of the block to the bottle cutter you made yourself. They are glued to the main part so that the distance from the center of the pin to the edge of the rib is 45 mm.
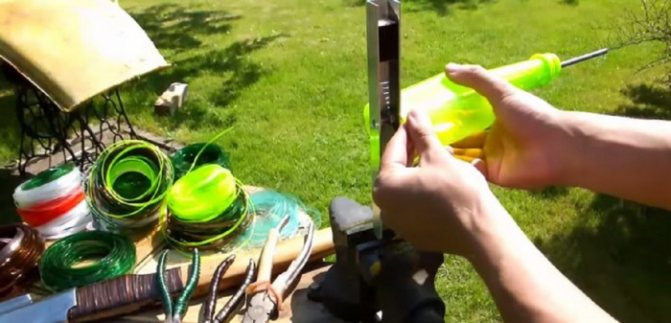
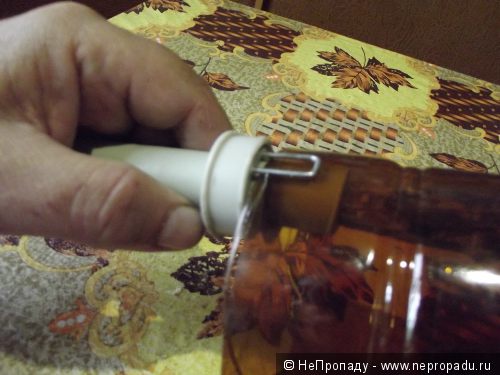
Hello to all comrades! Any prepper will agree that a bottle cutter is a very useful thing. With its help, you can cut a plastic bottle into a long thin strip, replacing a rope. The application of such tape is so diverse that it can become an independent topic. I want to talk about how I made this bottle cutter and how to use it. On the Internet I found several design options for a bottle cutter. Perhaps I wasn’t looking well, but they were all stationary: to work they had to be attached to a table, board or tree. Plus, they had a significant disadvantage: they were inconvenient to transport. They are inconvenient for packing in a backpack, and they won’t fit into a pocket at all. I wanted to create a bottle cutter that would be compact, easy to make, easy to use, and fit in a pocket. This is what happened.
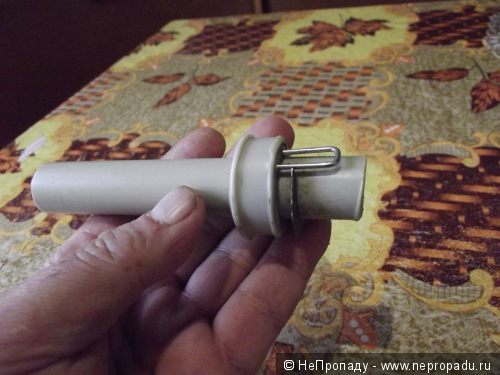
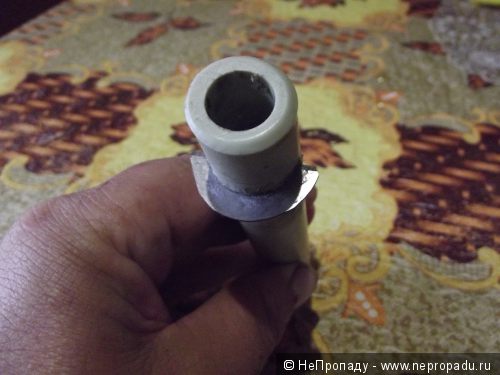
To make a bottle cutter, two pieces of plastic water pipe were needed: one with a diameter of 20 mm, 12 centimeters long, and the other with a diameter of 30 mm, 15-20 mm long. The internal diameter of the short tube is 22mm, and it fits onto the long one with a noticeable gap.
To eliminate this gap, I melted the end of a short tube near the flame of a gas stove and pressed it to a smooth surface (the bottom of the plate). The softened plastic flattened and the internal diameter decreased. Immediately, before the plastic hardened, I put this tube on a thin one and waited until it cooled. The plastic of the outer tube tightly covered the inner one.
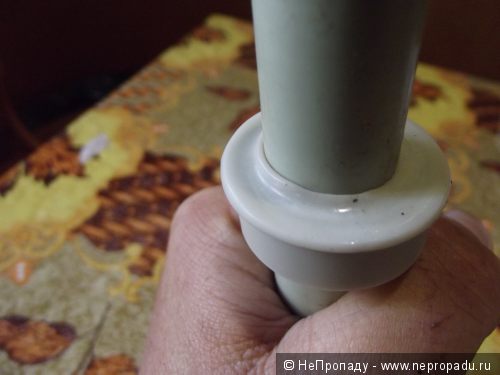
I repeated the same thing with the second end. As a result, the outer tube sat tightly on the inner one, and it could only be moved by applying noticeable force.
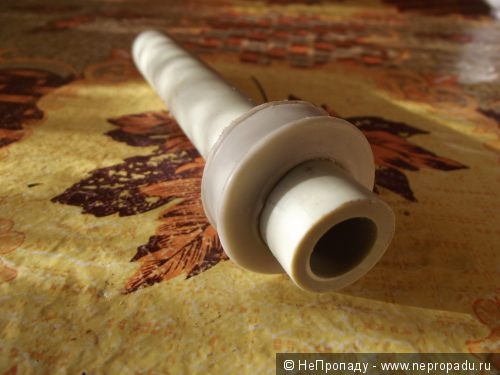
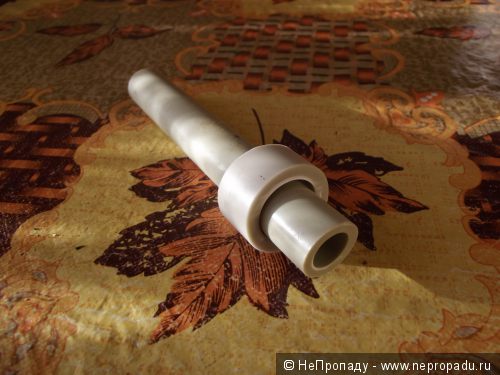
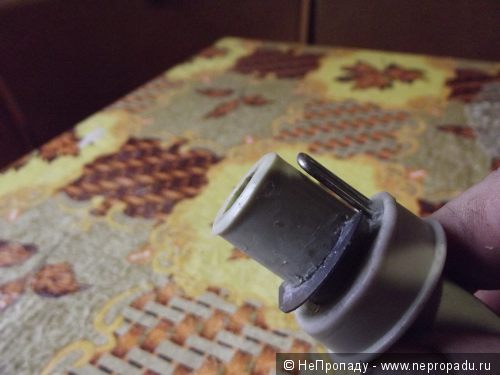
Approximately 25mm from the end of the long tube, I made a cross cut with a hacksaw almost to the middle of the diameter.
It is important that the cut does not reach the center, otherwise the angle between the blade and the tube will be obtuse, and the plastic of the bottle will not be pressed against the tube when cutting.
I applied melted glue to this cut, the kind that is sold in the form of rods for “guns” in any hardware store.
The same glue was applied to a heated piece of a blade from a stationery knife.
Having heated both the tube and the blade over the flame of a gas stove, and melted the glue, I inserted the blade into the cut and waited for it to harden.
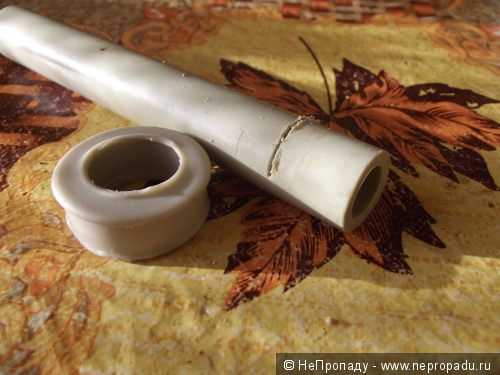
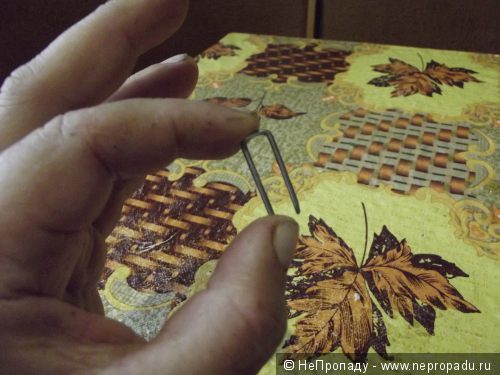
Then I started on the short pipe. From strong wire (I used an umbrella knitting needle) I bent a U-shaped bracket about 25mm long.
At the end of the tube (in the future I will call it a control ring) I drilled two blind holes,
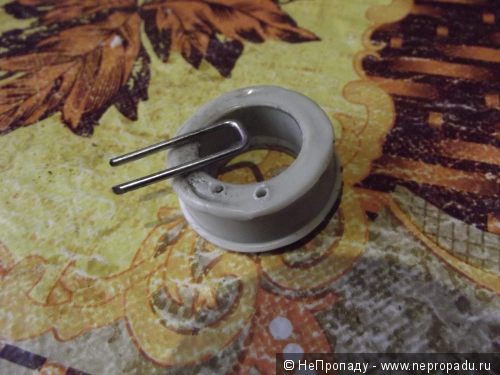
into which I inserted the legs of the wire bracket.
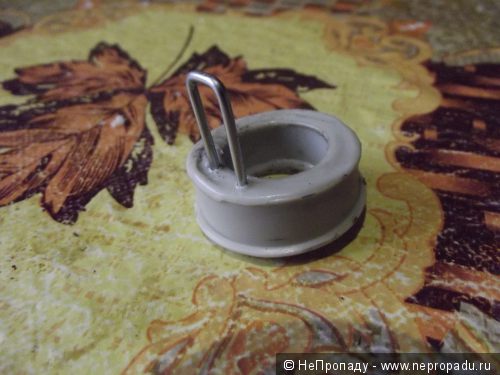
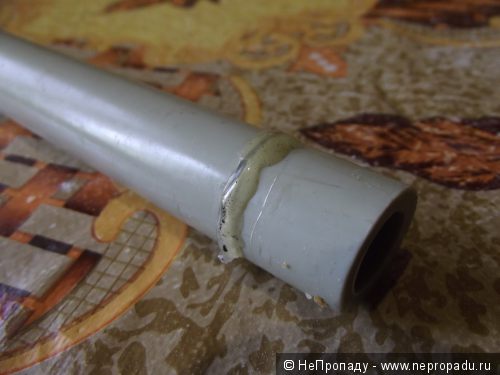
He put the ring on the pipe. All that remains is to sand down the part of the blade that protrudes beyond the dimensions of the regulating ring.
This operation must be carried out slowly so that the blade does not heat up and the glue does not melt. The device is ready!
To work, you need to pick up a small stick and insert it into the tube.
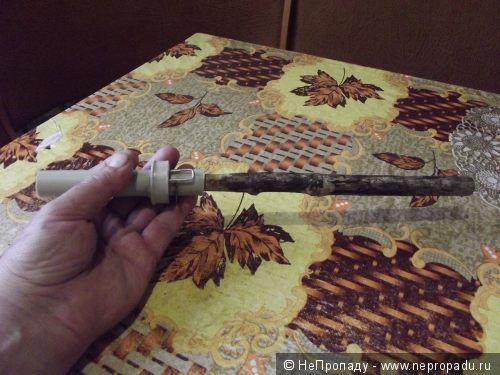
A cut bottle will be put on it. The distance from the adjusting ring to the blade determines the width of the tape. By moving the ring, we set the desired width of the tape. The wire staple is pressed against the blade. If you are right-handed, then it is more convenient for you to work by pressing it on this side:

and if you are left-handed, then with this:
The bottom and neck with the “shoulders” are cut off straight from the bottle, preferably with scissors, leaving only the cylindrical part. A “tail” is cut at the end, sharp at the end, gradually expanding to the required width. The “tail” is inserted under the wire bracket, between the blade and the adjusting ring, the rest of the bottle is also under the bracket, but on the other side of the blade.
We pull the tail, and the tape we need comes out of the machine.
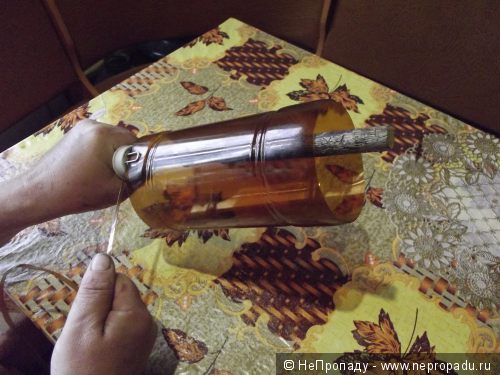
It is important that the tape, after cutting, is pressed against the tube, passing between the blade and the ring. This will ensure the bottle is positioned correctly and cuts correctly.
I liked this design. Lightweight, compact, easily fits in a pocket, has no sharp protruding parts, and is easy to manufacture and operate.
Features of a bottle cutter made from a wooden block
The secret of this bottle cutter is that the blade is located above the cuts, so the bottle does not move when cutting, and the tape is uniform. The cut is made slightly at an angle, and the position of the blade is adjusted to the desired size of the tape. For example, the cutting height on one side can be 1 cm, and on the other – 9 mm. The wider the tape, the more the bottle tilts on the machine, so the pin is attached to the bar at an angle. But it is important not to overdo it, otherwise the cut will be greatly bored and it will be difficult to pull out the tape. With a straight pin, the tape simply will not reach the bottom of the cut and will break. You can see in the photo a bottle cutter made with your own hands in this way. It may seem difficult to make, but without it it will be impossible to make an even ribbon from plastic bottles.